
How To Make an
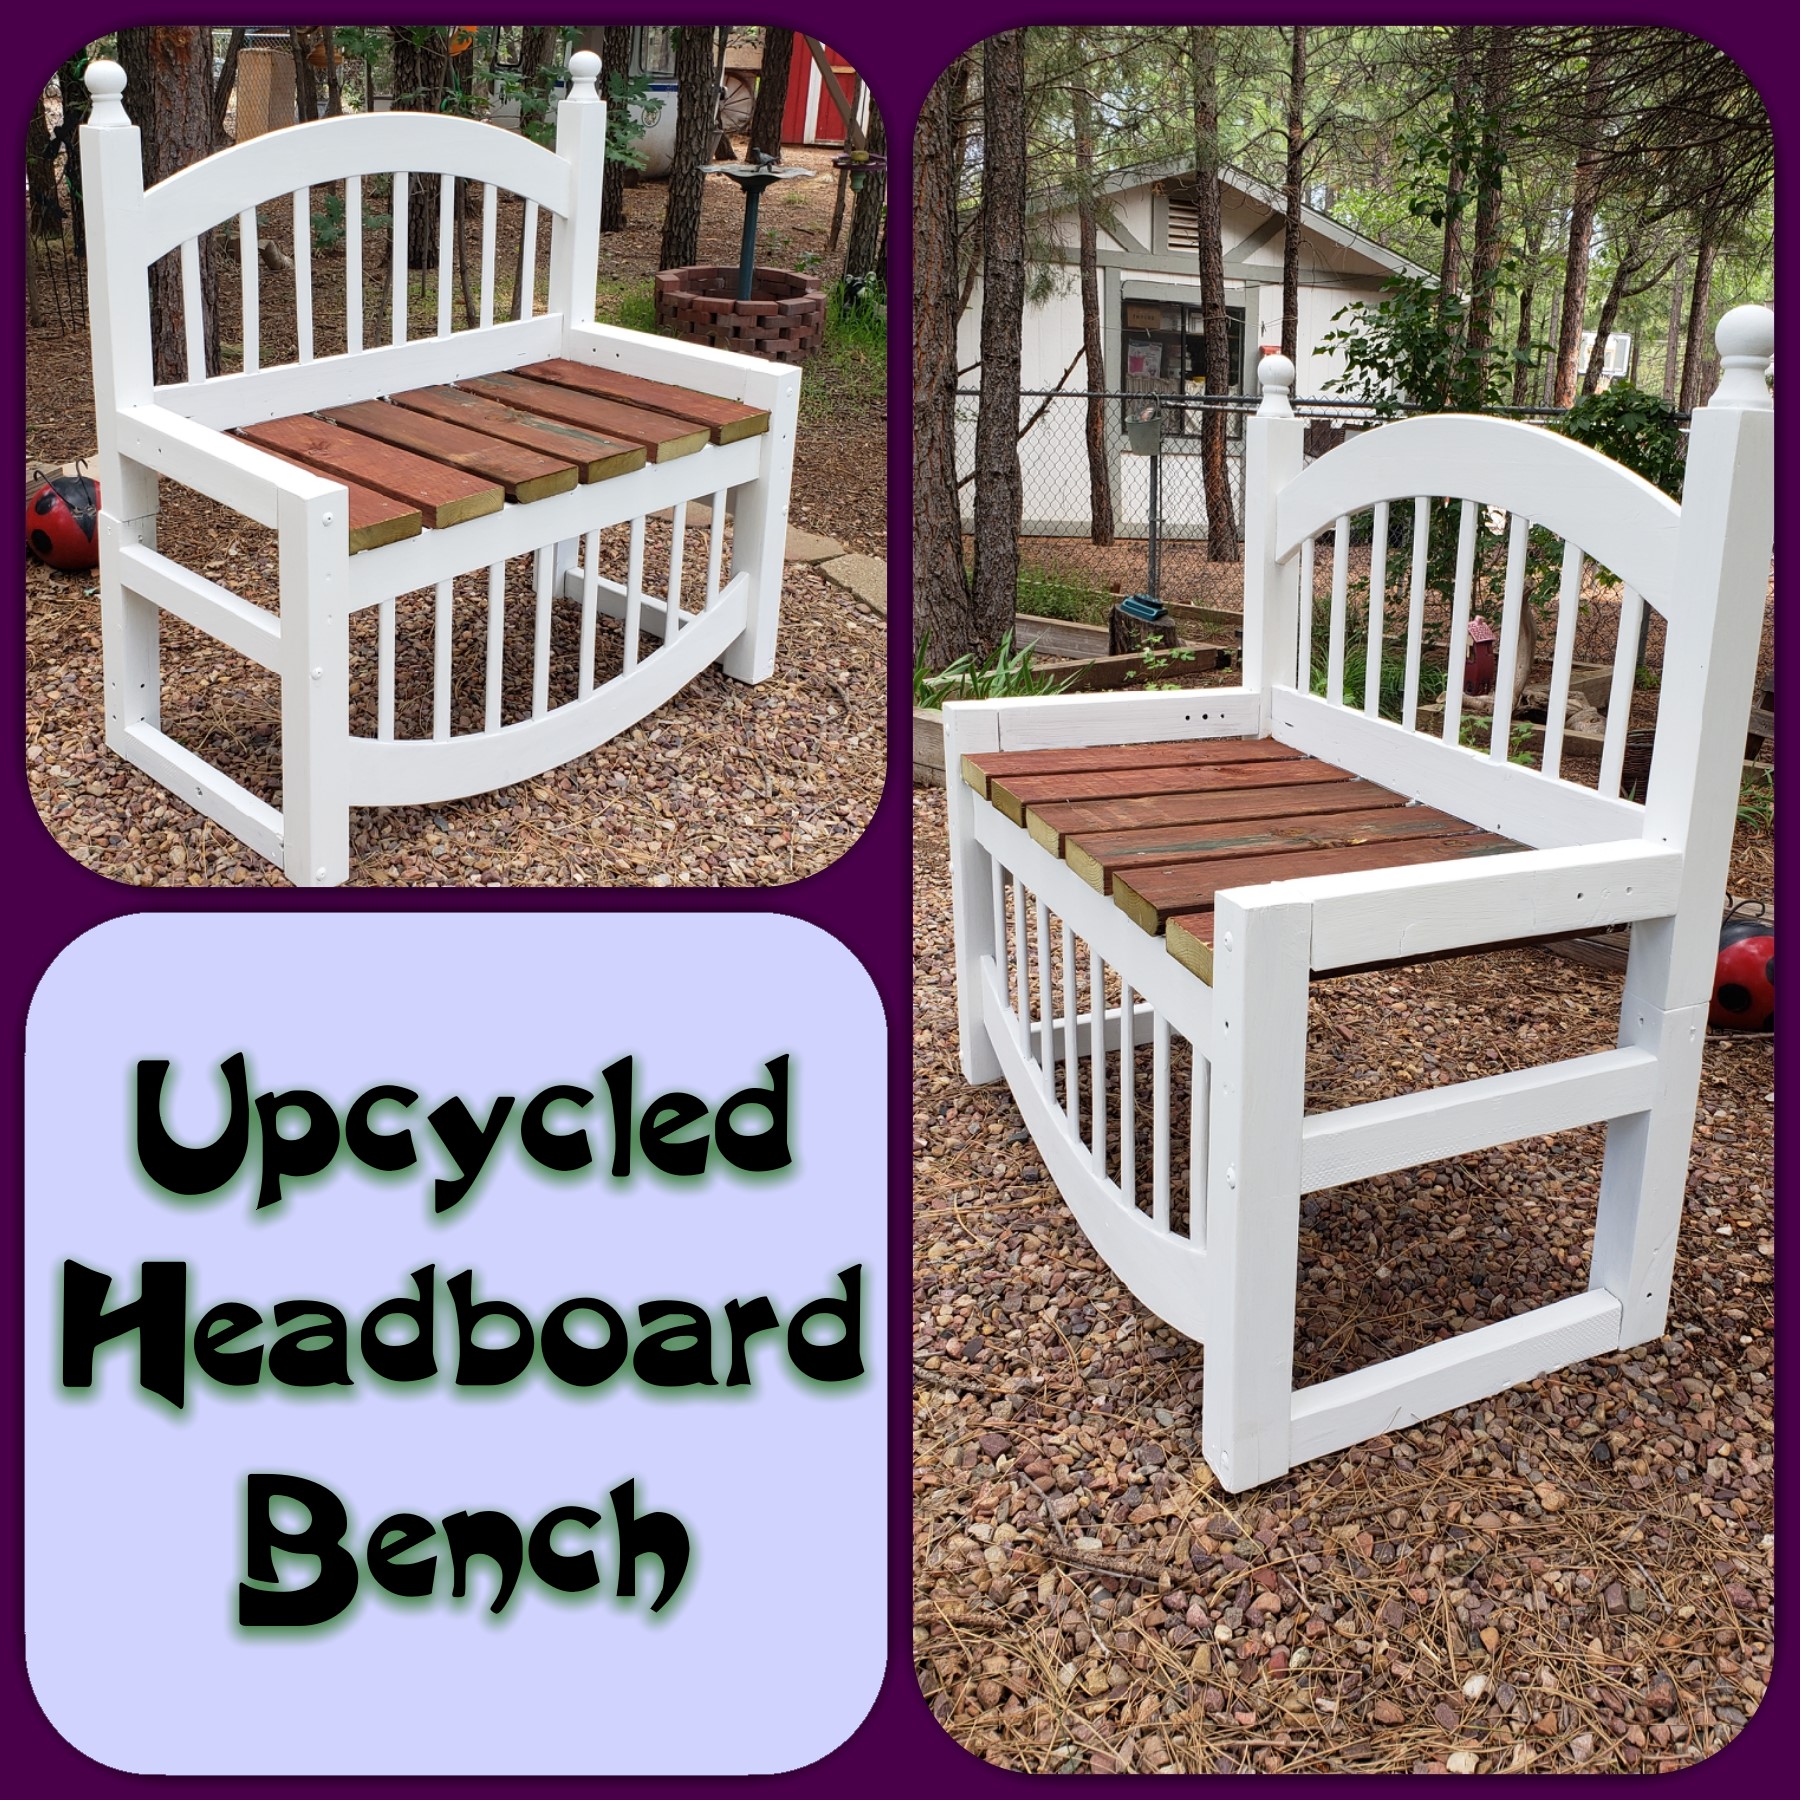
Upcycled Twin Headboard Bench
#TigerStrypesBlog #Upcycled #Bench
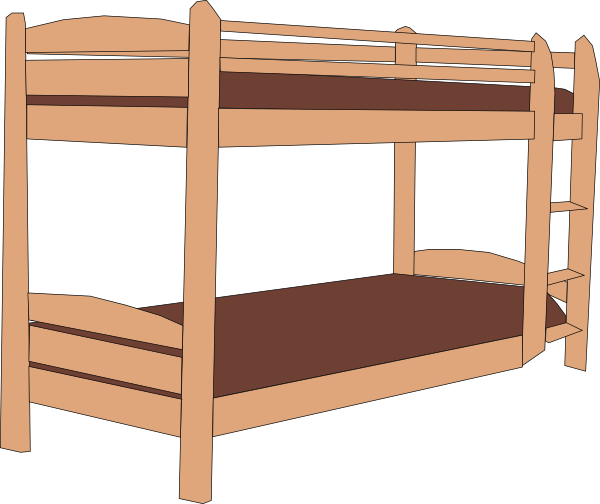
It seems like when you think that you have the perfect piece of furniture, you end up needing something else. We had a cute set of bunkbeds for our son, be he ended up not really liking them. We took the top off and had just the bottom for awhile, and then he needed something that was bigger. Okay, so what to do with the old ones? I tried to sell them, but nobody local needed any, so I figured that I would upcycle them and give one a new life. The other ended up getting damaged when we took it apart, so it was a trash filler! I’ve always seen photos of people making a bench from an old bed, so I figured that’s what I wanted to do. We can always use extra seats in the backyard for parties, right?
Take a look at the tutorial below and see how the old bed, got a new life. Leave me a comment and tell me what you think of it. I’d love to know how you would have done it, or a different way to use the bench. I sure hope that you like it and hope you have a blessed day. Please be sure to comment and share this craft on your social media channels – thanks so much!!
Learn How to Make an #Upcycled Twin Headboard Bench for your #yard #DIY - Find out more at Share on X
 Make an Upcycled Headboard Bench
Materials/Tools Used:
- Twin Bed Head & Foot Board
- Extra Pieces or Matching Size Lumber
- Paint
- Screws
- Tools
- & Time!
Instructions for the Upcycled Headboard Bench:
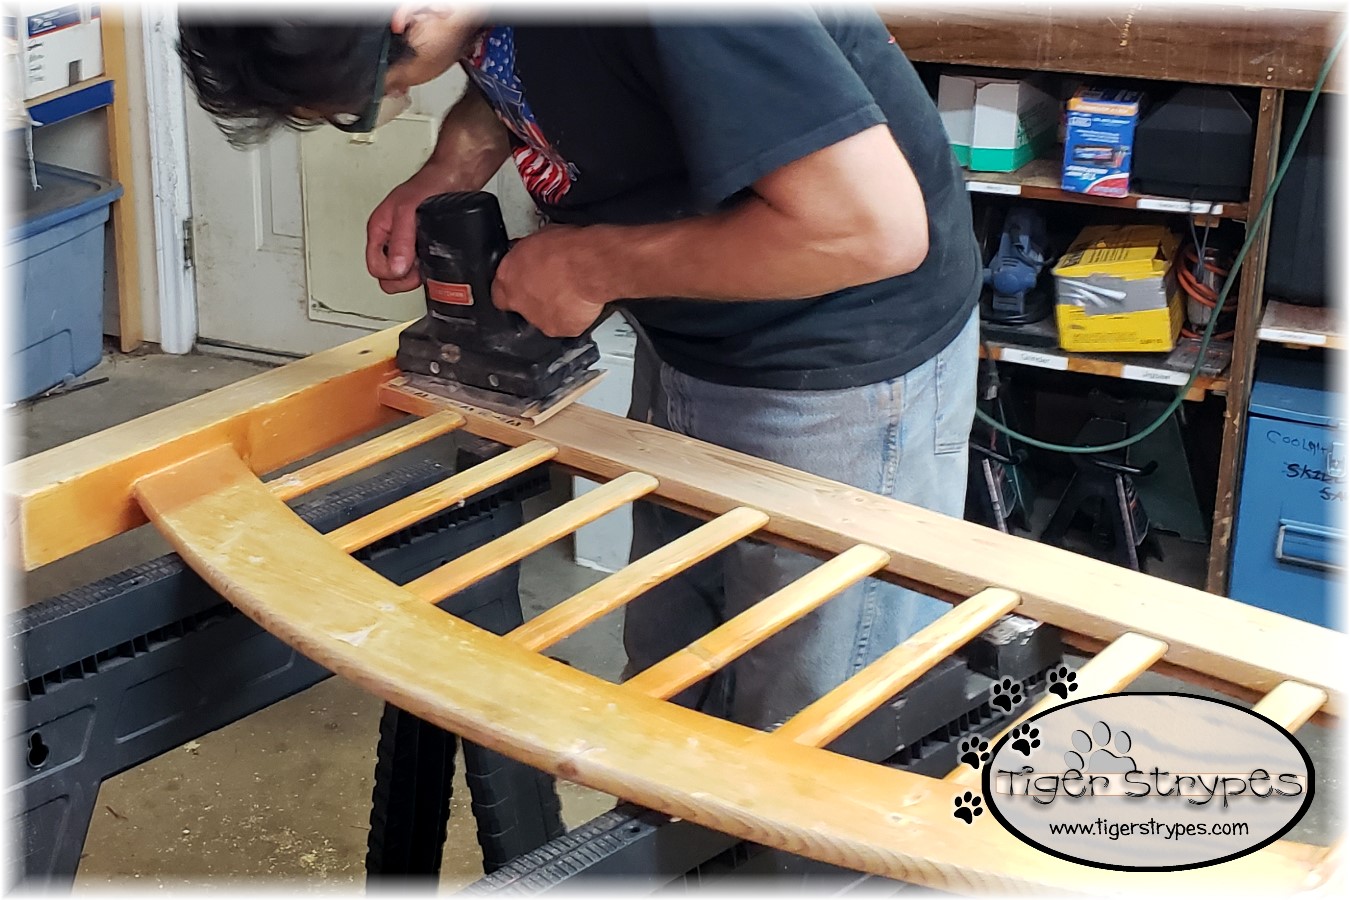
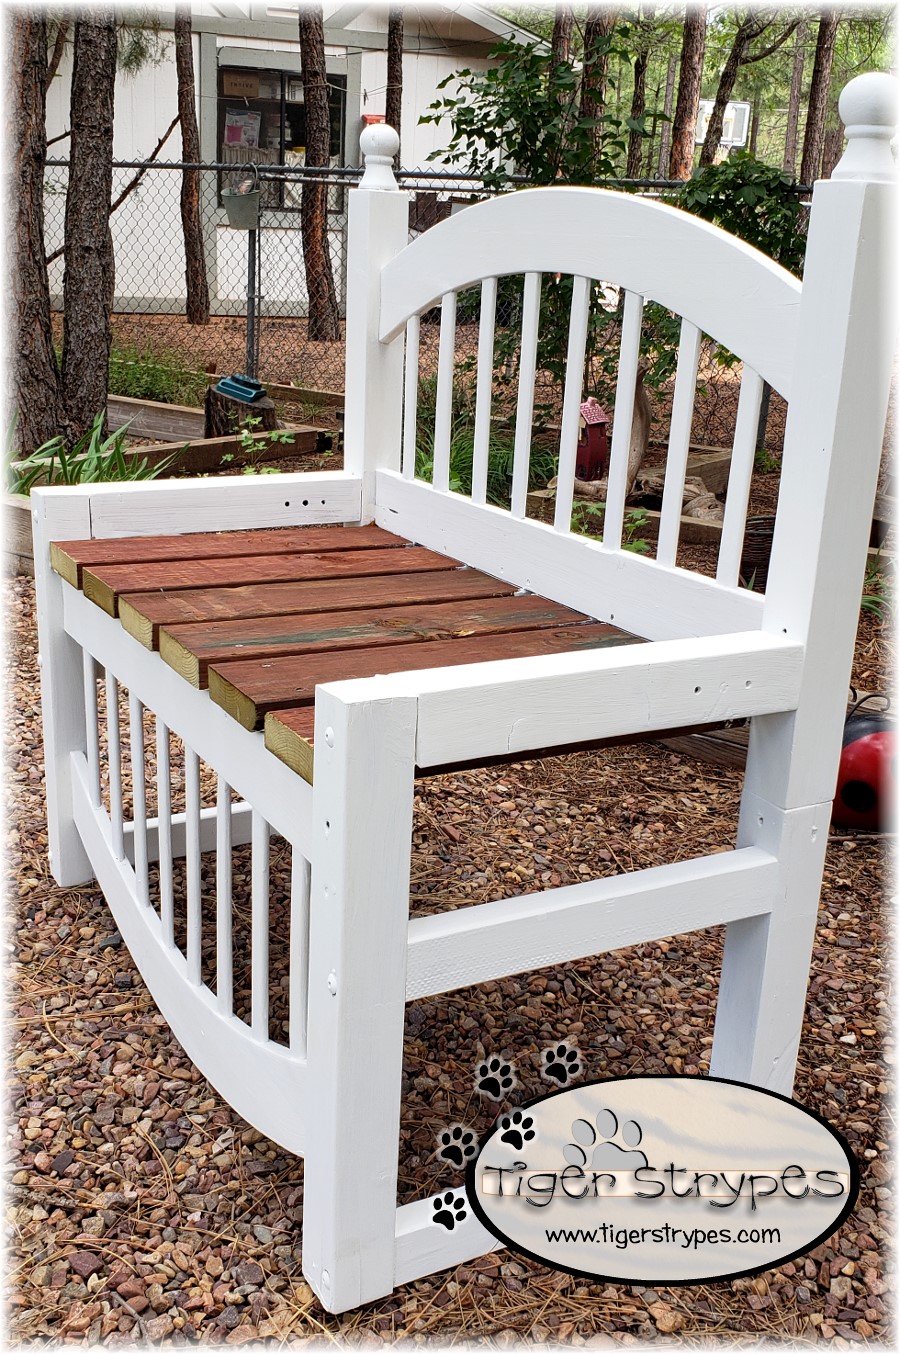
We started by dismantling the original bed and making sure that all hardware was removed. My husband then sanded the pieces to have them ready for paint when everything was put together.
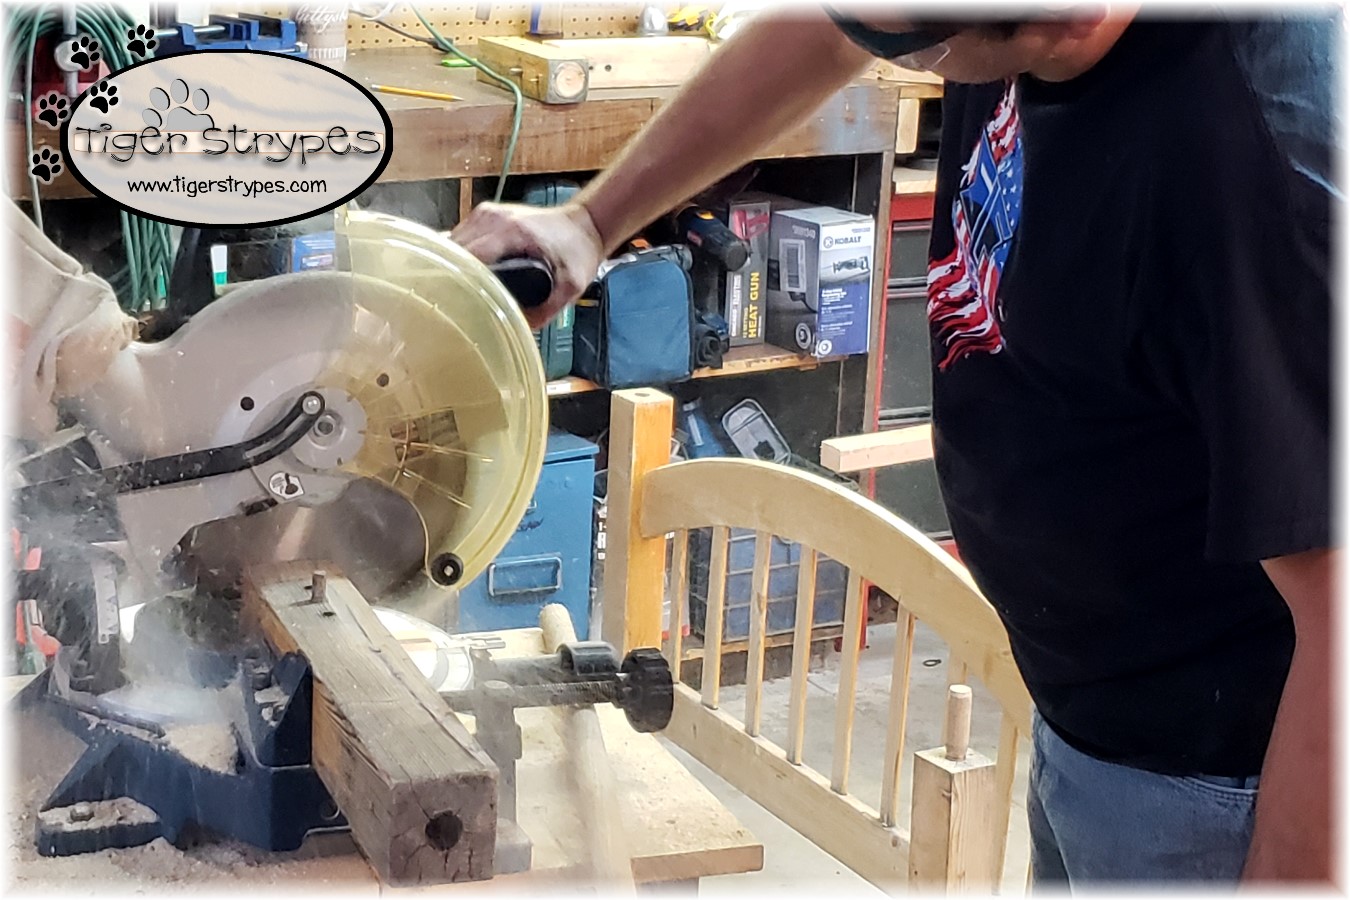
We turned one side over to be the bottom front portion and started adding the side pieces that would attach to the back, so we could figure how tall the rear piece would need to be.

When we had the correct dimensions, my husband trimmed a piece of wood that used to be part of the other piece of the bed. He did this for both pieces that would be the extensions on the rear to make it taller.
We put the cut pieces down, sat the rear portion on that and then secured it with multiple screws. Setting the front piece upside down in front, we attached the side pieces to make it sturdy. When that was done, we started to put the seat pieces on, that we had measured and cut to the correct sizes. We also added some stability pieces between the legs to make it even stronger.
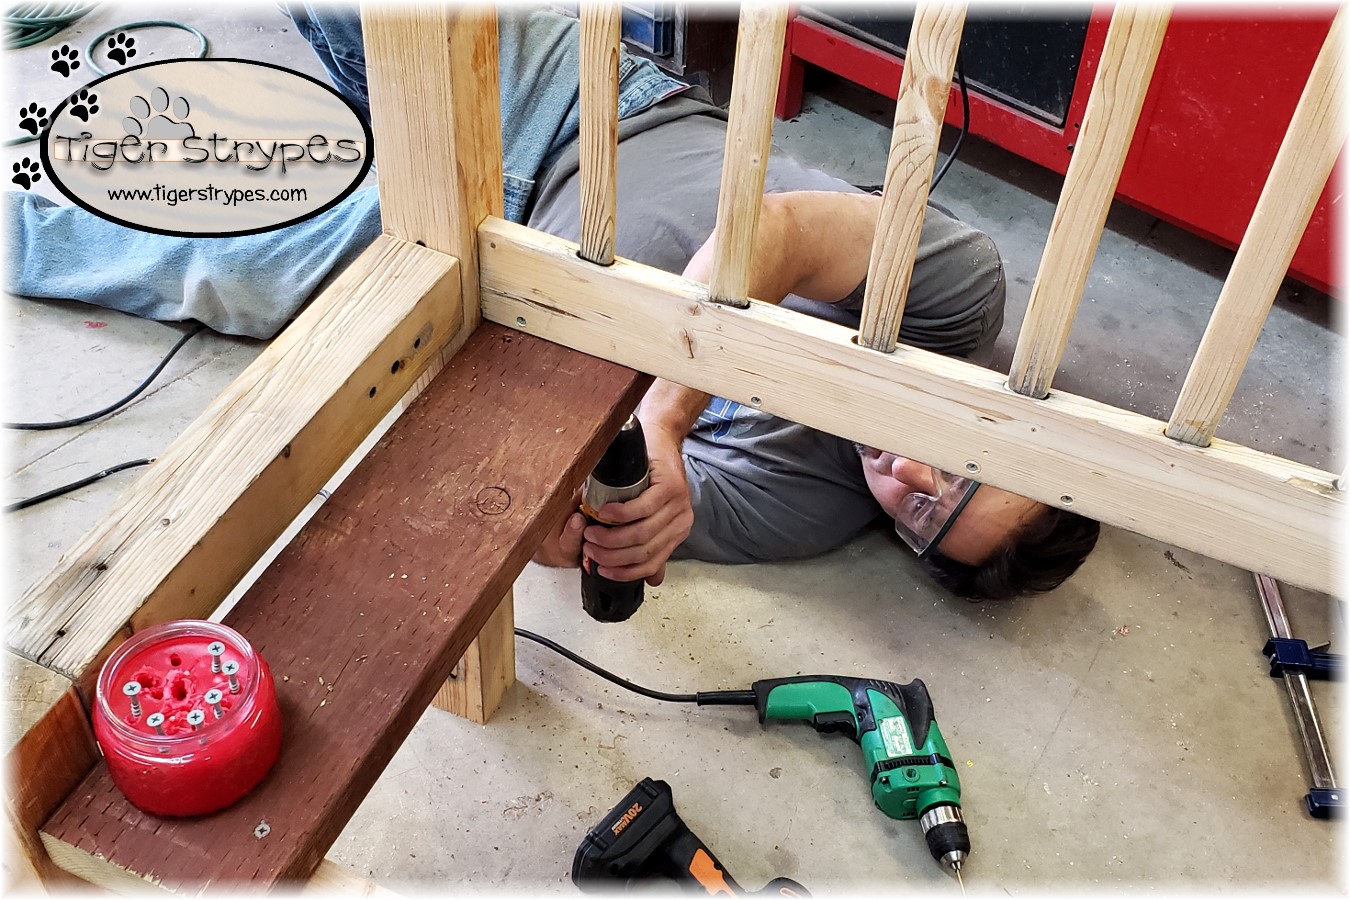
When all of the seat pieces were attached at the back, we screwed in the front portions to fully secure them. He also put screws in other areas for extra stability. After that, my husband sanded the seat pieces to remove all of the splinters and make it safe to use.

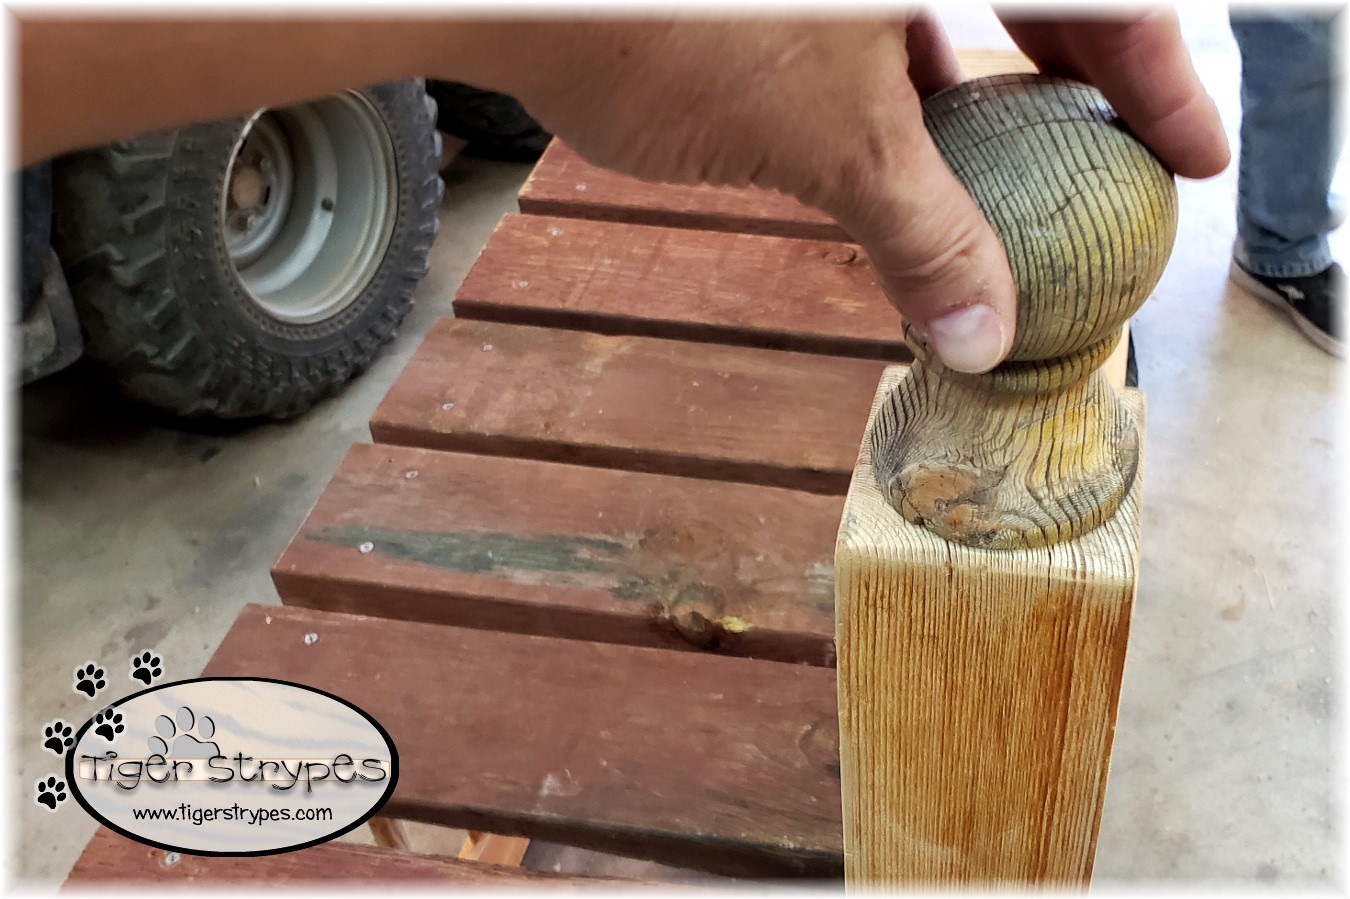
After that, I used some dowels to attach the knob pieces that had originally been on the top portion of the bunkbed to add a bit of flair to the top of the bench.
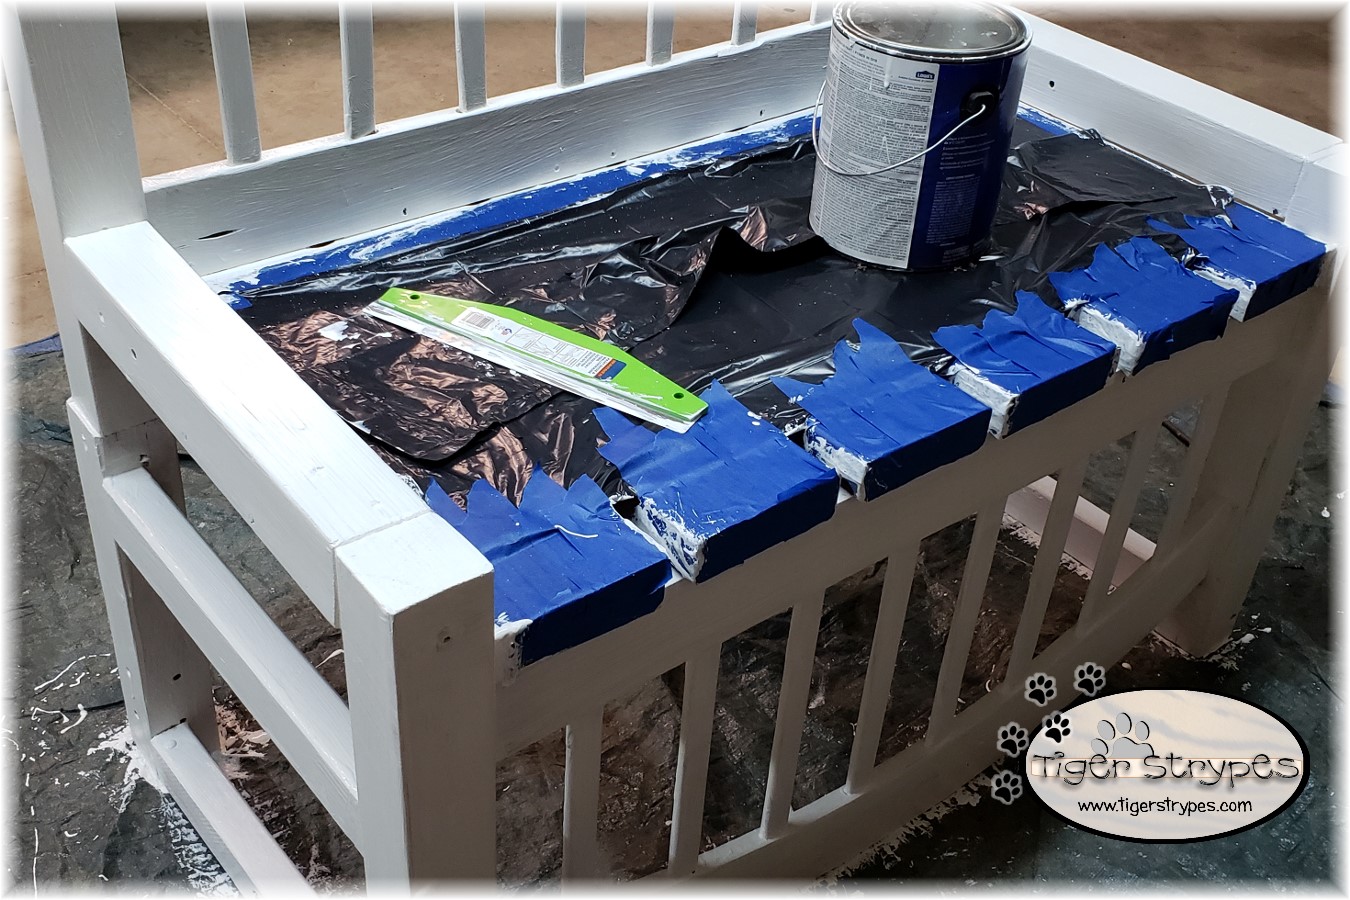
When the building portion was complete, we started the painting. Taping off the redwood part, to add a bit of different color, we started painting the rest of it. It’s always nice to be able to use up some paint that has just been sitting in the corner. Doesn’t cost anything and cleans up a spot in the garage!
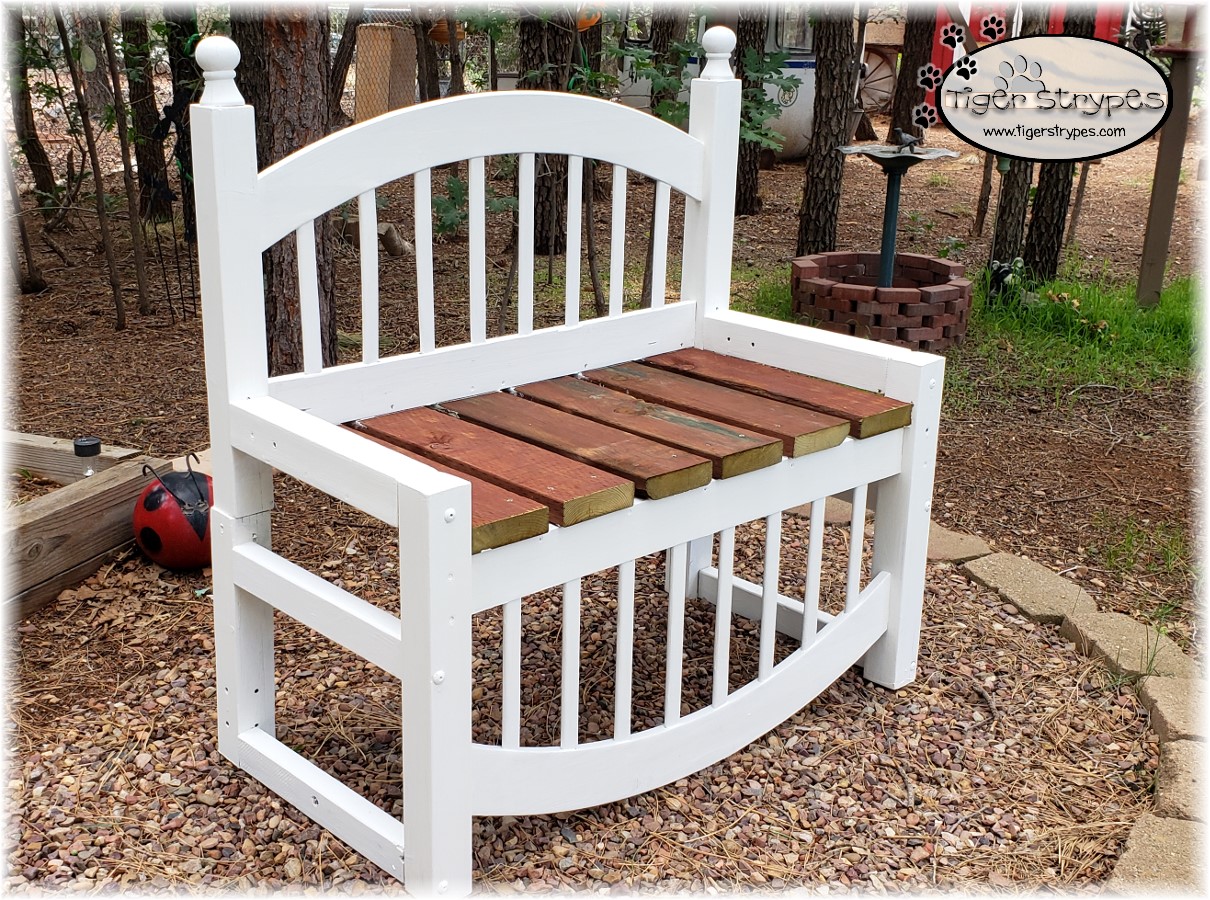
After that, we removed the tape and let it dry (which took awhile, since the monsoons are here in AZ). I found a spot in our backyard to set it and can now have some extra seats for when friends come over, or just a place to relax when I want some quiet time.
I hope you like it! Please take a minute to leave me a comment. Let me know what you would do different, or what you would add, etc. Be sure to tweet, pin, share, etc. – thanks!!
“God reigns over the nations; God is seated on his holy throne.” –Psalm 47:8
 HERE ARE SOME OF MY PREVIOUS PROJECTS:
 |
 |
 |
 |
 |
 |


Love this DIY! I have several old headboards that I’ve been wanting to use for a project.
It was pretty easy to do, too! 🙂
I pinned this. I think I could do this!
You totally could, Shelley – share a photo with me, if you do!!
This is so cool. I wonder if I could do this with an old crib?
I bet you could, as long as you had enough supports, etc.
What a great idea! I have some headboards around here that might work. Thanks for sharing!
You’re welcome, Apryl – I’m glad that you liked it!
Very clever idea- you are so handy!
Thanks Jenn. I get a bit of help from the hubbie! 🙂