
Make a Shadow Box Valentine Gift
#TigerStrypesBlog #Valentine
Shopping recently, I found a bunch of plain shadow boxes at a local store on clearance after Christmas, and figured they would be useful in making just about anything. Seeing a post online of someone adding a sticker to the front, so I figured that I could make something like that for Valentine’s Day. Visiting the Cricut website, I found a project of flowers and downloaded that to continue. I didn’t want to post photos of that file, since it belongs to someone else. I did pay for it and used it for this project. You can look for any type of flower on the Cricut Design Space and make whatever kind you’d like, too! This was pretty easy to do, and turned out great. I can’t wait to make some more!
I sure hope that you like the tutorial, the projects and pray that you have a blessed day! Please be sure to comment and share this craft on your social media channels – thanks so much!!
Learn how to make a Shadow Box #Valentine Gift for the one that you love. #CricutMaker #Flowers #Cricut #DIY - Find out more at Share on X
Materials/Tools Used:
- Shadow Box
- Cardstock
- Adhesive Vinyl
- Cricut Maker
- Glue Gun
- Styrofoam
- & Time!
Instructions for the Shadow Box:
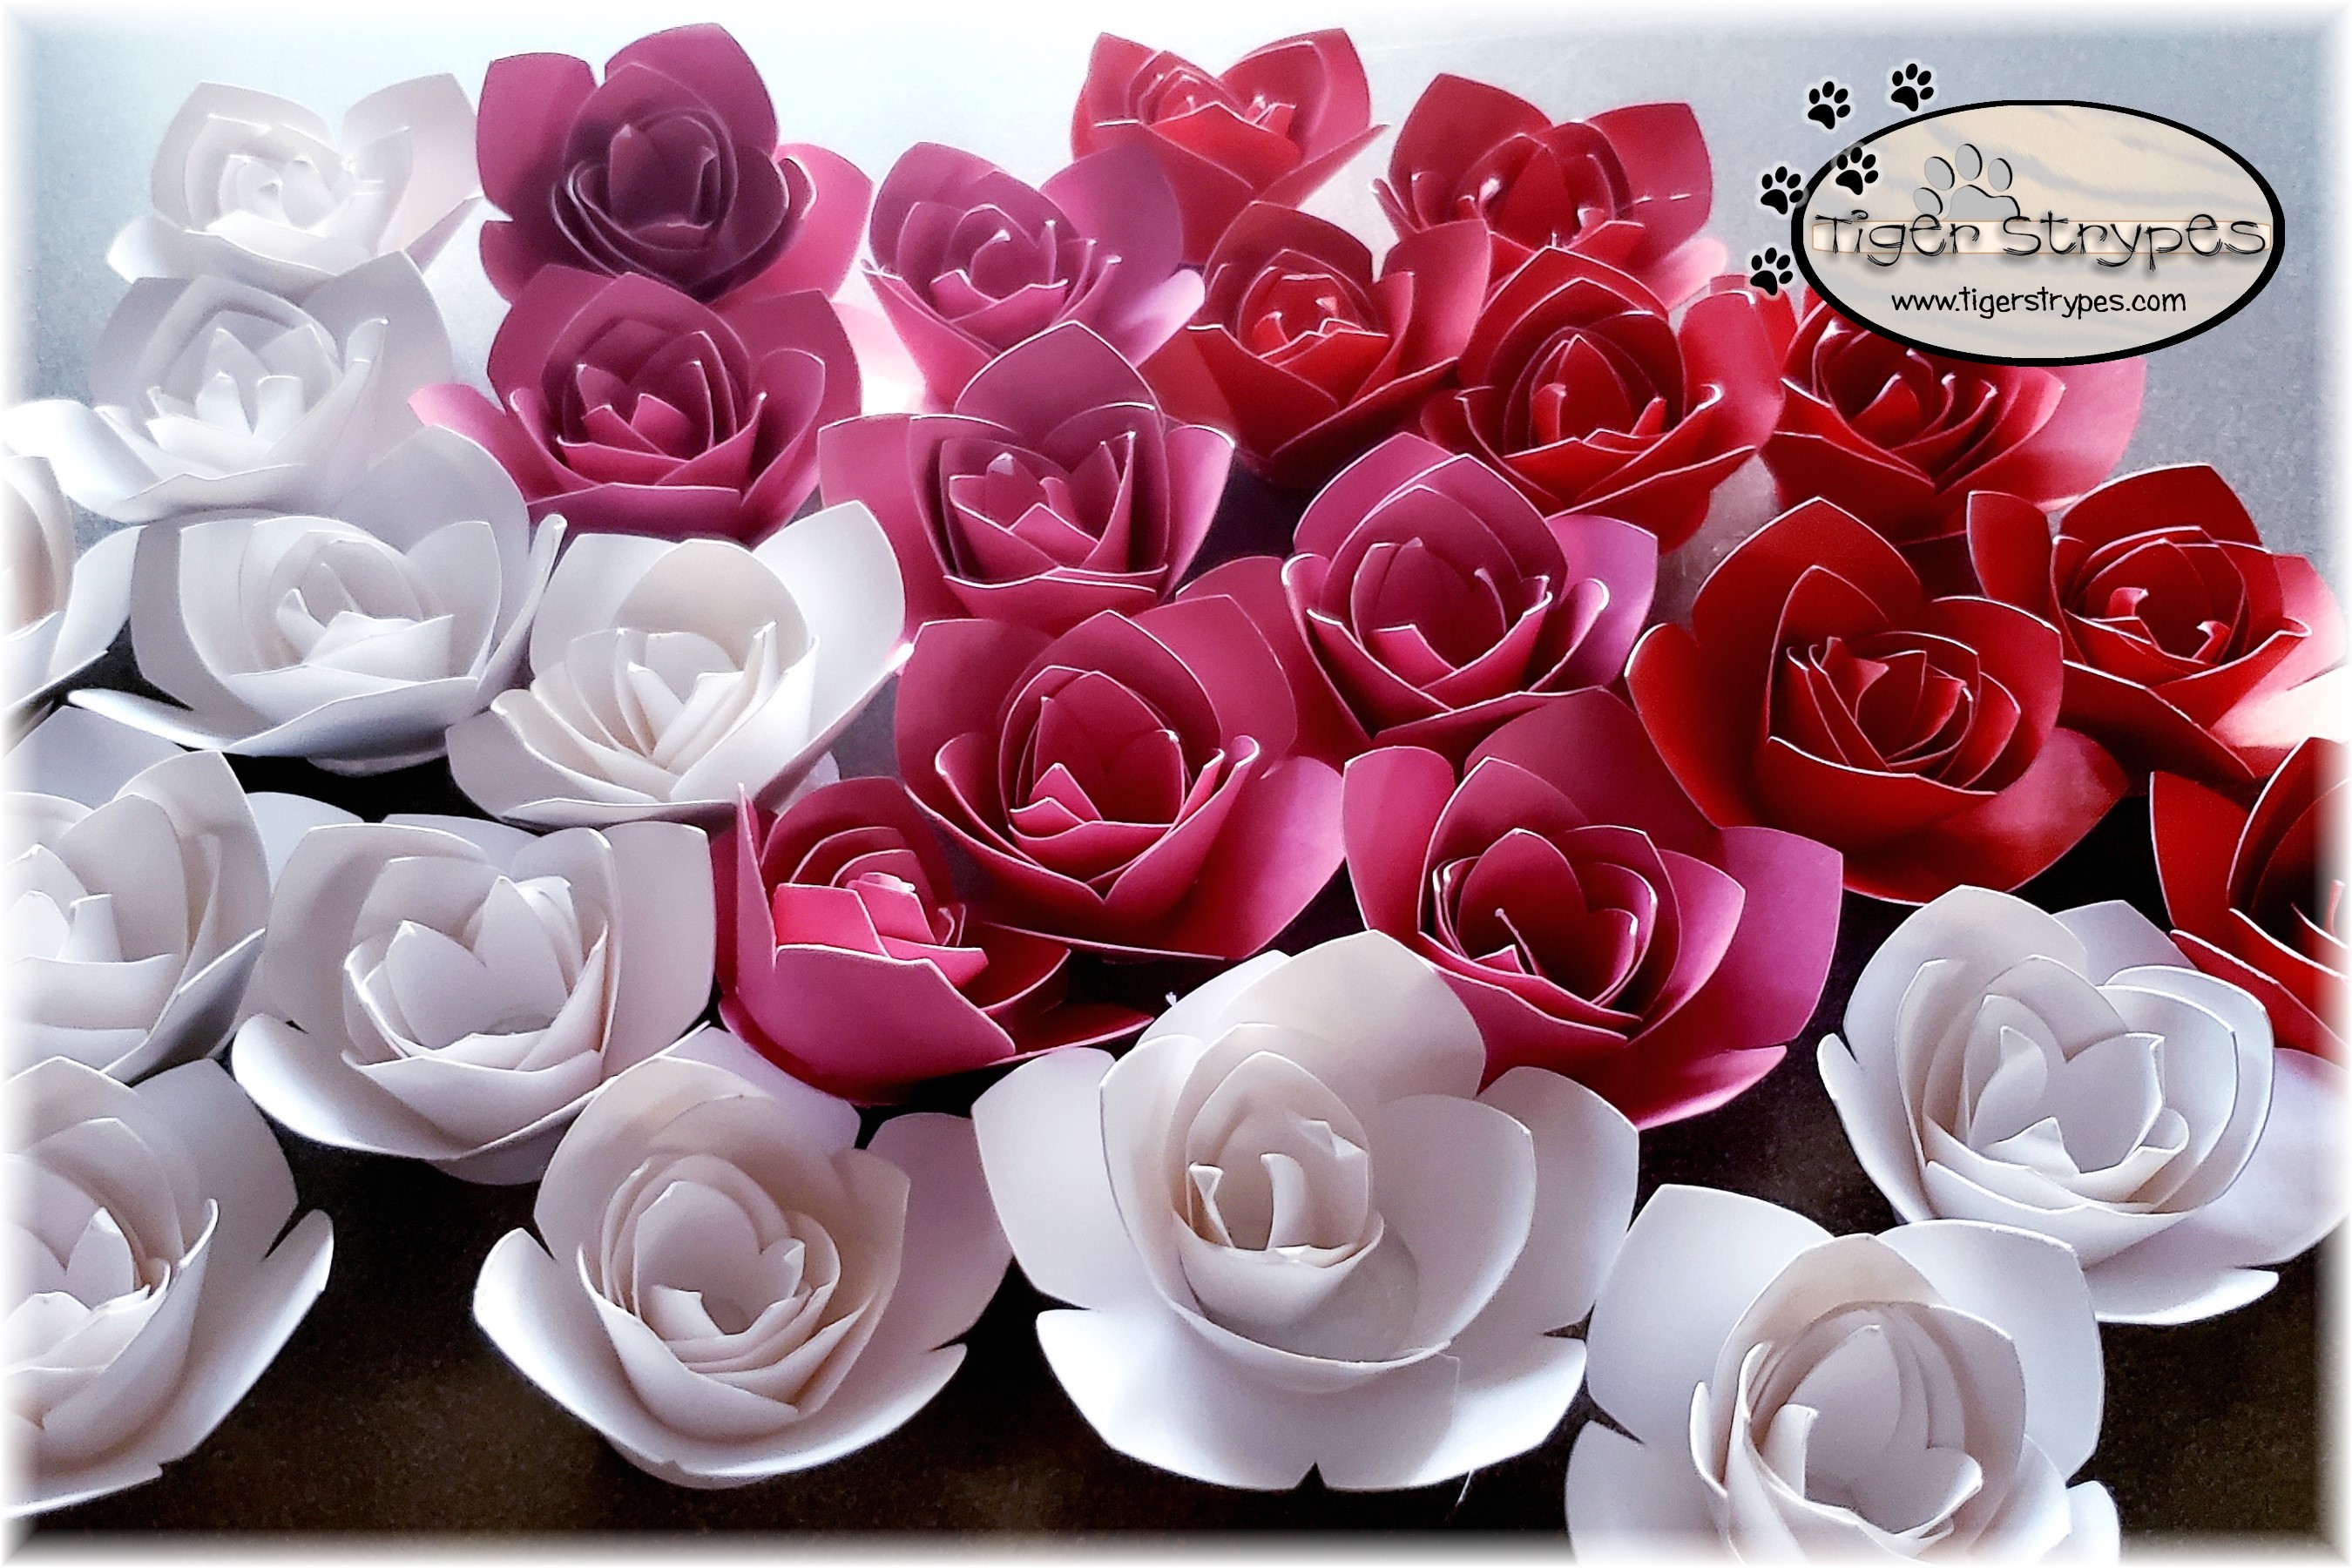
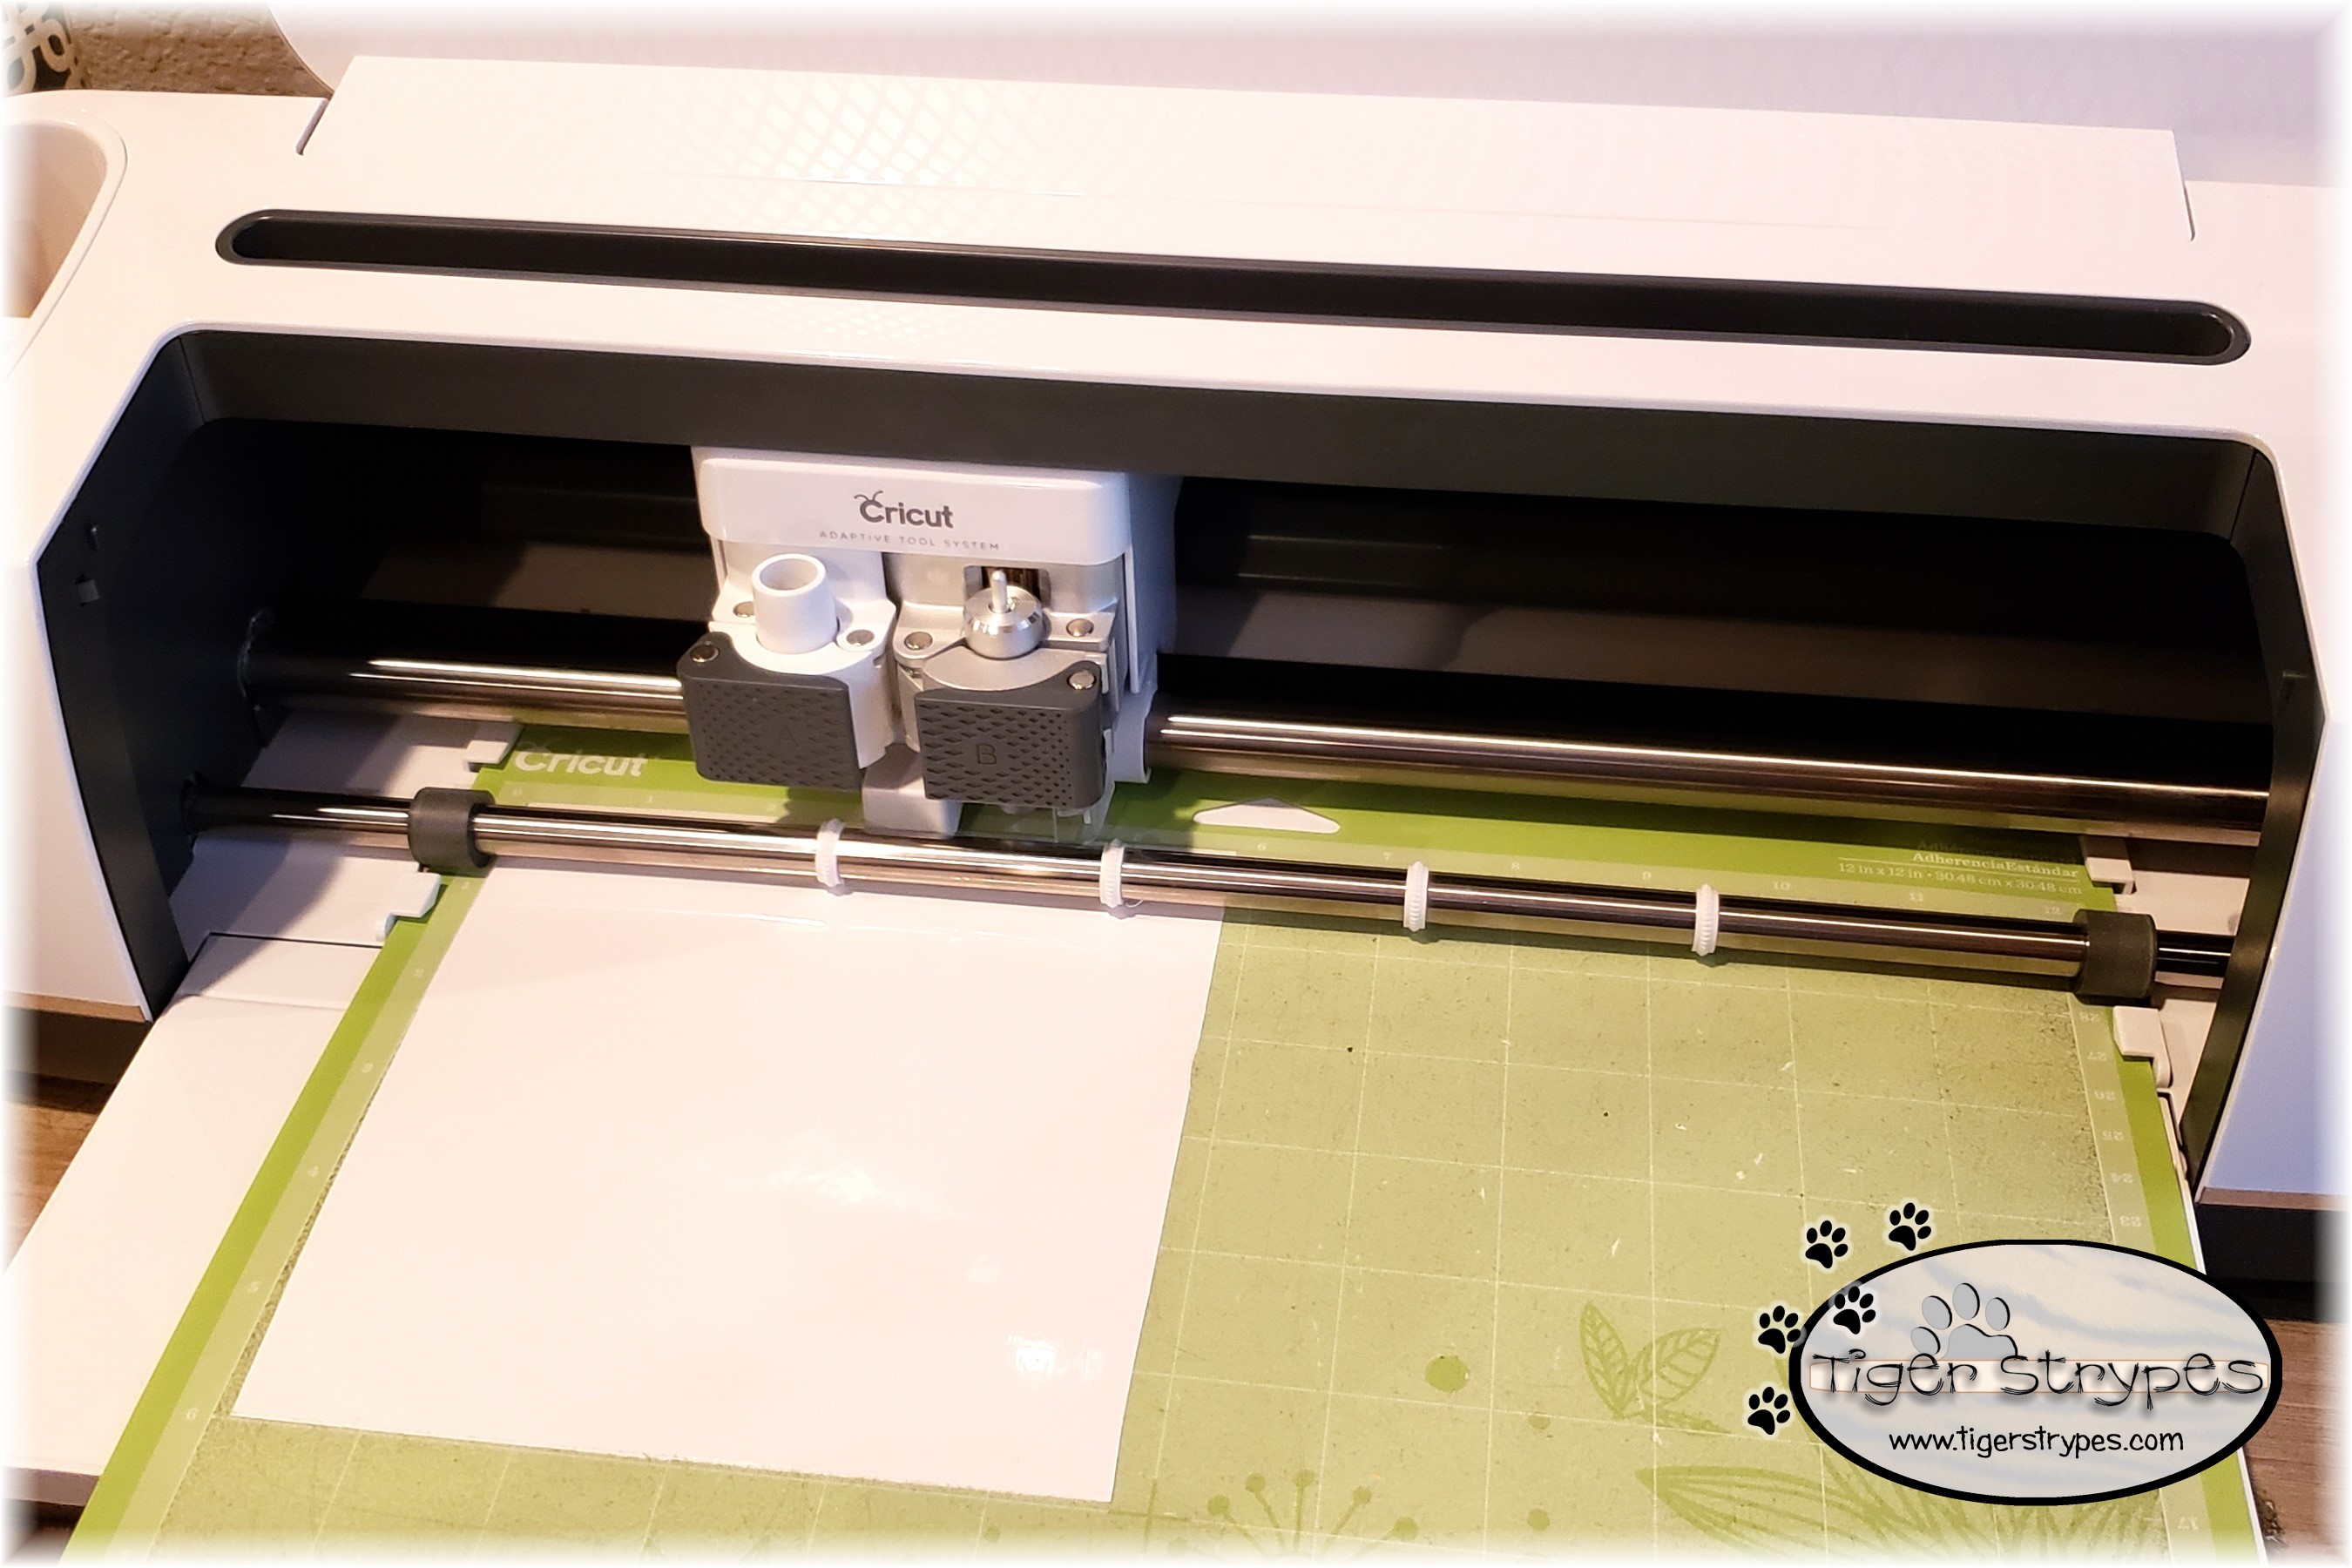
I started by making a bunch of flowers on my Cricut Maker using different color cardstock, from the pattern on Cricut Design Space.
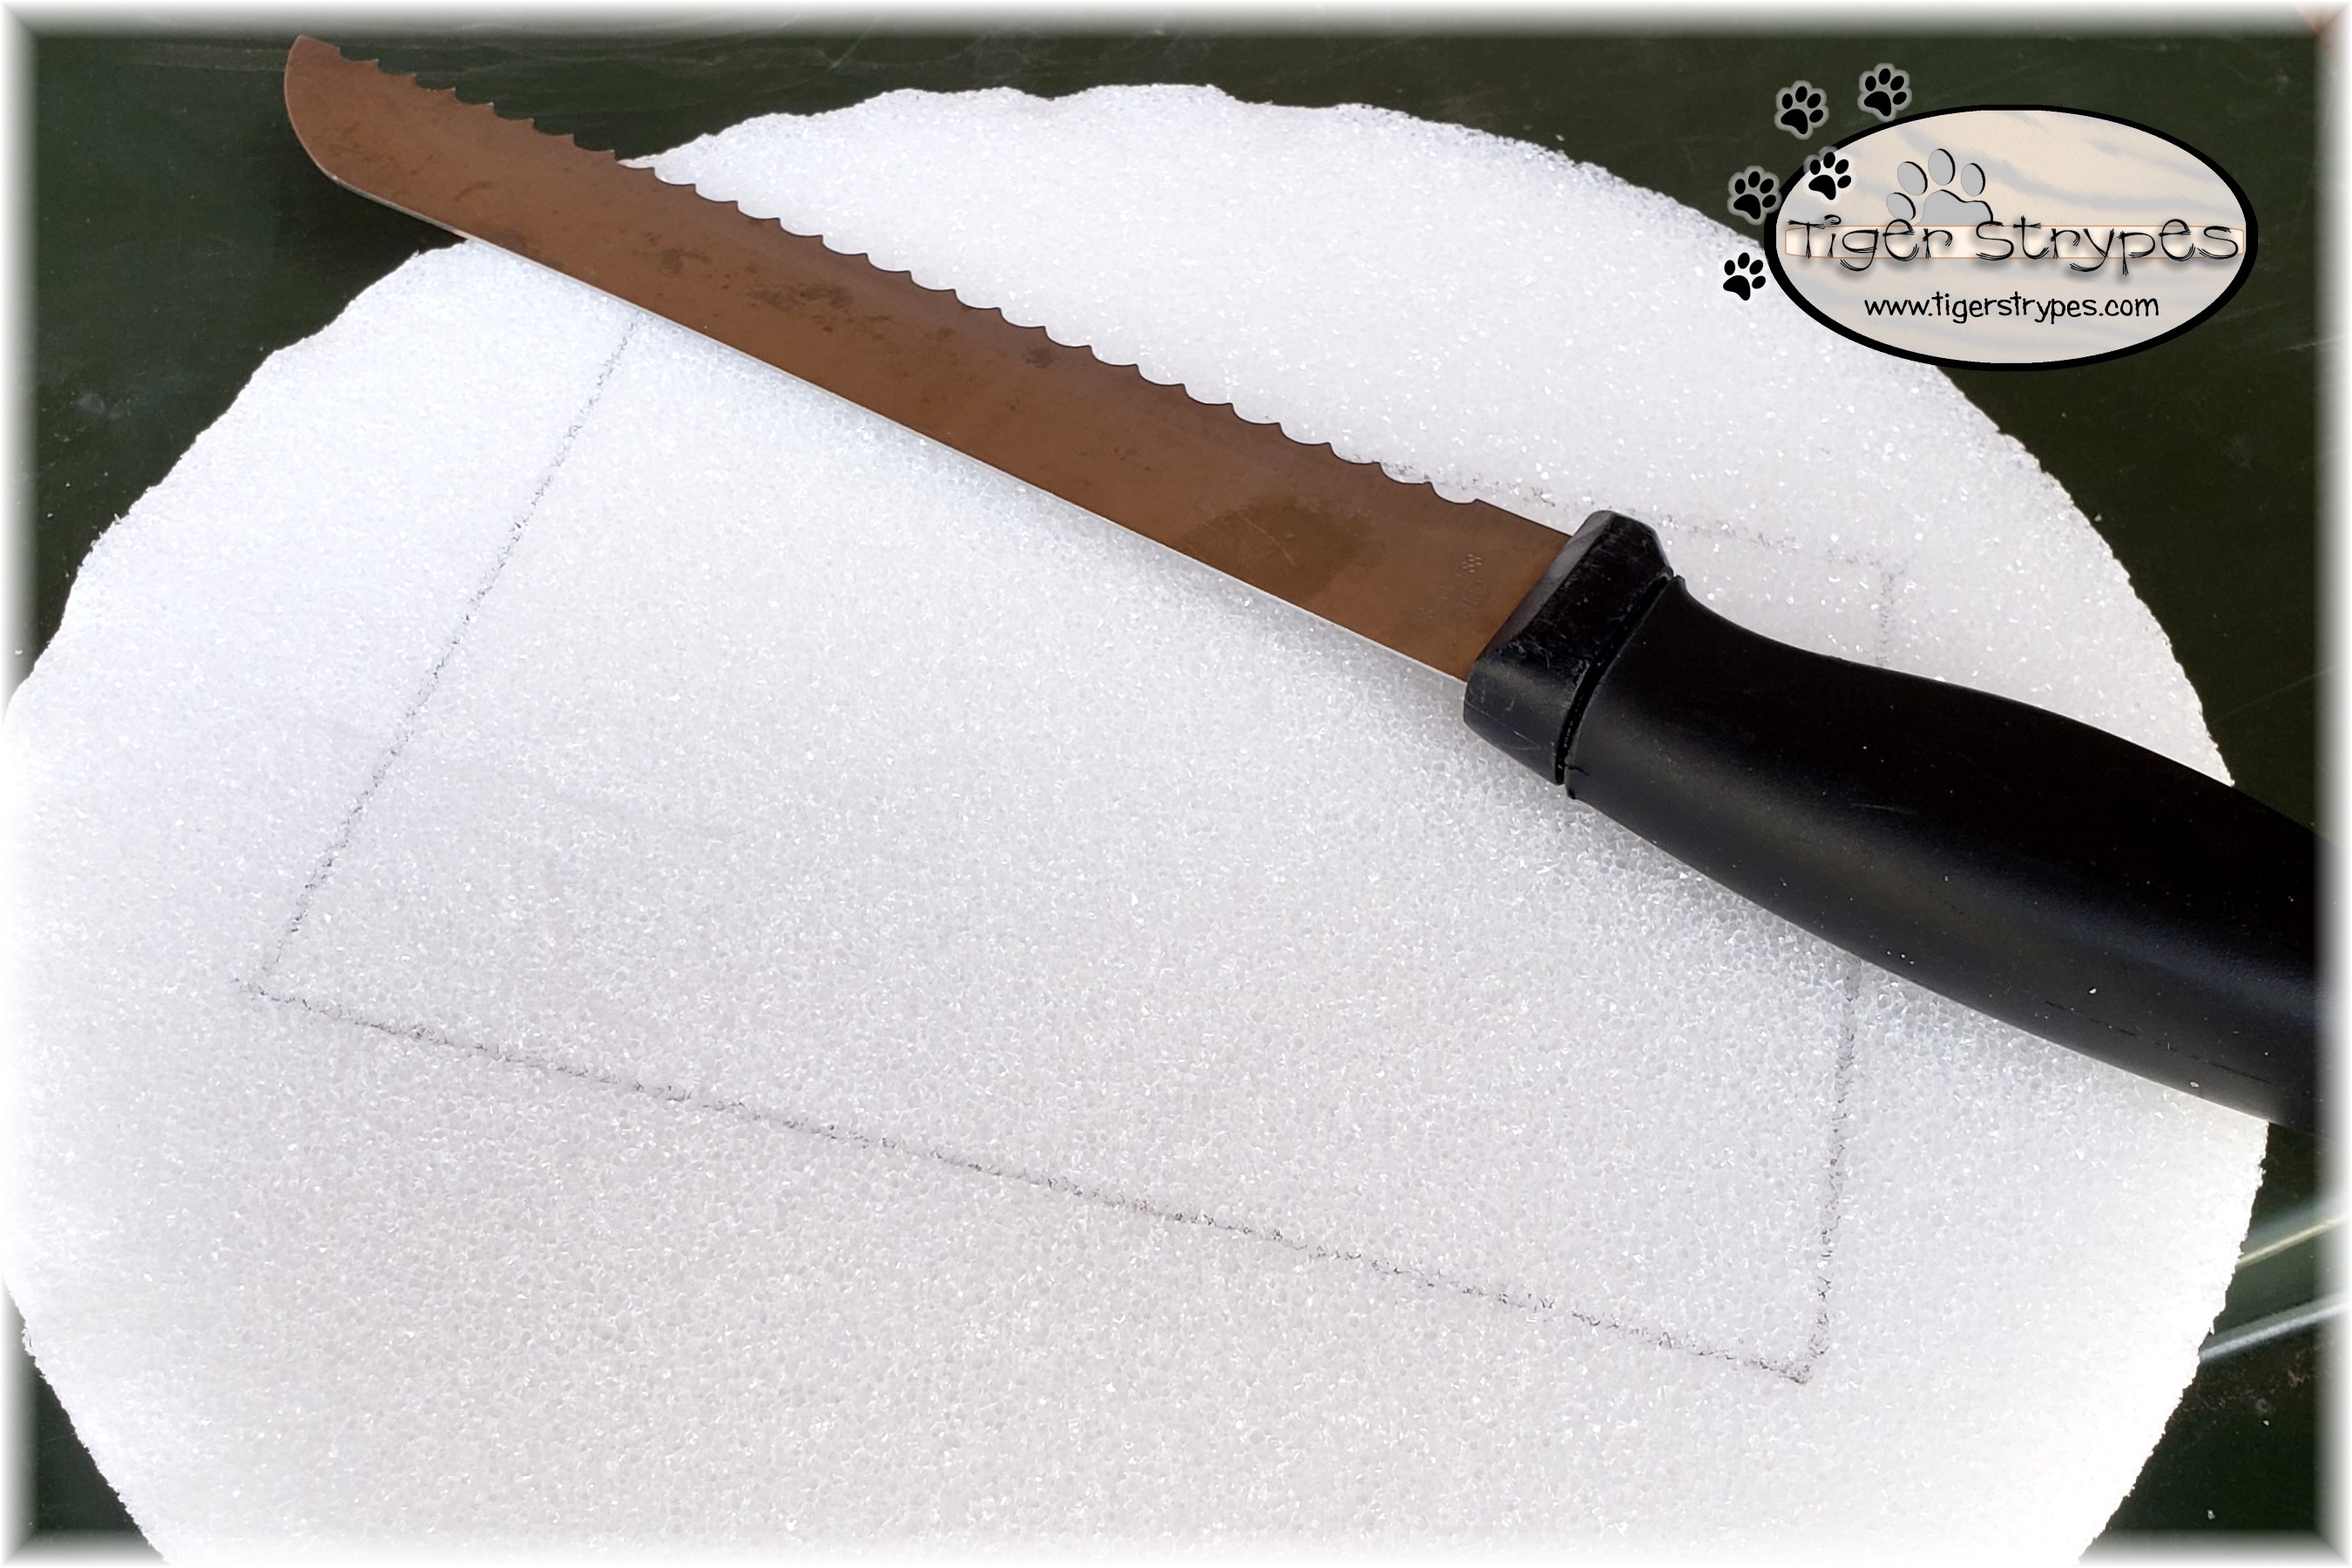
Once I had them all assembled, I waited a bit for the glue to dry. While waiting, I started on the part where they would be attached. Finding a piece of thin Styrofoam from the dollar store, I traced the area that it would be inserted into the frame…noting that it would need to be a bit smaller to fit inside. Using a bread knife, I cut it to the correct shape.
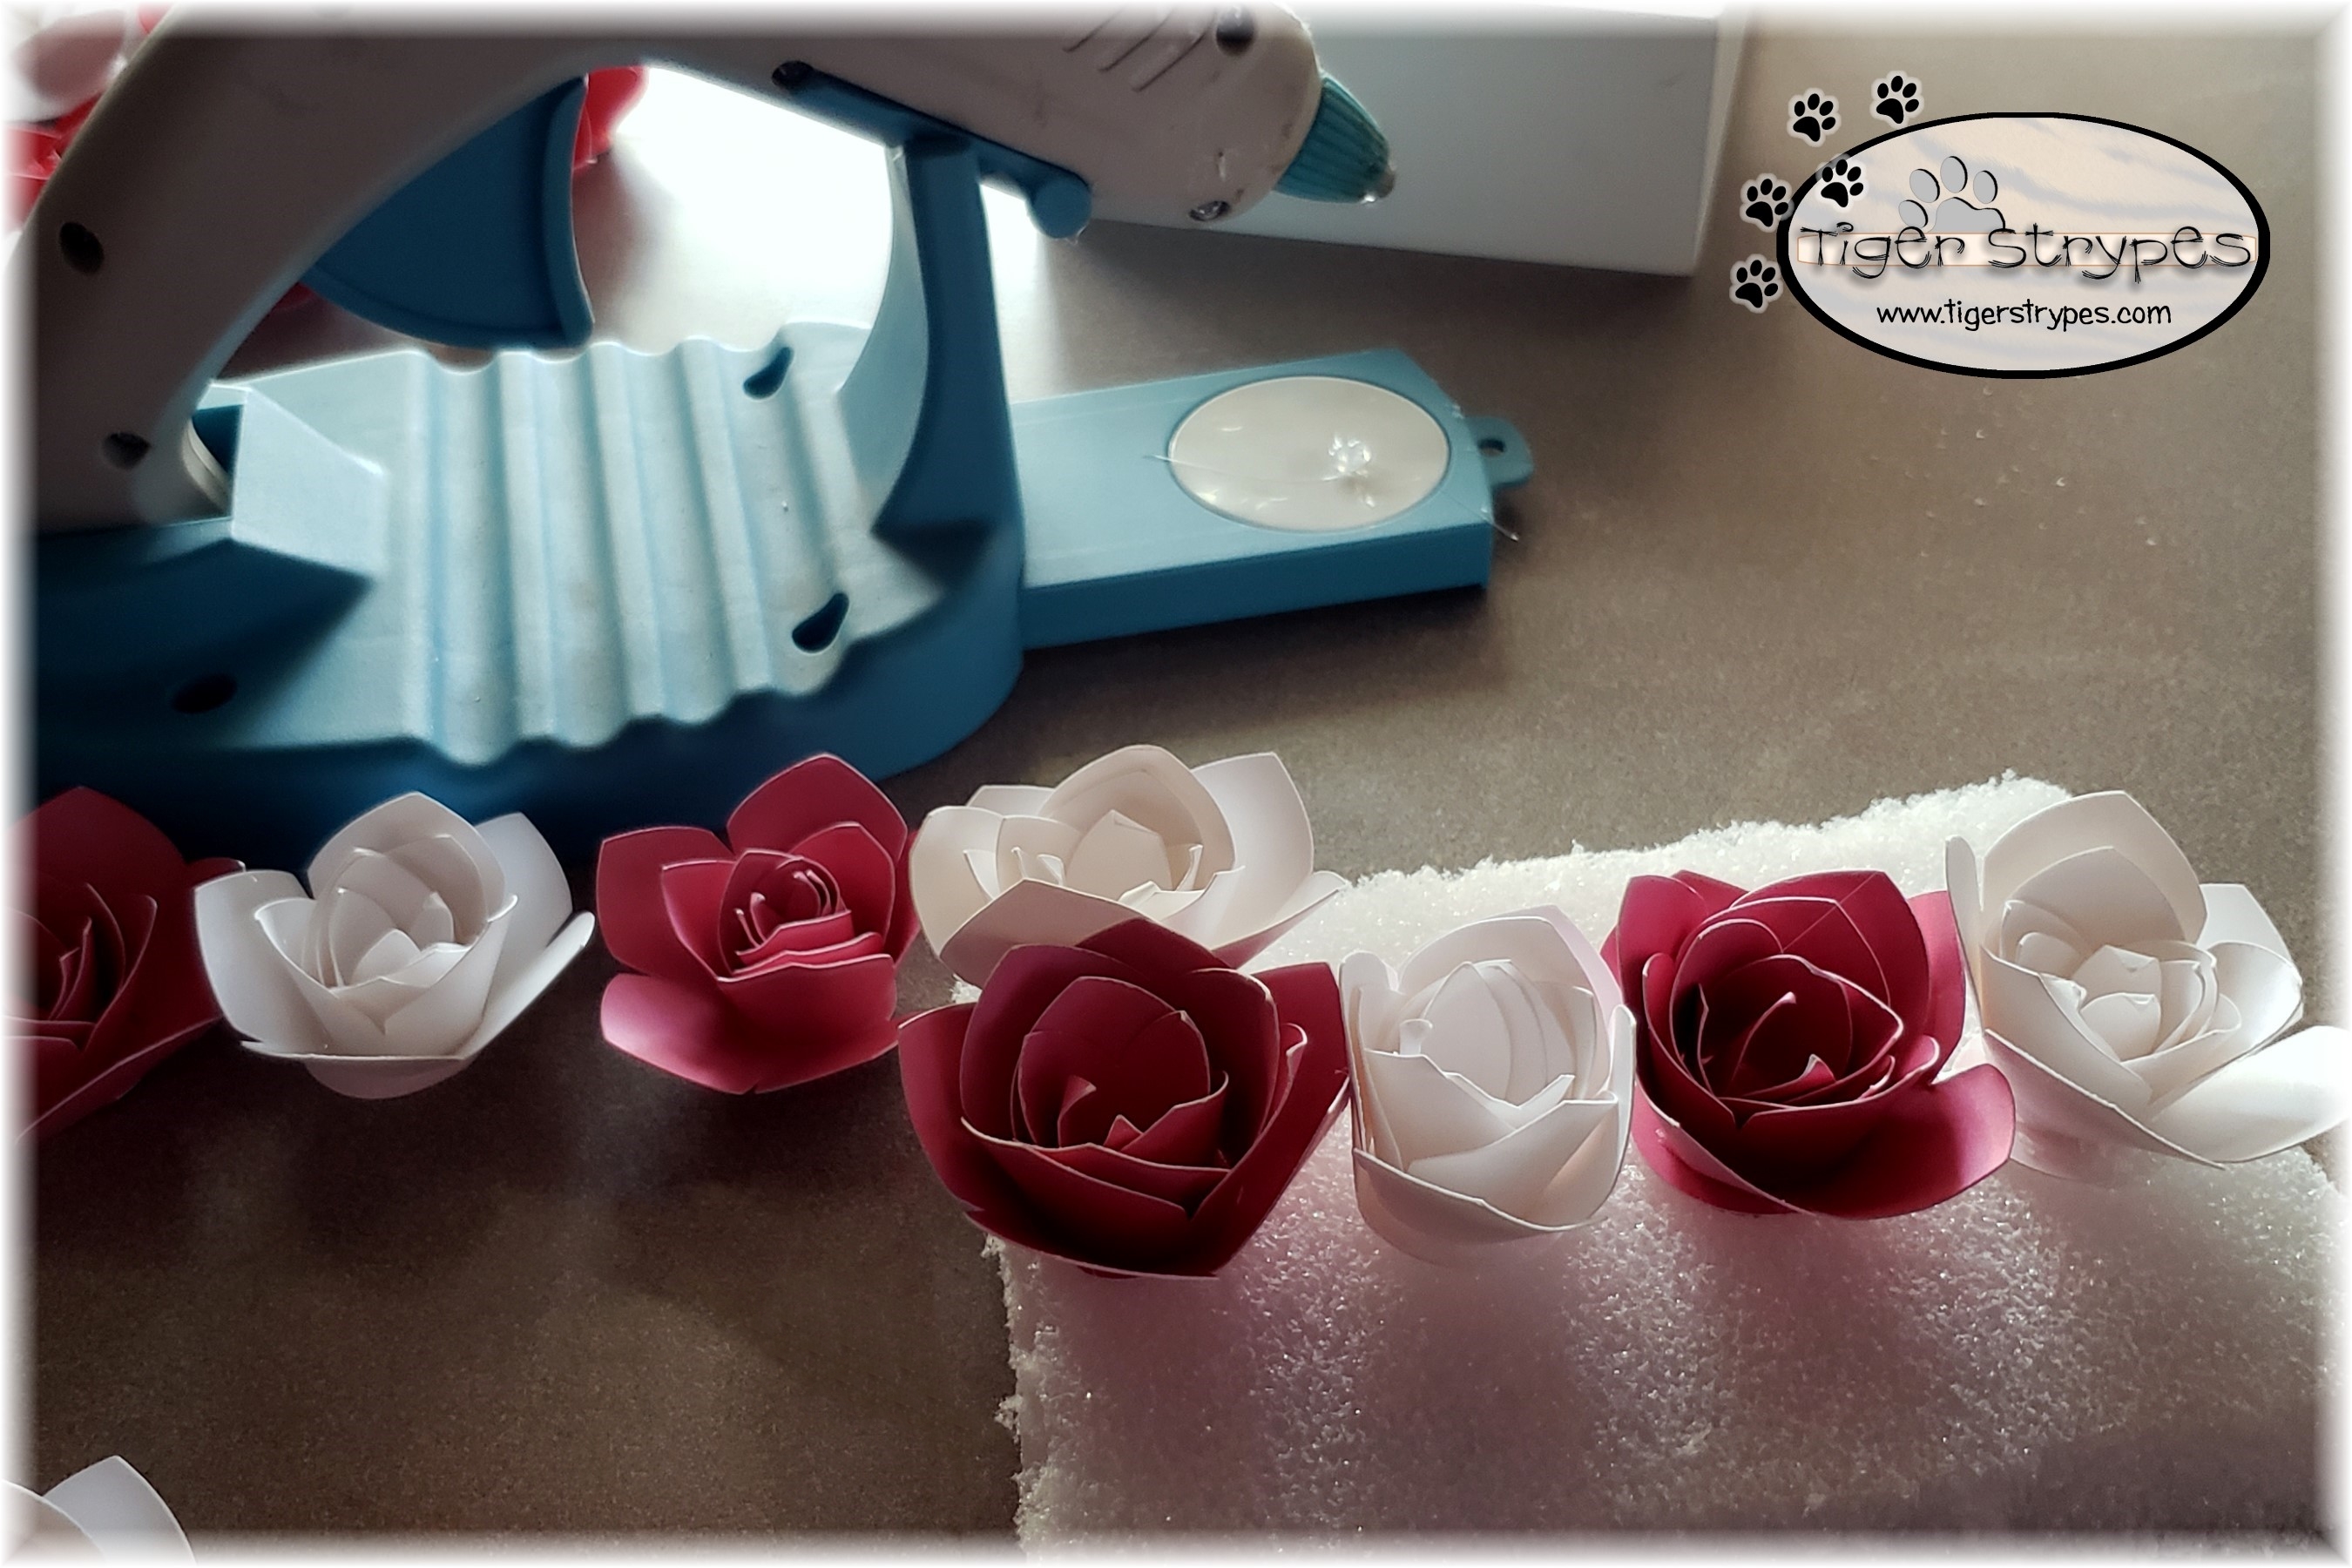
When that was done, I used my glue gun to attach the flowers in three rows on the Styrofoam. This could be done however you want, and depending on flower size, you could add more or use less. Be careful to not burn your fingers when attaching them, though…not like I know what that feels like, or anything. 🙄
After I had them all adhered, I inserted the piece of Styrofoam into the shadow box. You have to push on some of the petals to make it fit, so go slowly and make sure that everything is in the place that you need it to be in the end.

Just a note, you might need to mess with the depth of the foam piece you’re using. At the end, I found that this one ended up being too thick for the piece that I was doing, once the flowers were attached. Using the same bread knife, I was able to actually thin it half to make it fit. I made another project after this one and ended up just using thick craft board, and it was a great size.
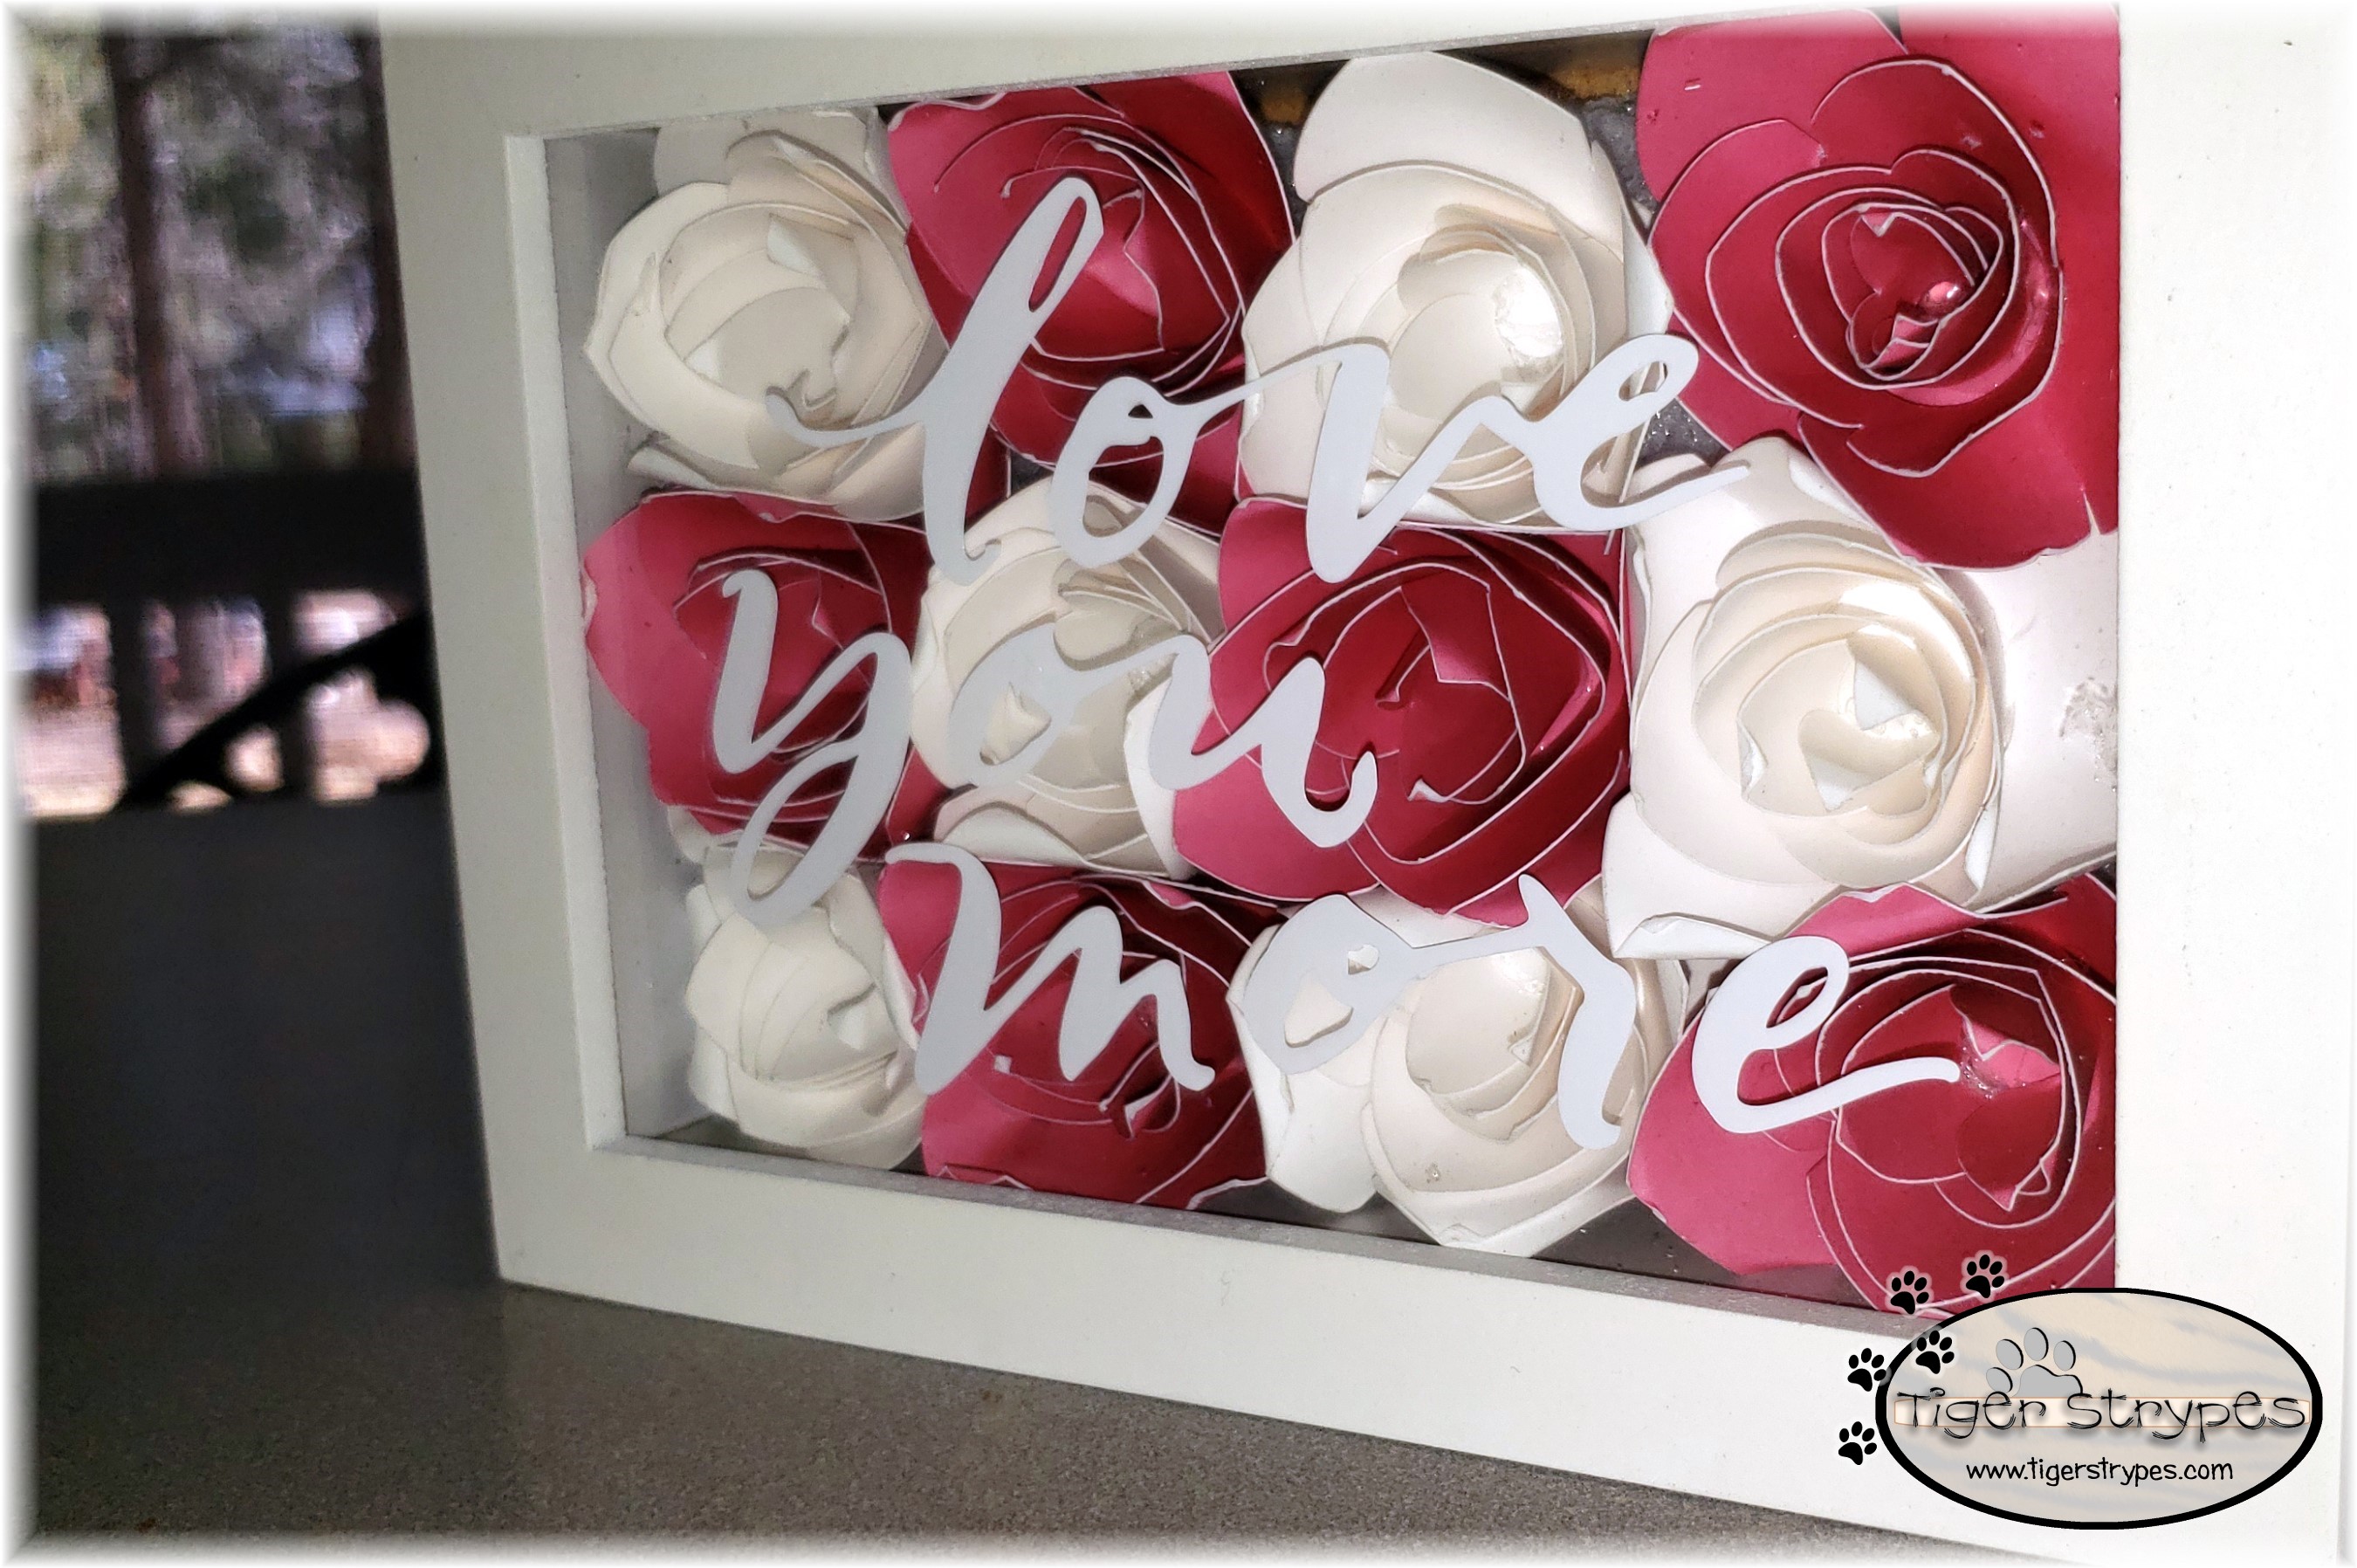
When I had the flowers were inserted, and that part was done, I started working on the sticker to use on the front of the piece. Using my Cricut Design Space, I put in the text of “Love You More” to have it cut it out of adhesive vinyl. I waited for the cut to finish, weeded the design and then attached the transfer paper to be ready to go. Removing the backing, and then attaching it to the front glass, I added a bit of text to the piece.
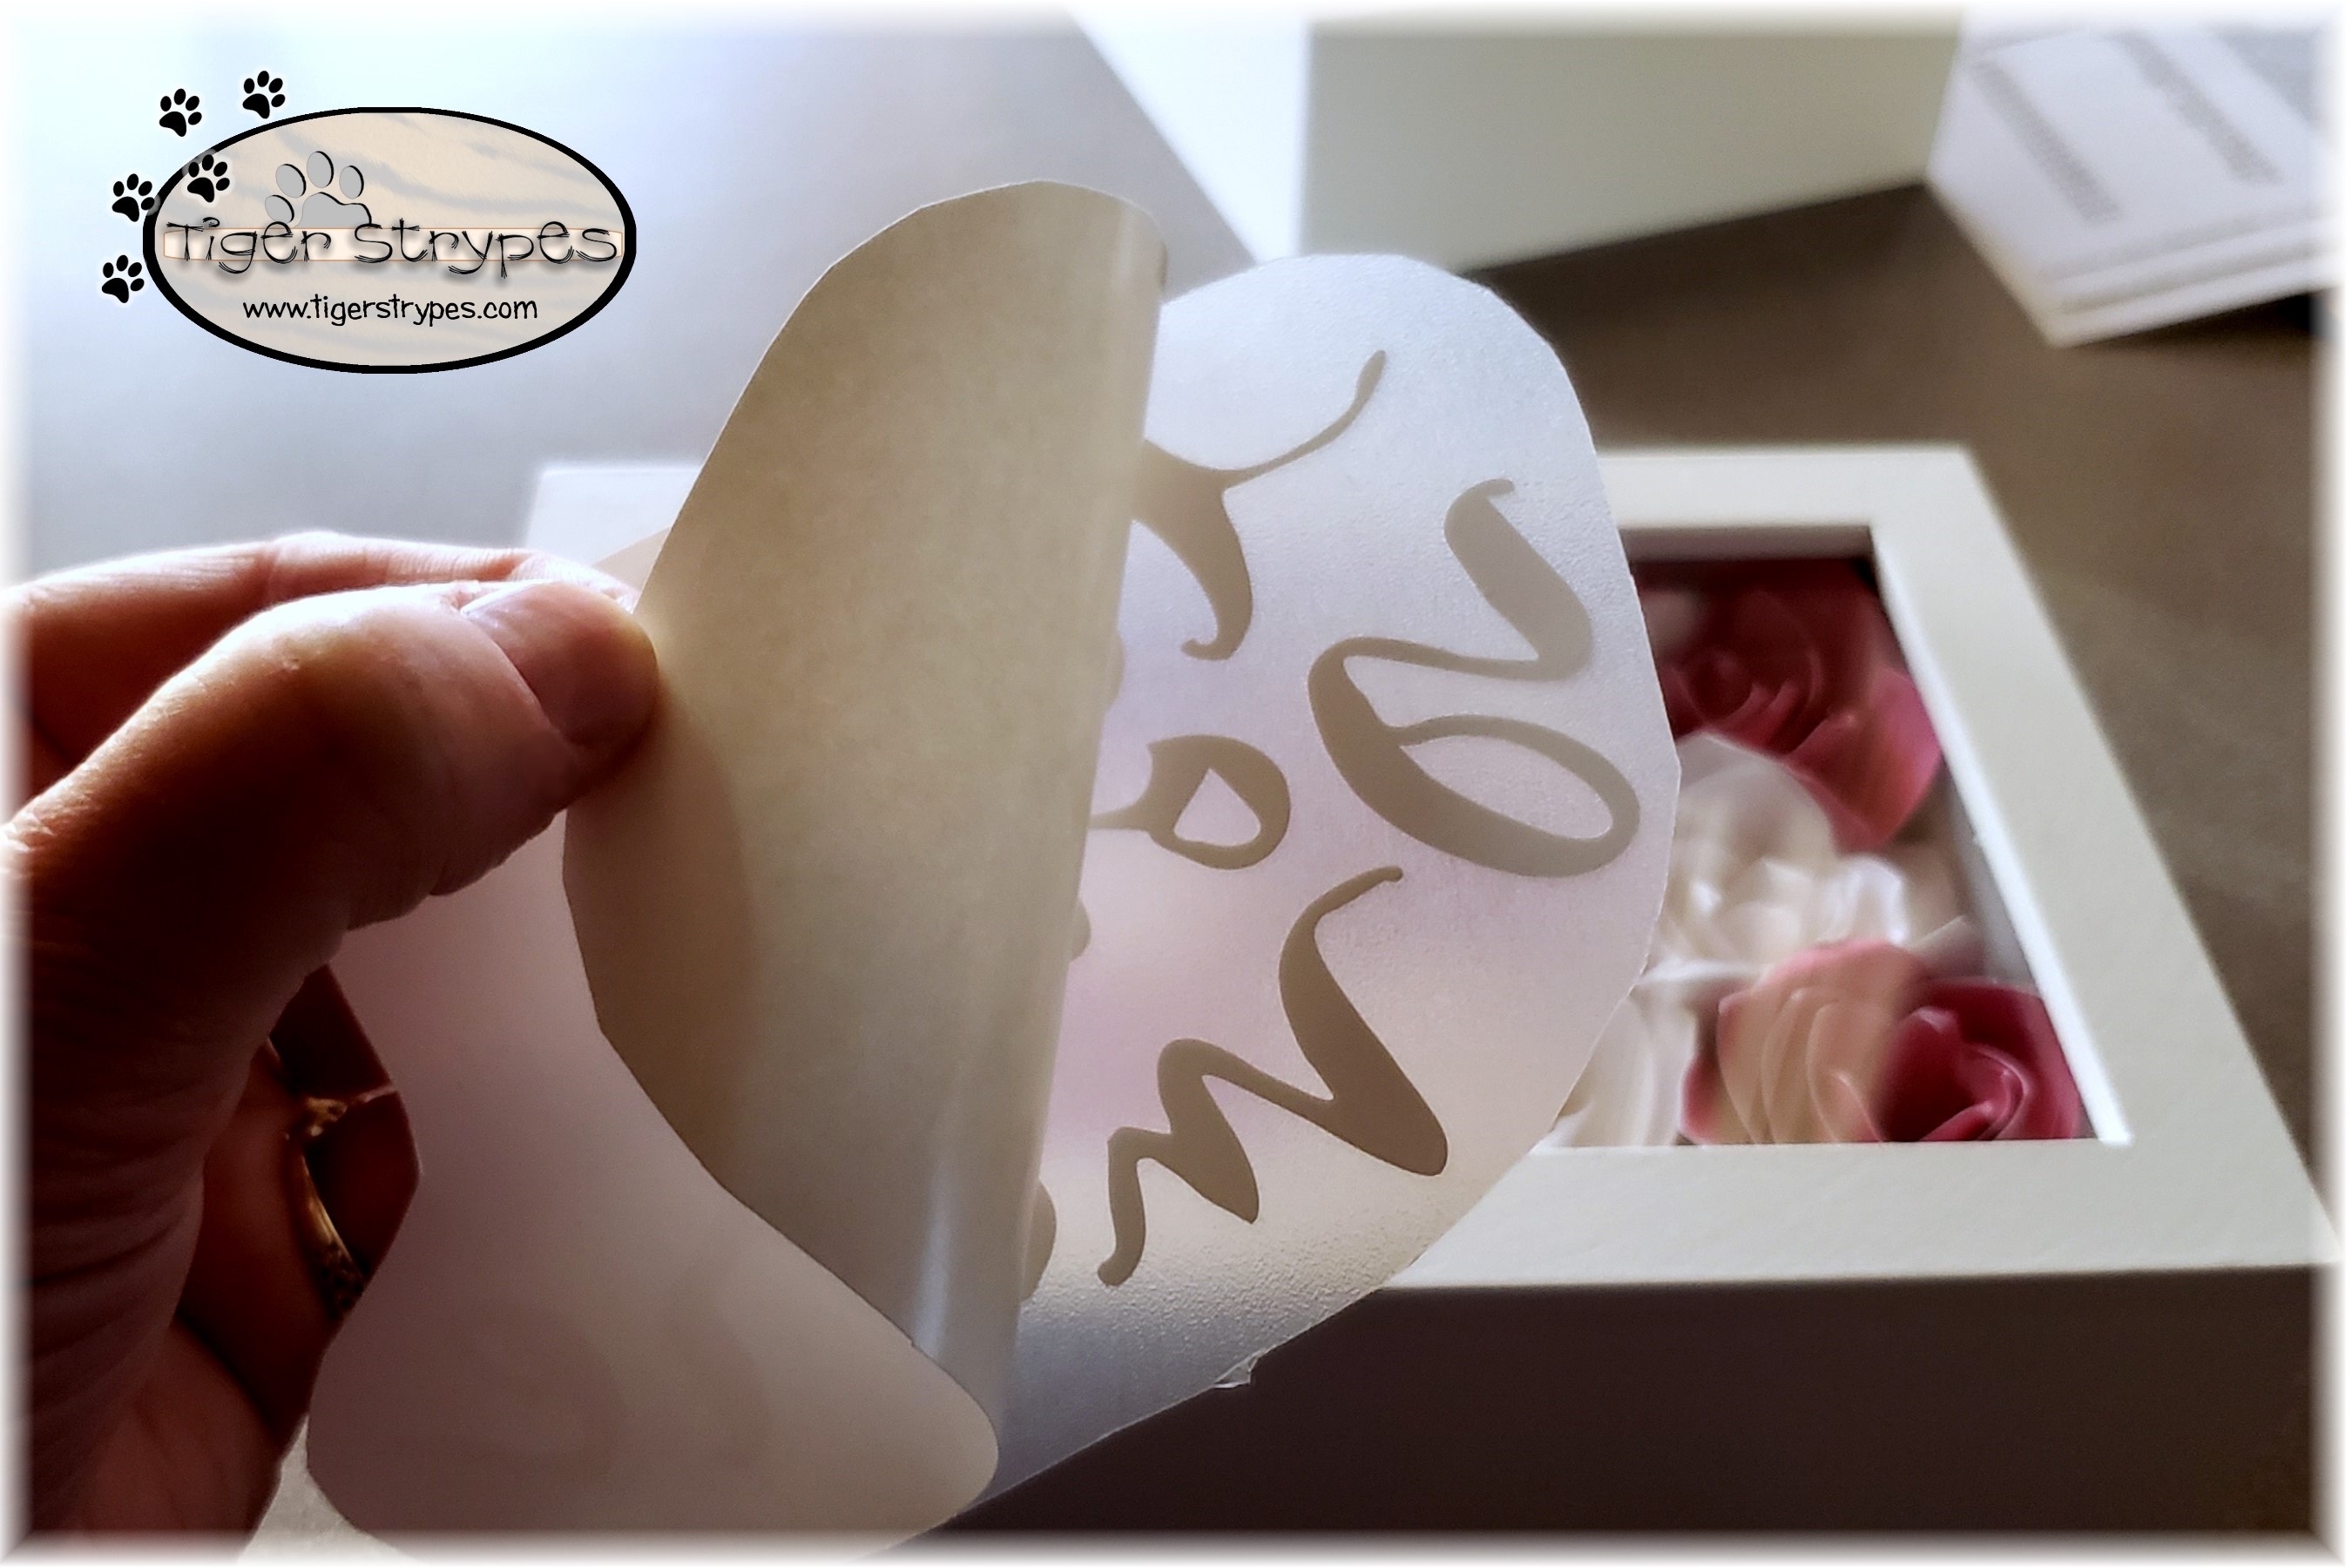
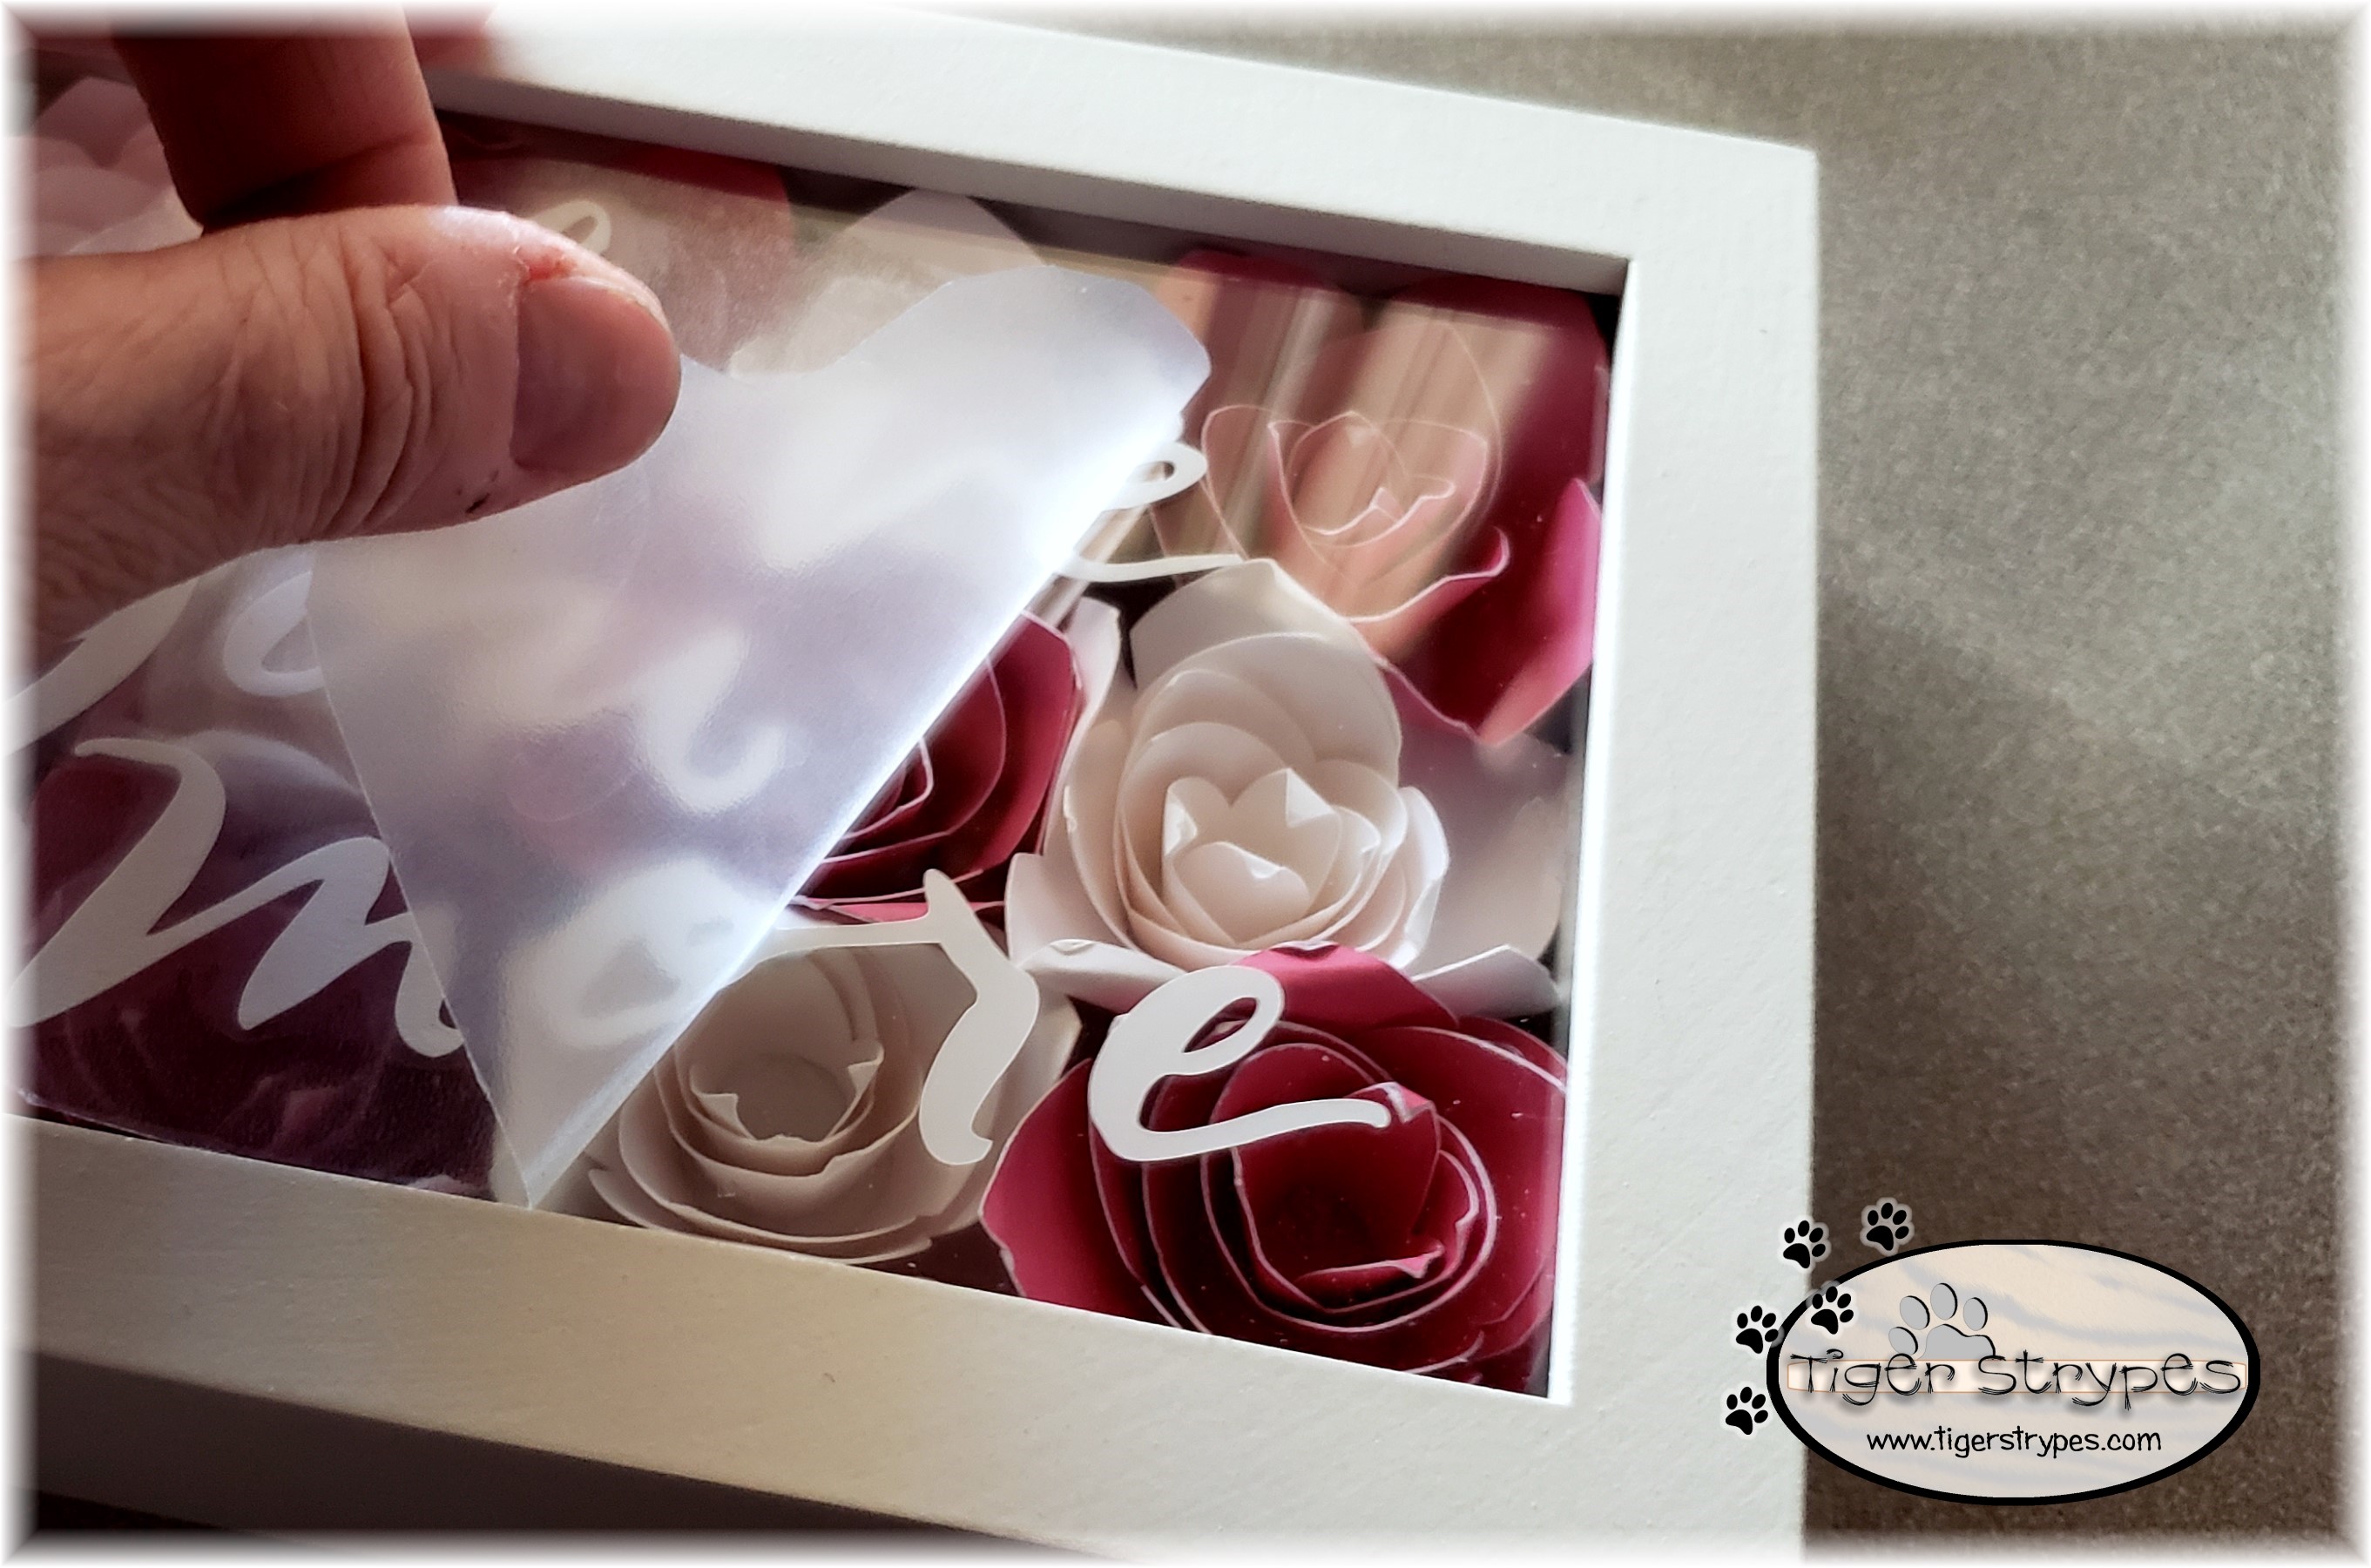
It is hard to see the text in the photo, but in person it looks great. I figure it will be perfect for someone to give as a gift to someone that they love this Valentine’s Day. I have it listed over at my Etsy Store, if you’re interested.

So, what do you think? I hope you like it! Please take a minute to leave me a comment on what you would like to create, and if you have any tips on how to do it different, or better! Be sure to tweet, pin, share, etc. – thanks!!
“The grass withers and the flowers fall, but the word of our God endures forever.” –Isaiah 40:8
![]()
HERE ARE SOME OF MY PREVIOUS PROJECTS:
 |
 |
 |
 |
 |
 |

[…] seen boxed artwork before, and wanted to try making another one. If you saw my post about the Valentine’s Day Box Art, I started with that and then decided to make another. This one was pretty easy, and is a great […]
This is such a lovely idea!! Would be a great craft for any season, I think it would look great in a bedroom or sitting room as a beautiful focal piece.
Thanks Barb – I figured it looked like a Valentine, but you’re right…it could be used all year! 🙂
That is adorable. I love the flowers you made.
Thank you, Grace – it was fun to make! 🙂
This is gorgeous! It’s perfect for Valentine’s Day!
Thanks Daisy!!!