
TBC CRAFTER’S HOP (#TBCCRAFTERS) – 01/31/2013
I was looking around for a new way to decorate with inexpensive things and found an idea close to this on “Dollar Store Crafts” website. I just had some of these things laying around the house and this is definitely one you can adjust to your own decor, taste, etc. Easy to do, not very expensive and would even be great as a gift. Enjoy!!
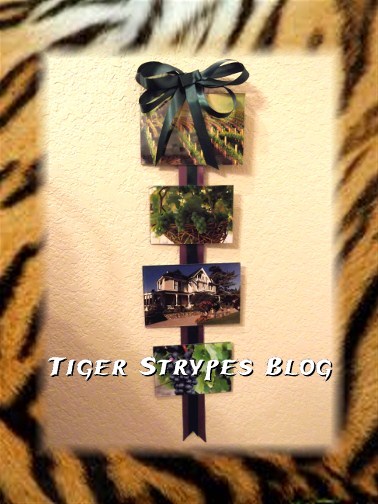
Hanging Photo Display
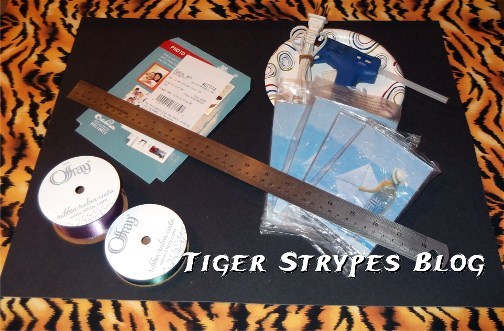
Materials Needed:
- Clear Photo Displays (I used some magnetic acrylic pieces)
- Photos
- Ribbon (your choice on color)
- Bow or Topper (your choice)
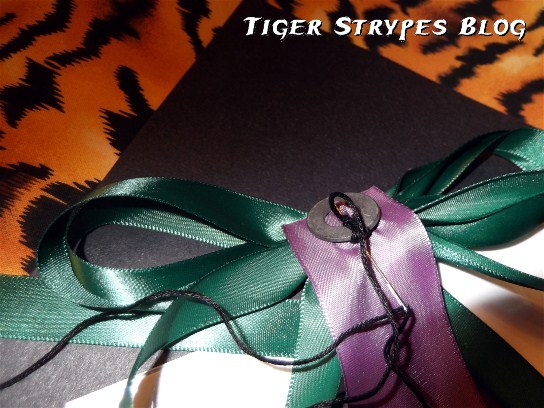
- Large Washer
- Glue Gun
- Photos
- Ruler
- & Time!!
Instructions:
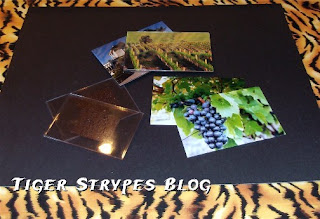
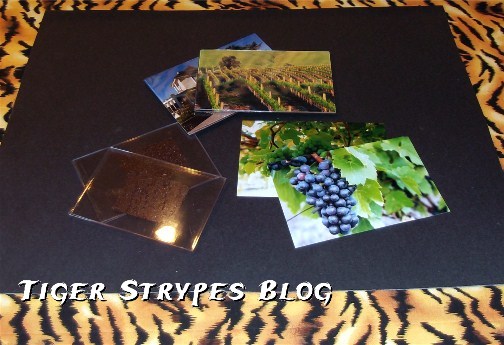
Insert your photos in clear holders, may have to cut to size if you use different size frames, like I did.
Measure your photos and space them at your desired measurement to find out how much ribbon to cut at the desired length (I used two different colors of ribbon for a layered effect).

Glue your photo frames to the ribbon with your hot glue gun.
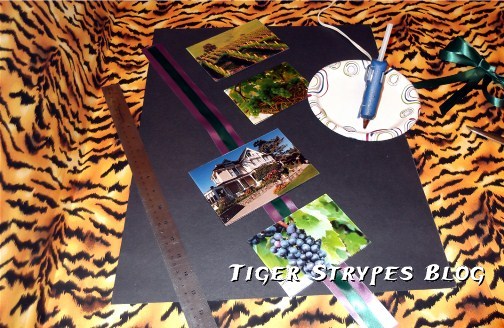
Glue the bow or whatever you decided to use at the top. I used my good old “bow maker” device to make this one. You can go with any style or size that you wish. I was even thinking of finding a little grape wall hanging piece and using that, but figured the bow would work for now.

Get it ready for hanging by using a washer. Just stitch the thread behind the bow and attach the washer to the desired spot for hanging.
Hang up your beautiful new artwork and enjoy!!
*****************************************************************
Do you have a Thrilling Thursday craft to add? Add a link to your blog post in the linky below after you’ve left a comment on this post and add this button to your blog post!”
http://thebloggerconnection.com/” target=”_blank”> http://www.thebloggerconnection.com/wp-content/uploads/2012/10/TBC_Crafters_hop_button.jpg“/>


Cute! Now I need to actually print some of my digital pictures!
I love that you were able to gather items that you already had at home. It is always fun to see what you can create out the items you already have sitting around collecting dust at home! But this is pretty!
Great idea! This is something my daughter can do to help decorate her room and a low cost! Thanks!!
Easy to make and good for home decor!
Fun and so pretty!
great idea, perfect for those photos you just want up for a little while and don’t want to buy frames for
I love this-it would make a really great gift!
What a cute idea. This would be great in my daughter’s room!
I love it.