
This site contains affiliate links. Please see below for more information.

Make a Redneck Doorbell
#DIY #Craft #Redneck #Home
If you’re like me, you’re always seeing funny pictures online, and saying “hey, I could make that!” I love crafts that make people smile. Living in the mountains of Arizona, this theme fit perfectly with our home, and area. Those who have been following my blog for awhile, know that my son and husband were an offroad racing team that was named “Redneck Edition.” We just love what it stood for, and how well it fits in with our local area. Seeing a photo like this online, I had to go shopping and make my own. I decided to do a post to show you how, in case you wanted one for your home!
I hope you enjoy this craft idea, or know someone who would. If you end up making one, be sure and share a photo on my FB page, with what you come up with. I’d love to see it! I sure hope that you like the tutorial, and pray that you have a blessed day!
Please be sure to comment, and share this craft on your social media channels – thanks so much!!
Have Some Fun and Make a #Redneck #Doorbell for your #Home - Makes People #Laugh #Craft #DIY via #TigerStrypesBlog - Find out more at Share on X

Materials/Tools Used:
- Wood Scrap
- String / Rope
- Craft Paint & Paintbrush
- Cricut
- Vinyl
- Mouse Trap
- & Time!
Instructions for the Redneck Doorbell:
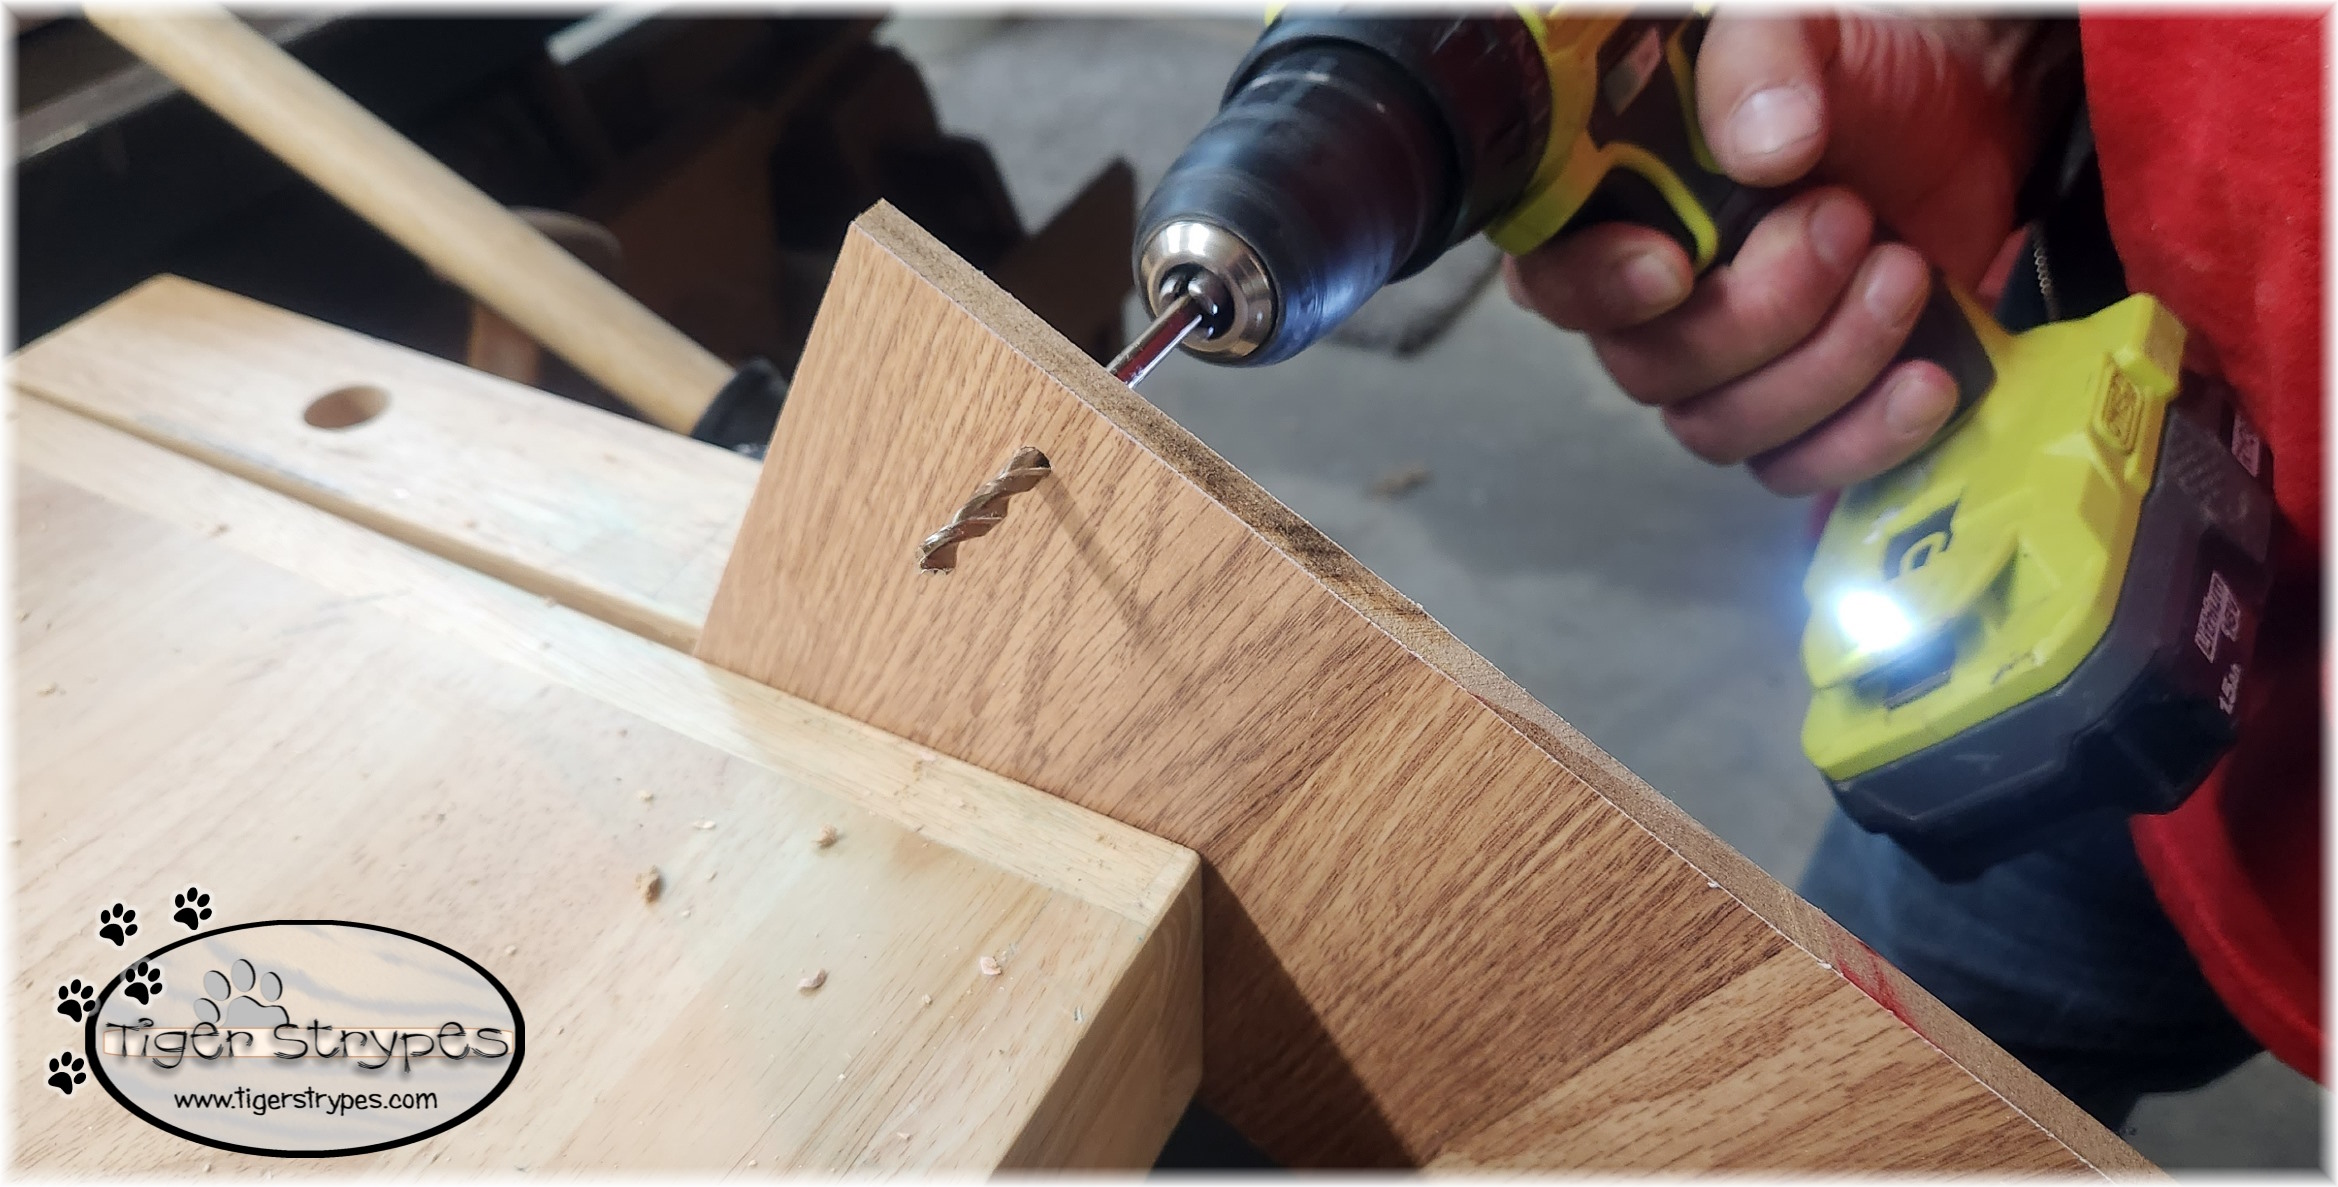
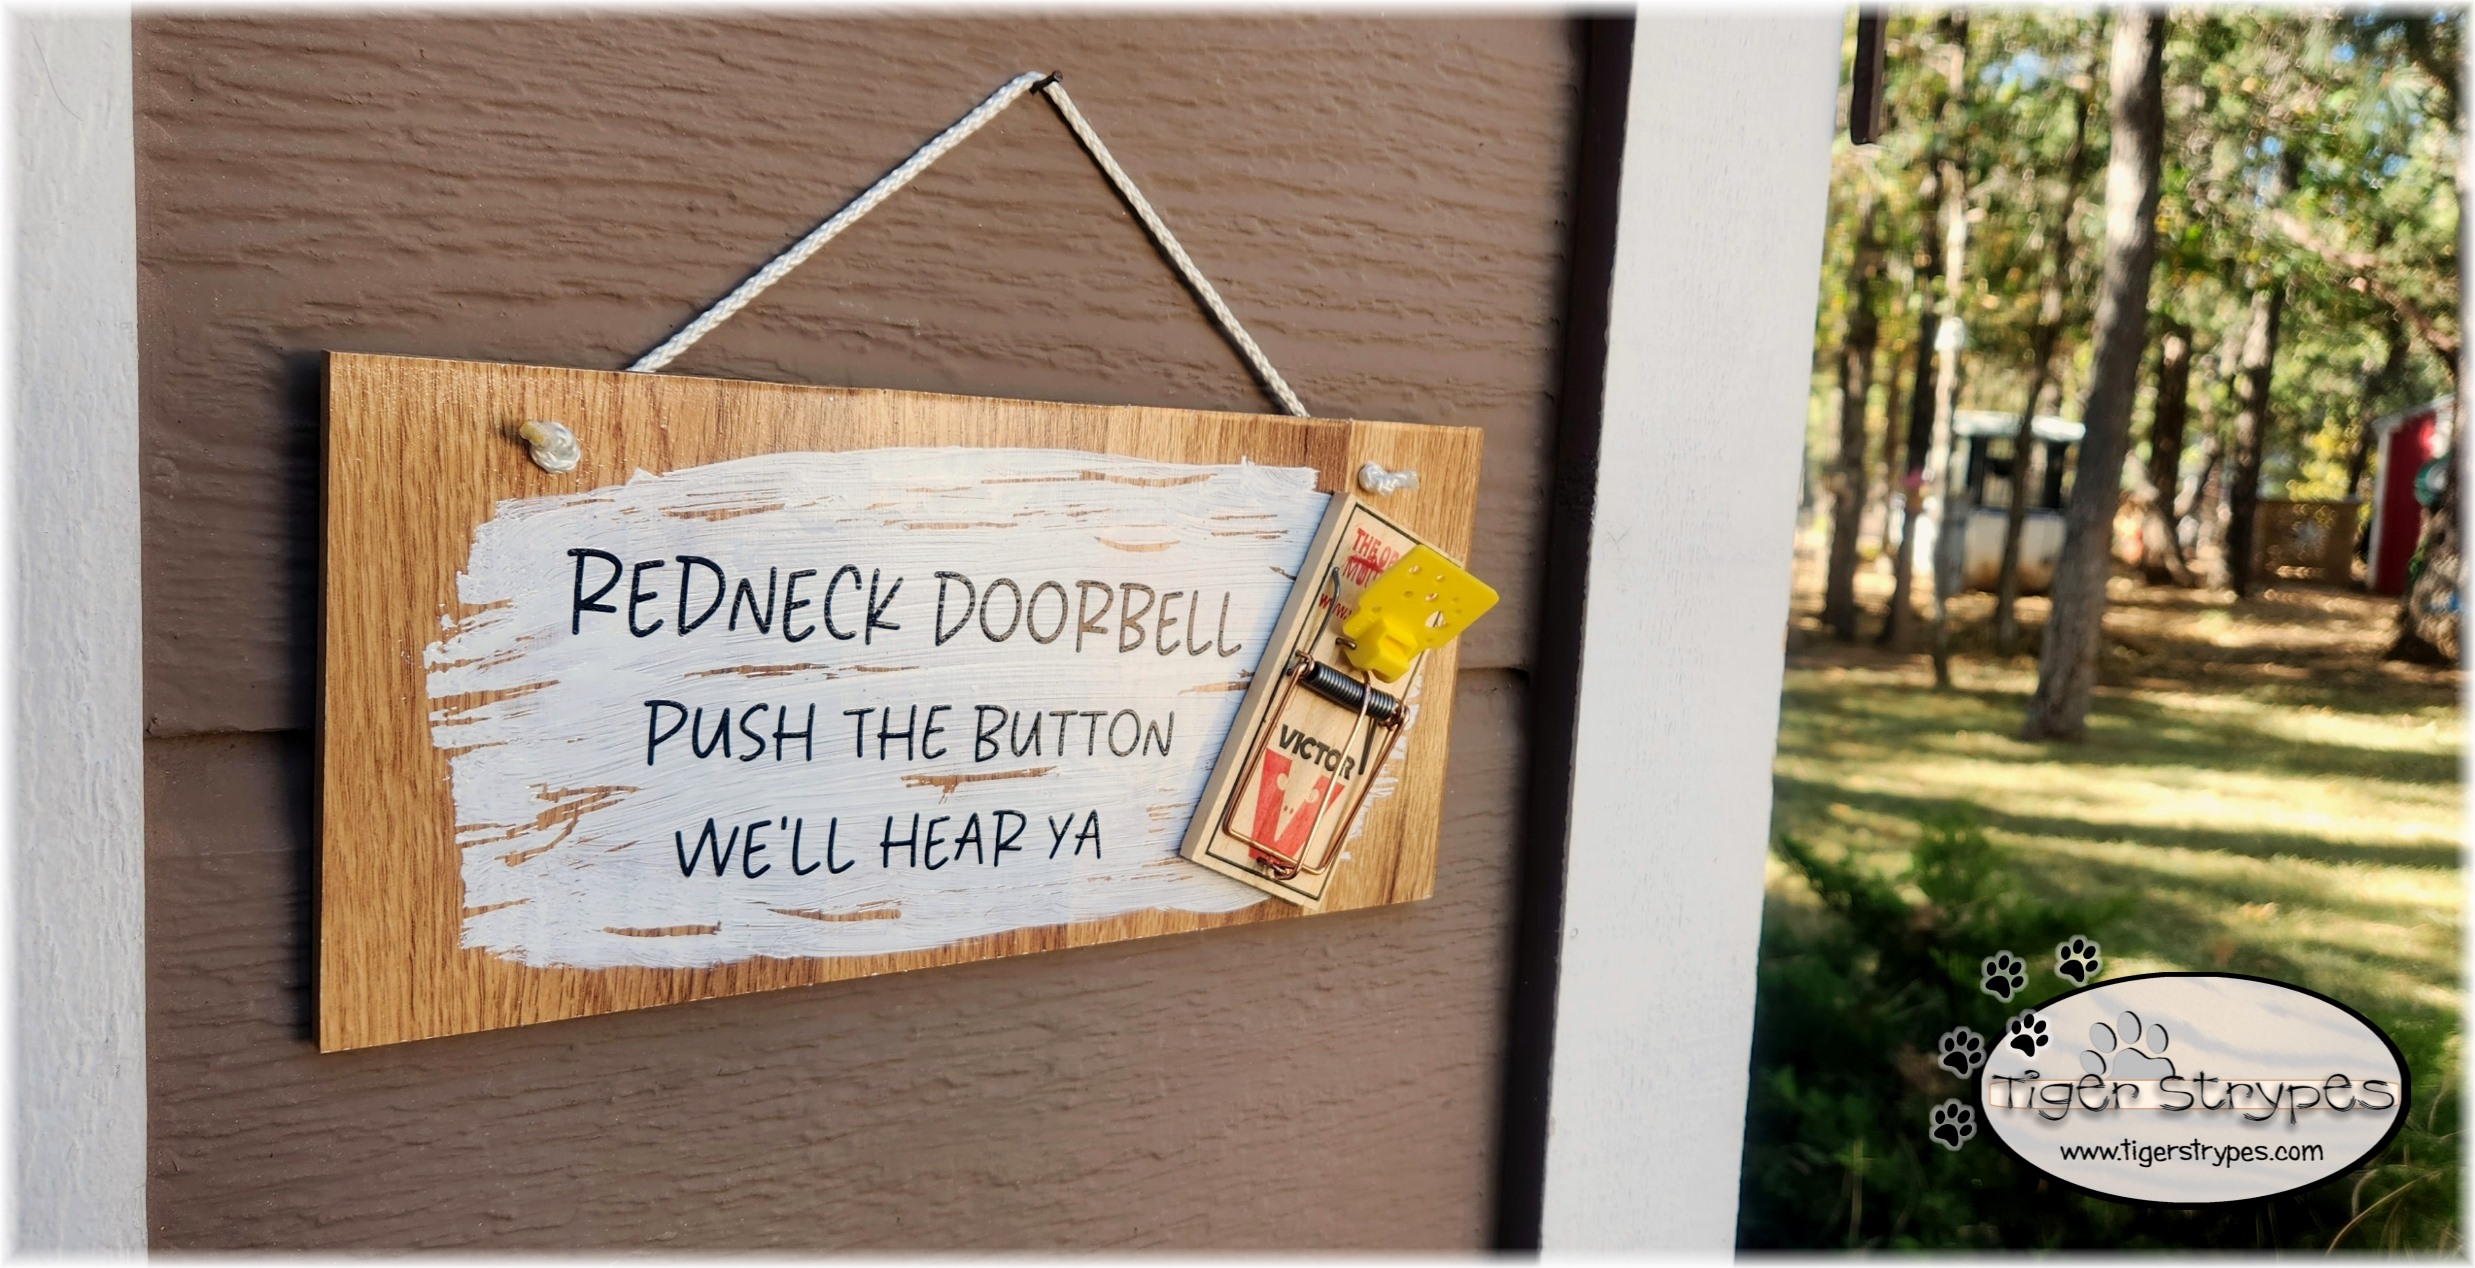
My craft room is full of little things left over from other projects, etc. I figured I could use some of that to make this sign. We updated our flooring upstairs awhile back and I had a bunch of extra pieces from the stair toppers. I just had to cut a bit off to use for this project. You could use whatever you have laying around, or old pieces you find out in your wood shed, etc. Once you have the piece cut in the size that you want (I went with about 10″ x 6″), you can drill a couple holes at the top to use for hanging.
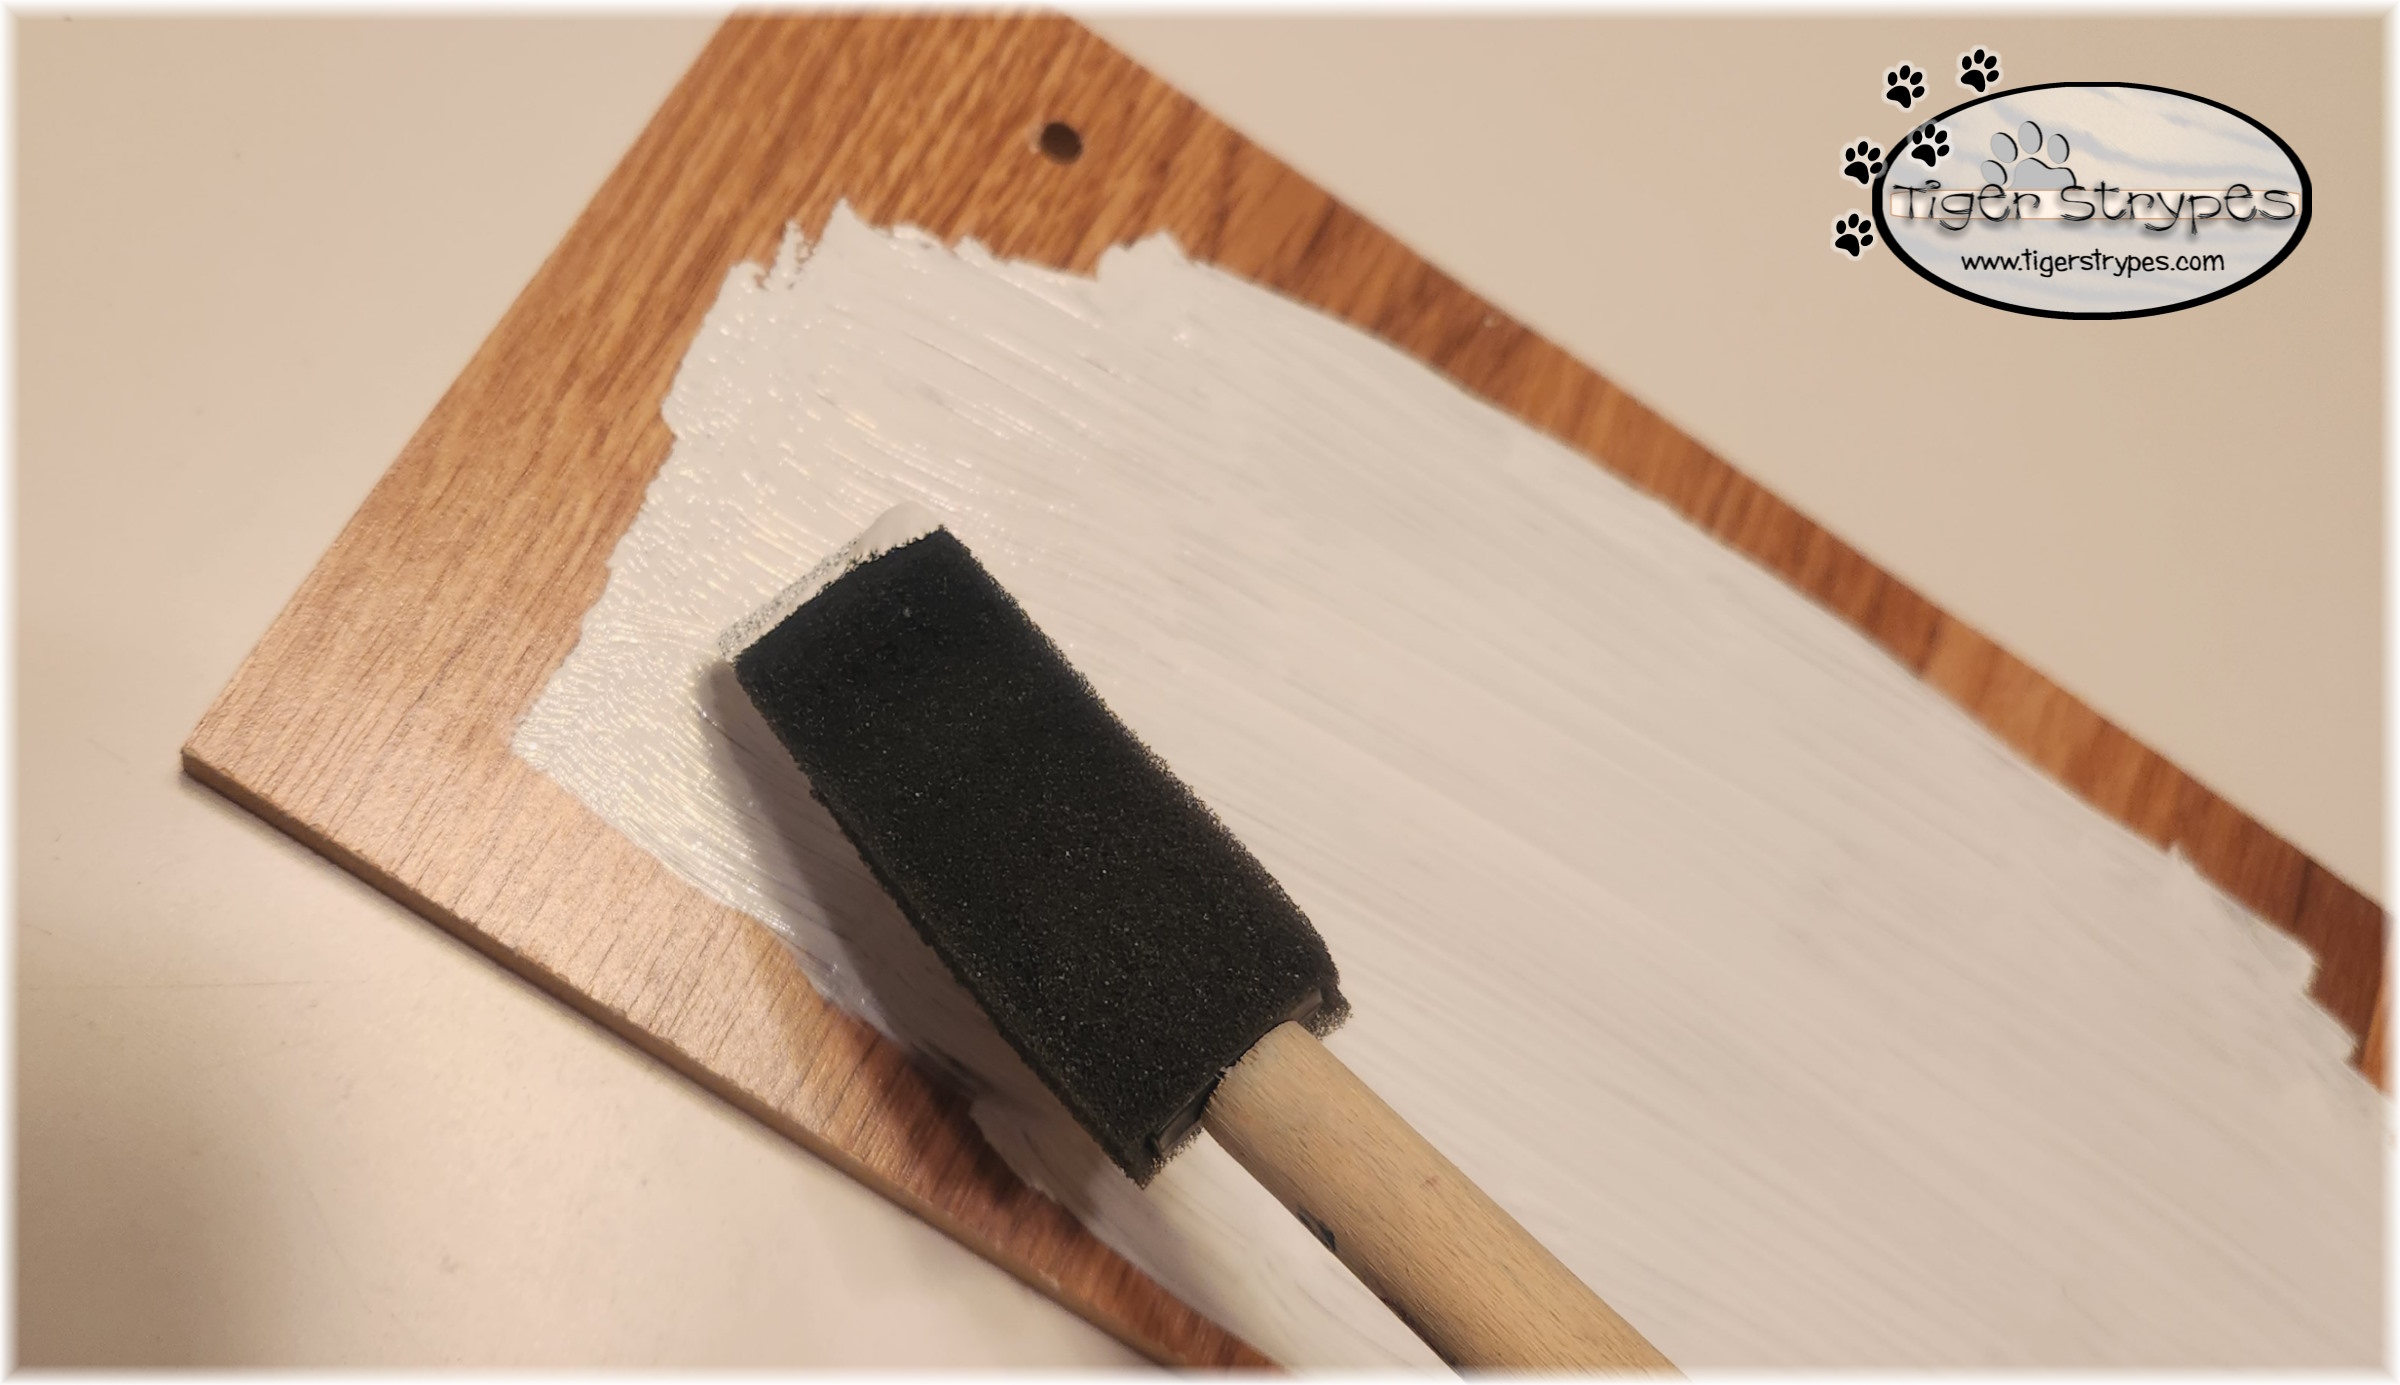
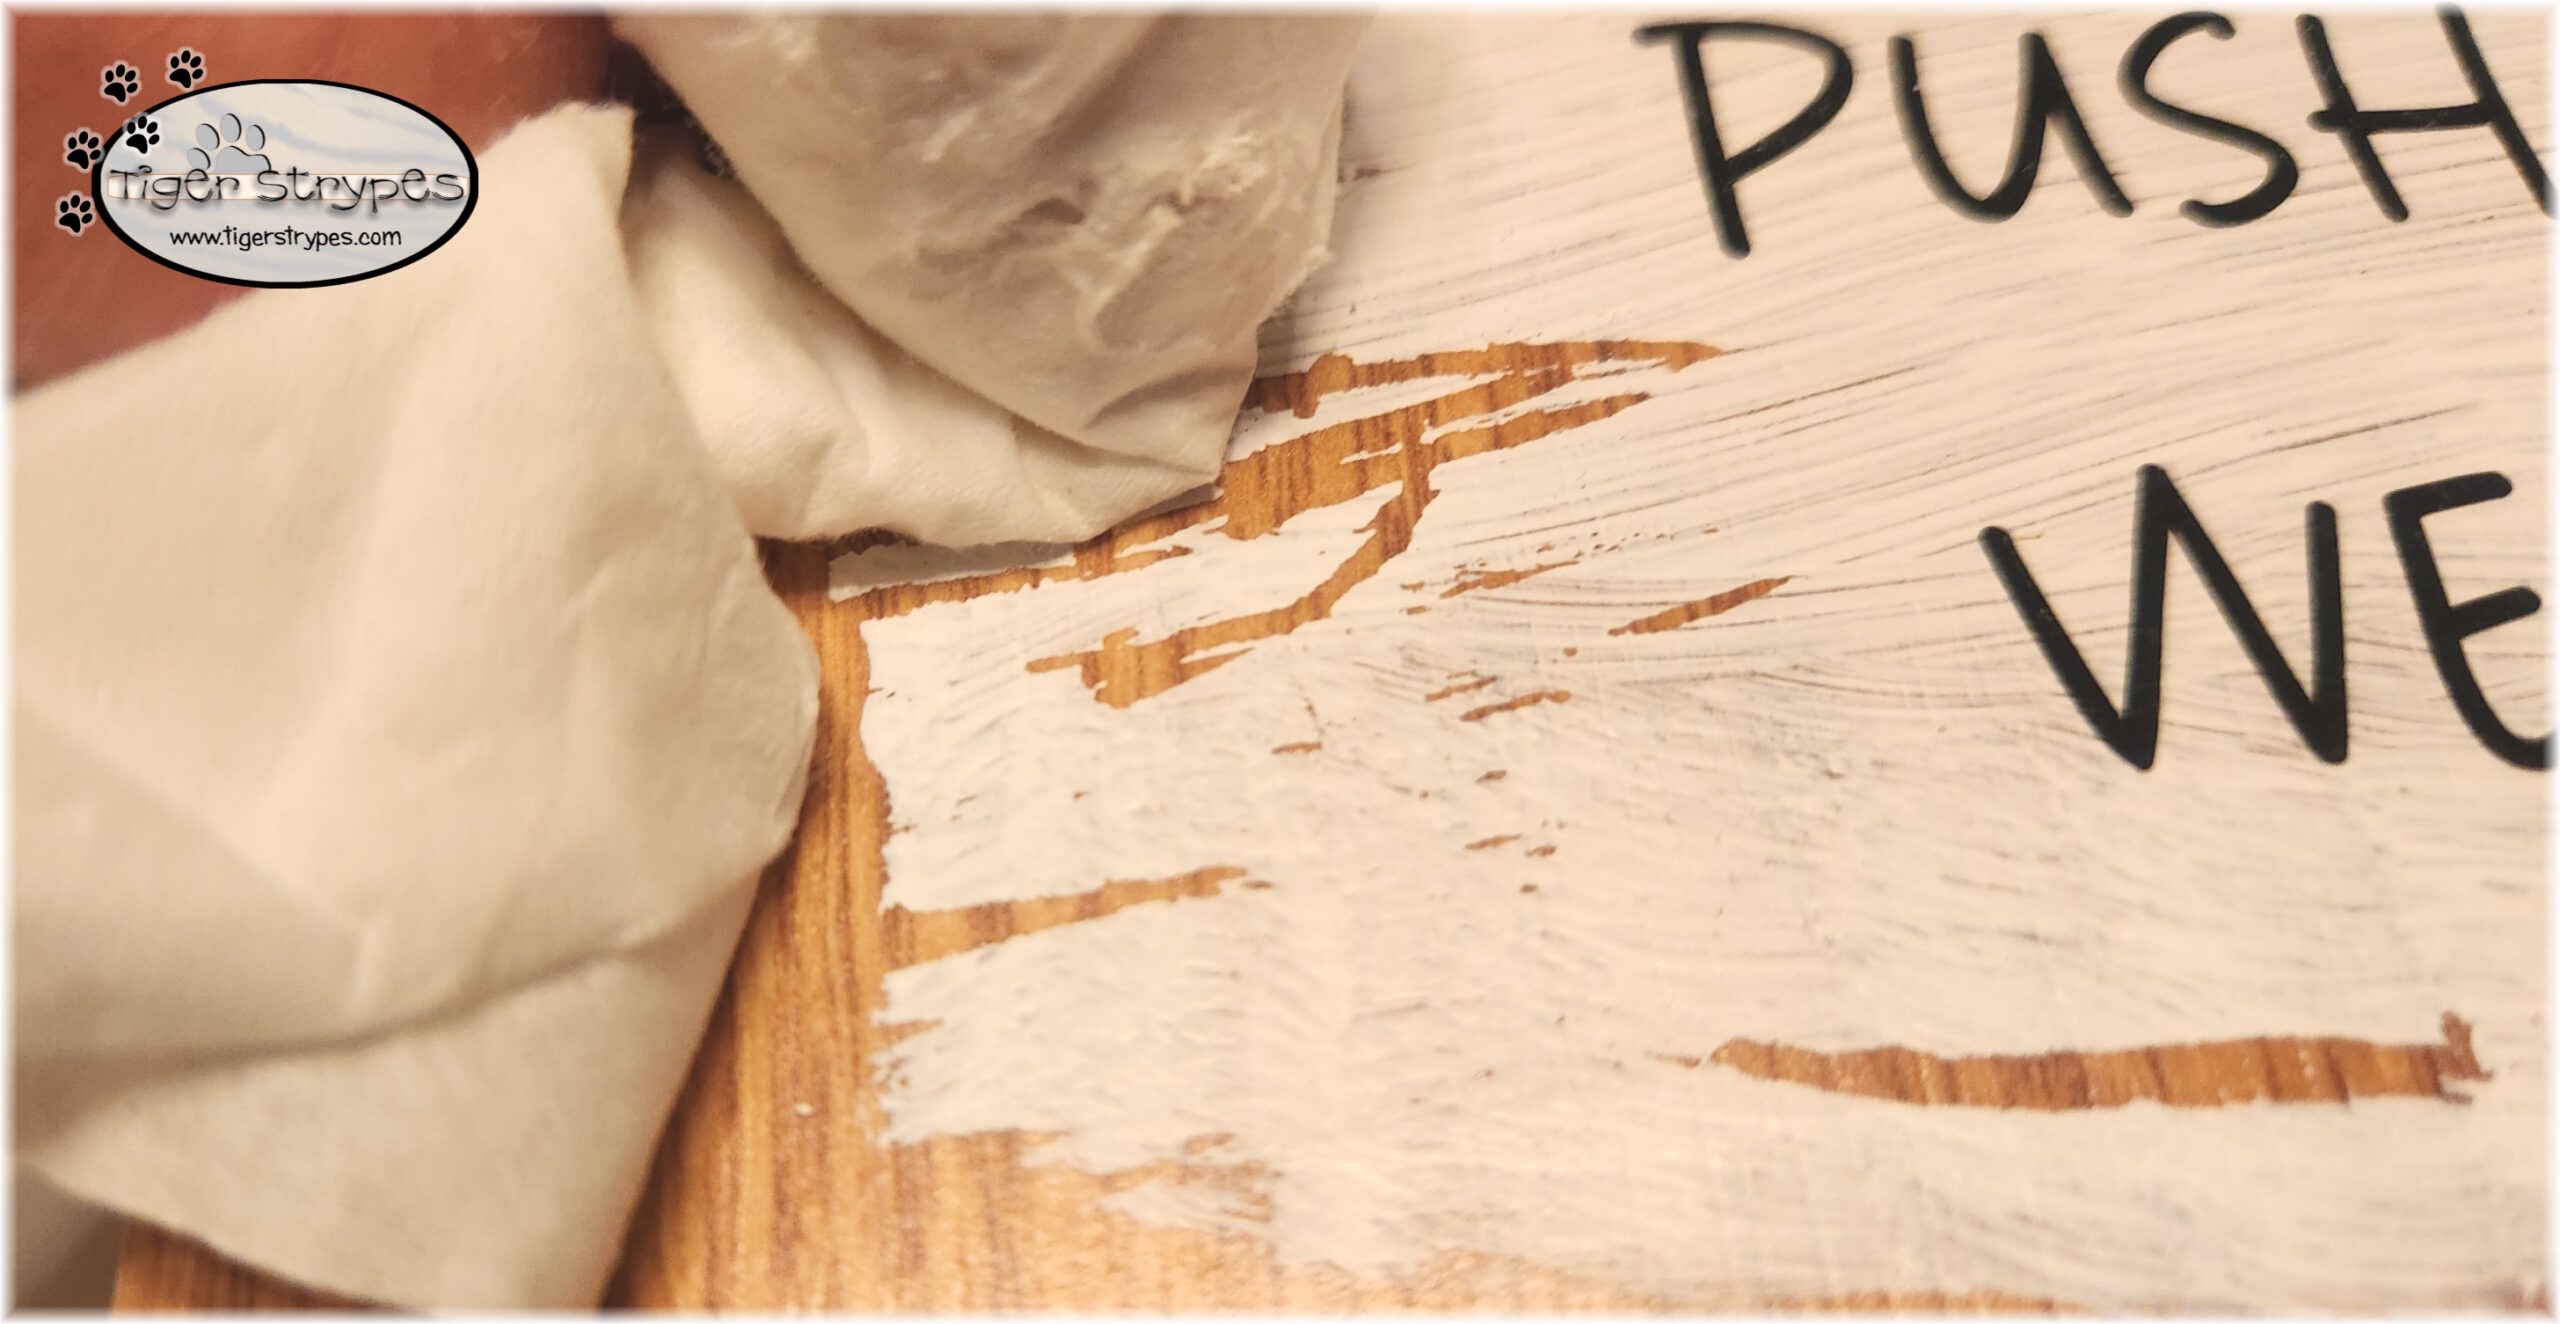
After you have the holes drilled, use some craft paint to paint the front of the piece, just a bit. There is no set size, requirements of design, etc. Just add some paint to use as the background for your lettering that will be added later. Set it aside and let it dry completely.
When you’re waiting for the paint to dry, you can make up your saying, using your Cricut or whatever machine you have. If you’re good with painting, you could always paint the lettering, but I didn’t want mine to look like a 3 year old did it, so I cheated with the machine! 😀

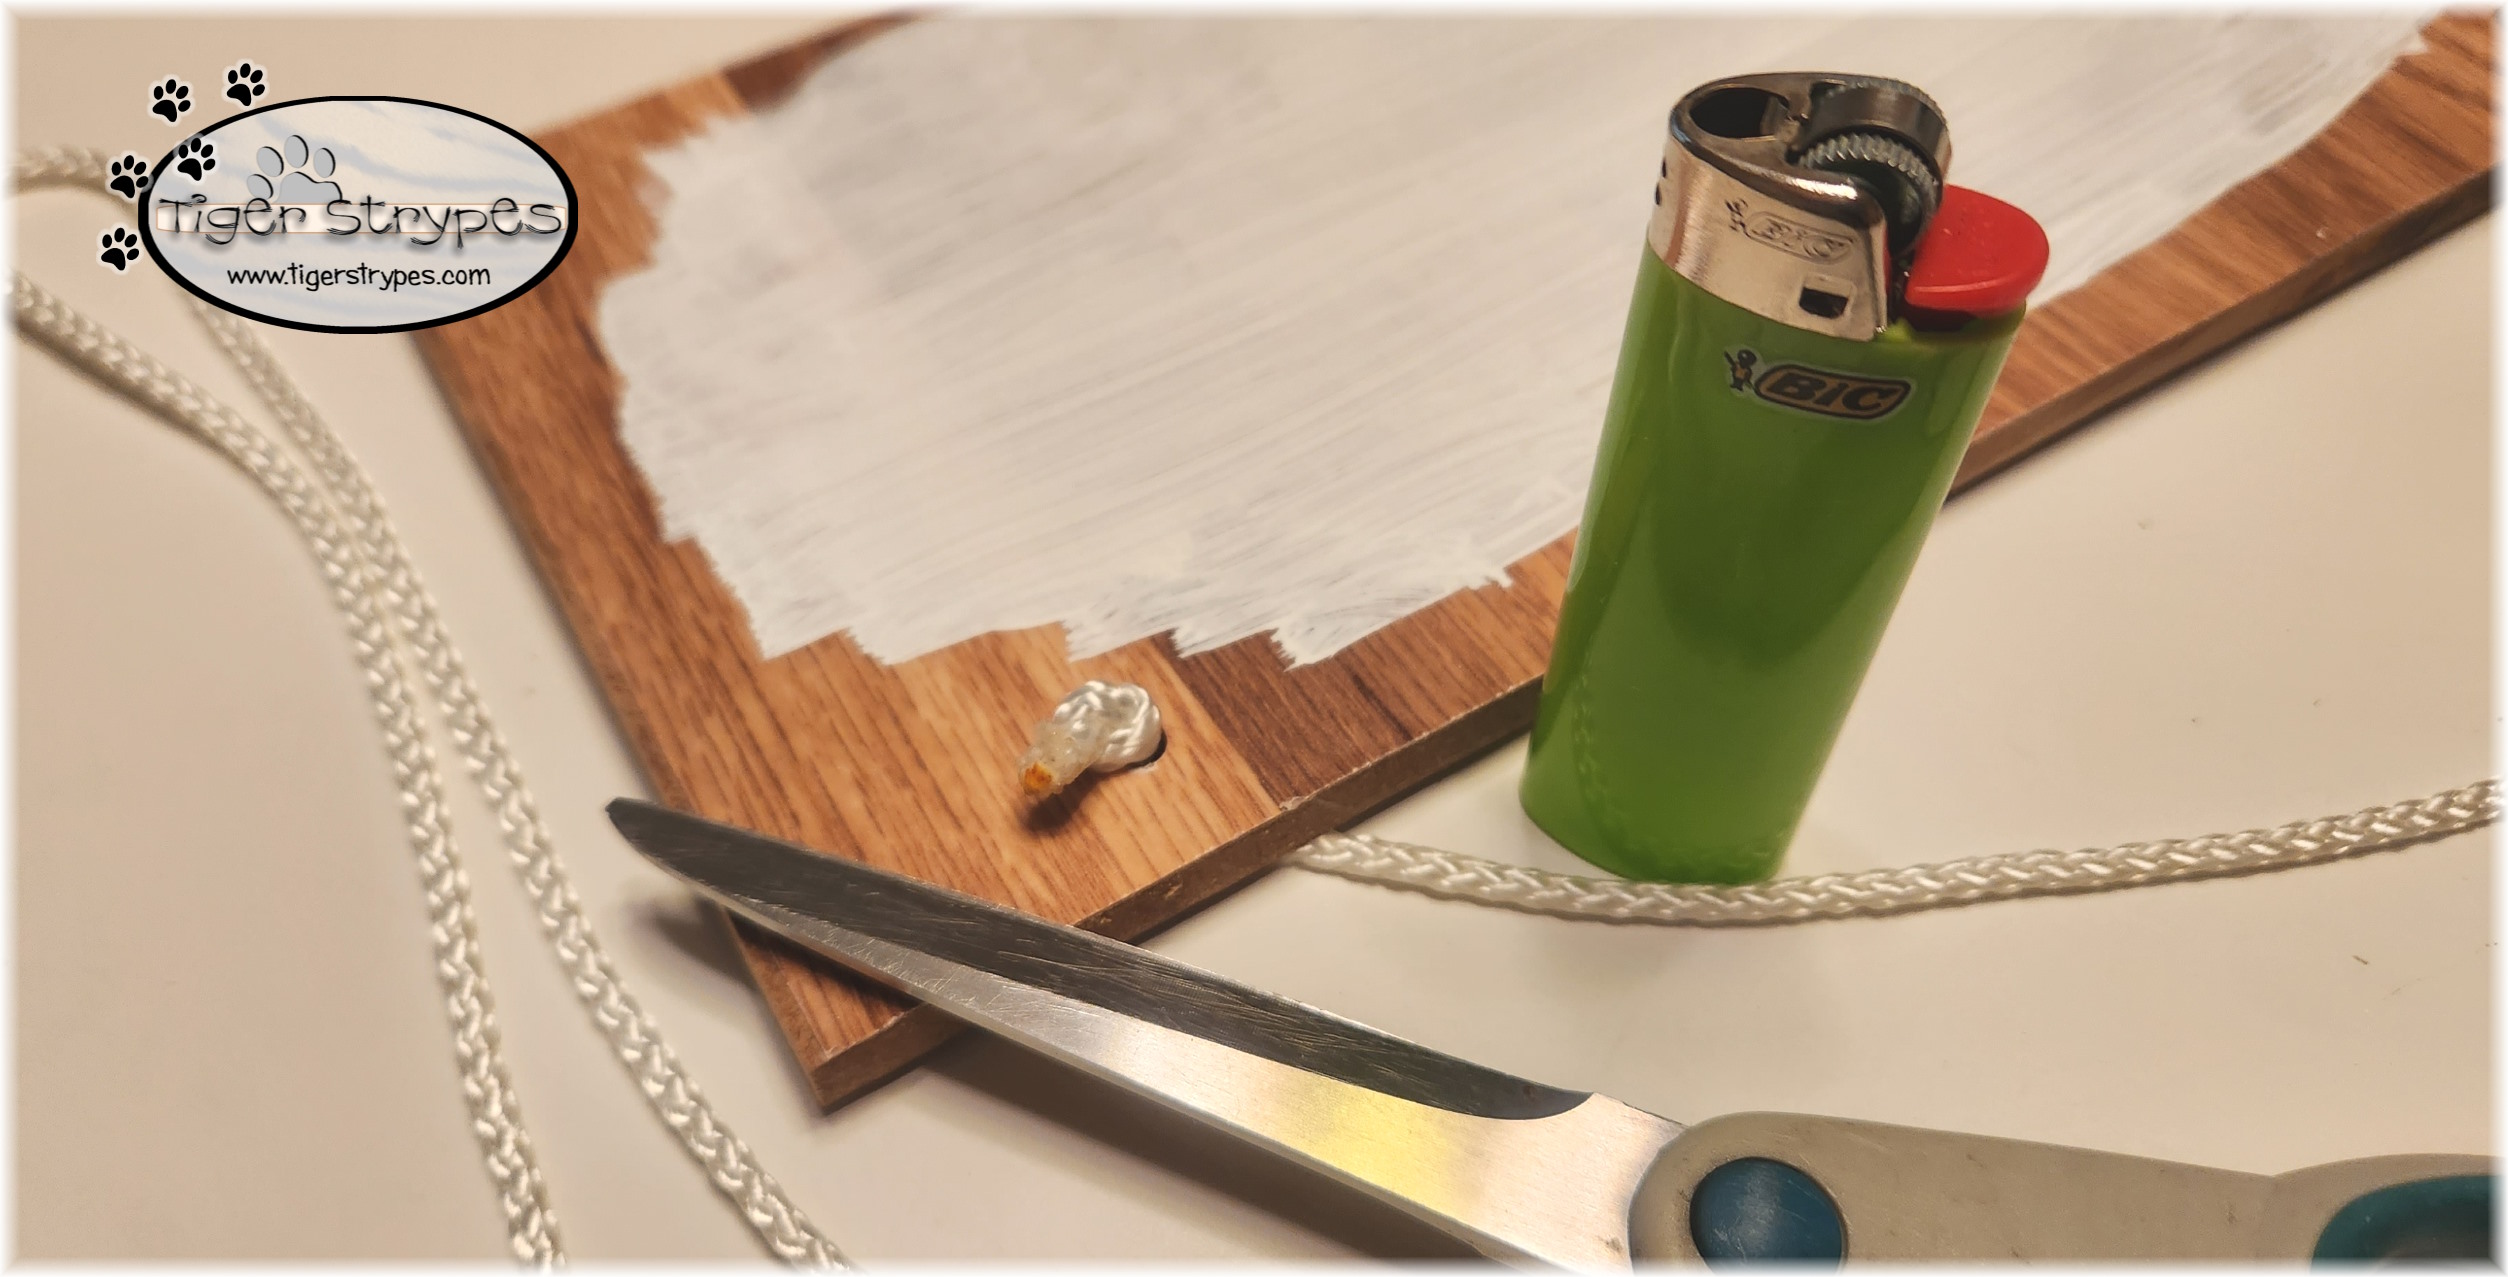
Later in the day, when the paint was dry, I continued with what else needed to be done. Using some craft rope that I had in my craft closet, I cut a piece that would be the right length when hung. Tying knots in the ends, I used a lighter to melt the ends, so it didn’t fray later.
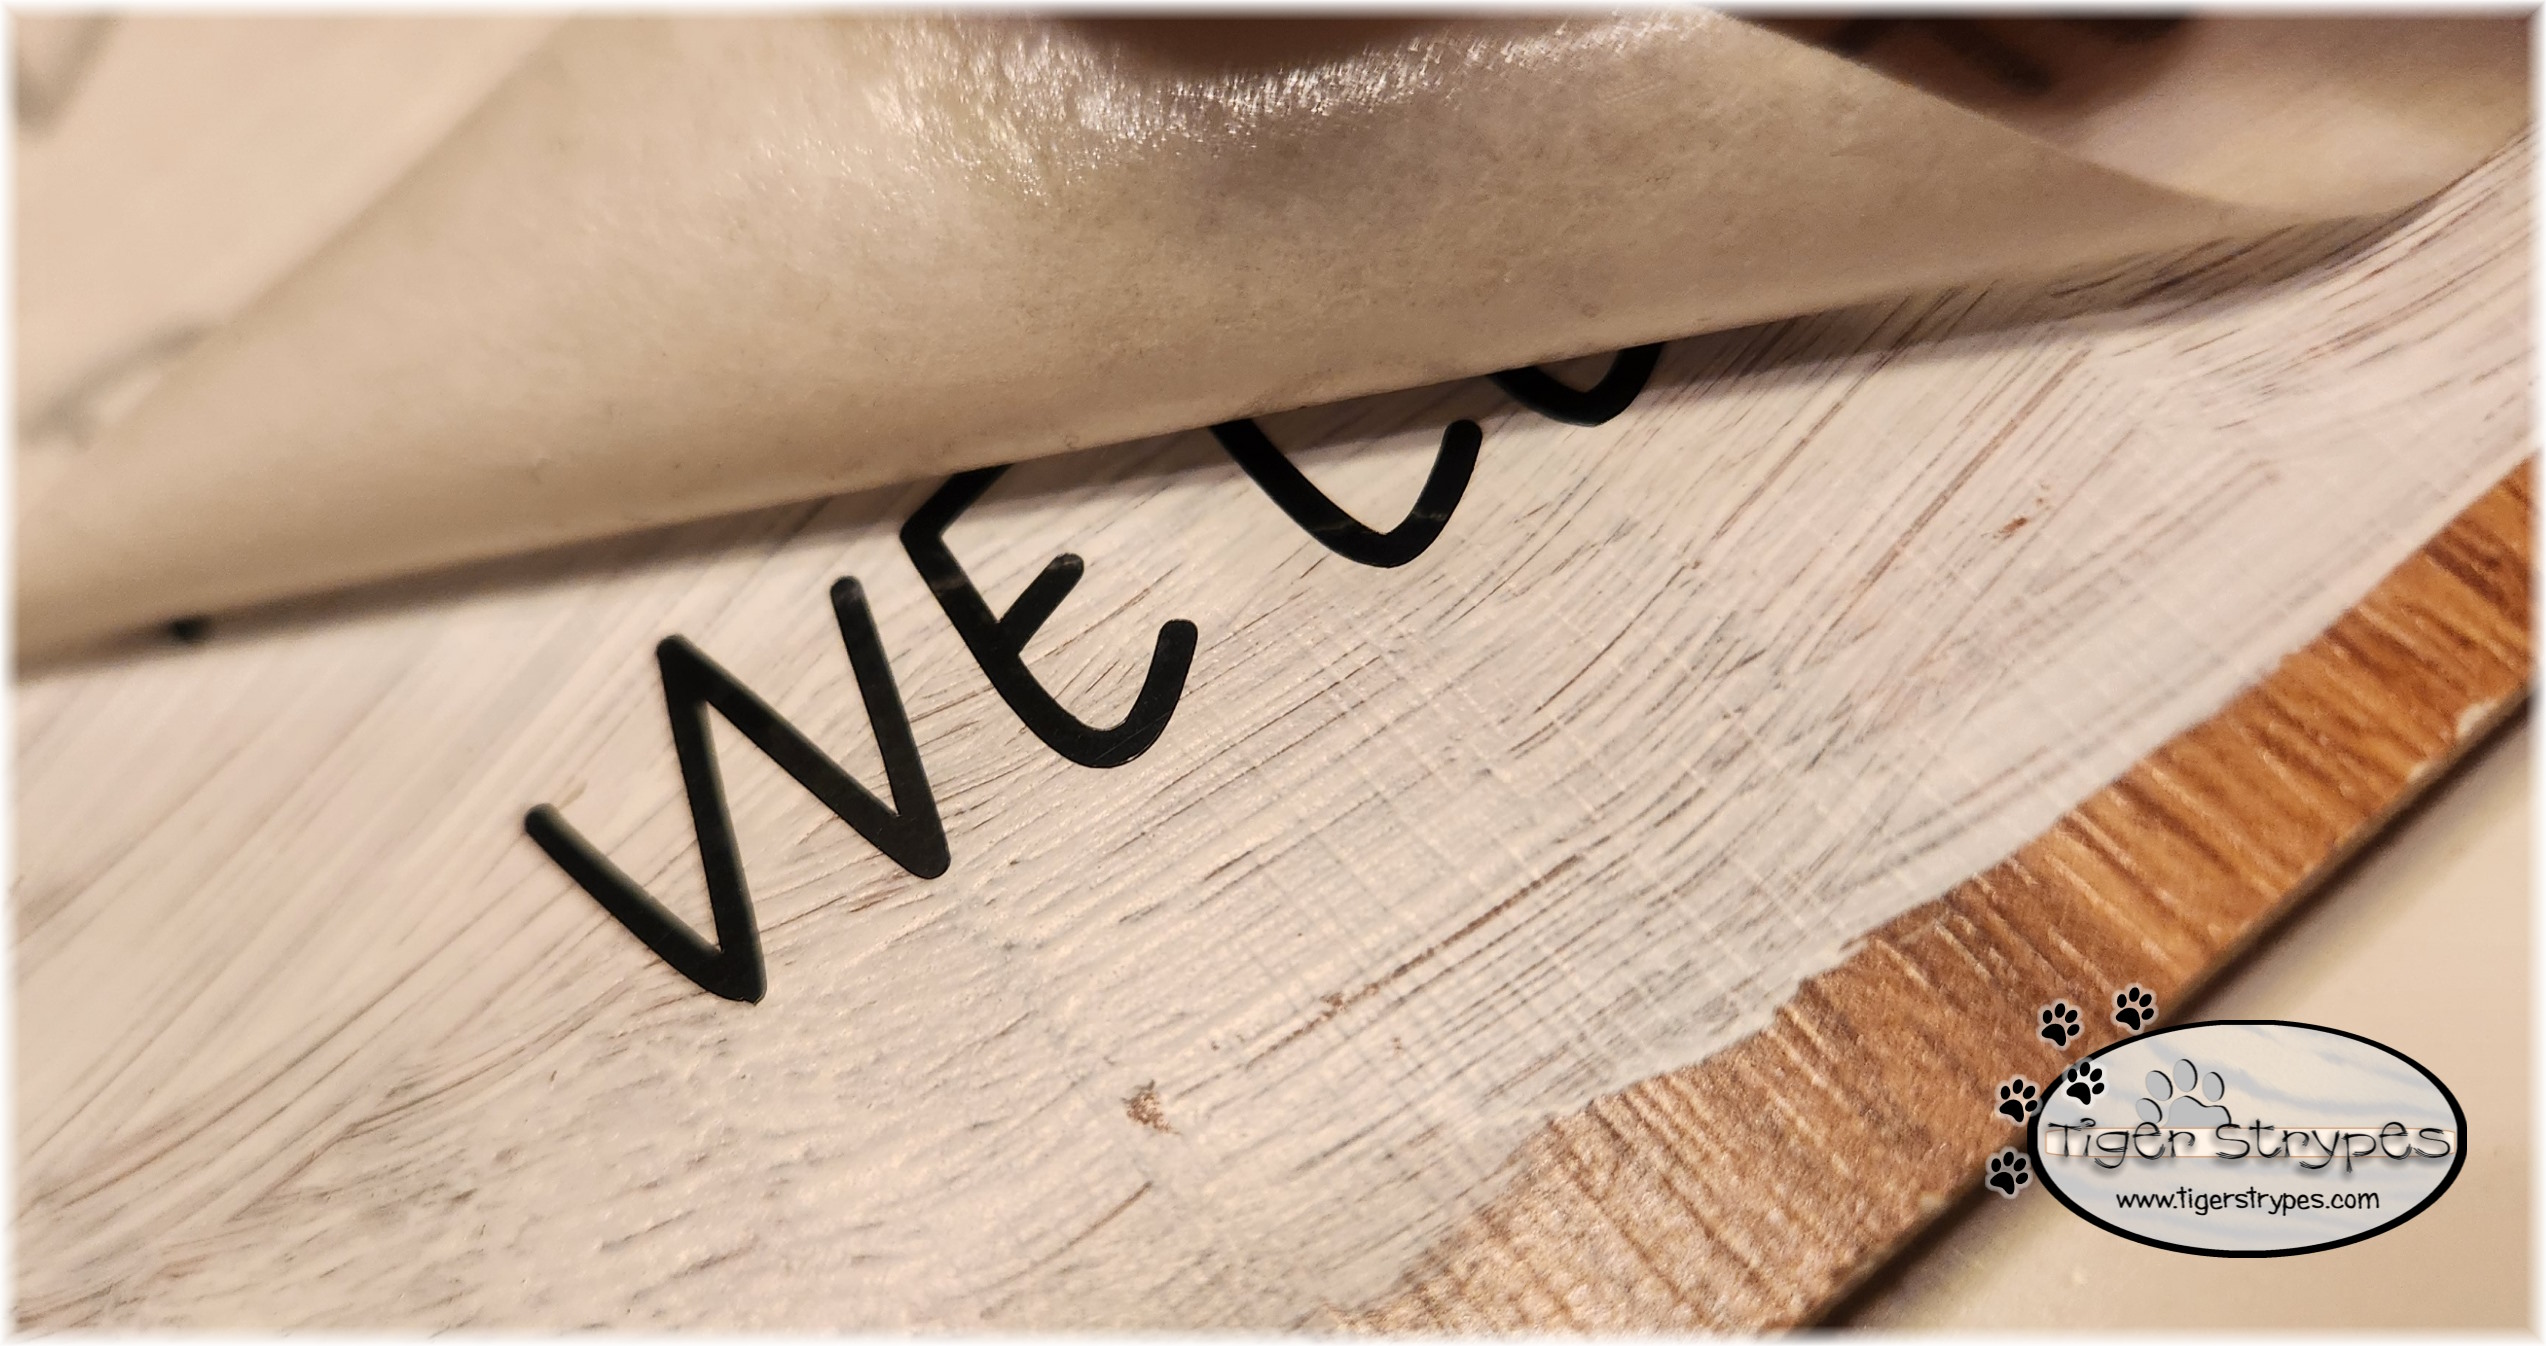
Now you can add your lettering to the painted portion of the wood. Use some transfer tape and make sure to have it adhere strongly before removing the tape.
Once the words are one, and firmly attached, use a wet paper towel to distress the edges of the paint and make it look a bit worn.
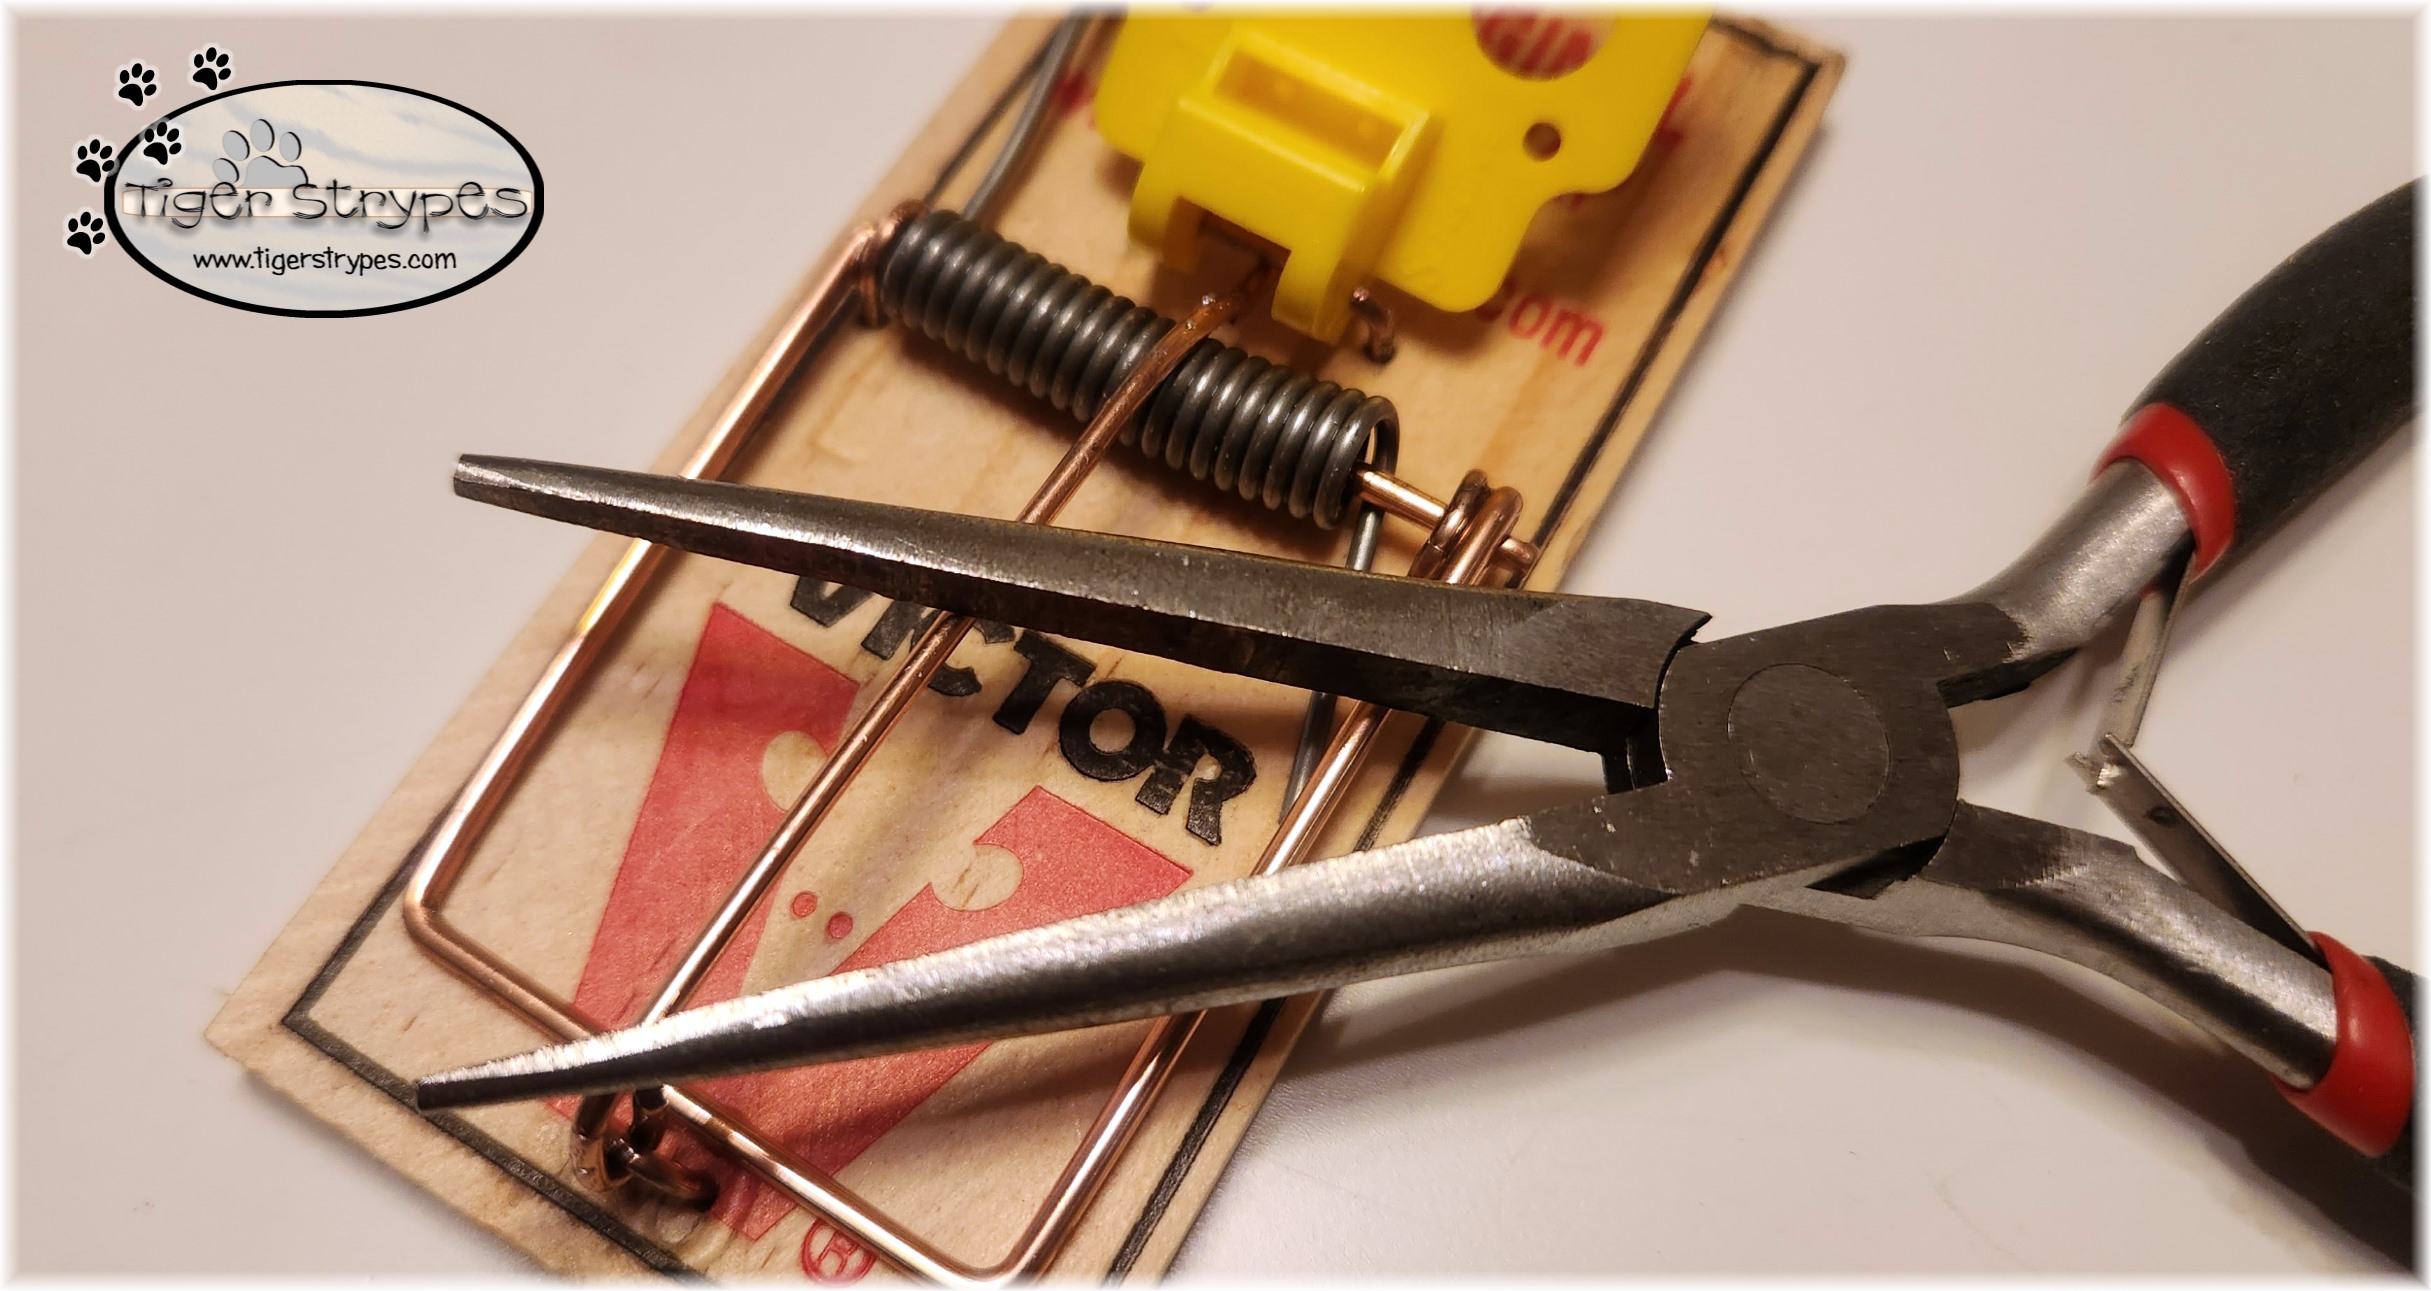
Now it’s time to get the mouse trap ready. I really didn’t want to hurt anyone that came over, just give them a laugh. That being said, I used some pliers and made the trap stay in the “set” position, without it really being able to snap anybody when they touched it. Sorry, being a Grandma now, I need to make sure things are safe.
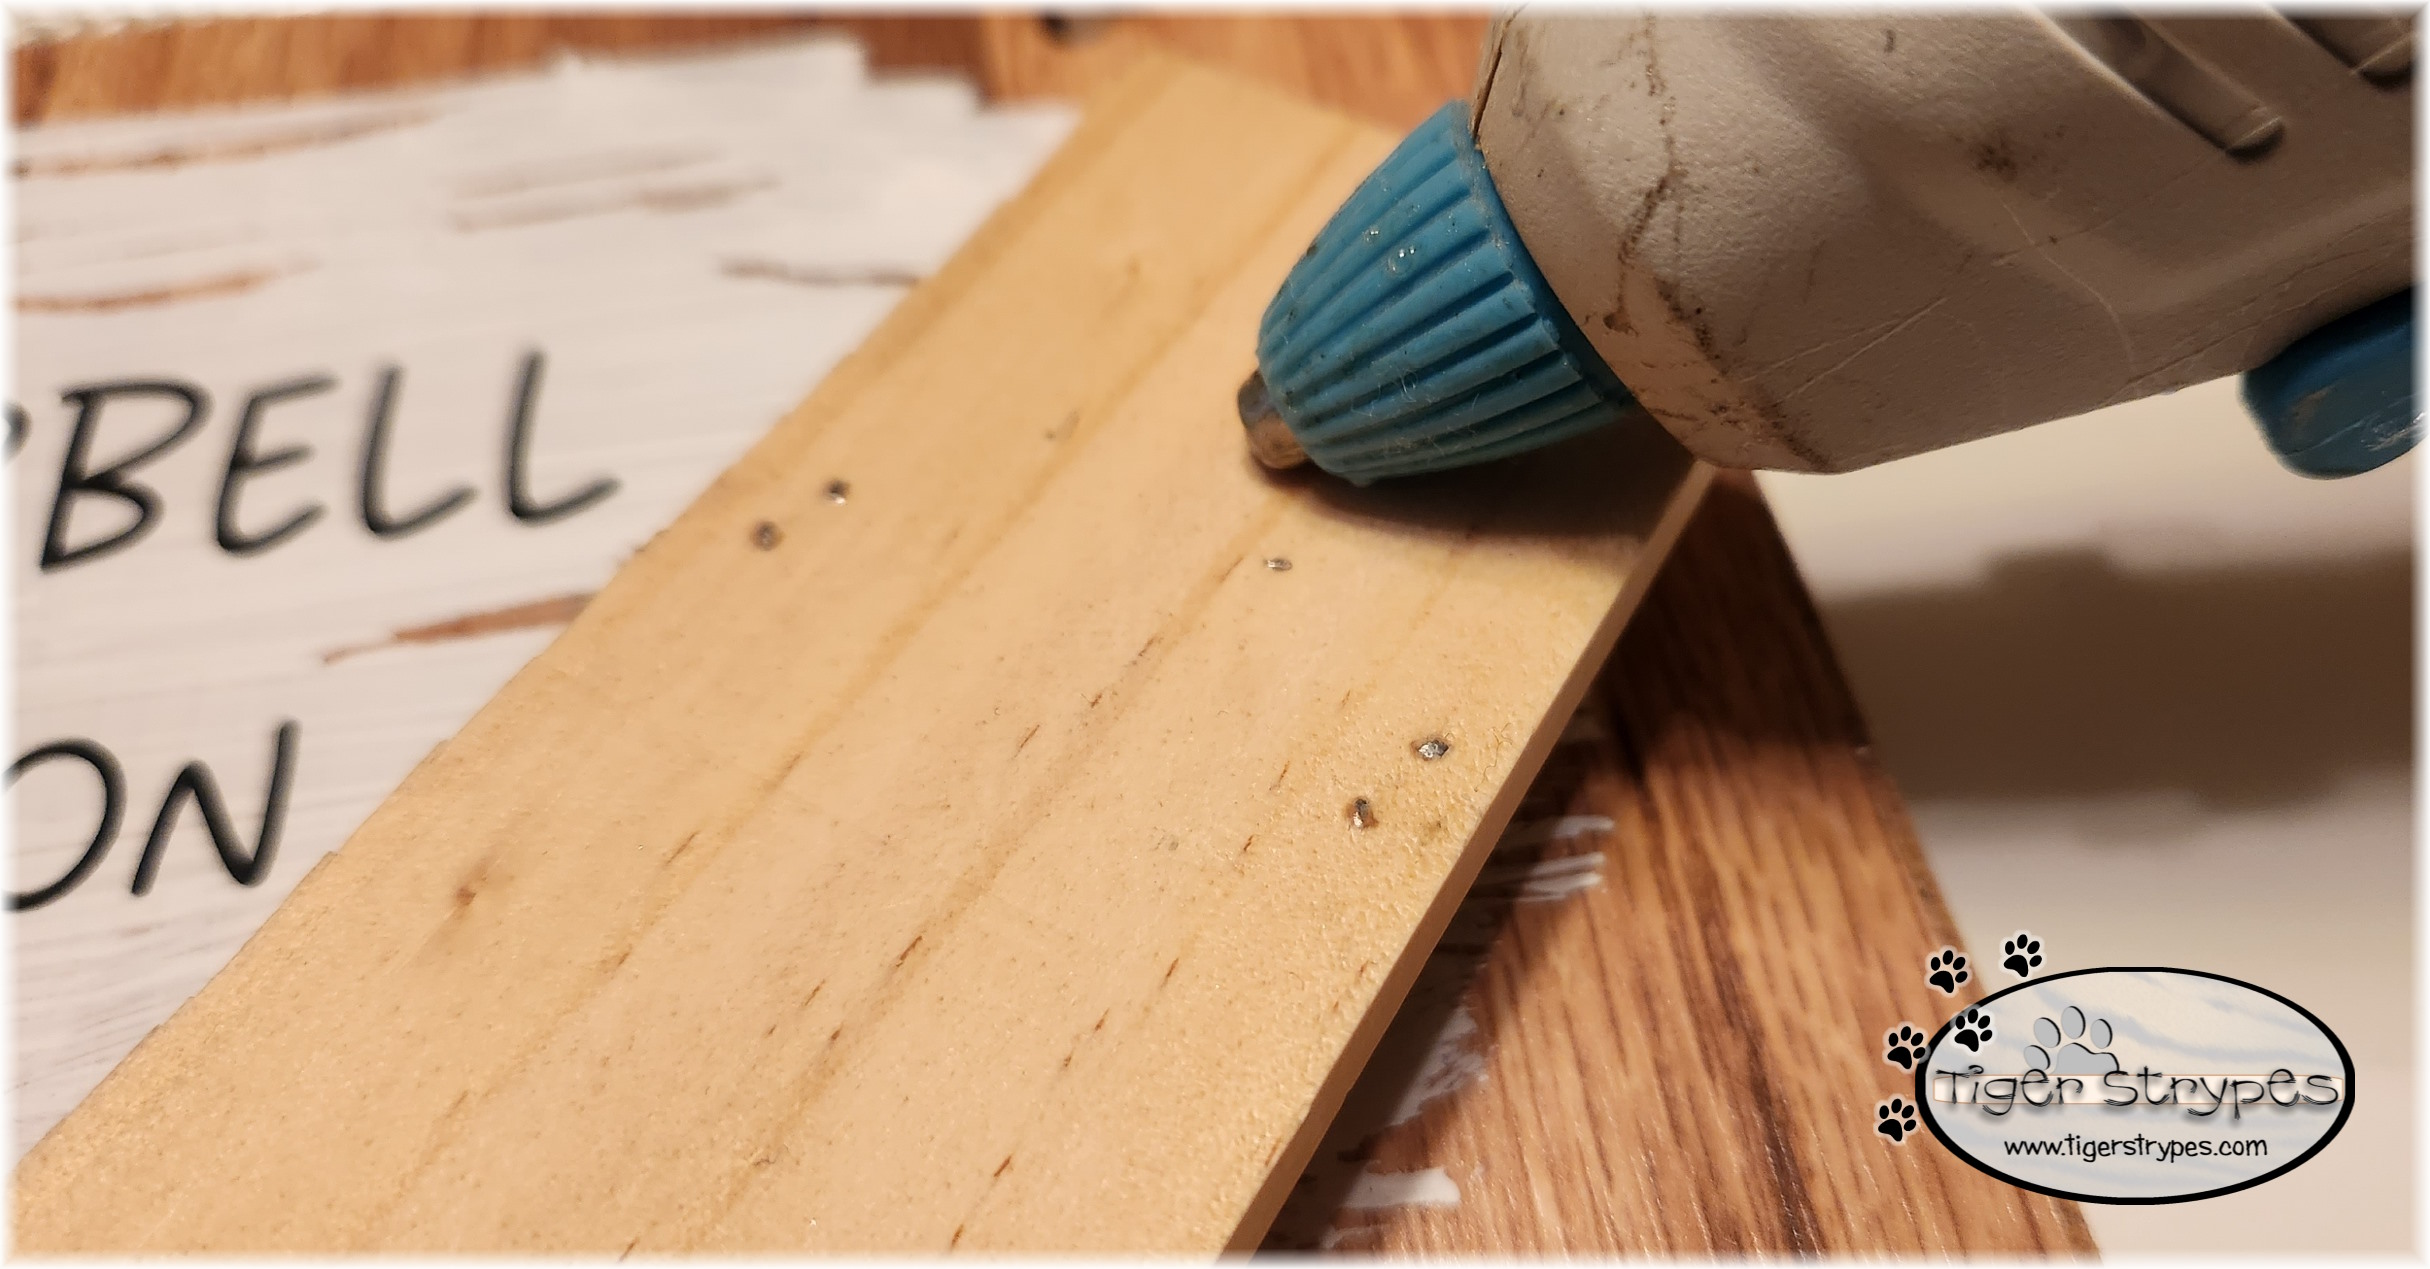
After that, I just added some glue to the back and attached it to the sign. This can be put on however you want.

Now you can just hang it wherever you’d like, and get ready for the laughs!! What do you think of this craft? I hope you like it! Please take a minute to leave me a comment on what you would like to create, and maybe if you have any tips on how to do it different, or better!
Be sure to tweet, pin, share, etc. – thanks!!
“As a door turns on its hinges, so a sluggard turns on his bed.”–Proverbs 26:14

PLEASE SHARE THIS POST USING THE OPTIONS BELOW…THANKS!
Affiliate links for Amazon are used on my site. This means that when you click on a link, and make a purchase, I earn a commission for that purchase. There is no extra charge for you, it’s just their sites way of saying thank you for helping them get a customer. I use affiliate links to help fund my crafting budget, as well as help provide for our home.
This is hilarious! It would make a perfect gag gift!
Thanks Julie – I love making stuff that brings a smile! 🙂
I love this. What a great idea. I need to make one!
I figured it would make some people smile! 🙂
Hehe – now the big question is whether you are going to put this up for Halloween tonight! Kidding! 🙂
You crack me up!!! Hmmmm….now I’m kind of thinking about doing that. I have a Ring, so seeing their faces might be priceless! 🙂
This is so adorable! What a great idea and fun! Thank you for the great detailed instructions!
I just figured it looked easy, and fun! 🙂 Thanks for sharing!