
TBC CRAFTER’S HOP (#TBCCRAFTERS) – 07/25/2013
Make Your Own “Pom Pom” Craft
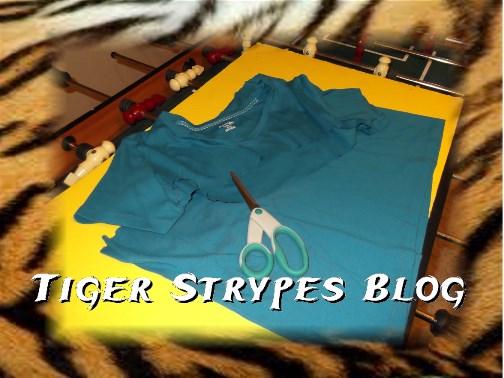
- Old T-Shirt (Cotton)
- Scissors
- Cardboard Template (Instructions Below)
- & Time!!
Instructions:
Start with an old t-shirt that you are ready to throw out or just added to the yard sale bag. Color and size is your call. No specifics here (other than must be t-shirt material, I’ll explain later).

Trim off the top of the shirt just under the arms, so that you have a single piece that is about the same size at top & bottom.
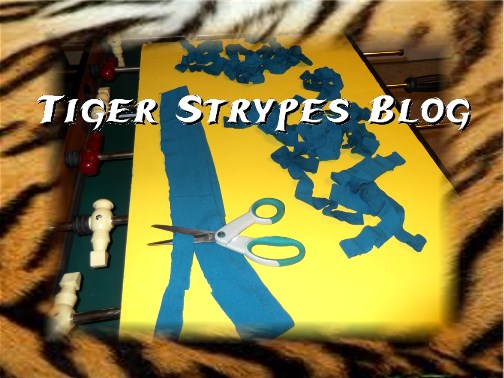
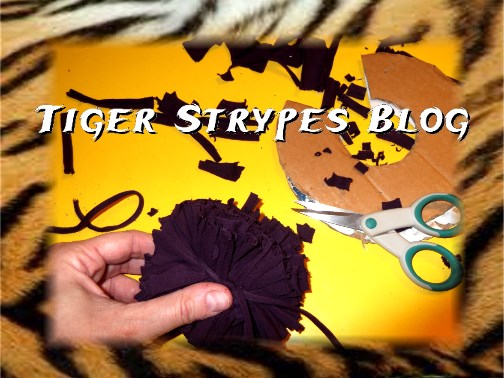
When you’re done with that, start cutting the shirt every 1/2″ or so in strips. I’ll tell you, I’m looking into buying a rotary cutting tool for projects like this. Using scissors really hurt my hands…dumb arthritis!

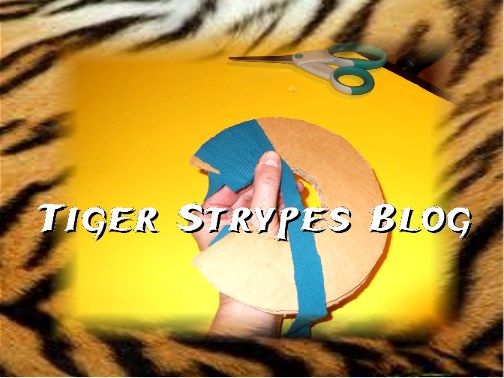
When you have all of your strips cut, you’ll begin working with your cardboard template. These are pieces you’ll need to cut out of cardboard and it will depend on how large you want your pom-pom to be. I made mine about 6.5″ round with an inner circle of about 2.5″ (you’ll need 2 of them). Once again, this size will depend on how large you want your finished piece to be. Start by adding one strip on top and around one piece, then put the other on top of it to cover and secure. That piece will be what holds everything together.


When you have this done, you’ll start to use the rest of your strips to wrap around the cardboard pieces. Make sure you’re wrapping them pretty tight to secure them. When you get to the end of one piece, just top it with another and keep on going, wrapping them over the top to secure.
When you’ve gone around the whole piece, begin again and go over 2 more times for a total of 3 levels of material.

When all of the levels are finished, tie the ends of the piece you put in the center of the cardboard pieces together pretty tight to secure it. Do not tie a knot, since you’ll need to make this even tighter once you cut it.


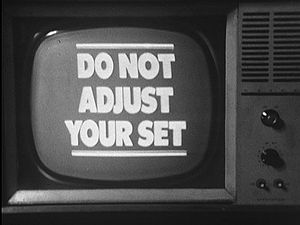
Now don’t adjust your monitor….the color of the shirt has just changed!! 🙂
Just to let you know the reason for a different color, I did not know that the first shirt not being cotton material would not work. After I cut it out of the circle, it pretty much fell apart. You have to have that t-shirt kind of material that curls a bit, otherwise, this just doesn’t work very well.
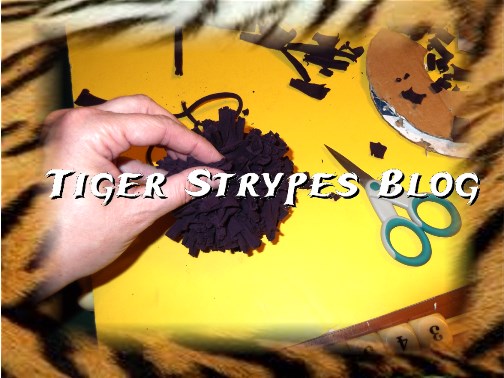
After you have this tied, begin cutting the edges of the material around the outer edge about where the center of the cardboard pieces meet.


Now just move it around to let all of the pieces spread out and not have the string in the middle be noticeable.


“The armies of heaven were following him, riding on white horses. They were dressed in fine linen, white and clean.” –Revelation 19:14
All pictures and text are my own and have not been copied in any way. I, Jamie Tomkins, own and operate Tiger Strypes Blog located at www.TigerStrypes.com. From time to time you’ll hear about my real life experiences or creations with products and/or services from companies and individuals. Let it be known that I have no affiliation with these said companies, and have not received compensation for reviewing or using their service/product. The information that I give regarding the product/service is based off my own personal experience, I do not guarantee that your experience will be the same.

*****************************************************************


I have saved quite a bit of old T-shirt to be used as cleaning cloth. Now, there is a new usage. I would make pom poms as hair accessories for my daughter. Your instructions are so easy and clear.
My daughter and I tried to make one when we upcycled our old tee into a scarf, but we were terribly unsuccessful! This is lovely and easy instruction.
What a great way to use up old T-shirts. I will have to try different types of fabric! Great craft! Pinned & Tweeted!
Very cute idea!