
This site contains affiliate links. Please see below for more information.
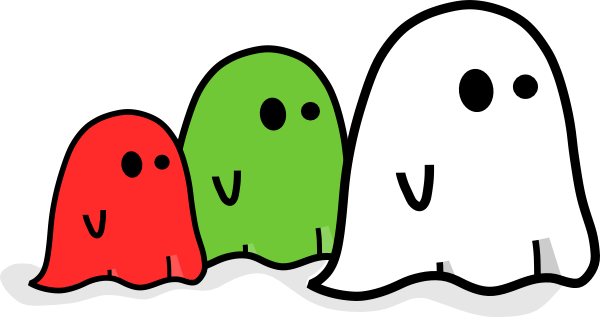
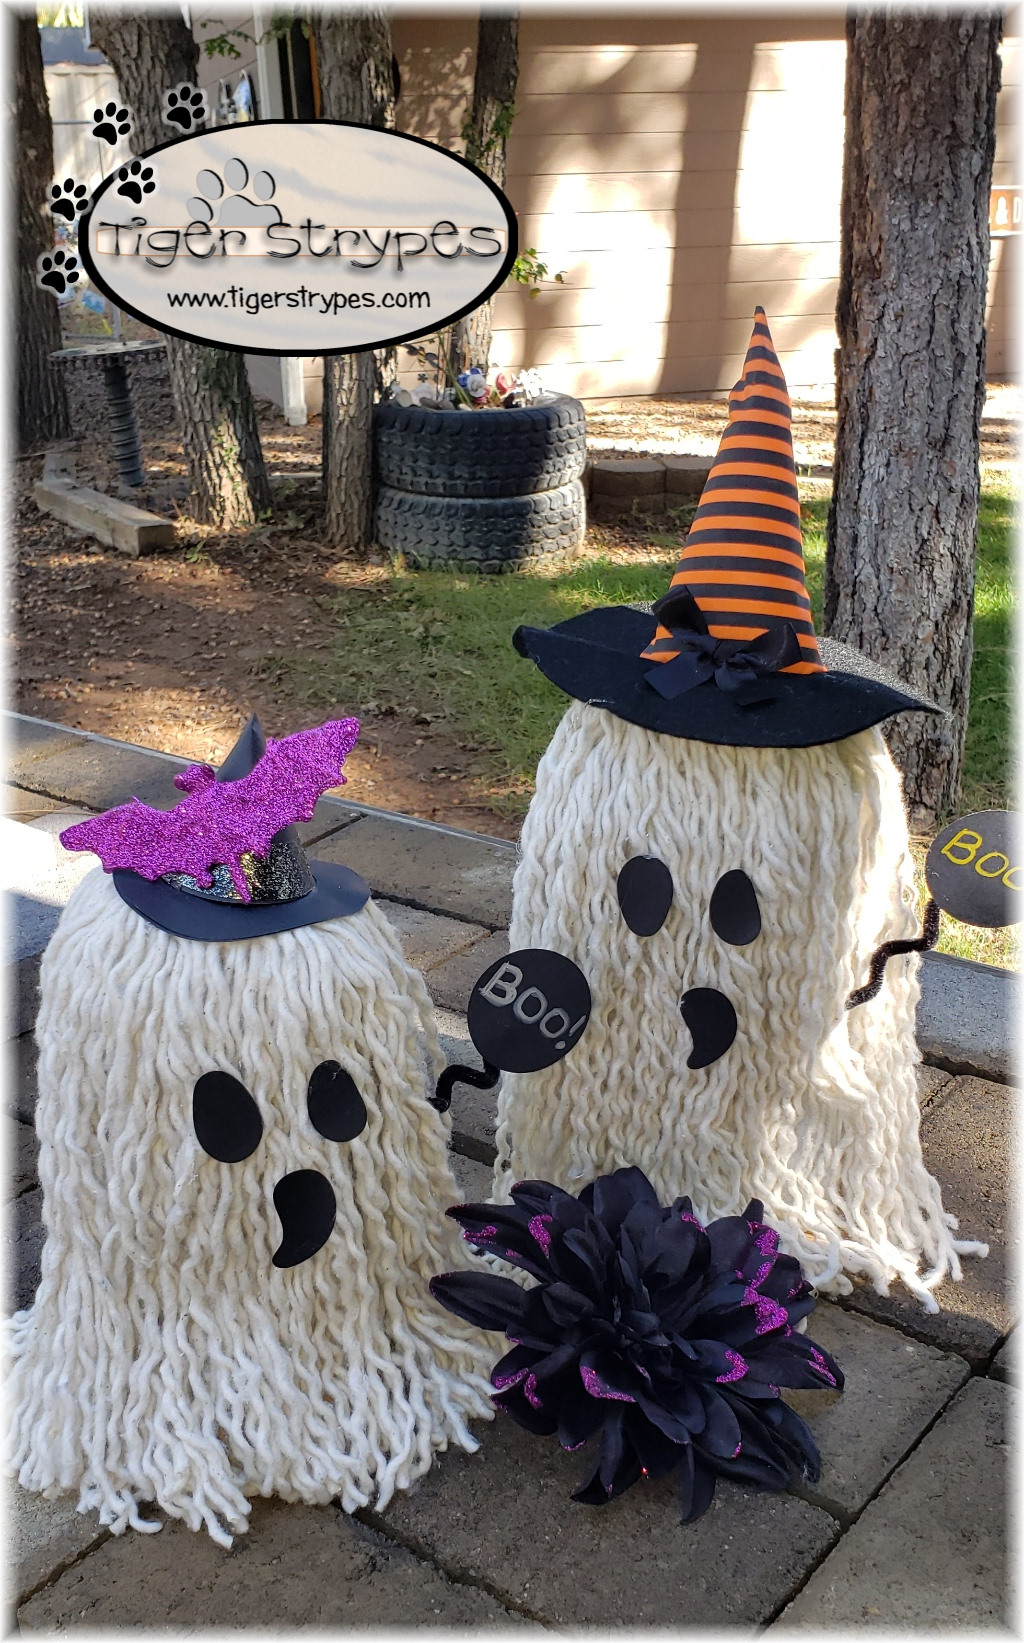
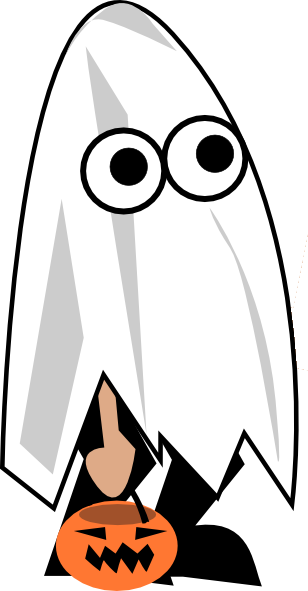
Make a Frugal Halloween Ghost
#DIY #Craft #Halloween
Browsing good old Pinterest the other day, I saw something like this, and figured it would be simple to make and I could do it in a frugal way. I went shopping at the local dollar store for some of the things, but they only had mop heads with horrible blue stripes around them, or were like bright yellow. Online shopping, here I come! I found some online that were on sale for a great deal, so I bought a set. Figured it wouldn’t hurt to bless one of my neighbors with a cute Halloween gift, as well.
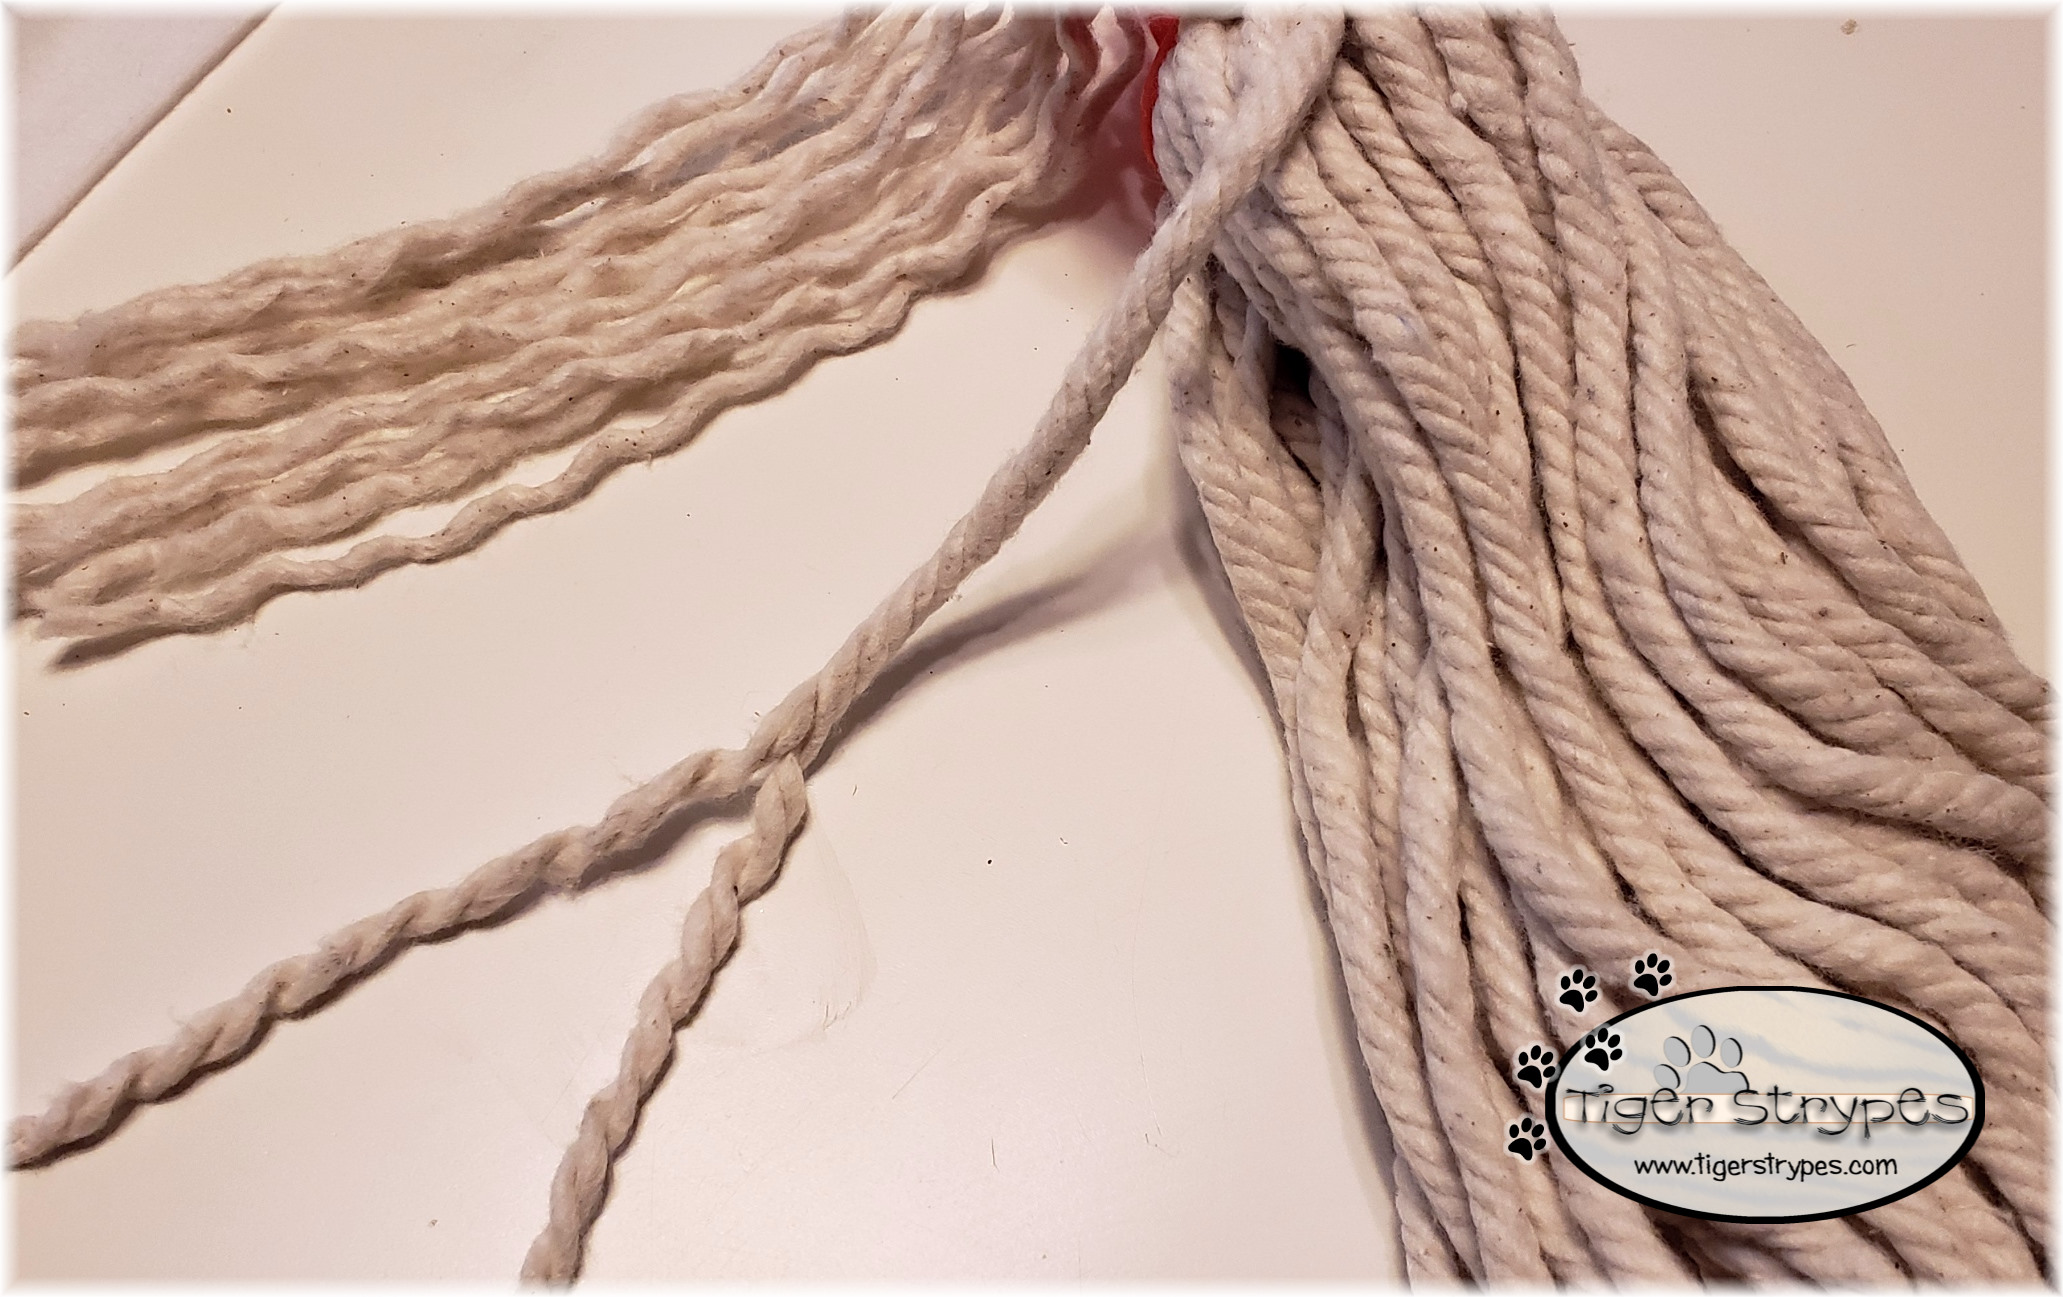
I’ll give you a warning, the untangling of the mop fibers was boring and MESSY!! Be sure to save some time while watching TV, or a movie to do this part and wear something that is easily cleaned. You can use either a hand covered in backwards tape, or cat hair roller….whichever works best for you. I was brave and was wearing my black pajamas, so it looked like we had a long haired white dog at the end. We don’t even have any animals!!! Just take this as friendly advice from a fellow crafter!
All in all, this was super fun to make and worth the mess in the end. You could do so many different things with this and make it your own, which I love. Be creative and be sure to tag me in a post of the one you end up making. I sure hope that you like the tutorial, and pray that you have a blessed day!
Please be sure to comment, and share this craft on your social media channels – thanks so much!!
Learn How to Make a #Frugal #Halloween Ghost! #Fun #Craft #DIY via #TigerStrypesBlog - Find out more at Share on X
Materials/Tools Used:
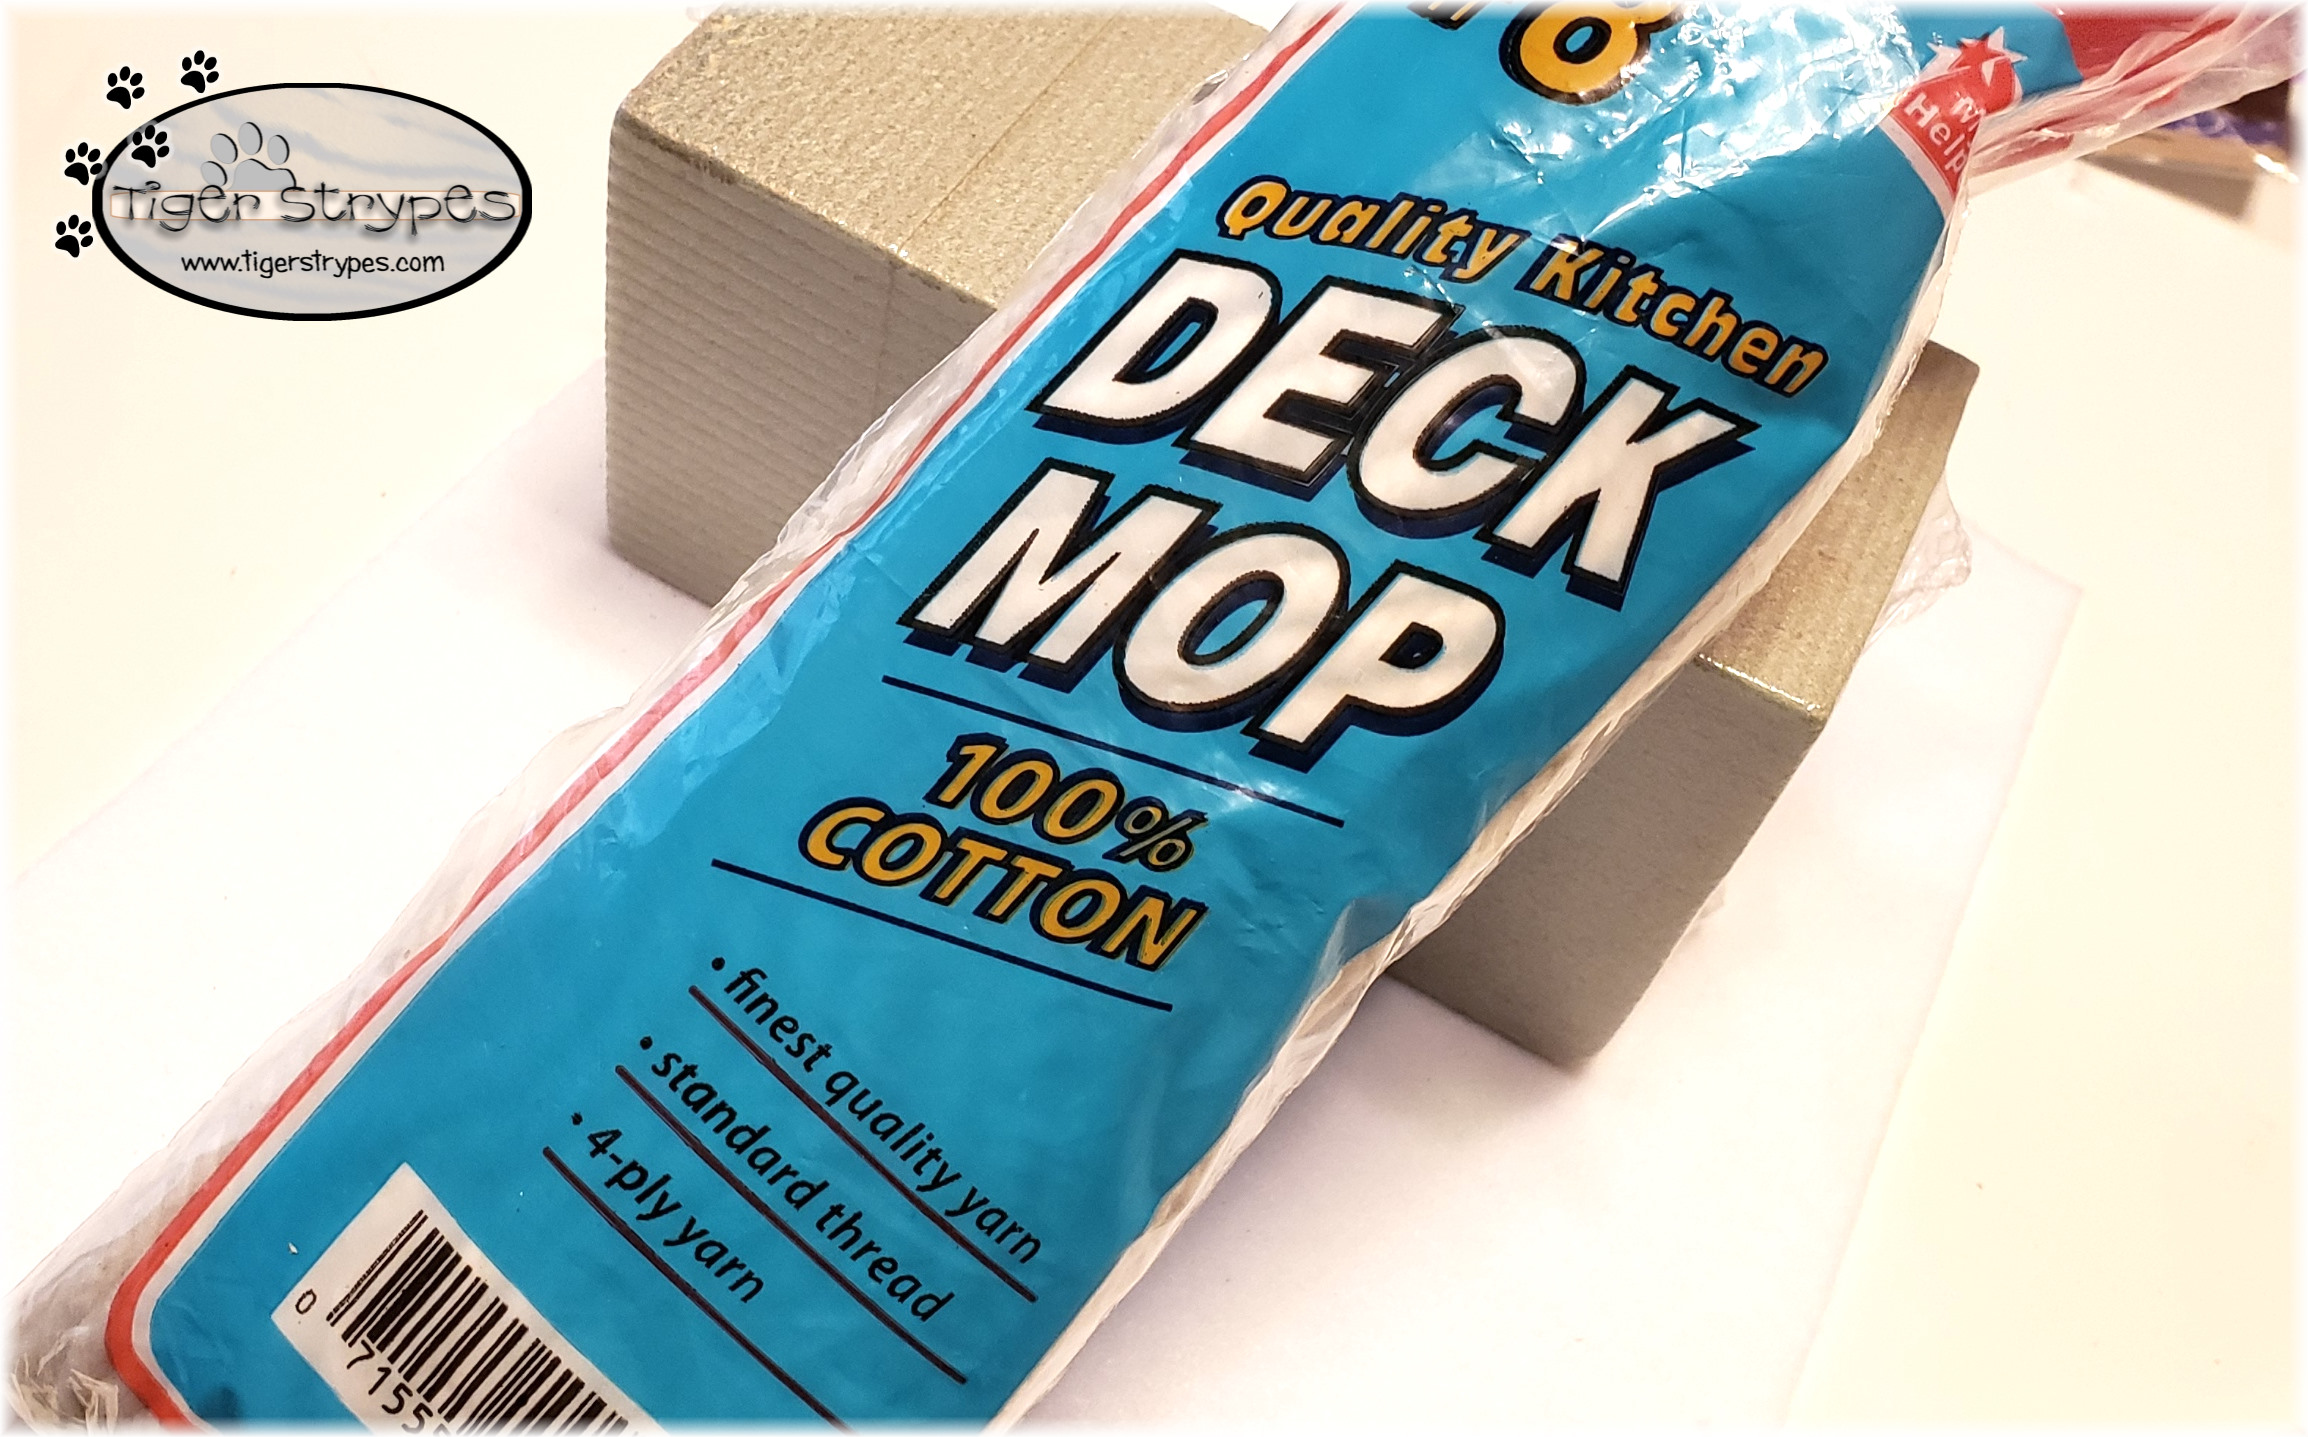
- Mop Head
- Foam Brick
- White Felt
- Black Cardstock
- Wood Base
- Glue Gun/Glue
- & Time!
Instructions for the Halloween Ghost:
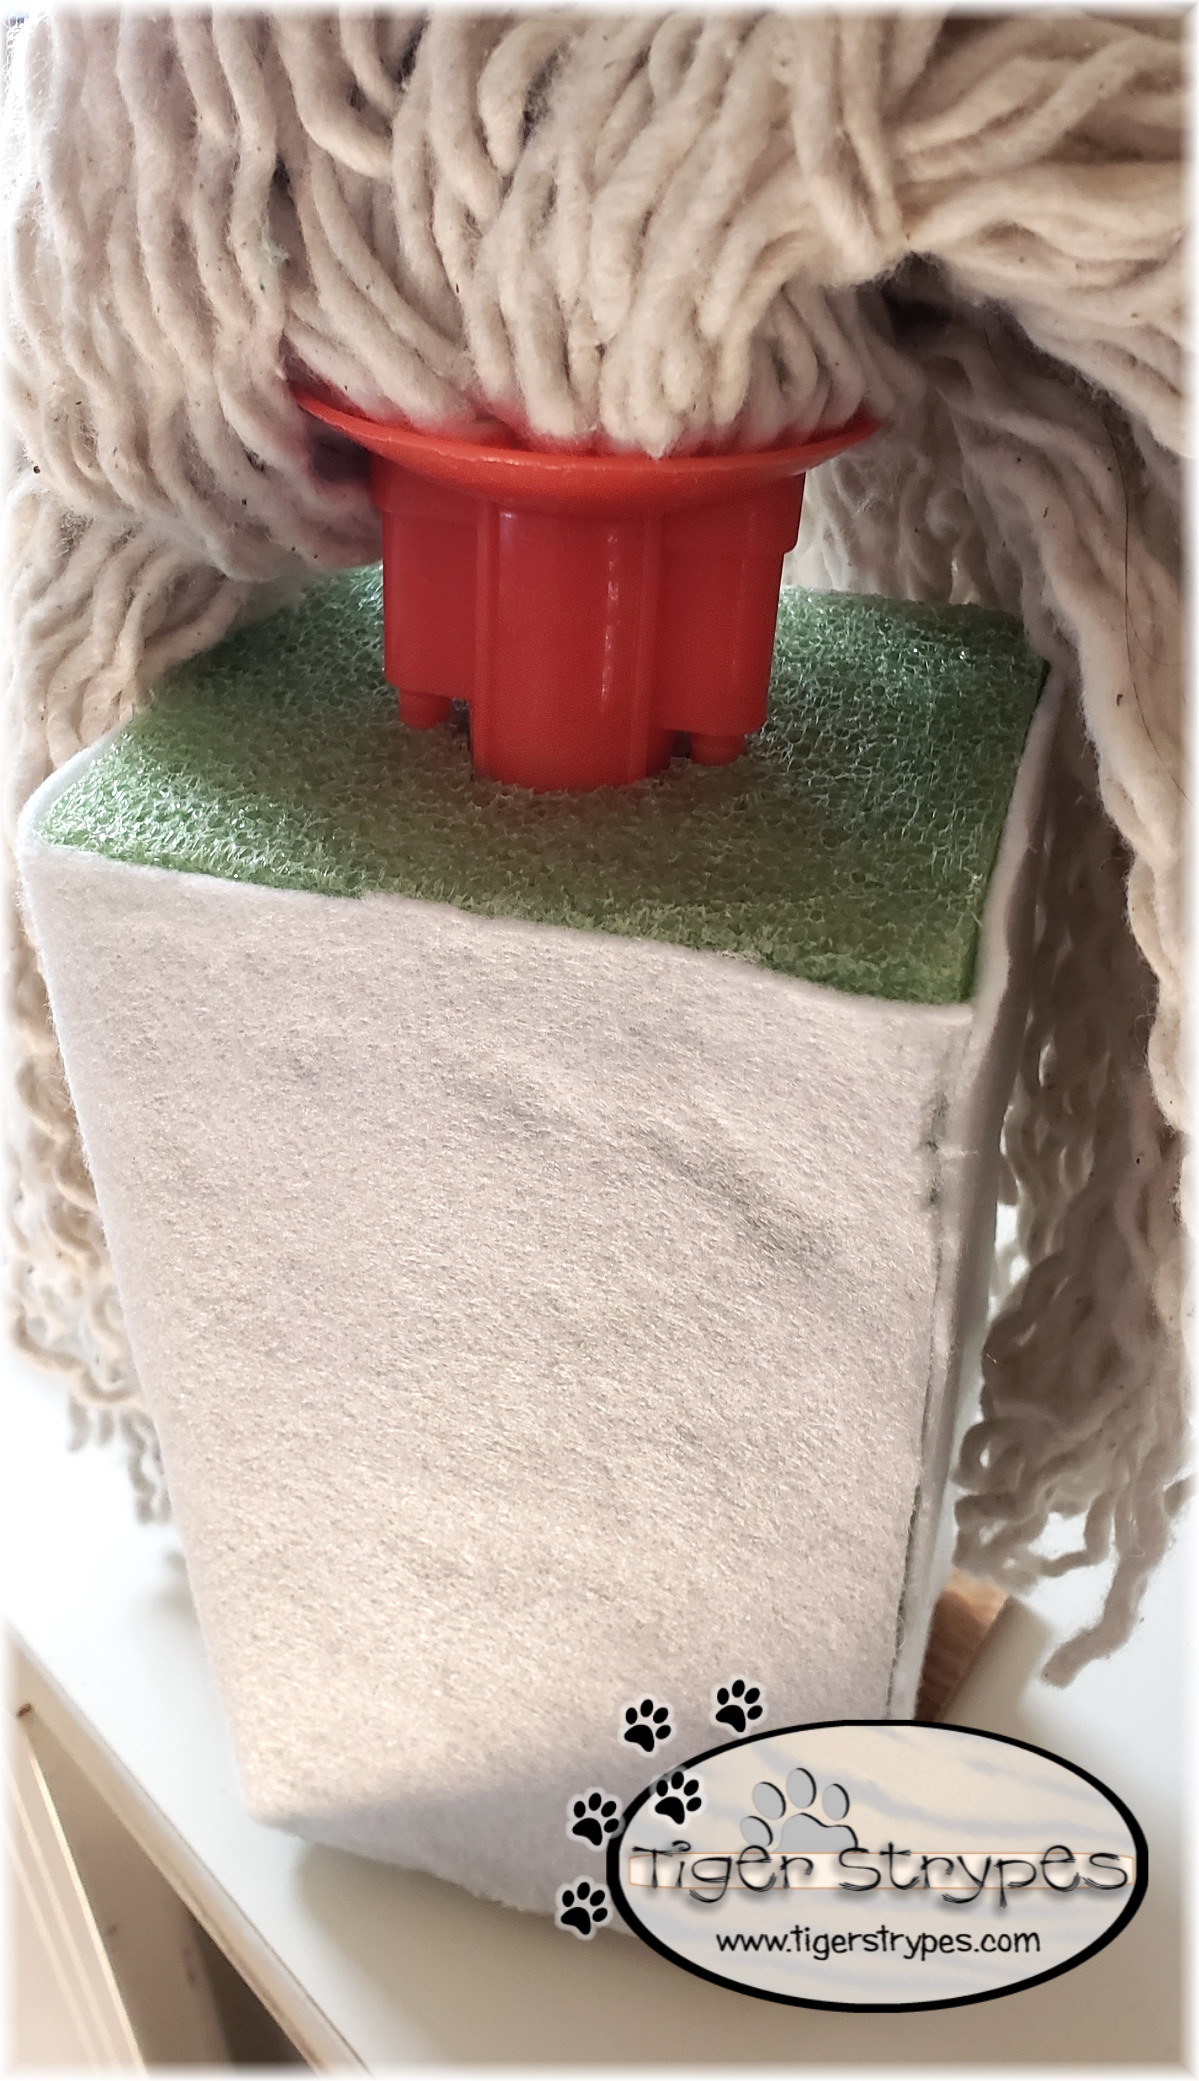
I started by heading to the local dollar twenty-five store, and bought a few of the products from the list above. The mop heads I had to buy online, since nobody here on the mountain had a simple white one!! Some things I already had at home, so that’s always a bonus. How many of us have more things in our craft rooms, that we know what to do with? The wood base is kind of up to you. I felt that it stood up okay with just the foam brick, but the base just helped to hold it down, and keep it steady.
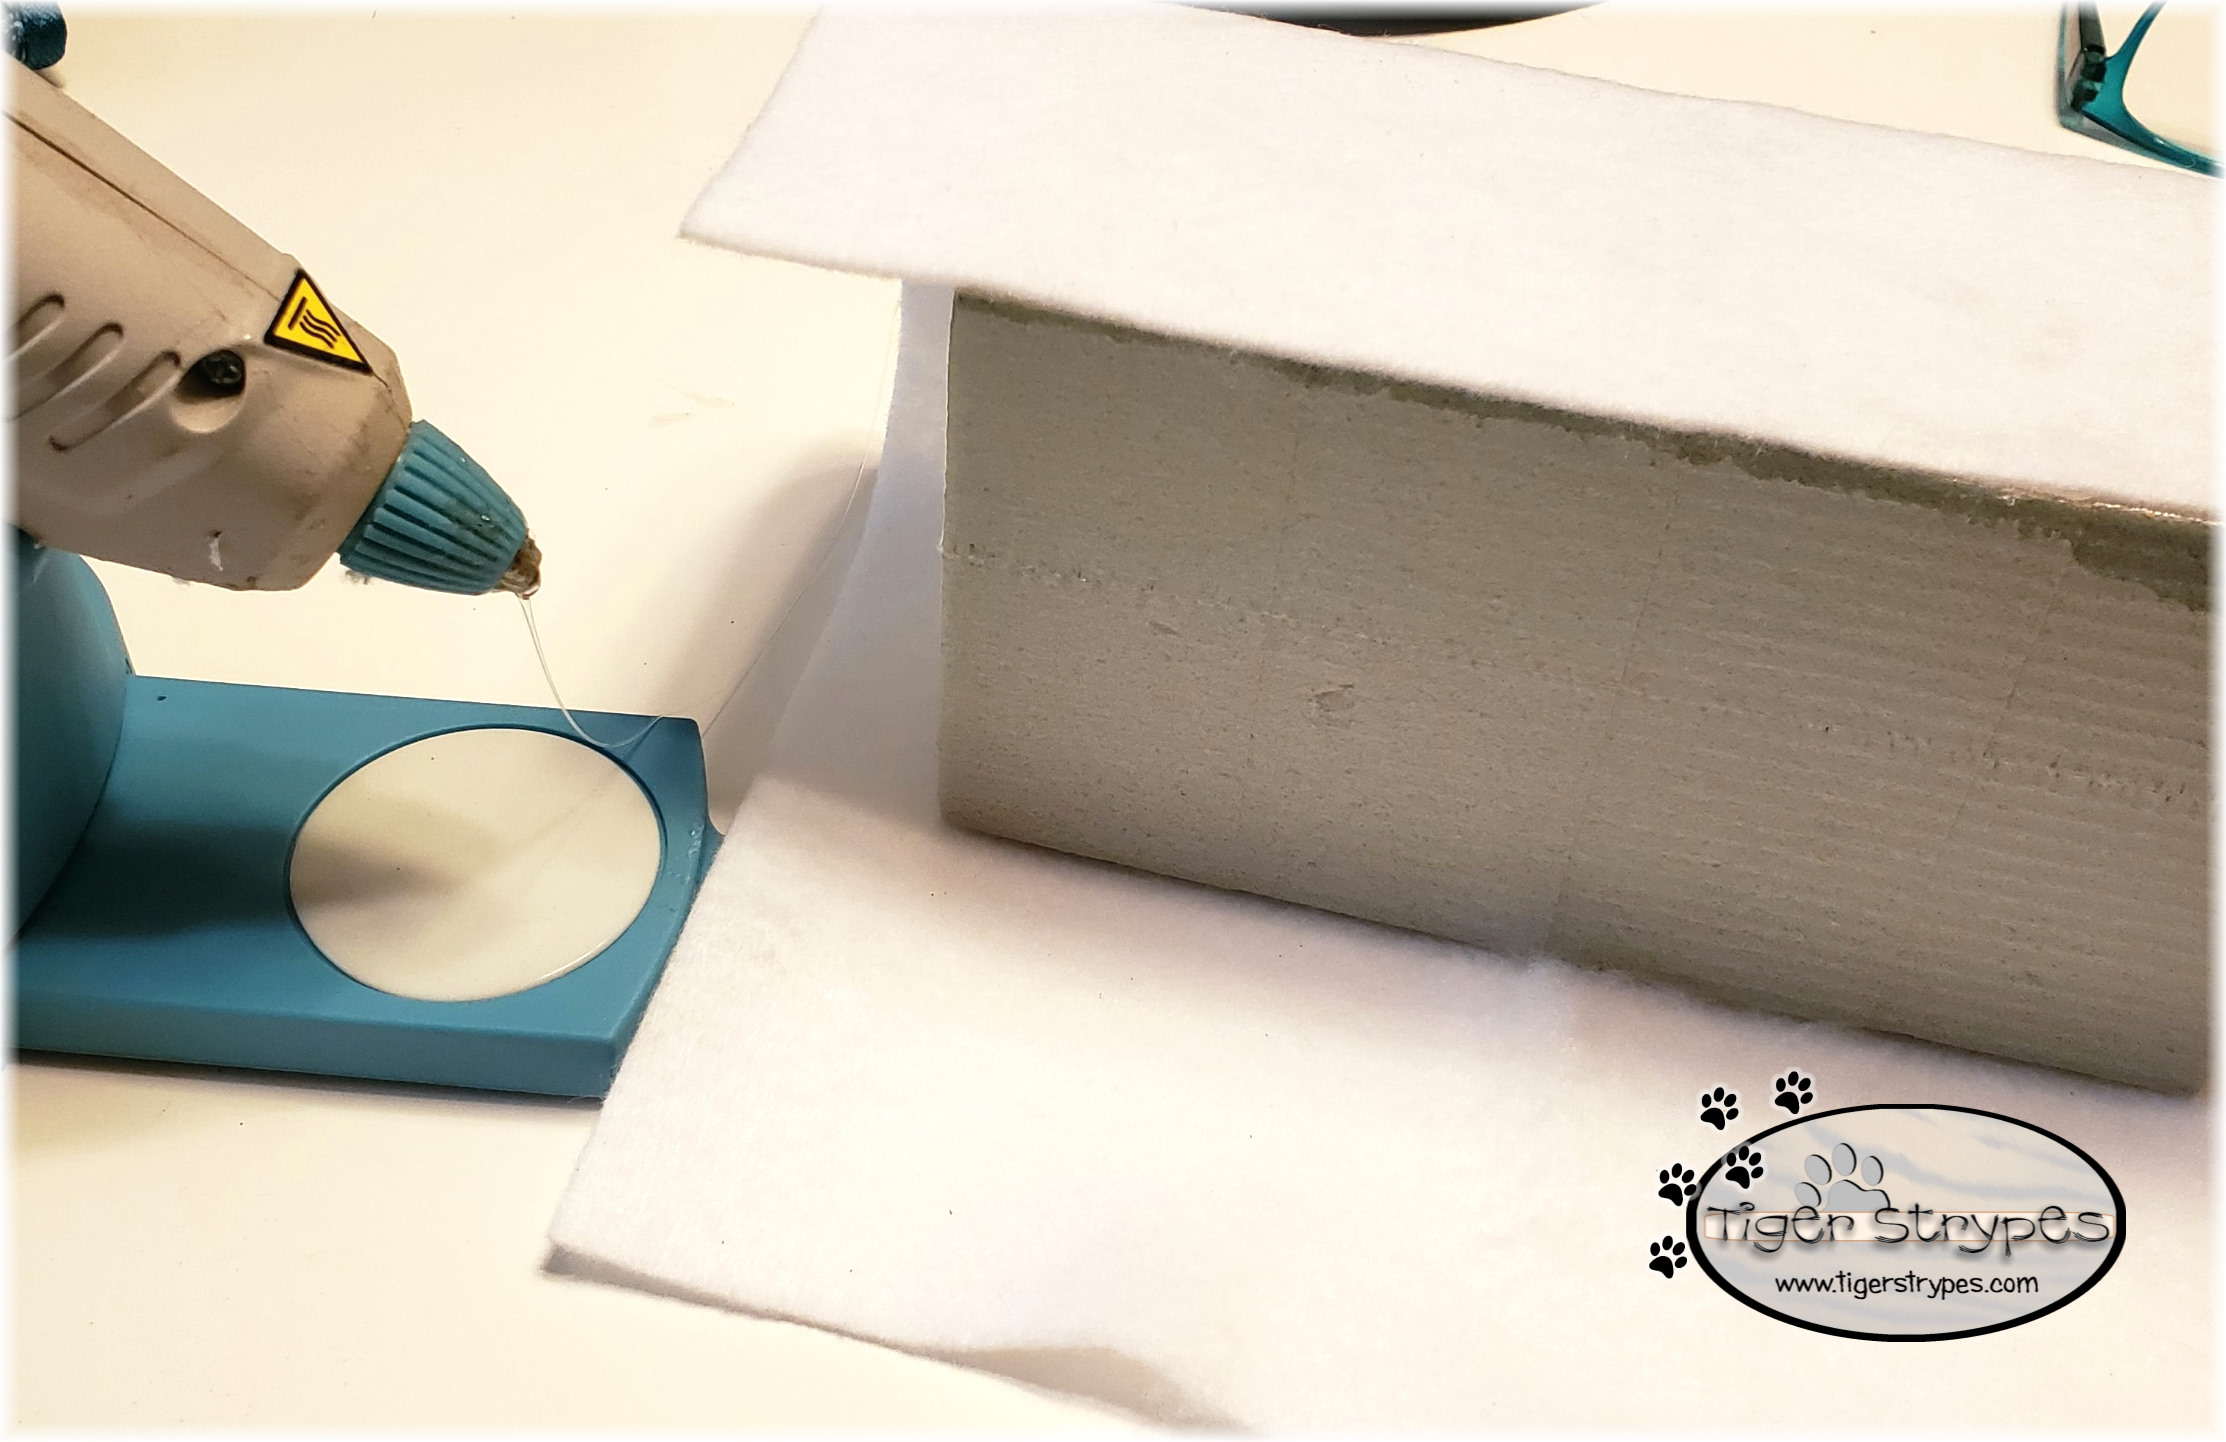
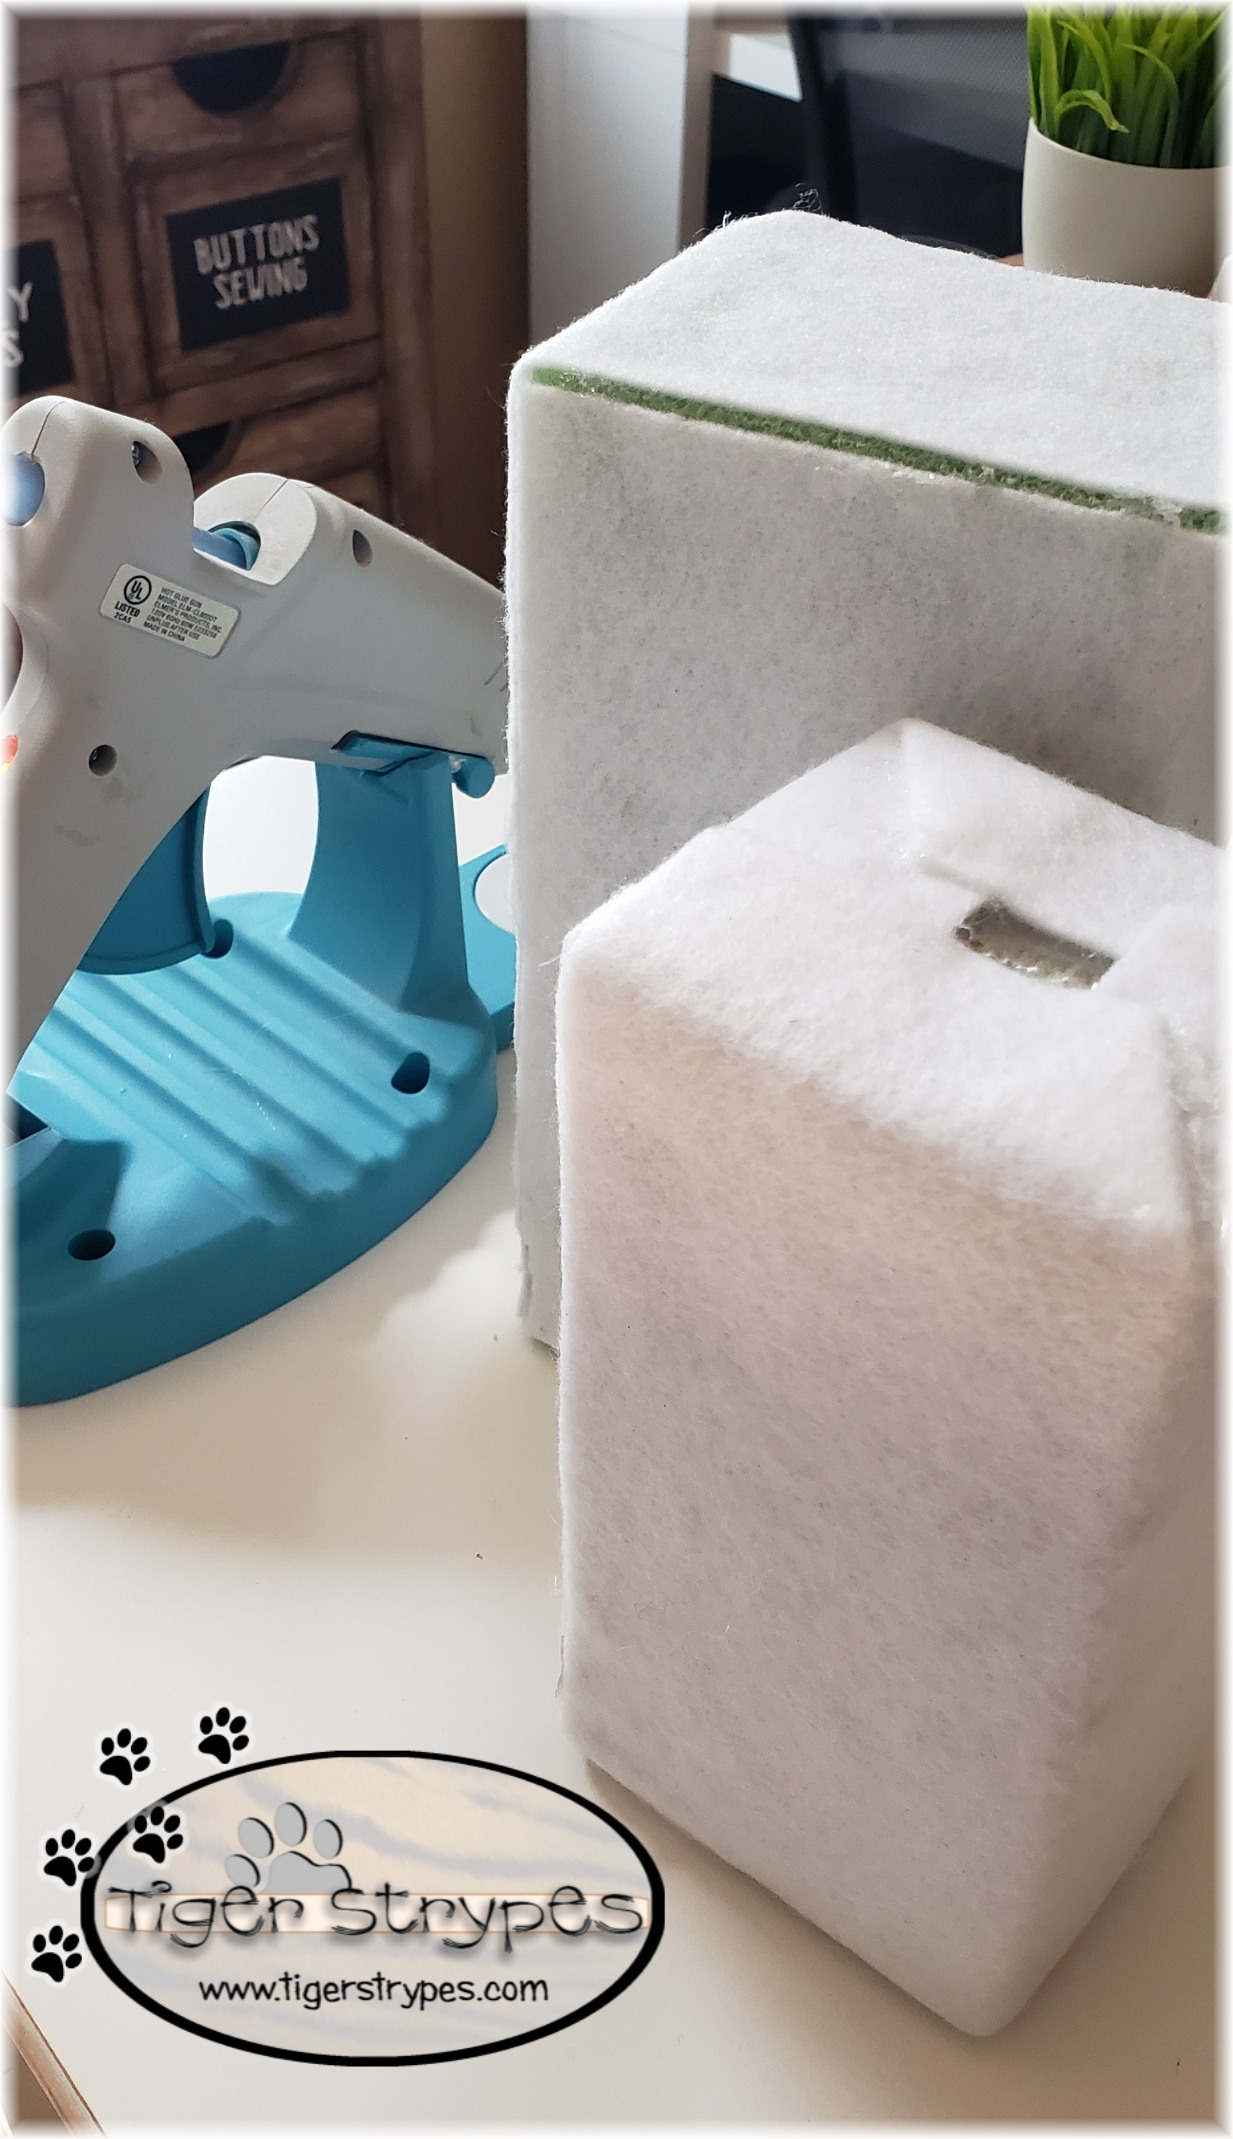
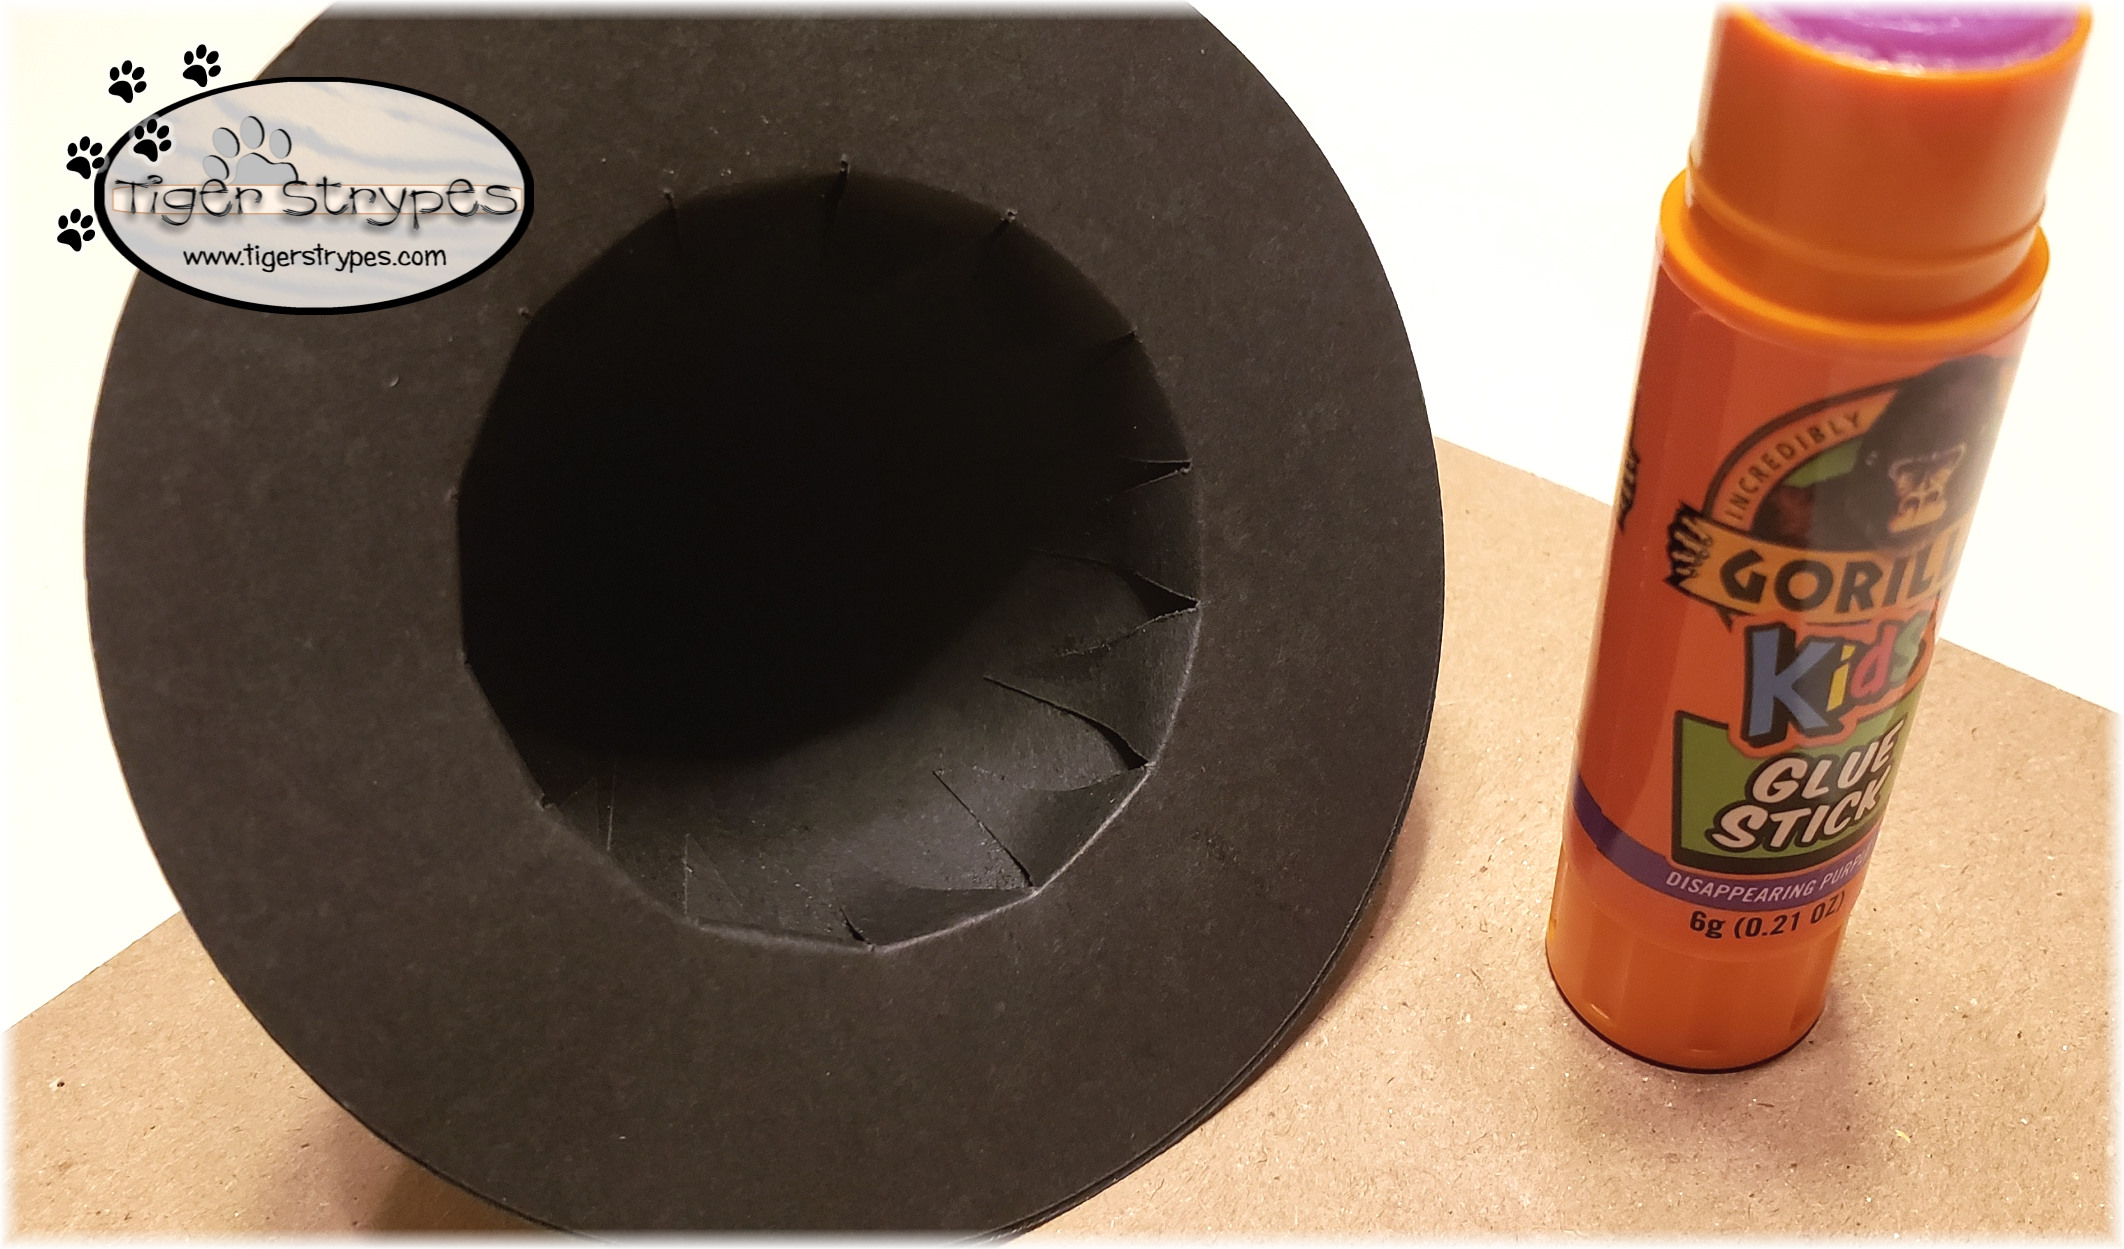
When I had everything that I needed, I got to work. Starting with gluing the white felt around the foam brick to help hide the color. You’ll be able to cover most of the foam piece with the mop head, but it would be too obvious under there with the green. Just be sure to wrap it however you want, glue it tightly, and watch your fingers on the hot glue! Also, be sure to have either one side uncovered, or the ability to trim the middle hole into a larger size, to insert the mop head.

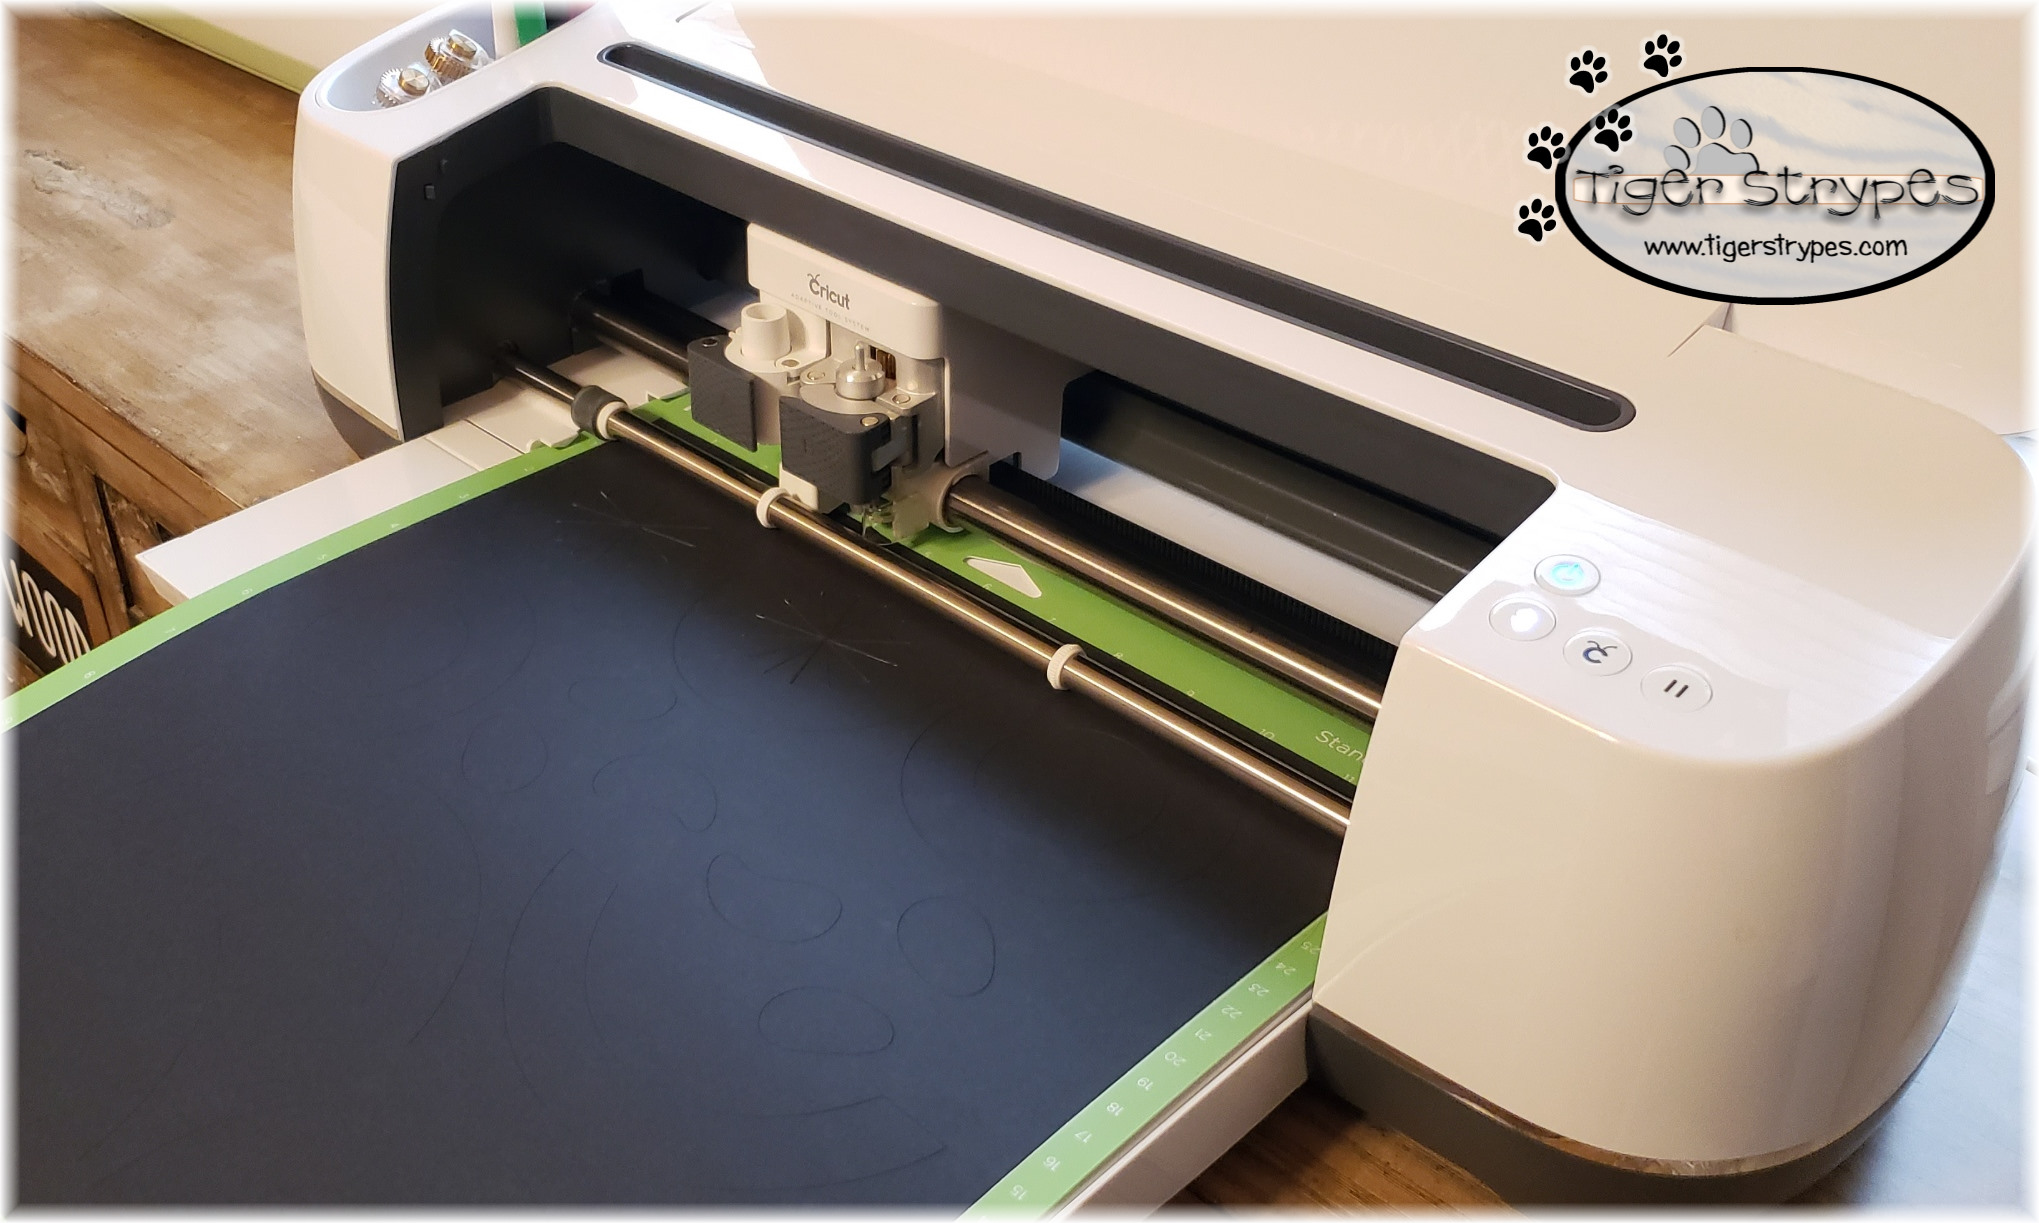
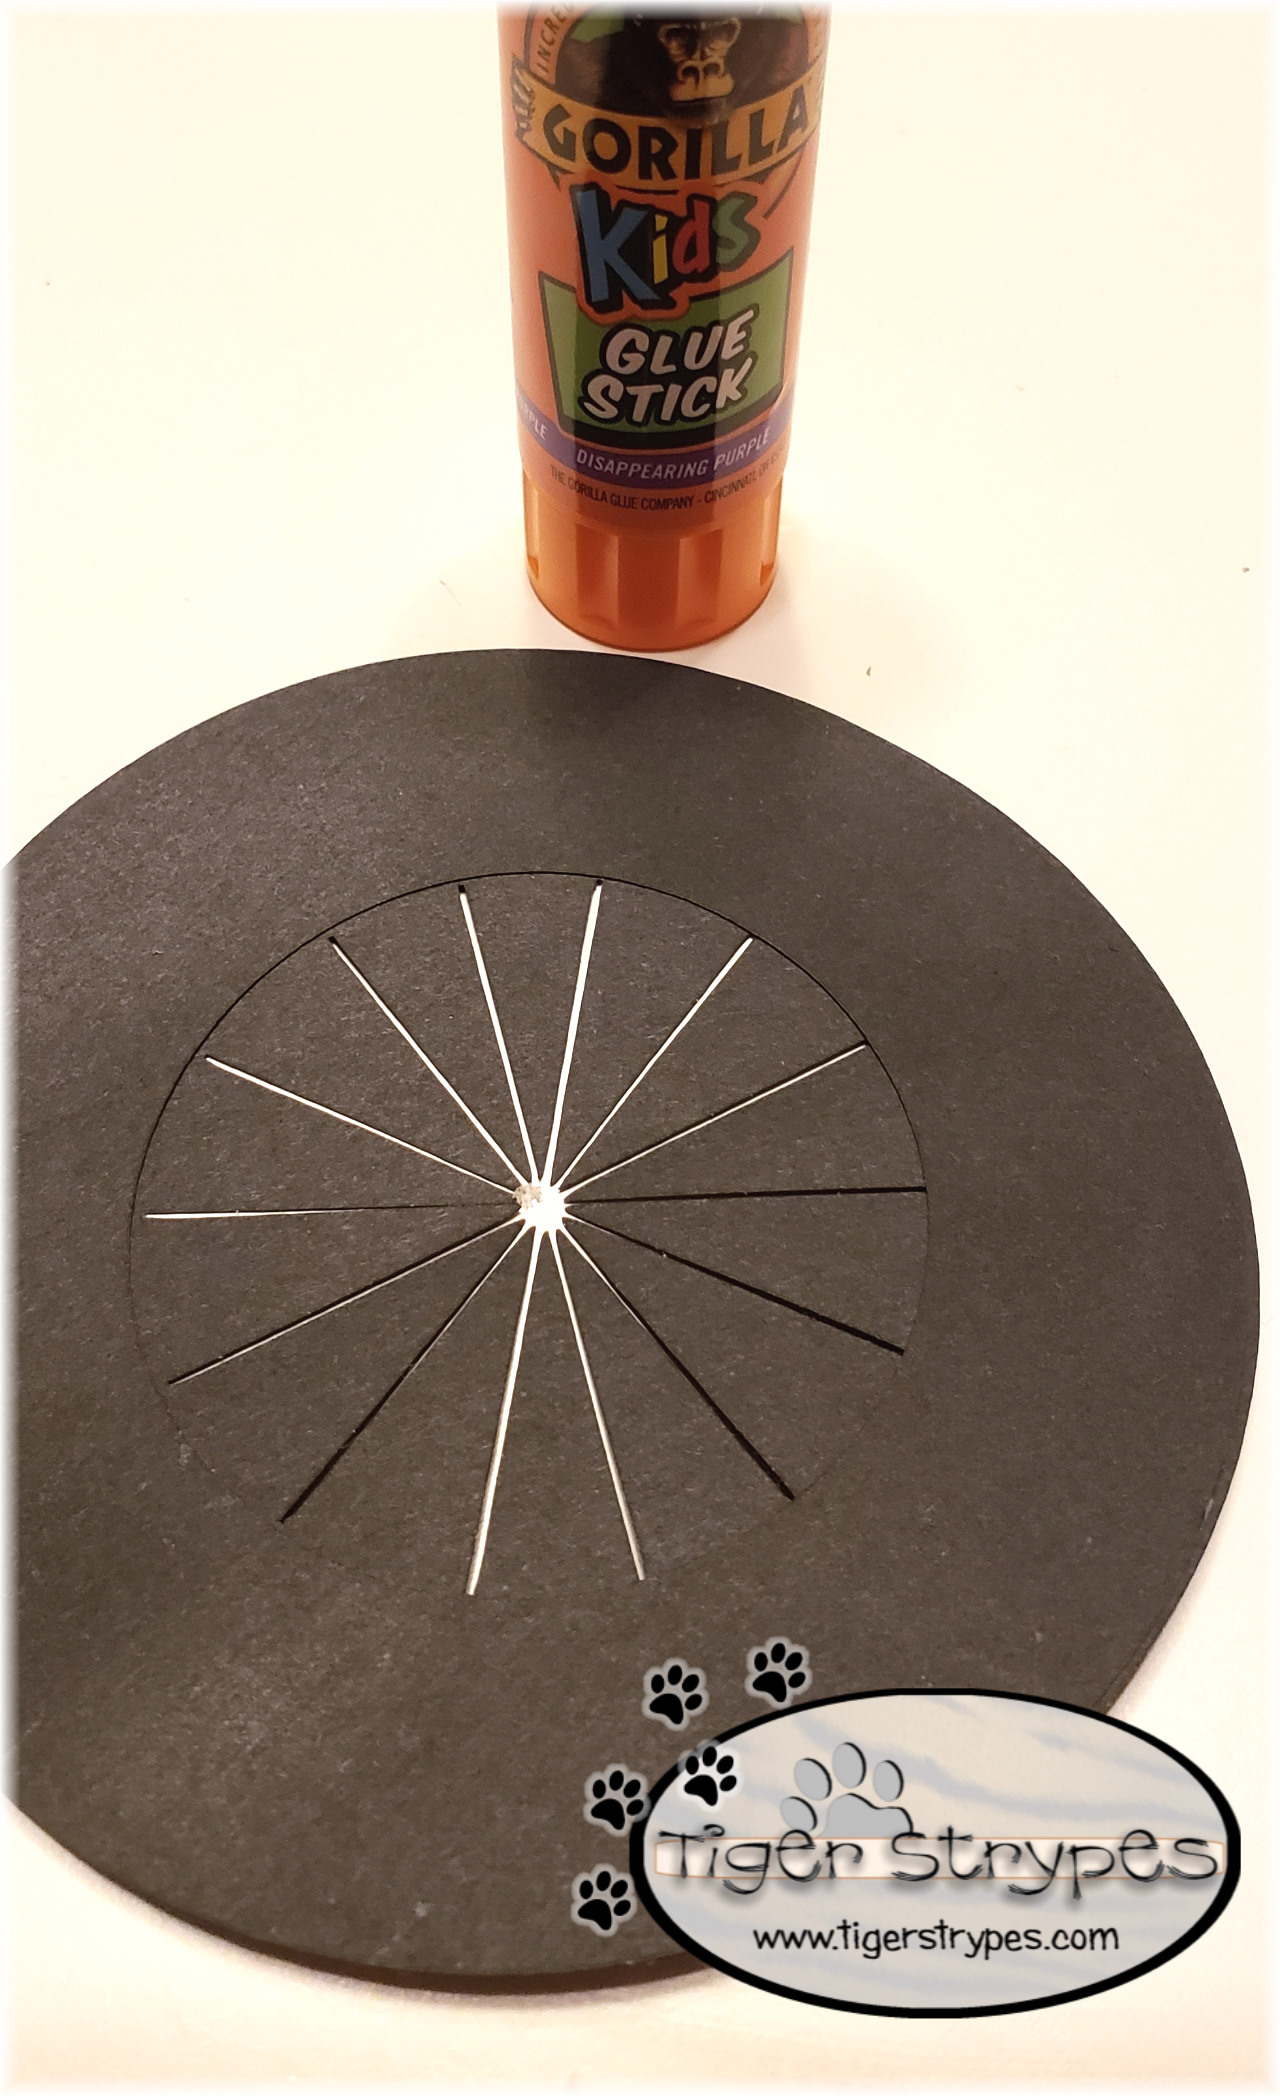
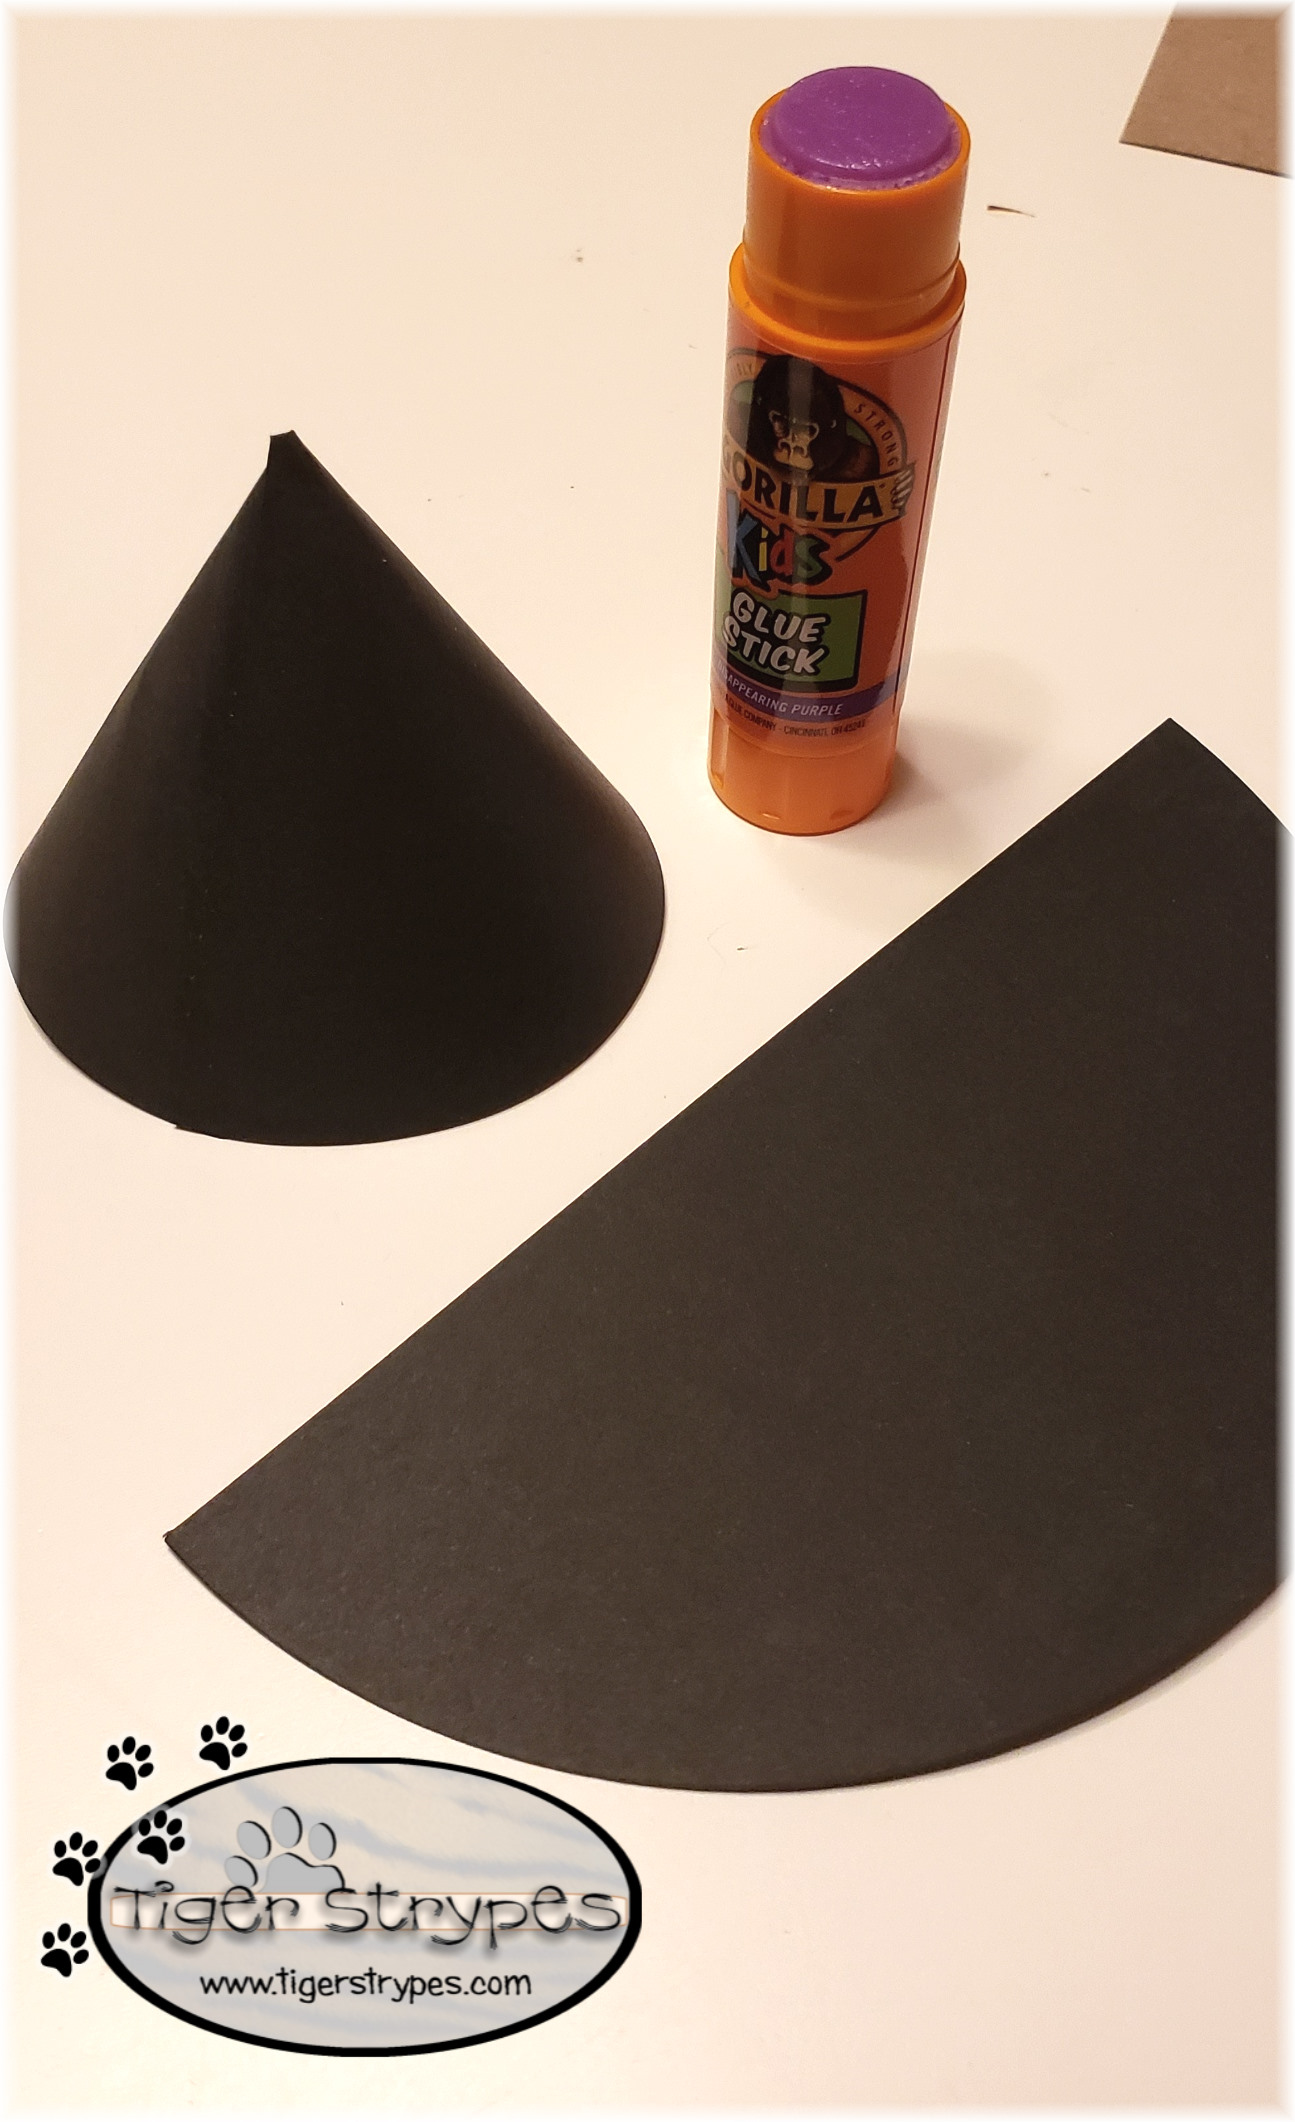
After the glue dried, I started on the computer part of it. Using the pattern for the Witch’s hat from Cricut, I got that cut out and ready to assembly.
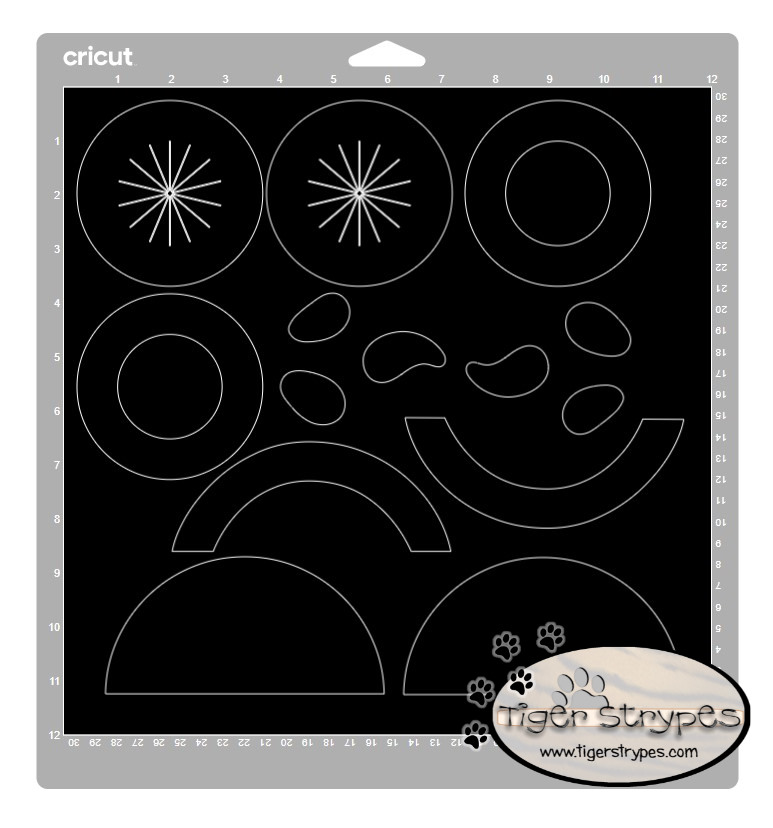
All you do is glue the full circle over the one with the middle cuts, to start. Then you create a cone shape with those half moon pieces. Once that’s done, you put the cone on top of the layered pieces and then glue the triangles up into the cone to secure it.
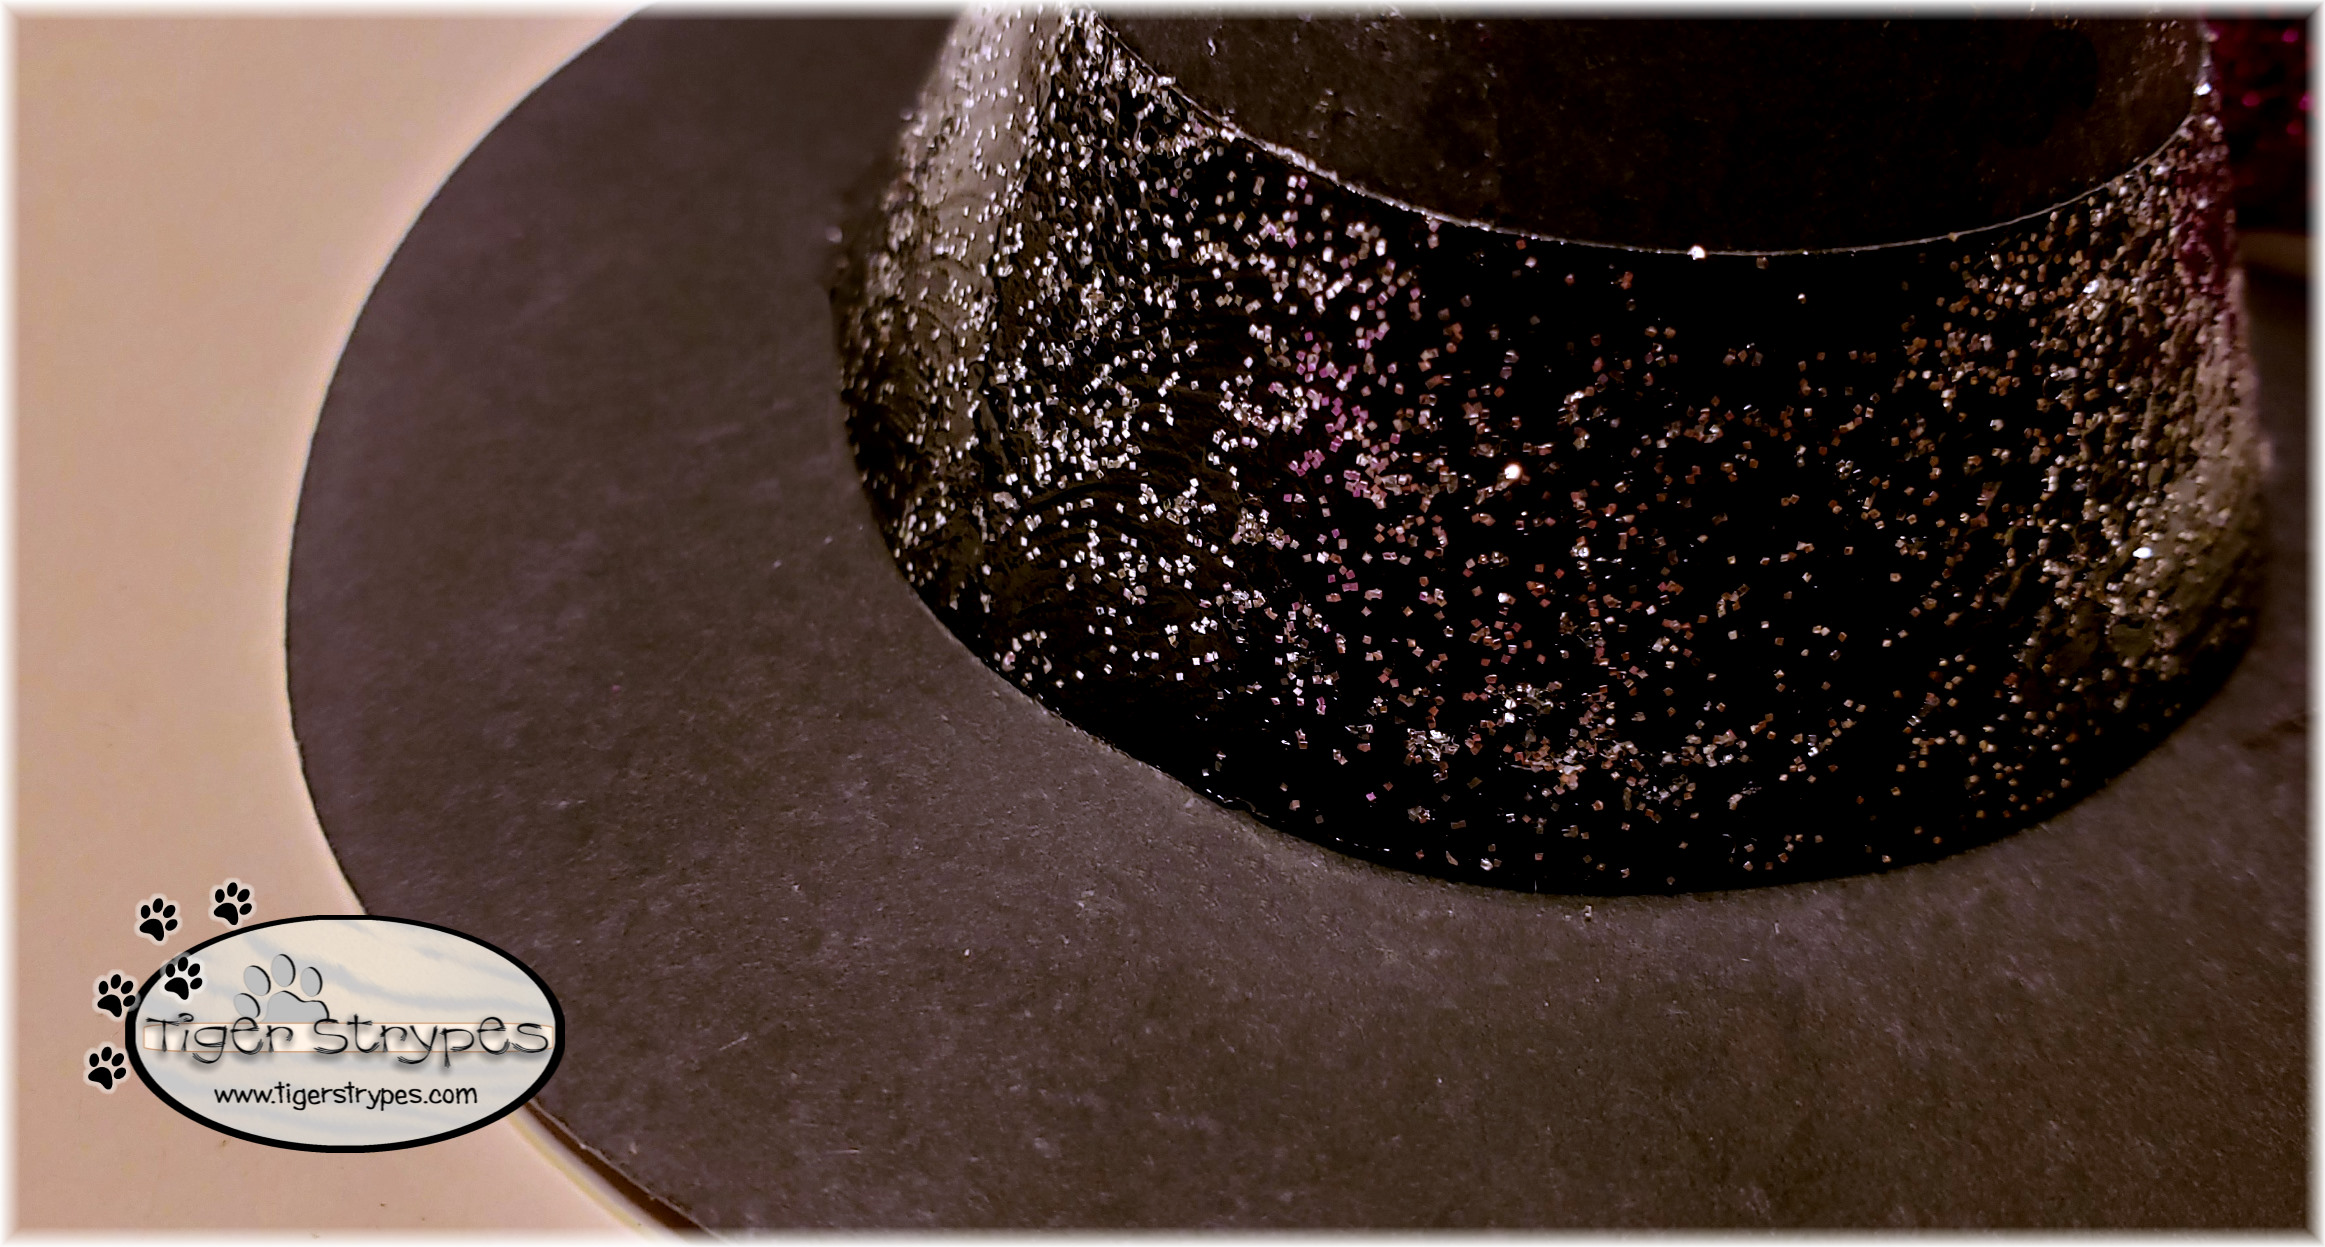
The little rainbow looking piece, is the band for the hat. Using some glitter paint, I was able to dress it up a bit, and then glued that around the top when it was dry.
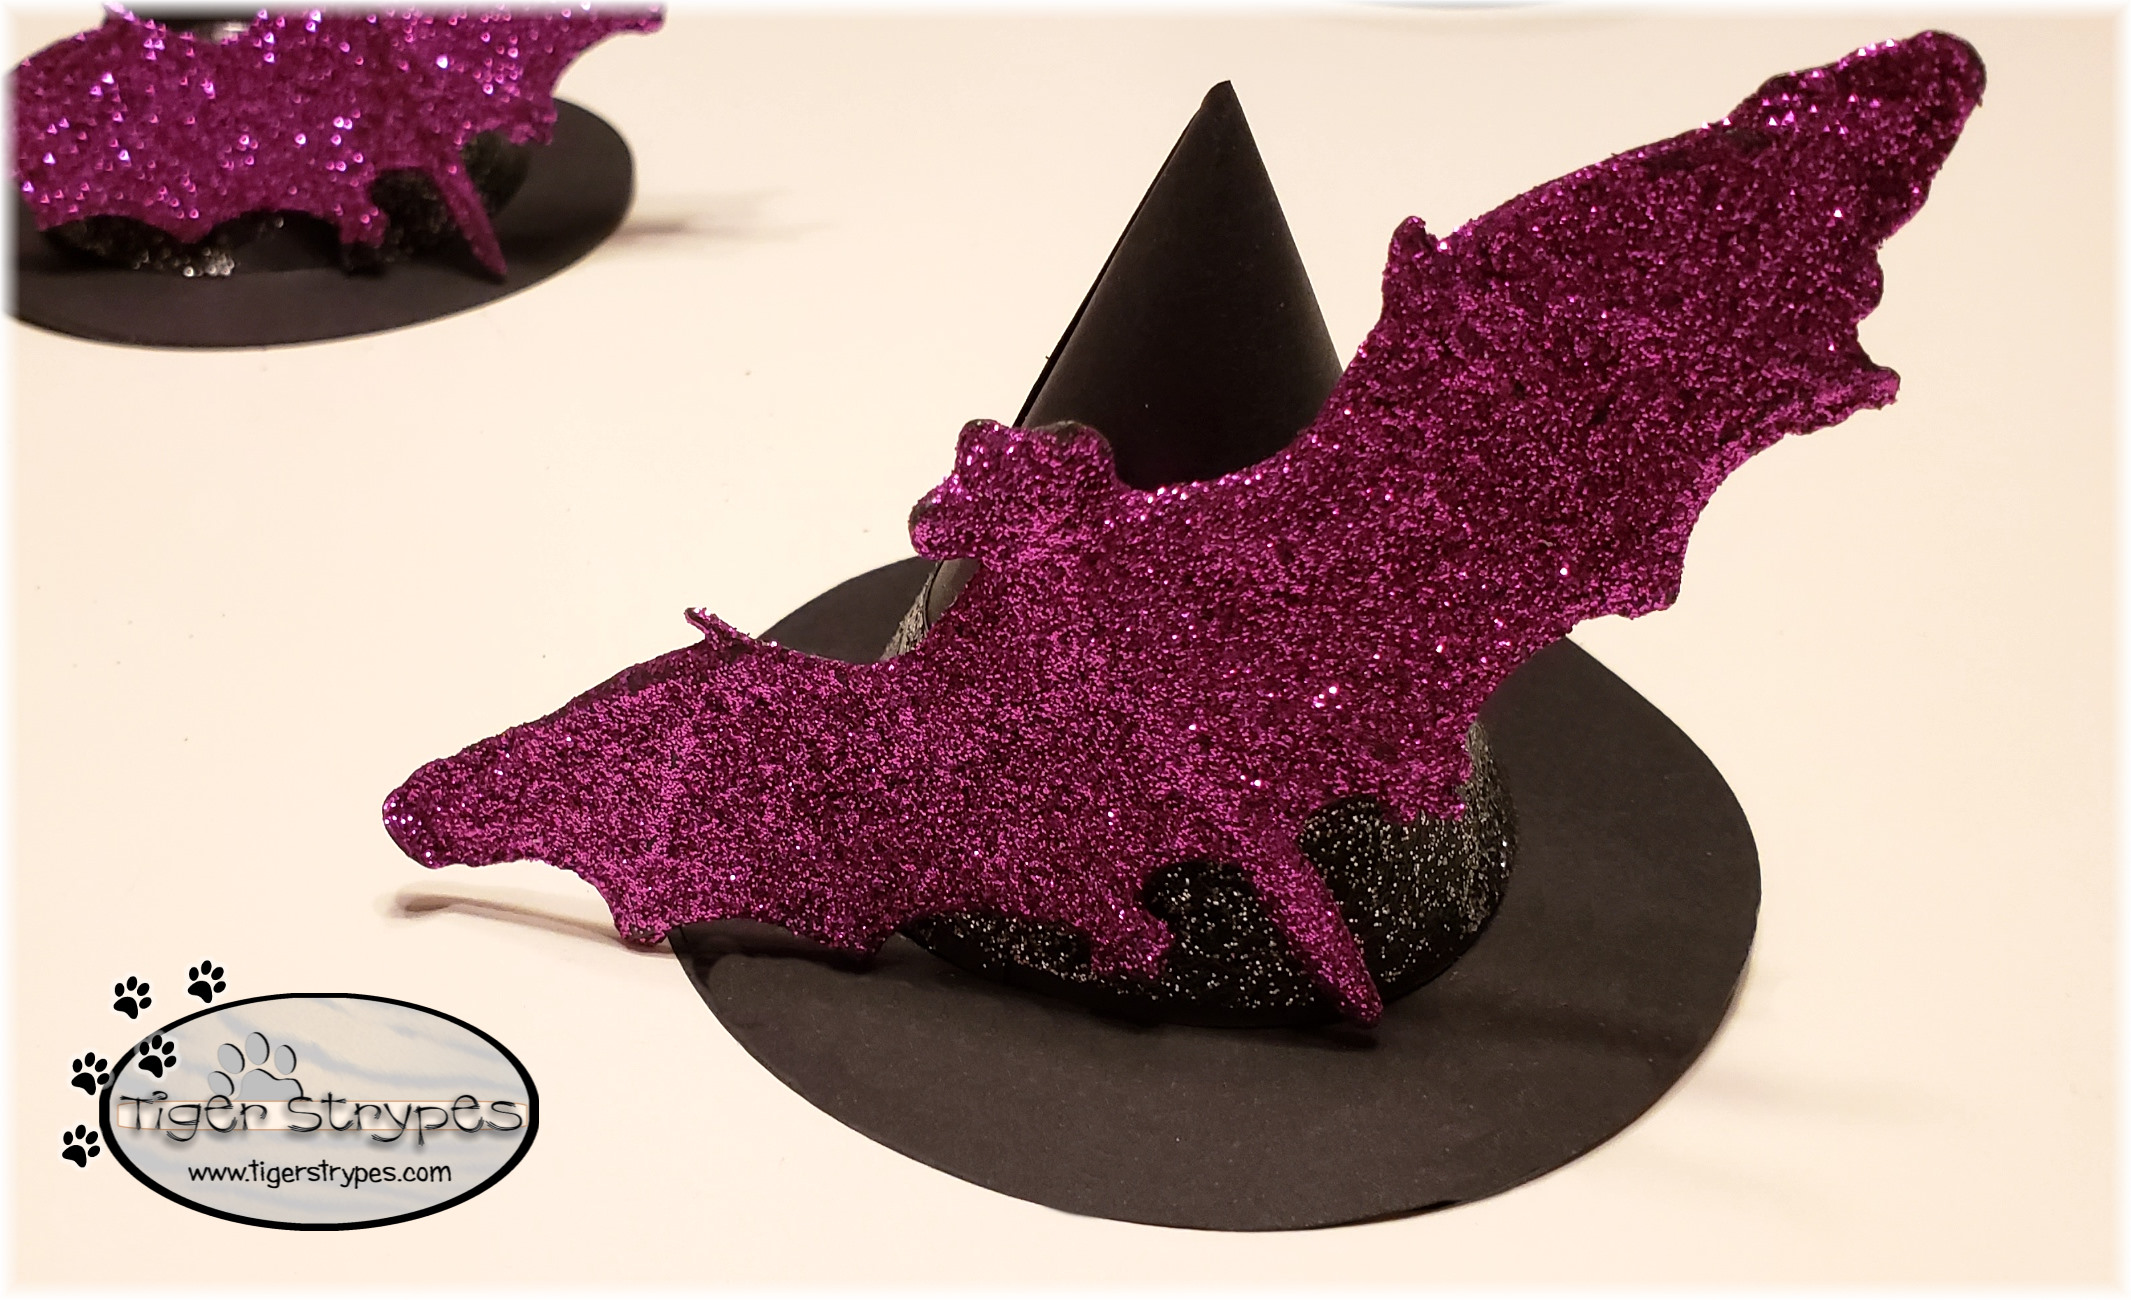
When I was at the dollar and a quarter store, I found some cute little bats and glued one of those on one of the hats. I had also found an adorable little headband for a child, that had a hat already made. I just removed the headband part, and glued that on the other ghost.
Now it’s time for the even messier part. Like I said, when you have a few minutes…or hour…to sit back and just do this while you watch TV, it’s probably the best. It was super boring, but will help with the extra material to cover that foam brick. Just unwind each piece of the mop to create about 4 pieces per strand. Once you get the hang of it, it’s not that hard, just tedious.
When you have that done, and all of the mess cleaned up, you can then turn it upside down and insert it into the top of the foam piece. You might have to trim some out first, but it’s usually pretty taught. I didn’t even have to add glue to secure it, but you might want to, just in case. After that, glue the bottom to a wood piece to help hold it down and make it sturdy for where you’ll display it.

Now you can get to the decorating part. Glue on the face pieces, and the hat on the top to give it a little cuteness.


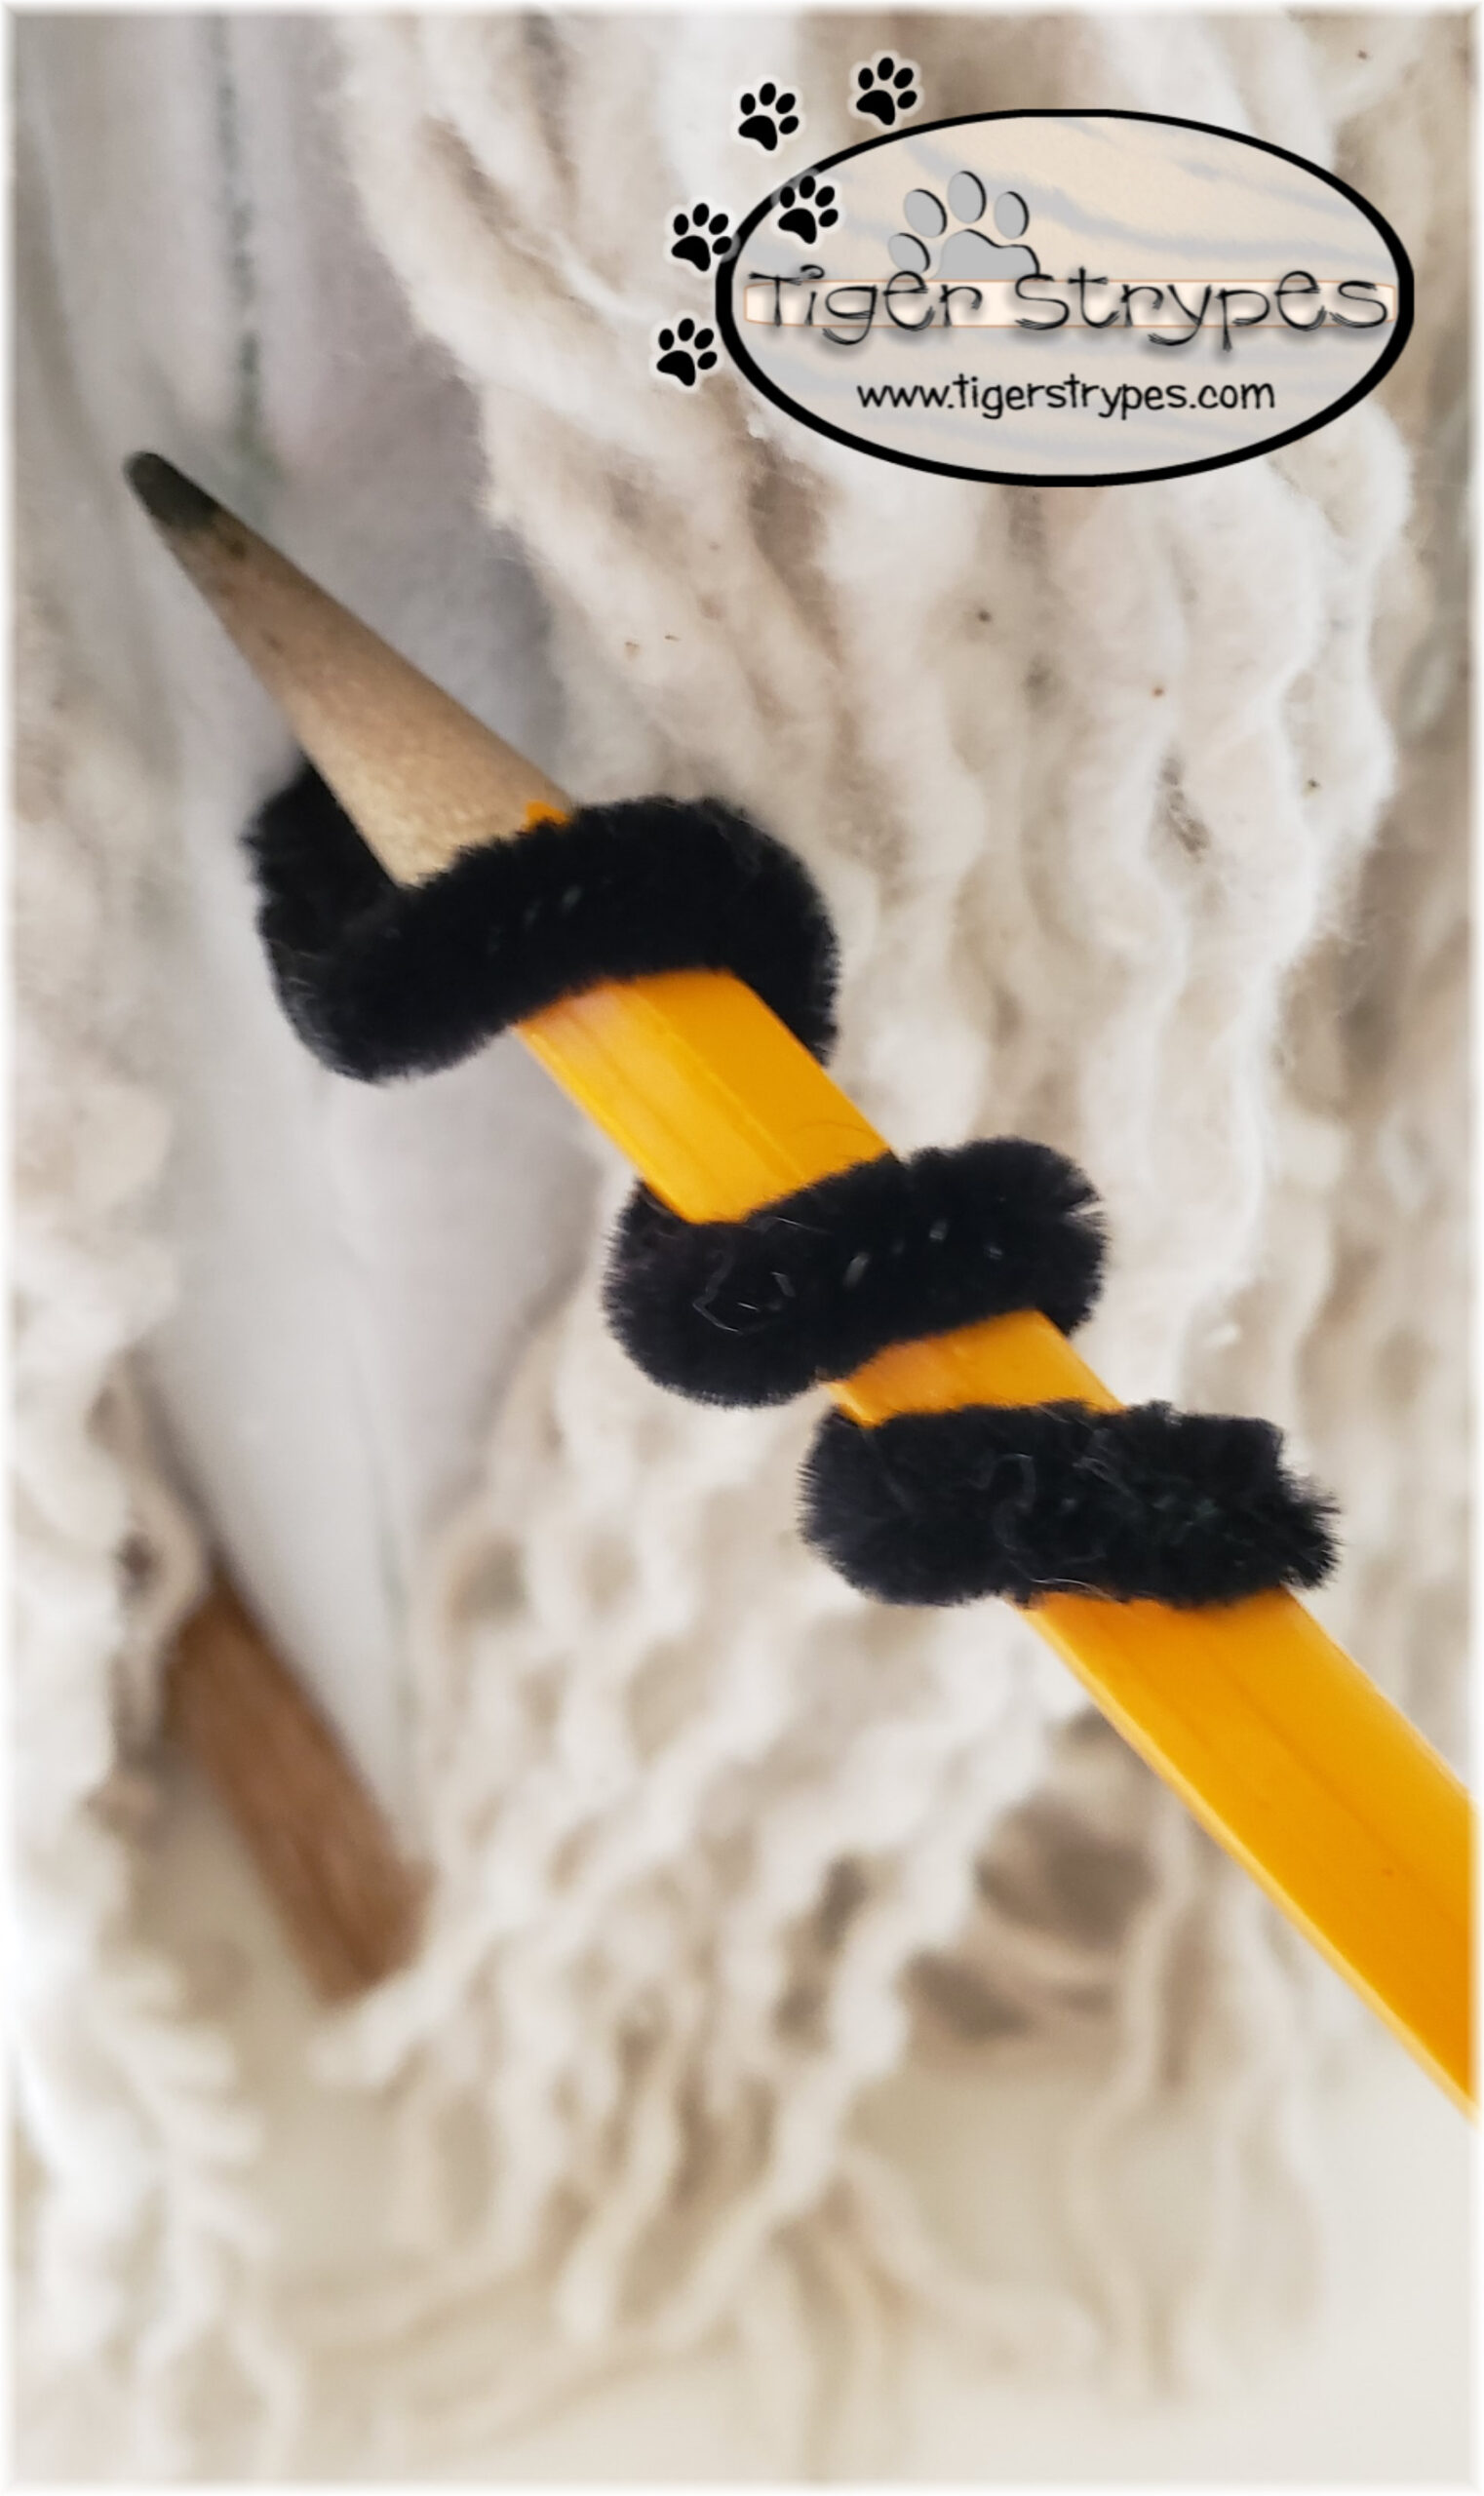
To add a little extra to it, I made a sign with a metallic paint pen. I inserted a curled pipe cleaner into one of the sides, and then glued it on to the front of that. You could do this however you wish, to make it yours.

Now you can display them wherever you wish. I sure wish I could find an industrial mop, and have an even larger one. I’m not sure I have the patience for unraveling one like that, though!
I hope you and your family have a fun and safe Halloween. What do you think? I hope you like it! Please take a minute to leave me a comment on what you would like to create, and maybe if you have any tips on how to do it different, or better!
Be sure to tweet, pin, share, etc. – thanks!!
“Look at my hands and my feet. It is I myself! Touch me and see; a ghost does not have flesh and bones, as you see I have.”–Luke 24:19

PLEASE SHARE THIS POST USING THE OPTIONS BELOW…THANKS!
Affiliate links for Amazon are used on my site. This means that when you click on a link, and make a purchase, I earn a commission for that purchase. There is no extra charge for you, it’s just their sites way of saying thank you for helping them get a customer. I use affiliate links to help fund my crafting budget, as well as help provide for our home.
These are absolutely adorable!! You are so creative. I love this idea so much!
Thank you, Barb! 🙂
OMG, these are fantastic!!! What a great idea. I think those look so good and are not too complicated to make which really helps.
Less complicated, the better for me! That’s how I roll! 🙂
awww these are so cute! I love them. I want to make some for our Halloween decor.
They are super easy to make, it just makes a bit of a mess…so plan accordingly. 🙂
These are so cute! I love how they turned out!
Thanks – they were fun to make!
These are super cute and look like they’d be easy enough to replicate, thanks for sharing!!
I love how you can make it any way you want. When I saw the post on Pinterest, I figured, hey I can do that. I just did it a bit differently. 🙂
This is so cute and a really clever idea! I’m sure kids would really love this! Can’t wait to let my kids see this!
I bet they would love it! Let me know if you make some, by sharing a photo!
Wow, those are so very cute and creative. I can’t wait to try this with my daughters.
Thank you. Just be ready to clean up a lot of fuzz! ha/ha
This is such a clever idea, I would love to do something like this.
Thank you – it was fun to make! Let me know if you end up making one! 🙂
Oh! How cute and perfect for last minute decorations, or if you want to stick to a budget.
The budget part is what I always have to stick to. :p
These are so cute! I love the witch hats they’re wearing.
Thanks Monica! The one was easy to make and I loved finding the other one as a headband. Time saver!!
I like the sound of frugal. These ghosts are so cool looking.
Thanks, Tara!
Such a beautiful DIY craft for Halloween! I am really impressed. I do not have cricut. But you use this machine so creatively.
Thanks so much!! I absolutely love my Cricut. Best investment ever!
I love this so much! I need to make one for sure. I need to get a cricut at some point!
You won’t be sorry. You can do so much with them! Thanks for stopping by!
So adorable! I still need one of those machines lol . This is so cute!
The Cricut is one of the best investments I’ve ever made!
What fun! And not too hard to do. Great way to celebrate!
It wasn’t hard at all…just a bit messy! 🙂
These are so super cute! How creative!
Thank you Heidi – they were fun to make!
These turned out super cute! Kids are going to LOVE seeing these ghosts!
Thanks Daisy – they are fun to make, but made a mess!! You could probably skip the unraveling portion and just use two mop heads in one!