 How To Create a Wooden Photo
(#TBCCrafters)
I love finding new ways to decorate, and especially with ideas that have a more natural look. I saw something like this on YouTube, and thought it would be fun to try. I used my regular HP Printer (which is ink), and found out that it is actually better to use a laser printer for this project. It seems to be able to have the photo transfer a little better, and be a bit more detailed on the finished project. I kind of liked my distressed look though, but just wanted to put that out there for those that want more detail.
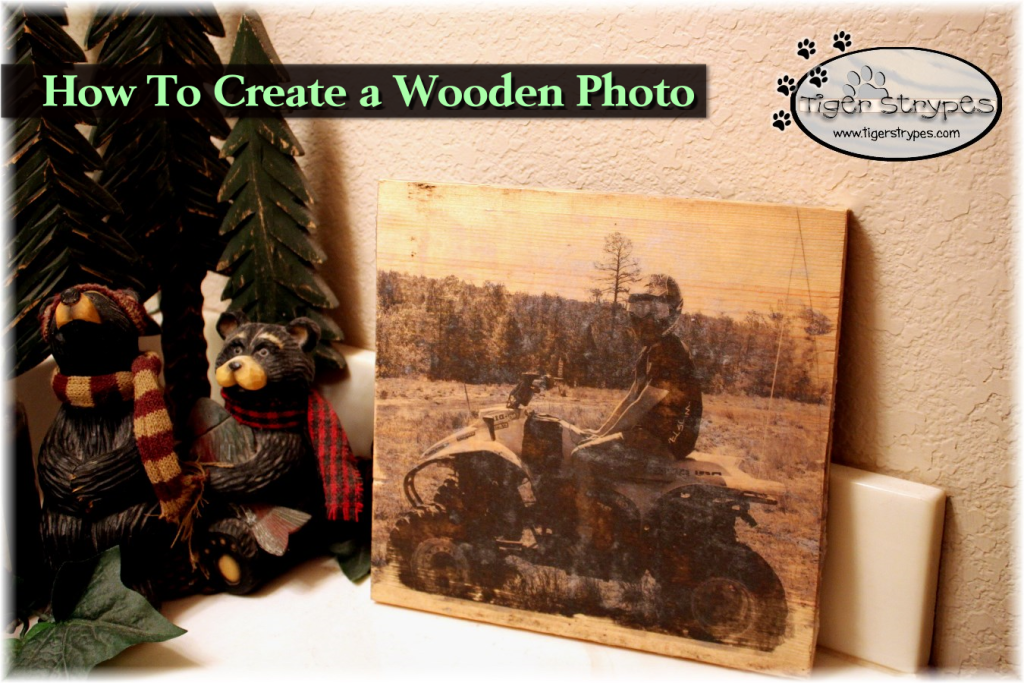
I figured that this could be a great thing for my husband’s sound room in his garage. Being able to have a picture of our son, enjoying himself on the quad, is always fun to see. This would also be great to do with a family photo, and give it to grandparents for a gift, etc. Any way you “transfer it”, it will turn out to be something that someone will love, I’m sure!
I hope you like it!! Have a blessed day, and please be sure to comment on, and share this #TBCCrafters craft on your social media channels – thanks!!
How To Create a Wooden Photo
Materials/Tools Used:
- Laser-Printed Black & White Photo
- Printer Paper
- Piece of Wood
- Gel Medium
- Mod Podge
- Water/Rag
- & Time!
Instructions:
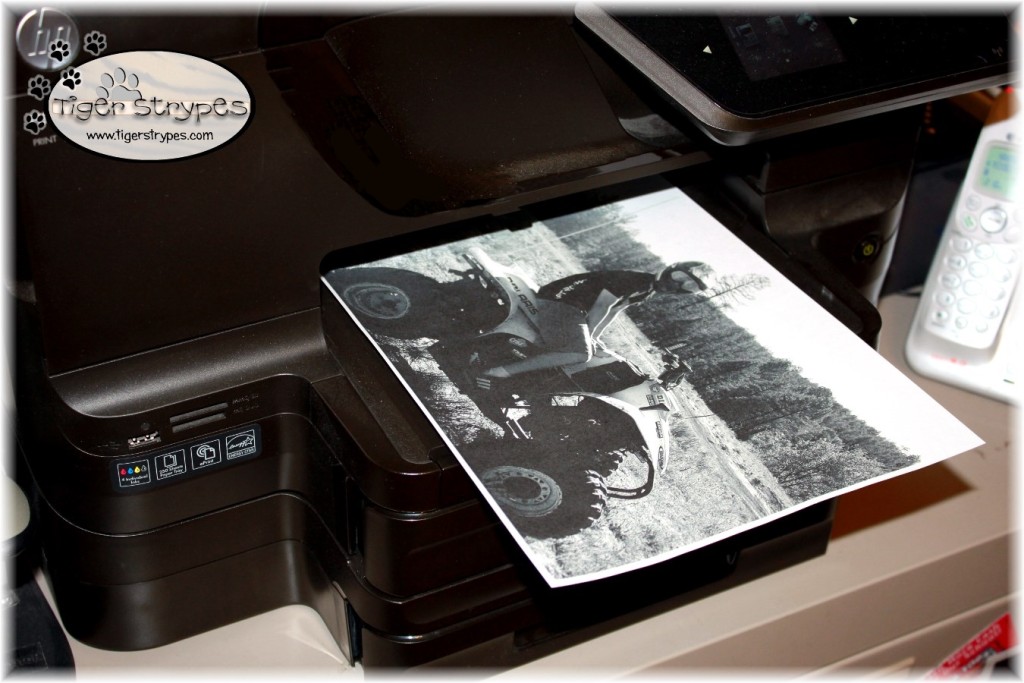
I started by printing out a black & white photo for the project. I later found out that using a laser print works better, and you don’t lose as much of the ink (idea kept for the future 🙂 ).
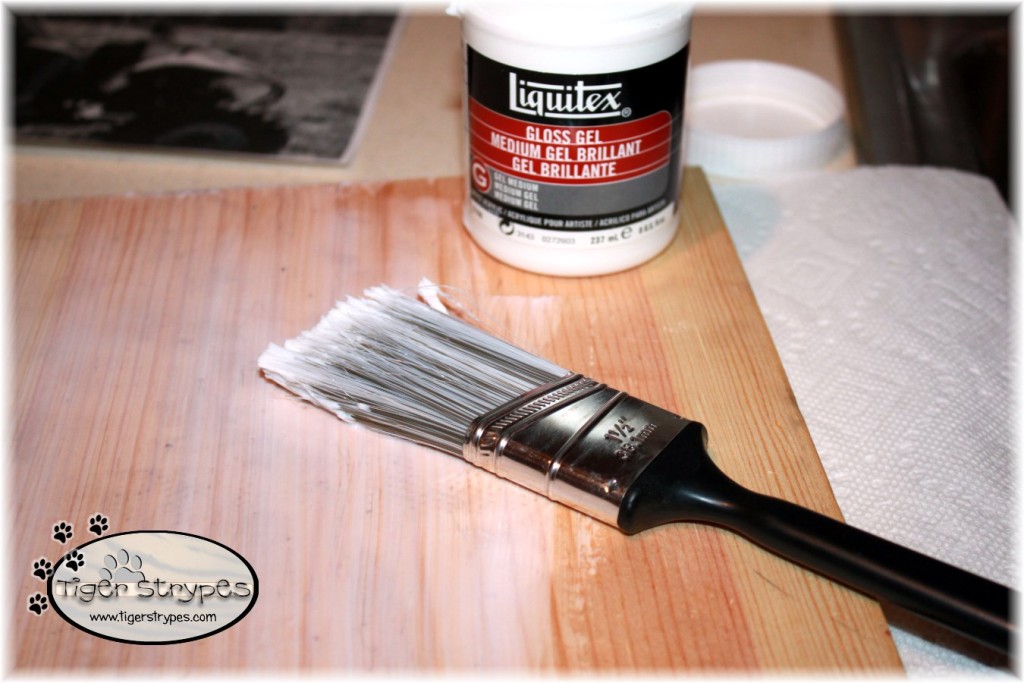
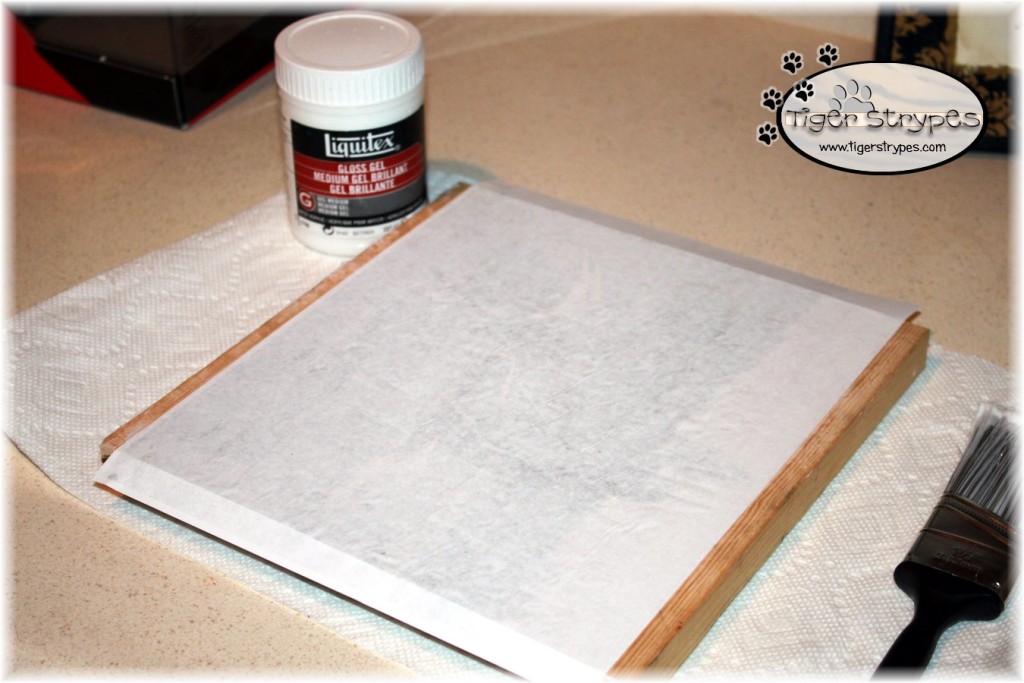
Then, I applied the gloss gel medium to the piece of wood that I was going to use. Be sure to cut the wood to match the size of the photo that you are printing, unless you want a border around the edge – then just cut appropriately.
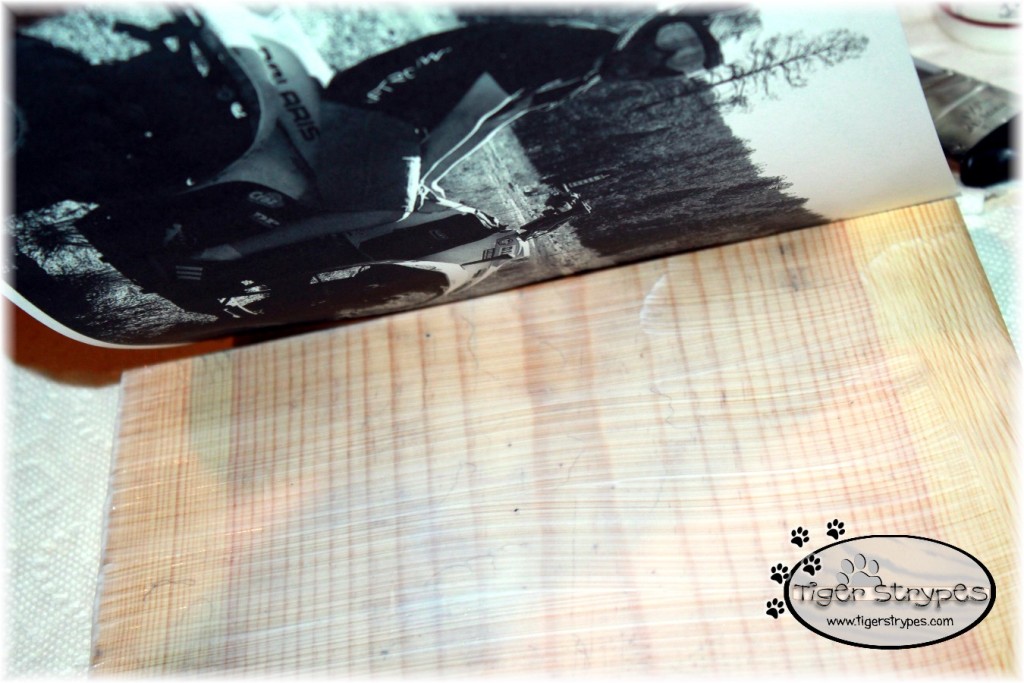
Now, I turned the ink side of the photo toward the wood, and secured it on the top of the wood, being sure to remove any bubbles, and flattening the whole thing out evenly.
Then, I left it to sit overnight, and fully dry.
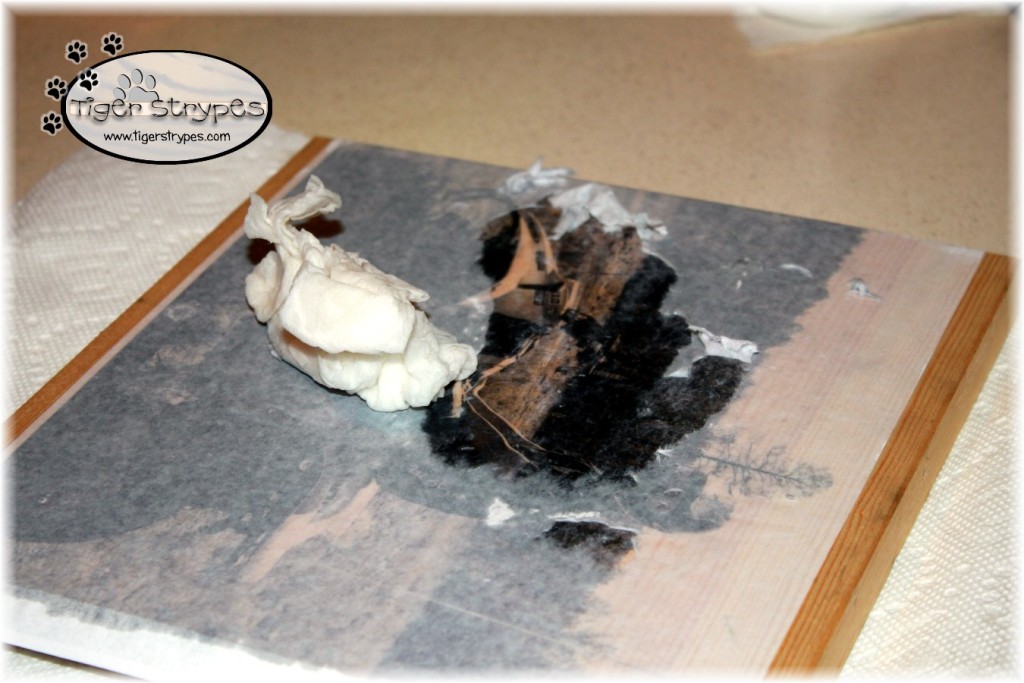
Once the piece was dry, I used a wet towel to fully moisten the paper. This allows for the paper itself to be removed from the wood. Using the inkjet, as I did, if you rub too hard, the ink does come off, so be careful. As I’ve heard, using a laser printer, makes the photo stay even better, and helps it to have a much glossier appearance.
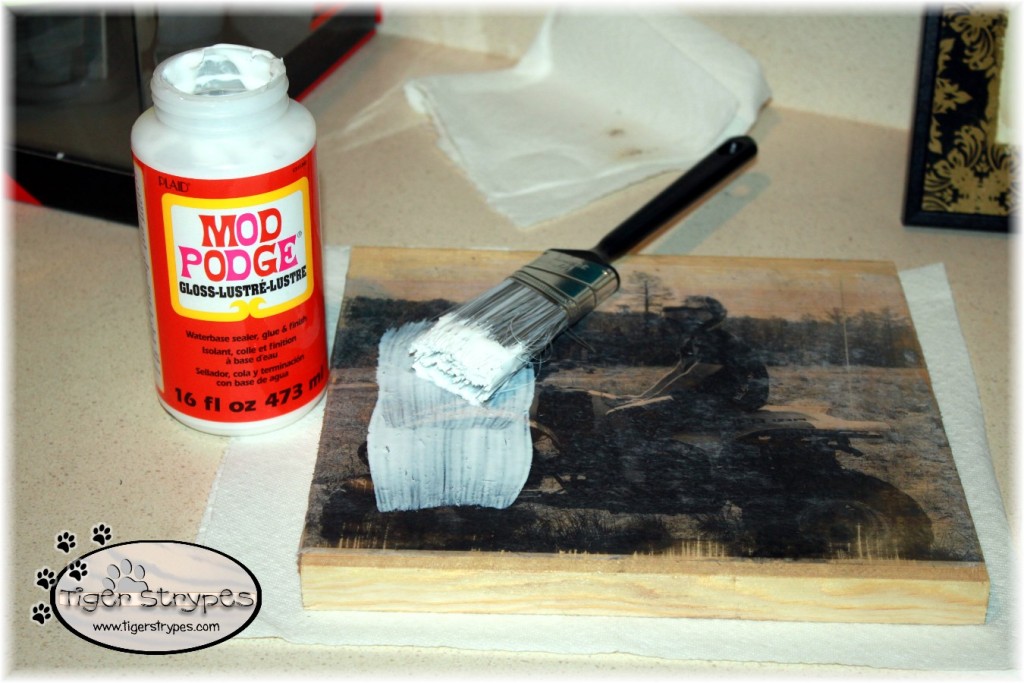
Next, I covered the photo with some Mod Podge, to finish it up. I’m using the gloss style, but you are welcome to use flat, or whatever you wish. This will help to seal the ink and bring a finished “look” to your piece.
Now, you can just display it wherever you wish. I can’t wait to try this again with the laser print, and see how much better it can turn out!
Hope you like it! Please take a minute to leave me a comment and let me know what you would do different, or what you would add, etc. Be sure to tweet, pin, share, etc. – thanks!!
All pictures and text are my own and have not been copied in any way. I, Jamie Tomkins, own and operate Tiger Strypes Blog located at www.TigerStrypes.com. From time to time you’ll hear about my real life experiences or creations with products and/or services from companies and individuals. Let it be known that I have no affiliation with these said companies, and have not received compensation for reviewing or using their service/product. The information that I give regarding the product/service is based off my own personal experience, I do not guarantee that your experience will be the same.
PLEASE SHARE THIS POST USING THE OPTIONS BELOW…THANKS!!
*****************************************************************************************************




I’m *finally* getting to create a gallery wall in our home, and I’d love to give this a try!
That will be so much fun, Mary – would love to see pix!!
[…] How To Create a Wooden Photo | Tiger Strypes […]
I’ve done these with good luck just using moistened wood and rubbing the back of the print with the edge of a credit card after it’s in place, but getting a dark image to transfer (and not be TOO dark) has been a challenge. I never even considered gel medium. What a great idea! I know just the picture I want to try 🙂
Thanks for linking up to the Momma Told Me link party, we really enjoy your work!
🙂
Rachel
What a cool idea, especially for vintage looking photos!
Thanks – it was fun to make!
That’s a great idea for a gift! I really love that idea since it’s simple too
I have been wanting to do this but just putting it off. I might try to do some for Fathers Day.
It doesn’t take long and is fun to do!!
That is so cool! I really need to do one of these for my husband to put in his office!
Definitely something that the guys like! 🙂
I love this idea and it’s a great way to display photos that are unique! I’ll be making a few of these with some of my favorite photos for our new home!
I bet it will look great!!
Very cool! I have some photos that I’d like to do this with. Plus, they would make great gifts. I had no idea the process would be so simple and quick to create.
That’s what amazed me, Tonya – only overnight and it was ready!
I love the way your wooden photo turned out. I have a family photo from camping that would be perfect for this project.
Let me know if you make one, Crystal – I’d love to see it!
I’m not crafty at all and feel like even I can do this! Great craft tutorial.
Don’t ever say that you’re not crafty!! Just give it a try and you’ll amaze yourself. You can do it!
Wow, this looks great, I love that it’s on wood. So cool, what a great way to display a photo!
I loved the natural look, for sure, Bernadyn!
Wow that looks so cool. I’d love to try making some photos into wooden pieces like this!
I hope they turn out well for you, Liz. Let me know if you do it, I’d love to see a pic!
I love this idea. I’d like to do few different pictures like this. Thanks for the idea.
You’re welcome, Nancy – I hope you enjoy doing it!
Thats so cool! I’d love to try this out
This is so cool!! I’ll have to give this a try! #MommaToldMe
It was fun to do Brandyn – let me know if you try it!
I really love this and do not think it could be more perfect. The idea is so versatile and I am going to be redecorating my kitchen and you have give me some great idea to add some cute memories and design to my kitchen. I know your husband will love this. I’m pinning and sharing because this is such a great project.
That’s a great idea Grace!! Would be perfect on wood paneling, etc. 🙂
This is too cool!!! Looks like a easy craft to do. This would make really cute gifts. Maybe I should start early on Christmas gifts. Thanks for sharing this craft. 🙂
Thanks Jamie – I hope that you can make a bunch of them!!
I did this with canvas but LOVE how it turned out with wood! I want to try something like for my sons room now! Thanks!
You’re welcome Jennifer – be sure to tweet a pic when you’re done!
I love this idea of a picture on wood! I need to get the stuff to do this. I have some pictures that would look fabulous!
It was fun to try out – will definitely make some changes, but liked the “weathered” version! 🙂
This is very cool. My husband would like this, a great idea for a present
It has a different look, which is what I loved – Father’s Day idea!! 🙂