
TBC CRAFTER’S HOP (#TBCCRAFTERS) – 08/15/2013
“Silhouette Candle/Plant Holder” Craft
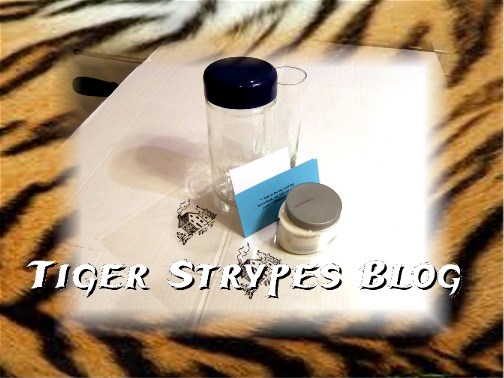
- Large Glass Jar
- Small Glass Jar (able to fit in above)
- Paint*
- Painters’ Tape or Sticker
- 3D Piece or Transparent Paper
- Candle
- Plant or Flowers
- & Time
Instructions:
Begin by using Painters Tape or sticker to cover a spot on each side of the large jar that will become your “window”, per se.
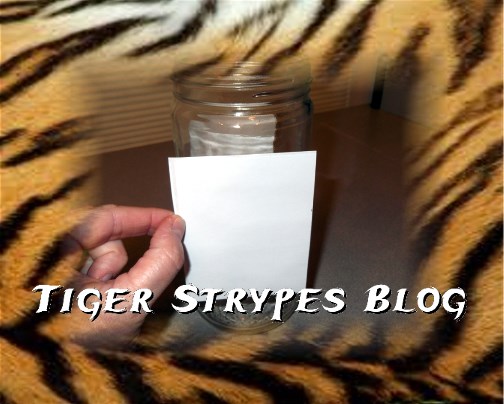
Once you have the tape/sticker on, be sure to remove all bubbles from edges, so that the paint doesn’t leak through. Then you can paint around the stickers to cover your piece.

When you have that painted, let it sit and dry. *Just a note – I used regular paint and for some reason, it peeled off pretty easily. I’m not that into painting, so not sure if there’s something out there that you can prime glass with, but might want to research that first. 🙂
While you’re waiting for that to dry, begin painting the inside of your smaller jar. You could always paint the outside, like you did the big one, but I just like the look of the shine that you get from doing it the other way.

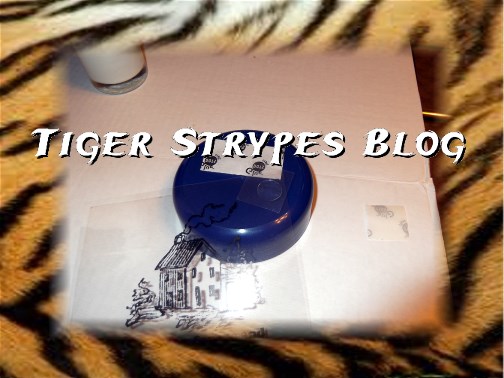
When the large jar is dry, begin to peel off the stickers or tape to open up the clear area. I never thought of it before, but you could probably use etching powder to do this instead of paint on the outer jar instead….hmmm….have to think of that for next time.

Once peeled off and cleaned up of any residue, you can begin to cut the transparent paper with the artwork you would like on it. I decided for a cabin style look with my favorite bible verse. If you like this one – here’s a link to a copy you can print out: http://i20.photobucket.com/albums/b209/satrntgr/craft_zps37e80d04.png.
Whatever piece you decide to use will be showing through the “window” or you can always do the effect like on the blog I saw this on with a cutout or something you create with your Cricut machine, etc.

I used glue dots to make sure that the piece didn’t fall too low in the jar. Just make sure you attach them to a place that will not show through the opening.
Insert your pieces to each side and make sure they are centered.
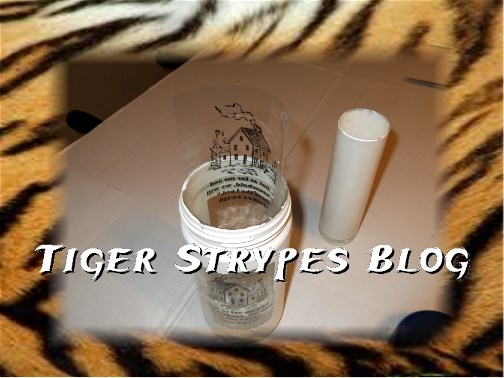
Once secured, you can then insert the smaller jar/vase in the center. If you are using cutouts, then just attach them to the bottom of that smaller jar and insert everything together.
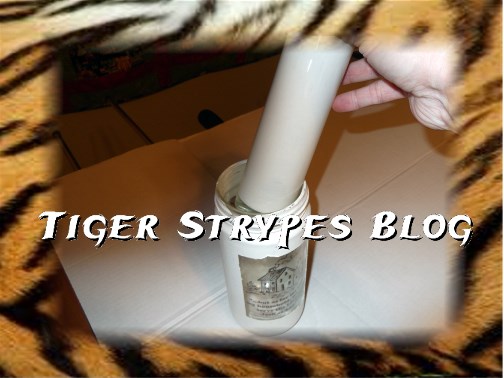
I put it in and was just not happy at how it was not centered and was wiggling around a bit. I got a thin piece of Styrofoam and cut out a piece that would act as a frame for the bottom of the middle jar/vase and stuck it down in the bottom. This helped to keep the middle one centered.

Now you can add a battery operated candle into the center, if you wish (be sure to not use a regular candle, since the paint inside might not like that!)
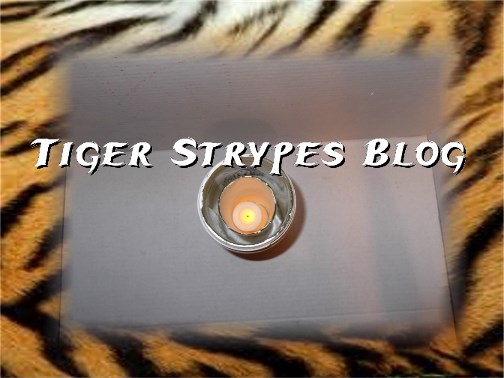
Once you have all of that put in (kind of hard to see the light in the picture), decorate with a plant or flowers and enjoy!! I hope you like it!
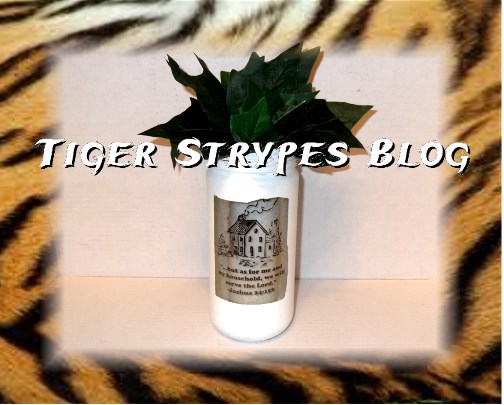
“In the same way, let your light shine before others, so that they may see your good works and give glory to your Father who is in heaven.” –Matthew 5:16
All pictures and text are my own and have not been copied in any way. I, Jamie Tomkins, own and operate Tiger Strypes Blog located at www.TigerStrypes.com. From time to time you’ll hear about my real life experiences or creations with products and/or services from companies and individuals. Let it be known that I have no affiliation with these said companies, and have not received compensation for reviewing or using their service/product. The information that I give regarding the product/service is based off my own personal experience, I do not guarantee that your experience will be the same.

*****************************************************************


Cool idea! Ive never seen anything like this before.
Good idea to make nice candle holder this way
nice!
Love the window, the season is changing and everyone can tell and feel it, Candles everywhere!
That is so cool! I love the window and how easy it is to do!
Love the way this turned out!
Thanks Ellen!! 🙂