
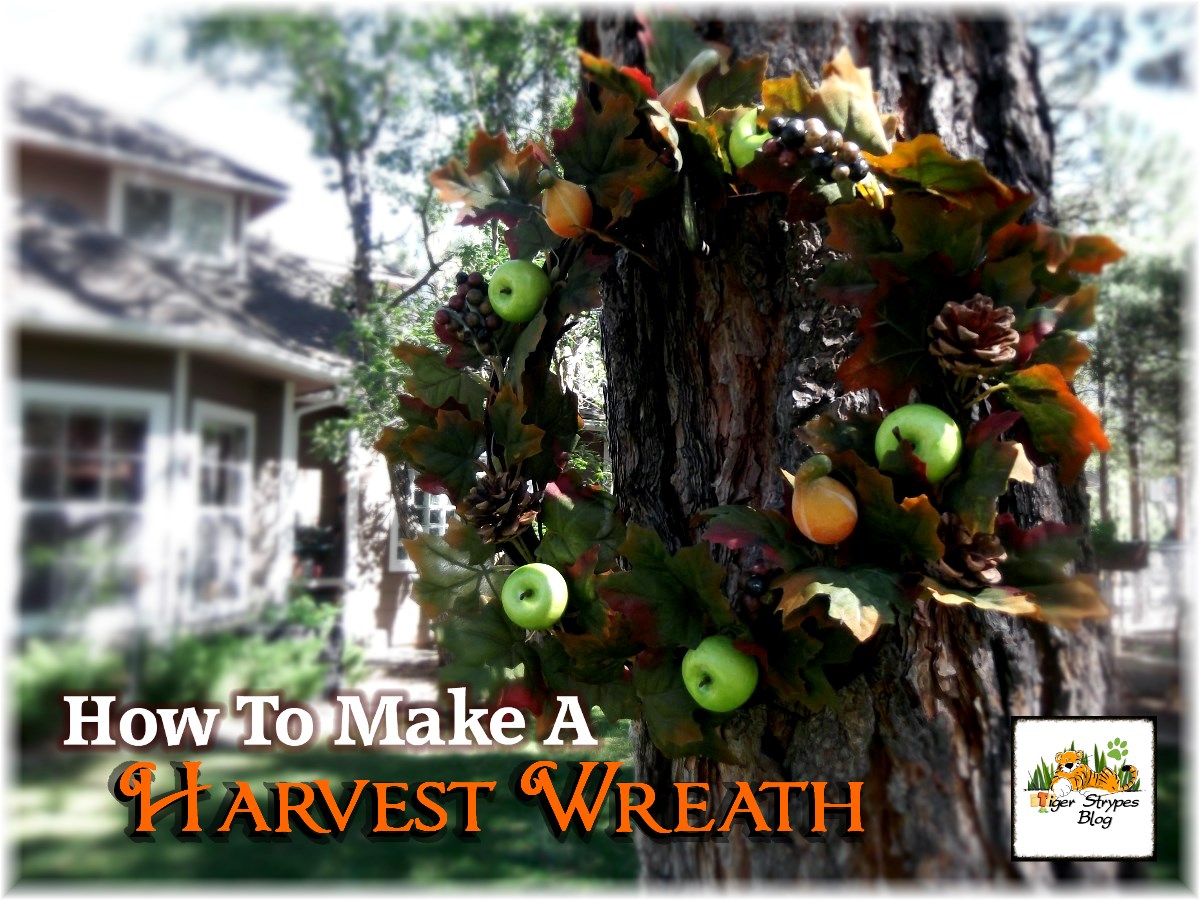
 How To Make a Harvest Wreath For Fall Decor
#TBCCraftersHop #Craft
I can’t believe that Fall is almost here. Up here in the White Mountains of Arizona, it is definitely my favorite time of year. The leaves will start changing and the smell in the air is just different. It’s hard to describe, but you can just tell when Fall is starting up here in the mountains, and I love it. We’re already planning on getting more wood for the fire, as it starts to cool down and the jackets & sweaters might need to start getting hung up and ready to wear.
I figured that since I always decorate for Fall and Harvest time, that I would make this wreath for hanging on the porch or in the house…can’t decide yet. It’s really easy to do, and I got everything at Dollar Tree, so very inexpensive.
I hope you like it!! Have a blessed day, and please be sure to comment on and share this #TBCCrafters craft!!
Learn how to make a #Fall #Harvest Wreath to decorate your home! #Craft Find out more at Share on X
Harvest Wreath Decor Craft
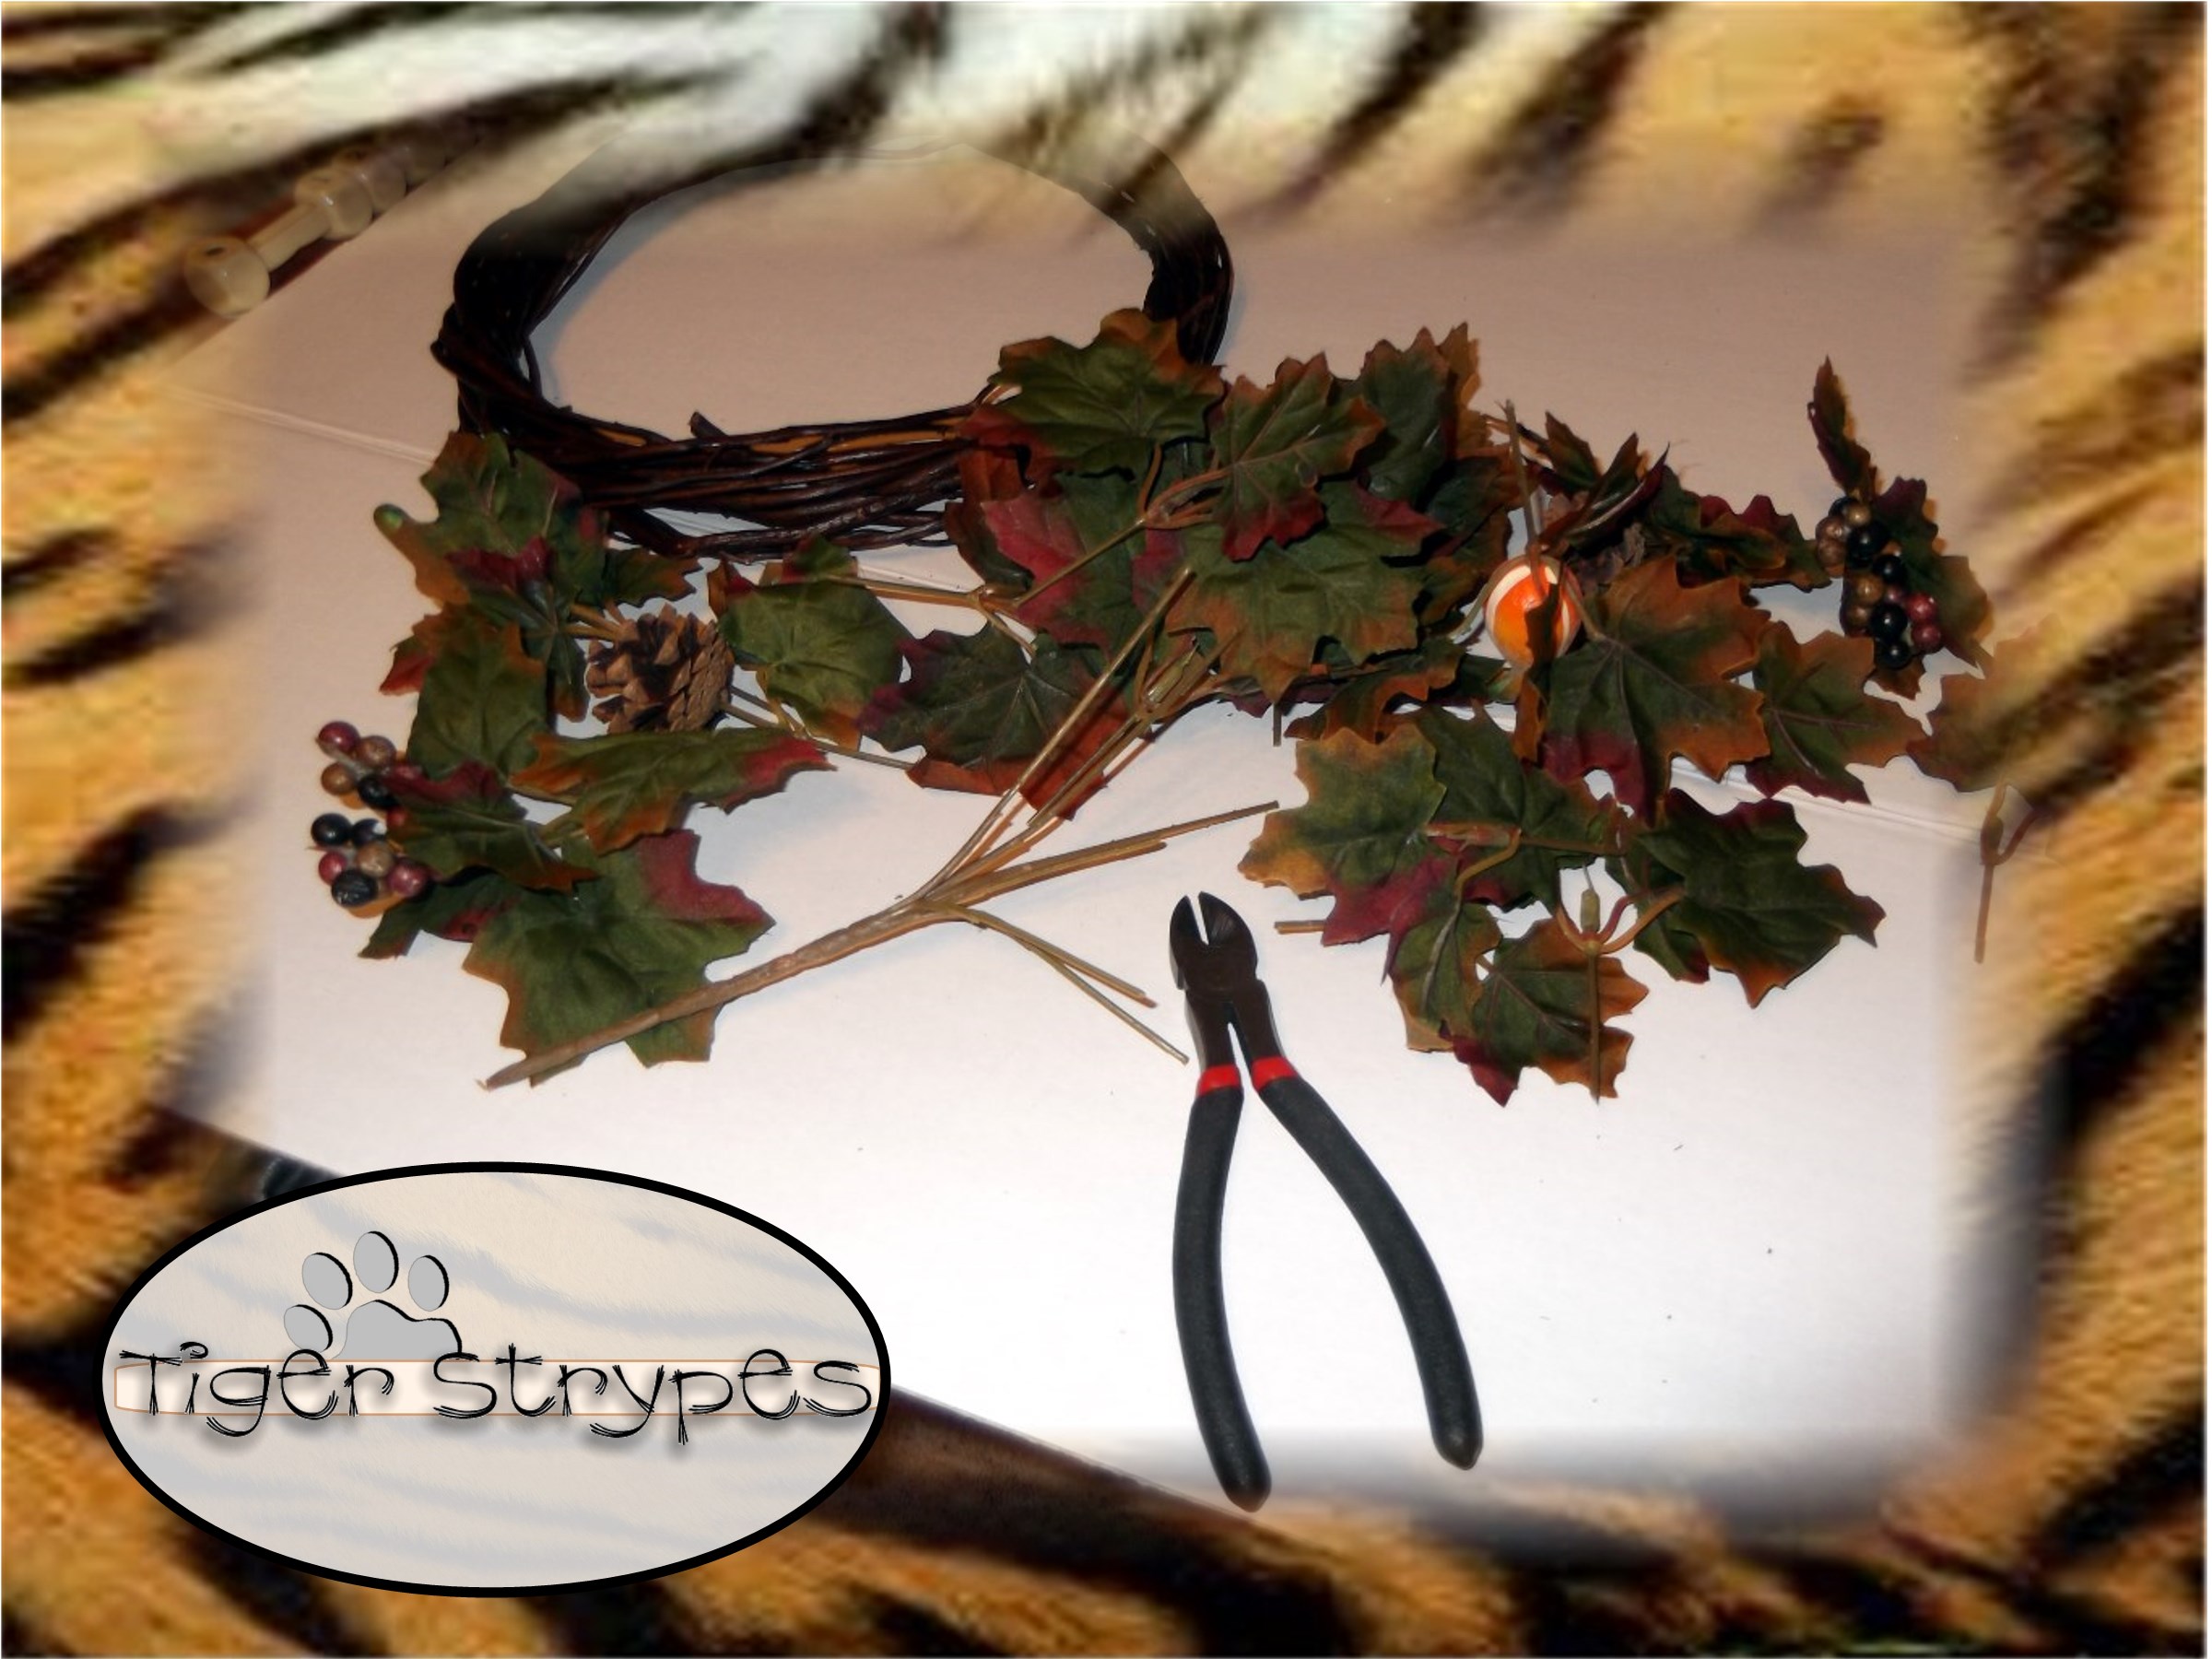
Materials/Tools Used:
- Pre-Made Wreath
- Faux Foliage
- Faux Apples (Small)
- Floral Wire
- Scissors
- & Time!
Instructions:
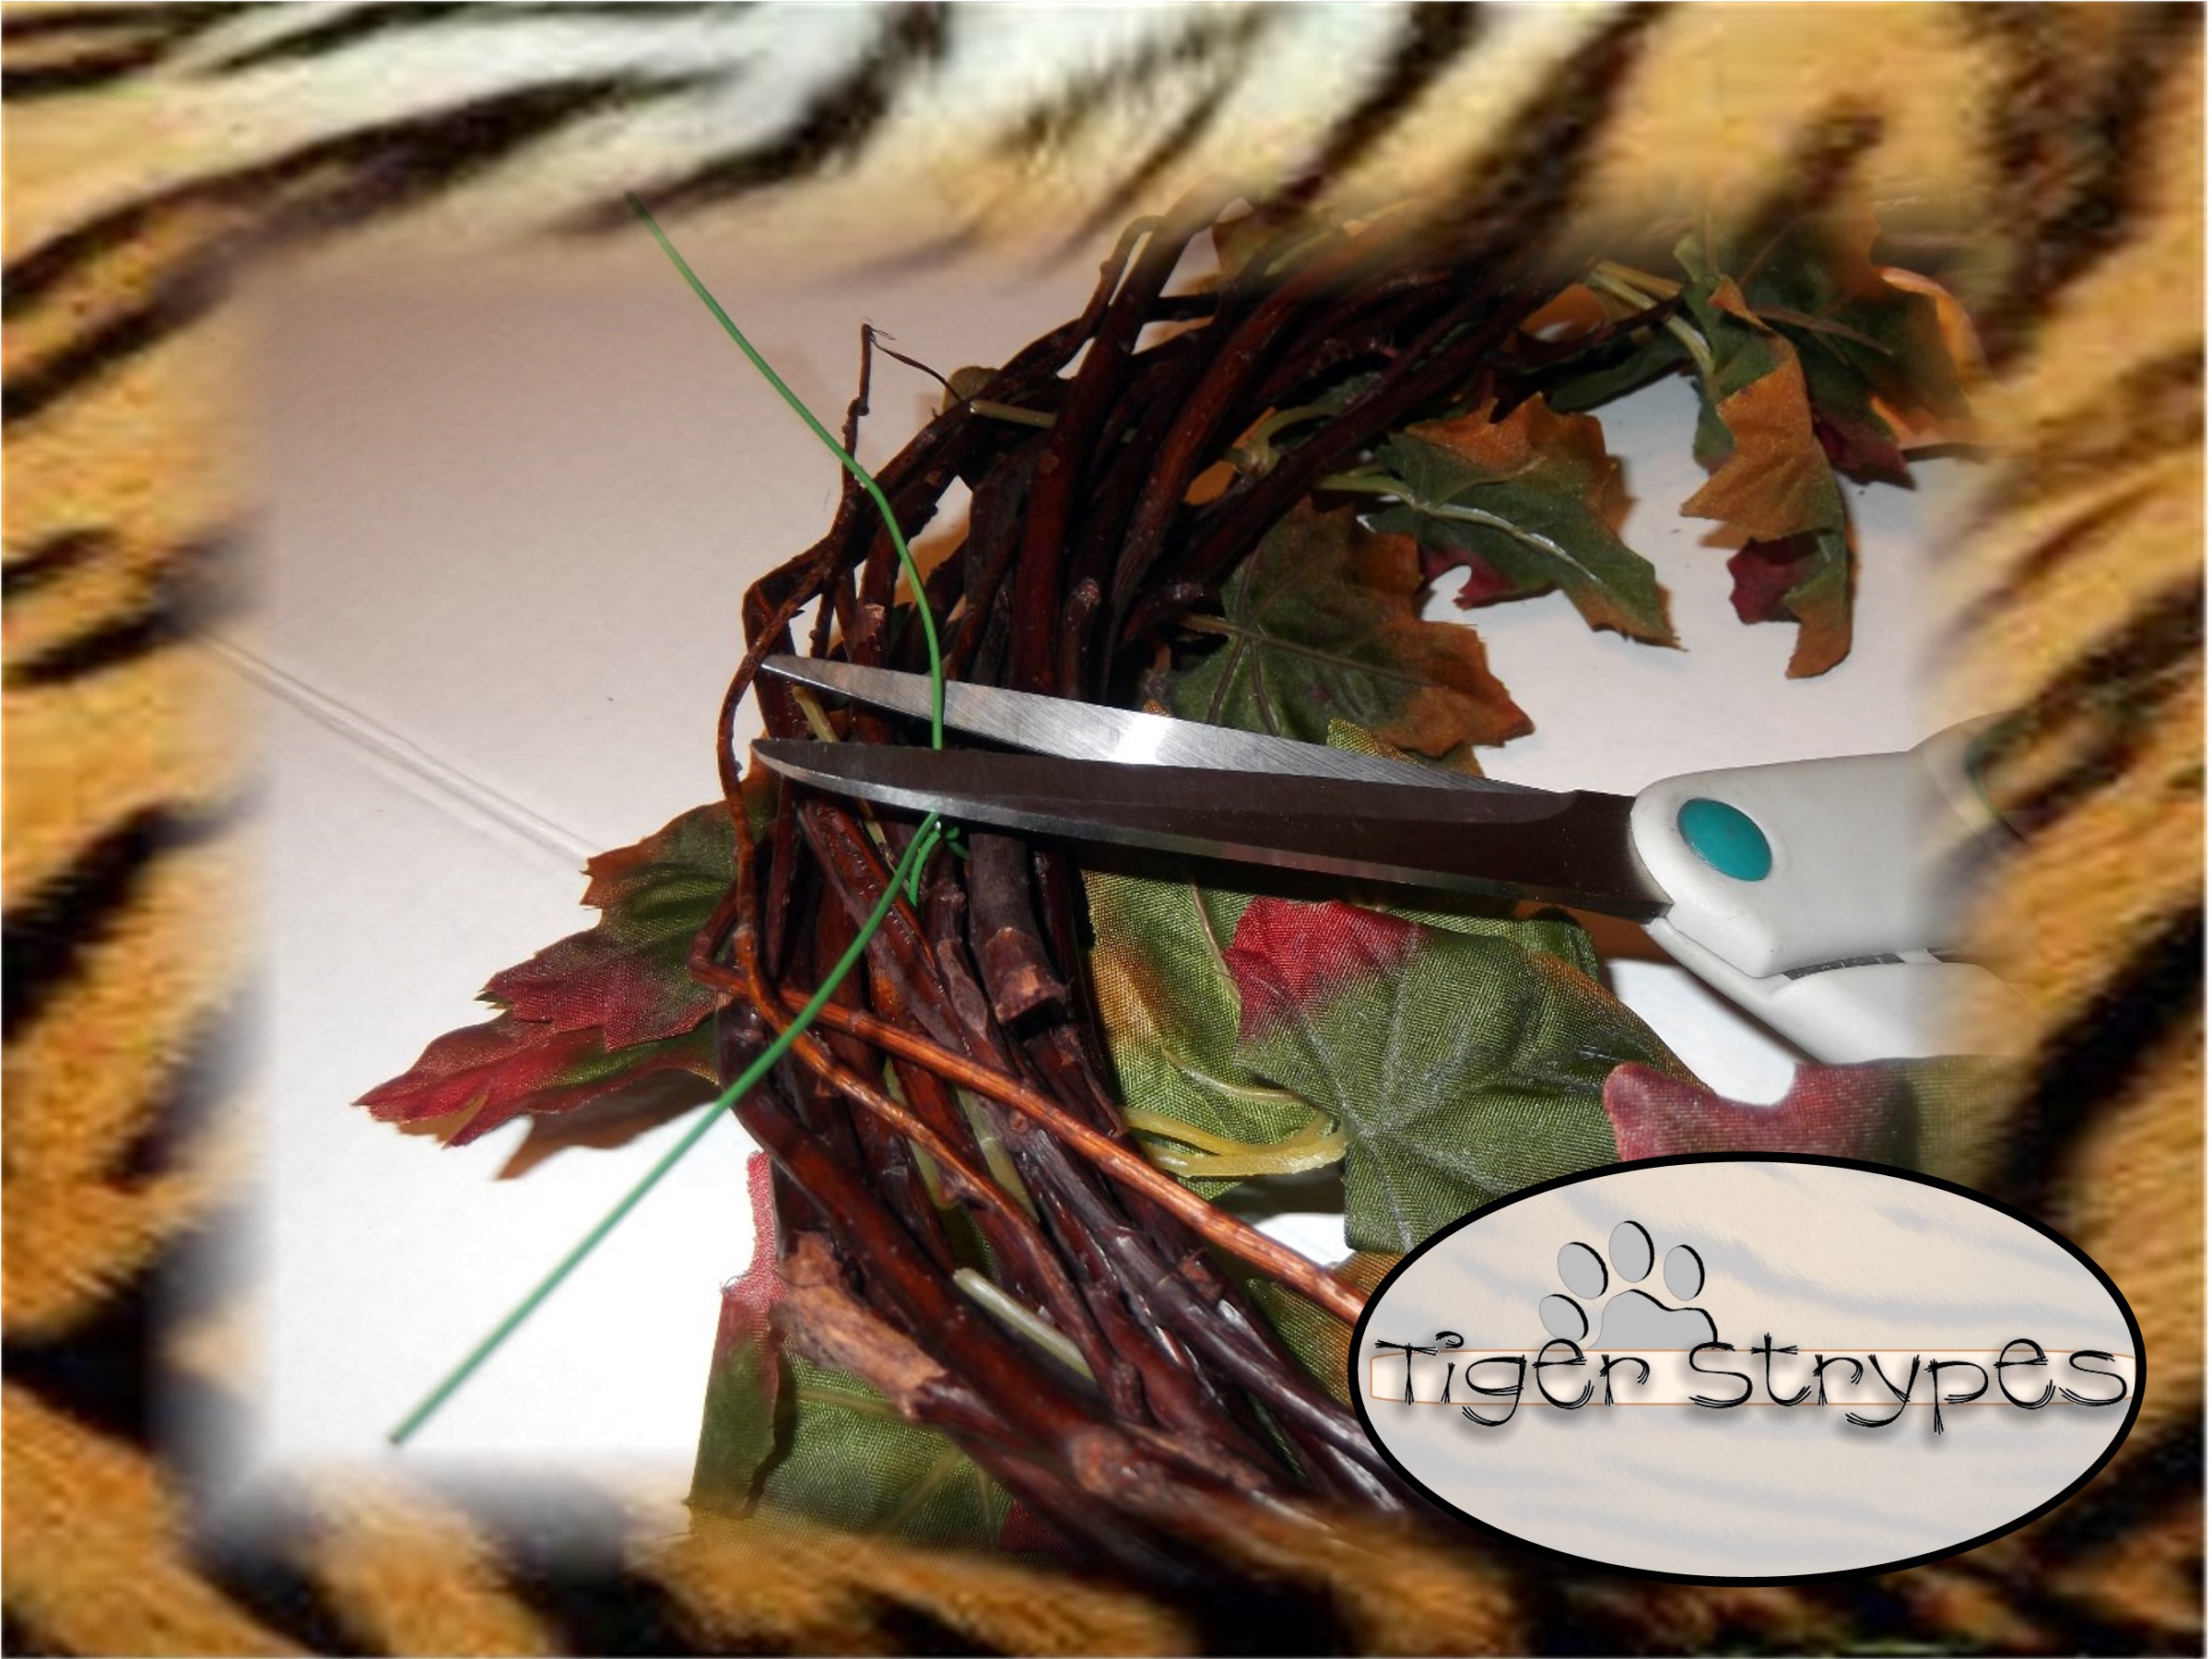
Start by using some wire clippers to cut the floral pieces apart, being sure to keep the ends somewhat short, since you’ll have to insert these into the wreath and don’t want a lot hanging out, etc.
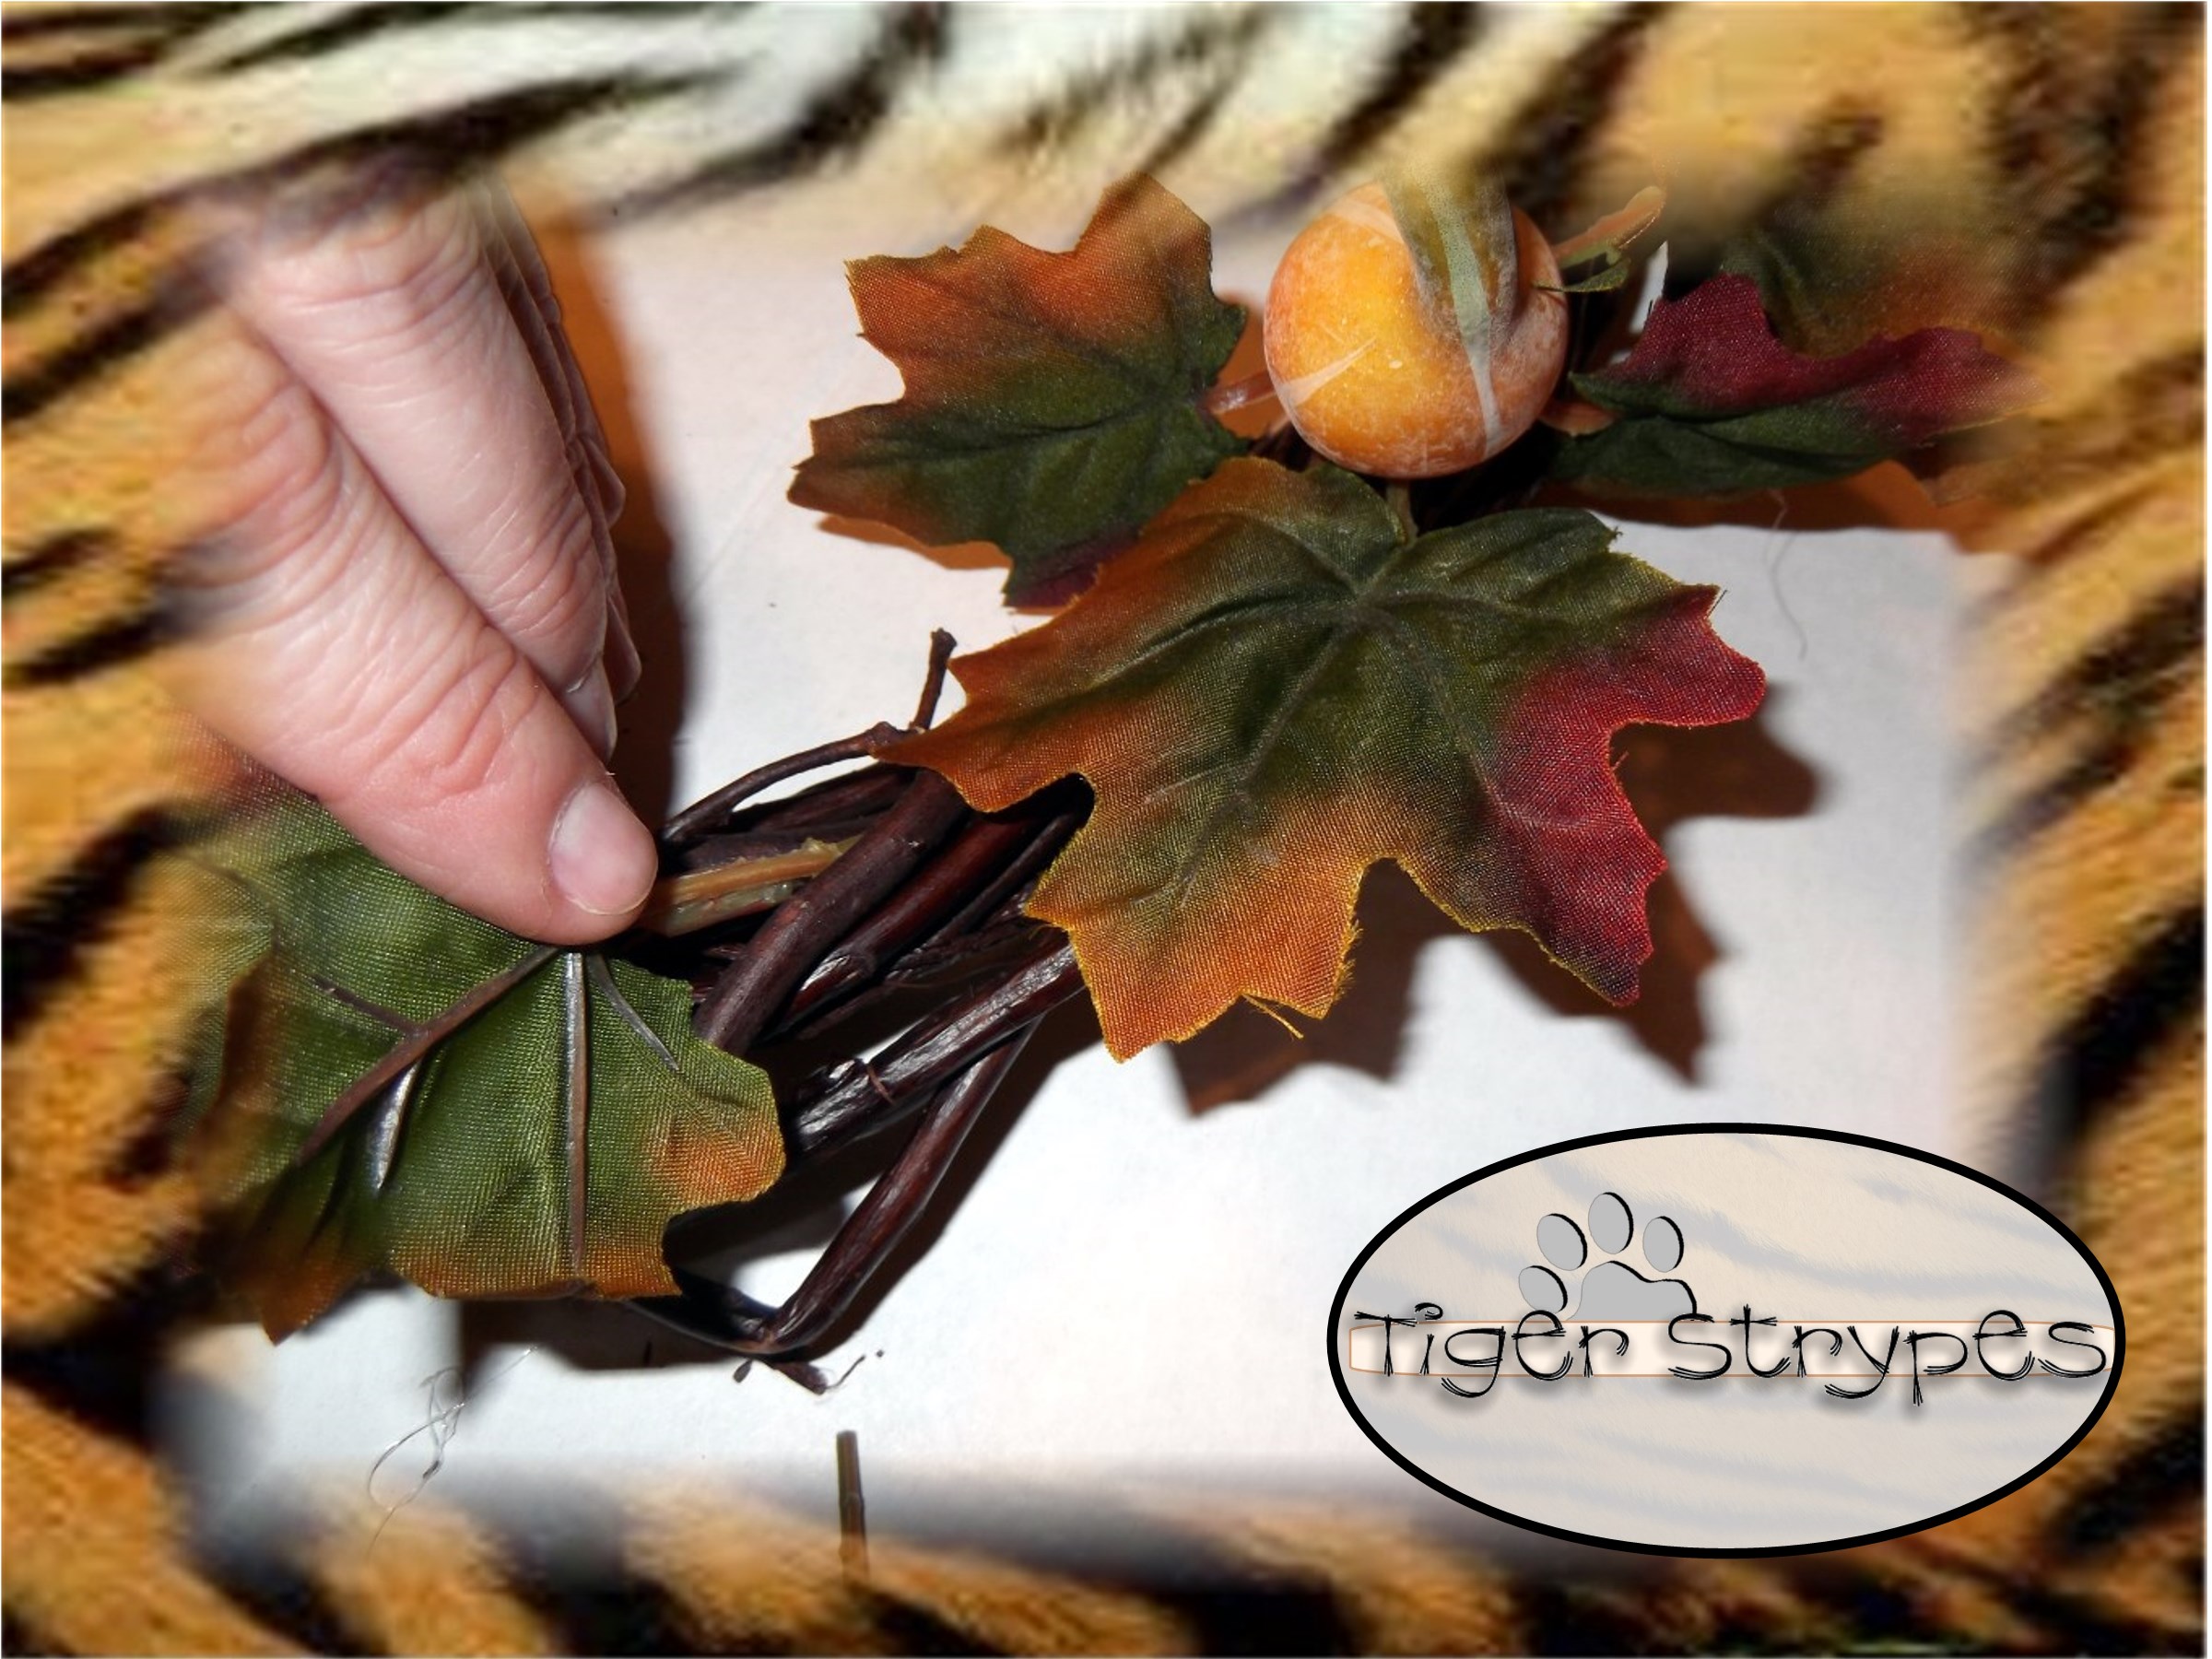
When you have as many pieces cut, that you will need (I used about 3 full floral pieces), you can then start inserting them into the wreath. Just space them as you wish and be sure to intertwine the ends, to hide them.
Next, to attach your faux fruit, insert a small piece of floral wire through the bottom. This will be used to secure it onto the wreath and secure them, so they don’t fall off, or if you’re hanging it outside, the birds can’t take it, if they think that they are real.

When you have the wire inserted, just bend the ends down toward each other. Then find a place on the wreath that you wish to attach it and slide the ends of the wire through the branches.
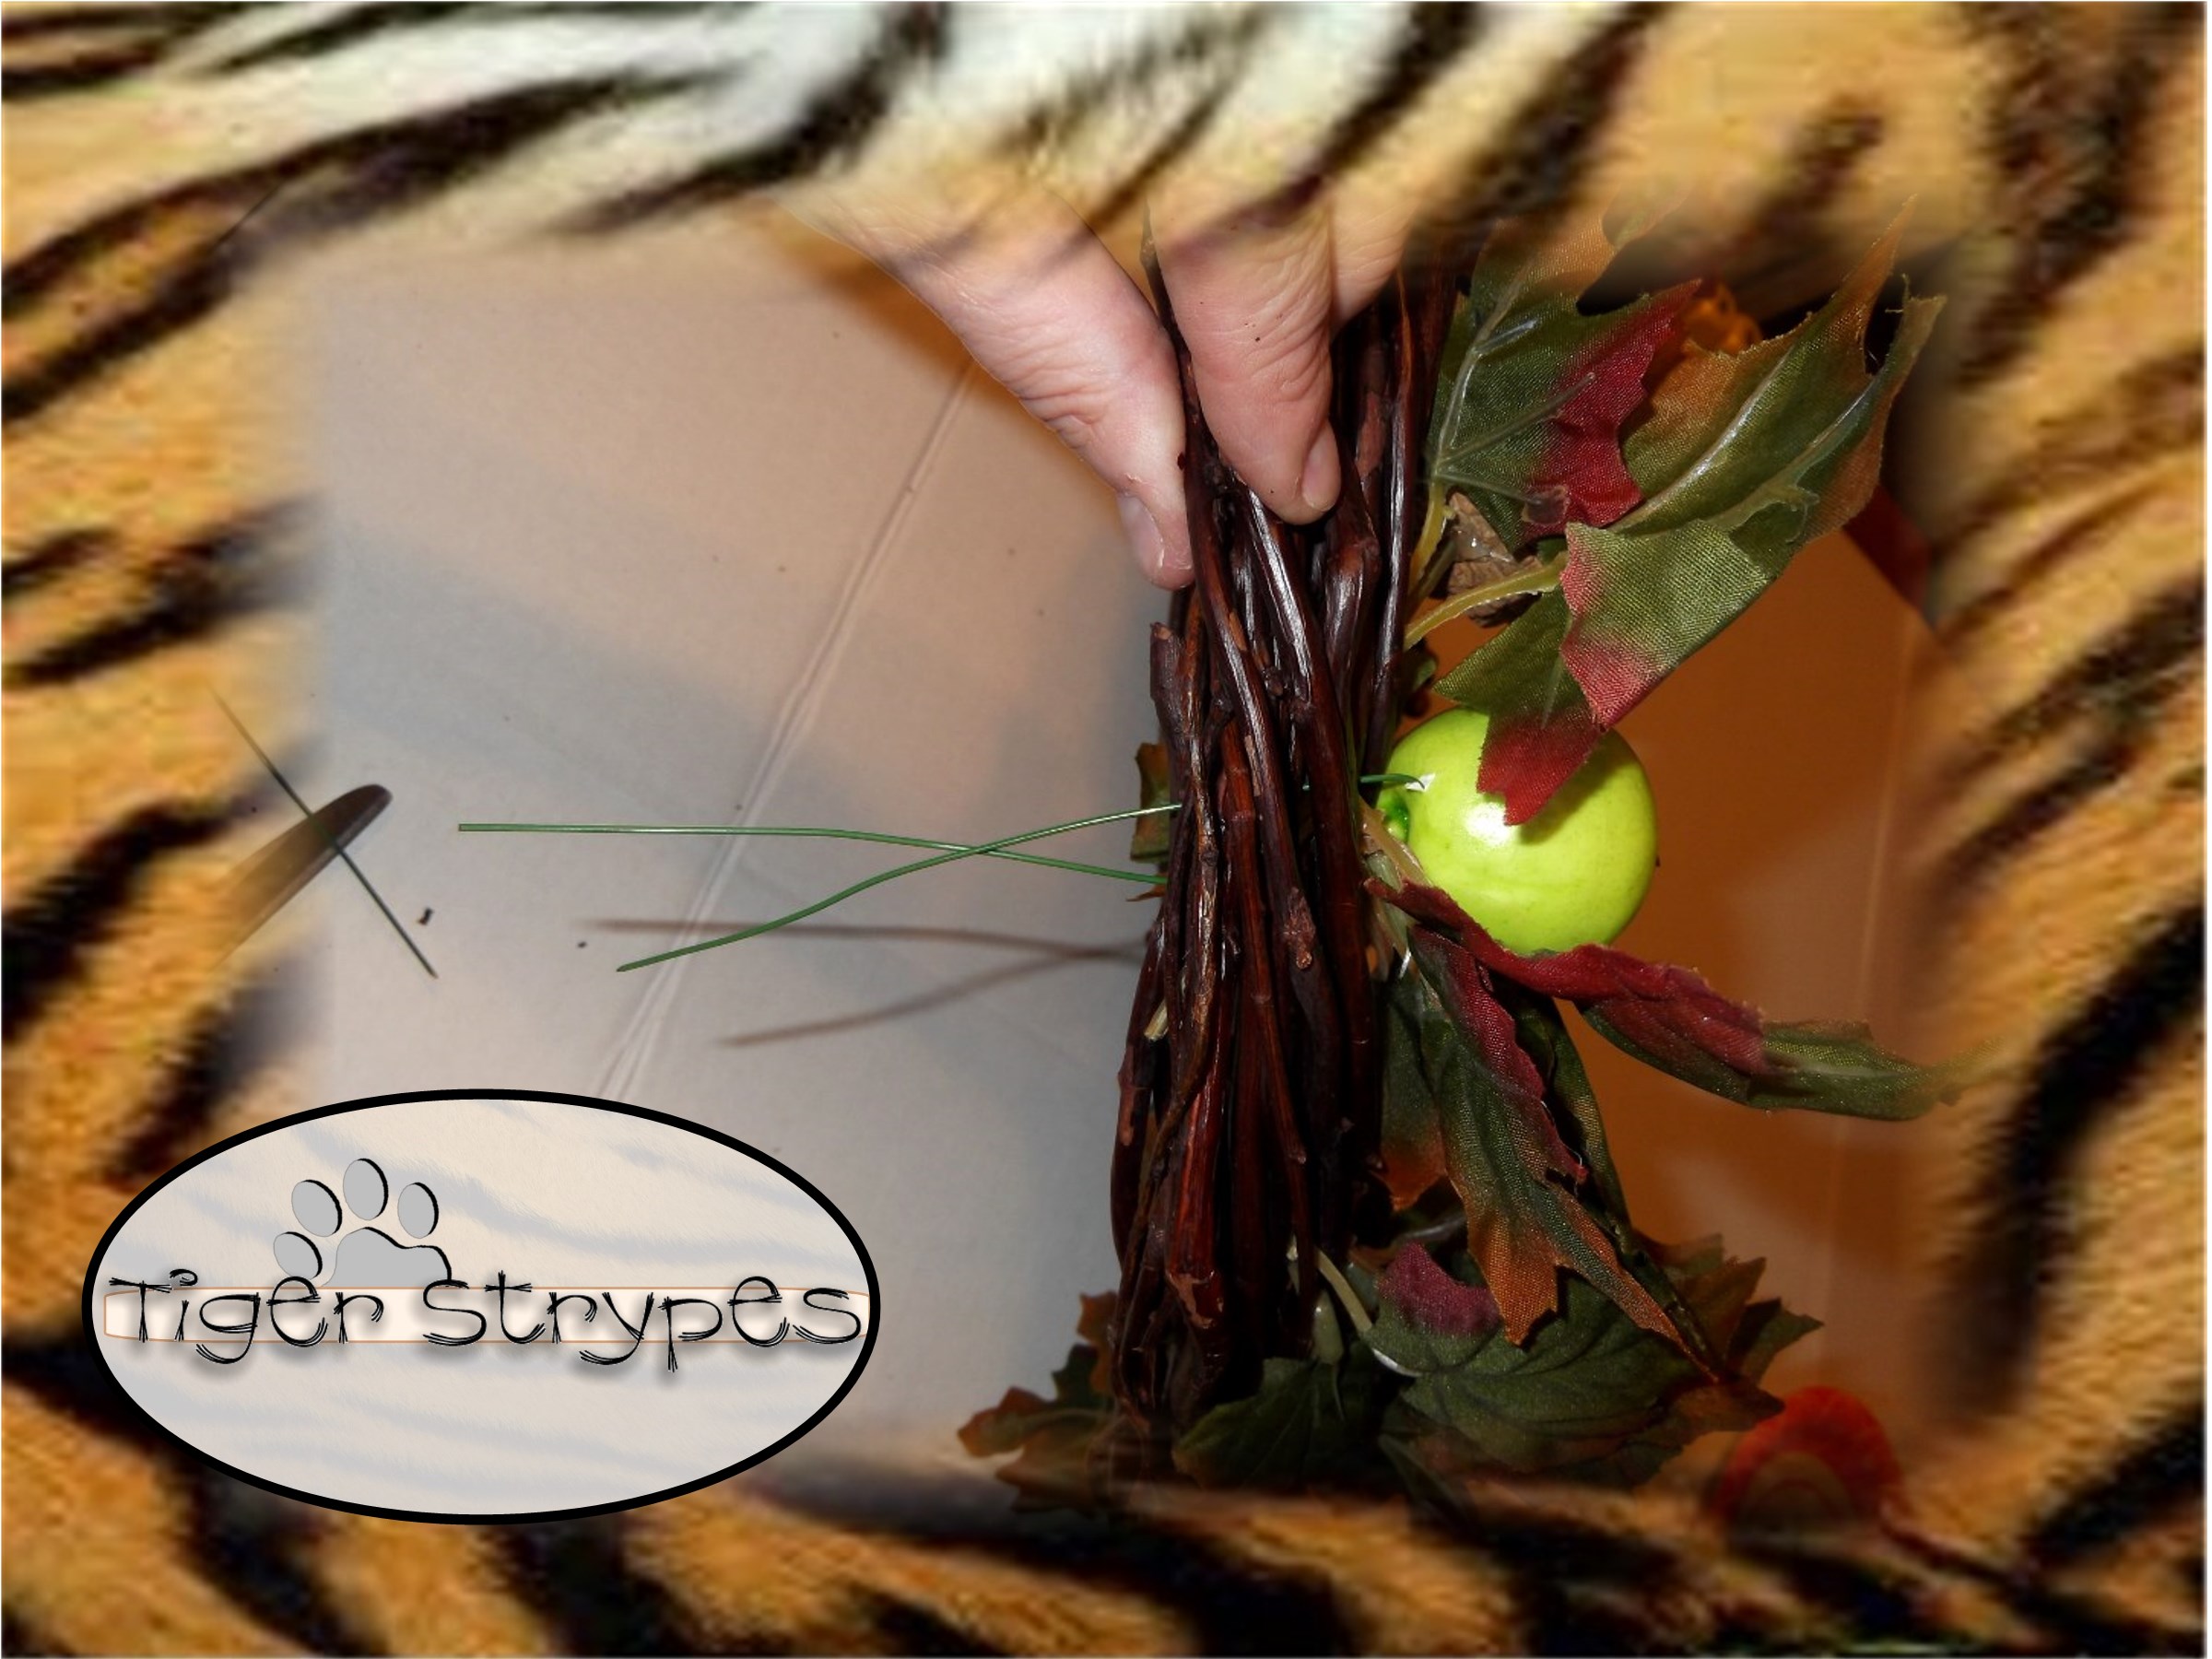
Be sure to have each wire in different areas, so that when you twist it together to tighten it, you have it secure and not just tied to itself. Then, using your fingers or pliers, twist the ends together to secure and then trim them to as close as you can. Be sure to tuck the ends into the wreath, so that there aren’t any sharp things that might hurt you.
After that, just attach another piece of wire to the back to use as a hook. Just to be sure it will secure well and stay up wherever you hang it. Now, just put it where you wish and enjoy the Fall season!
Hope you like it! Please take a minute to leave me a comment and let me know what you would do different, or what you would add, etc. Be sure to tweet, pin, share, etc. – thanks!!
“Those who depend on their wealth will fall like the leaves of autumn, but the righteous will prosper like the leaves of summer.” -Proverbs 11:28
All pictures and text are my own and have not been copied in any way. I, Jamie Tomkins, own and operate Tiger Strypes Blog located at www.TigerStrypes.com. From time to time you’ll hear about my real life experiences or creations with products and/or services from companies and individuals. Let it be known that I have no affiliation with these said companies, and have not received compensation for reviewing or using their service/product. The information that I give regarding the product/service is based off my own personal experience, I do not guarantee that your experience will be the same.
PLEASE SHARE THIS POST USING THE OPTIONS BELOW…THANKS!!
*****************************************************************************************************


That wreath is gorgeous. Even I could do that and maybe I will. The next time my daughter and I go shopping I’ll add the craft store to our list of stops. Maybe I can even get her to do one also I know she’ll love it!
Thank you Gladys – I’m sure you could make one! I love simple things that still look great. Share a photo, if you do end up making one!
Love it! I just might make one, it’s looks great Jamie = ) So Fally!
Send me a picture if you do!! 🙂
[…] How to Make A Harvest Wreath […]
This is great! I only wish I had a tree to put one on!
You can put it anywhere Dawn – I actually have it on our porch next to the door now for Fall decor. 🙂
[…] Harvest Wreath Decor […]
I love wreaths. We just moved into a new house this summer, and the wreath that came with the house is U G L Y. But my husband loves it because it has sea shells on it, and he is in the Coast Guard. So I needed some new inspiration for a fall wreath, thank you for sharing this! Stopping by from the IBA Facebook Group! 🙂
I hope you can make some changes, so that you’ll love it there.
G’day Your wreath is gorgeous! Love people who are creative!
Cheers! Joanne
#ibabloggers
Thanks Joanne!
I love wreath making. I adore the apples on yours! I will have to try adding some. thanks much for sharing!
Thanks Carolann – let me know if you make one, I’d love to see yours!! 🙂
I love that you used apples on your fall wreath. A fresh and unique idea I just may have to borrow. Thanks for the inspiration!
You’re welcome Linda – can’t wait to see what you design! 🙂
I love this so much, I think harvest decor is my favorite!!
Thank you Heidi – I agree…Fall is the best!
This wreath is beautiful and I absolutely LOVE the photography of it hanging on the tree!!! Pinning it!
Thanks Rose – I’m trying really hard to do better photography. Little by little, I guess!! 🙂