
This site contains affiliate links. Please see below for more information.
DIY Wood Burning Stencil Craft
#TigerStrypesBlog #Wood #Cricut #Craft
I’ve seen many projects online for things like this, but never have had the time to try it out. I found some pieces of wood at the dollar store, and had to buy the burning gel on their website. Some of the shopping sites do have other brands, that are less expensive, so you can just shop around until you find something that you like. It was weird to make a piece on the Cricut that was kind of backwards. We’re so used to pulling off the outer pieces, but with this craft, you use that as the stencil for painting. It was a fun way to try something new. I sure hope that you like the tutorial, and pray that you have a blessed day!
Please be sure to comment, and share this craft on your social media channels – thanks so much!!
Learn How to Make Your Own #DIY Wood Burning Stencil #Craft! Easy #DIY for the #Family! #TigerStrypesBlog - Find out more at Share on X
Materials/Tools Used:
- Wood Piece
- Wood Burning Gel
- Cricut
- Adhesive Vinyl
- Foam Brush or Sponge
- Heat Gun
- & Time!
Instructions for the DIY Wood Burning Stencil Craft:
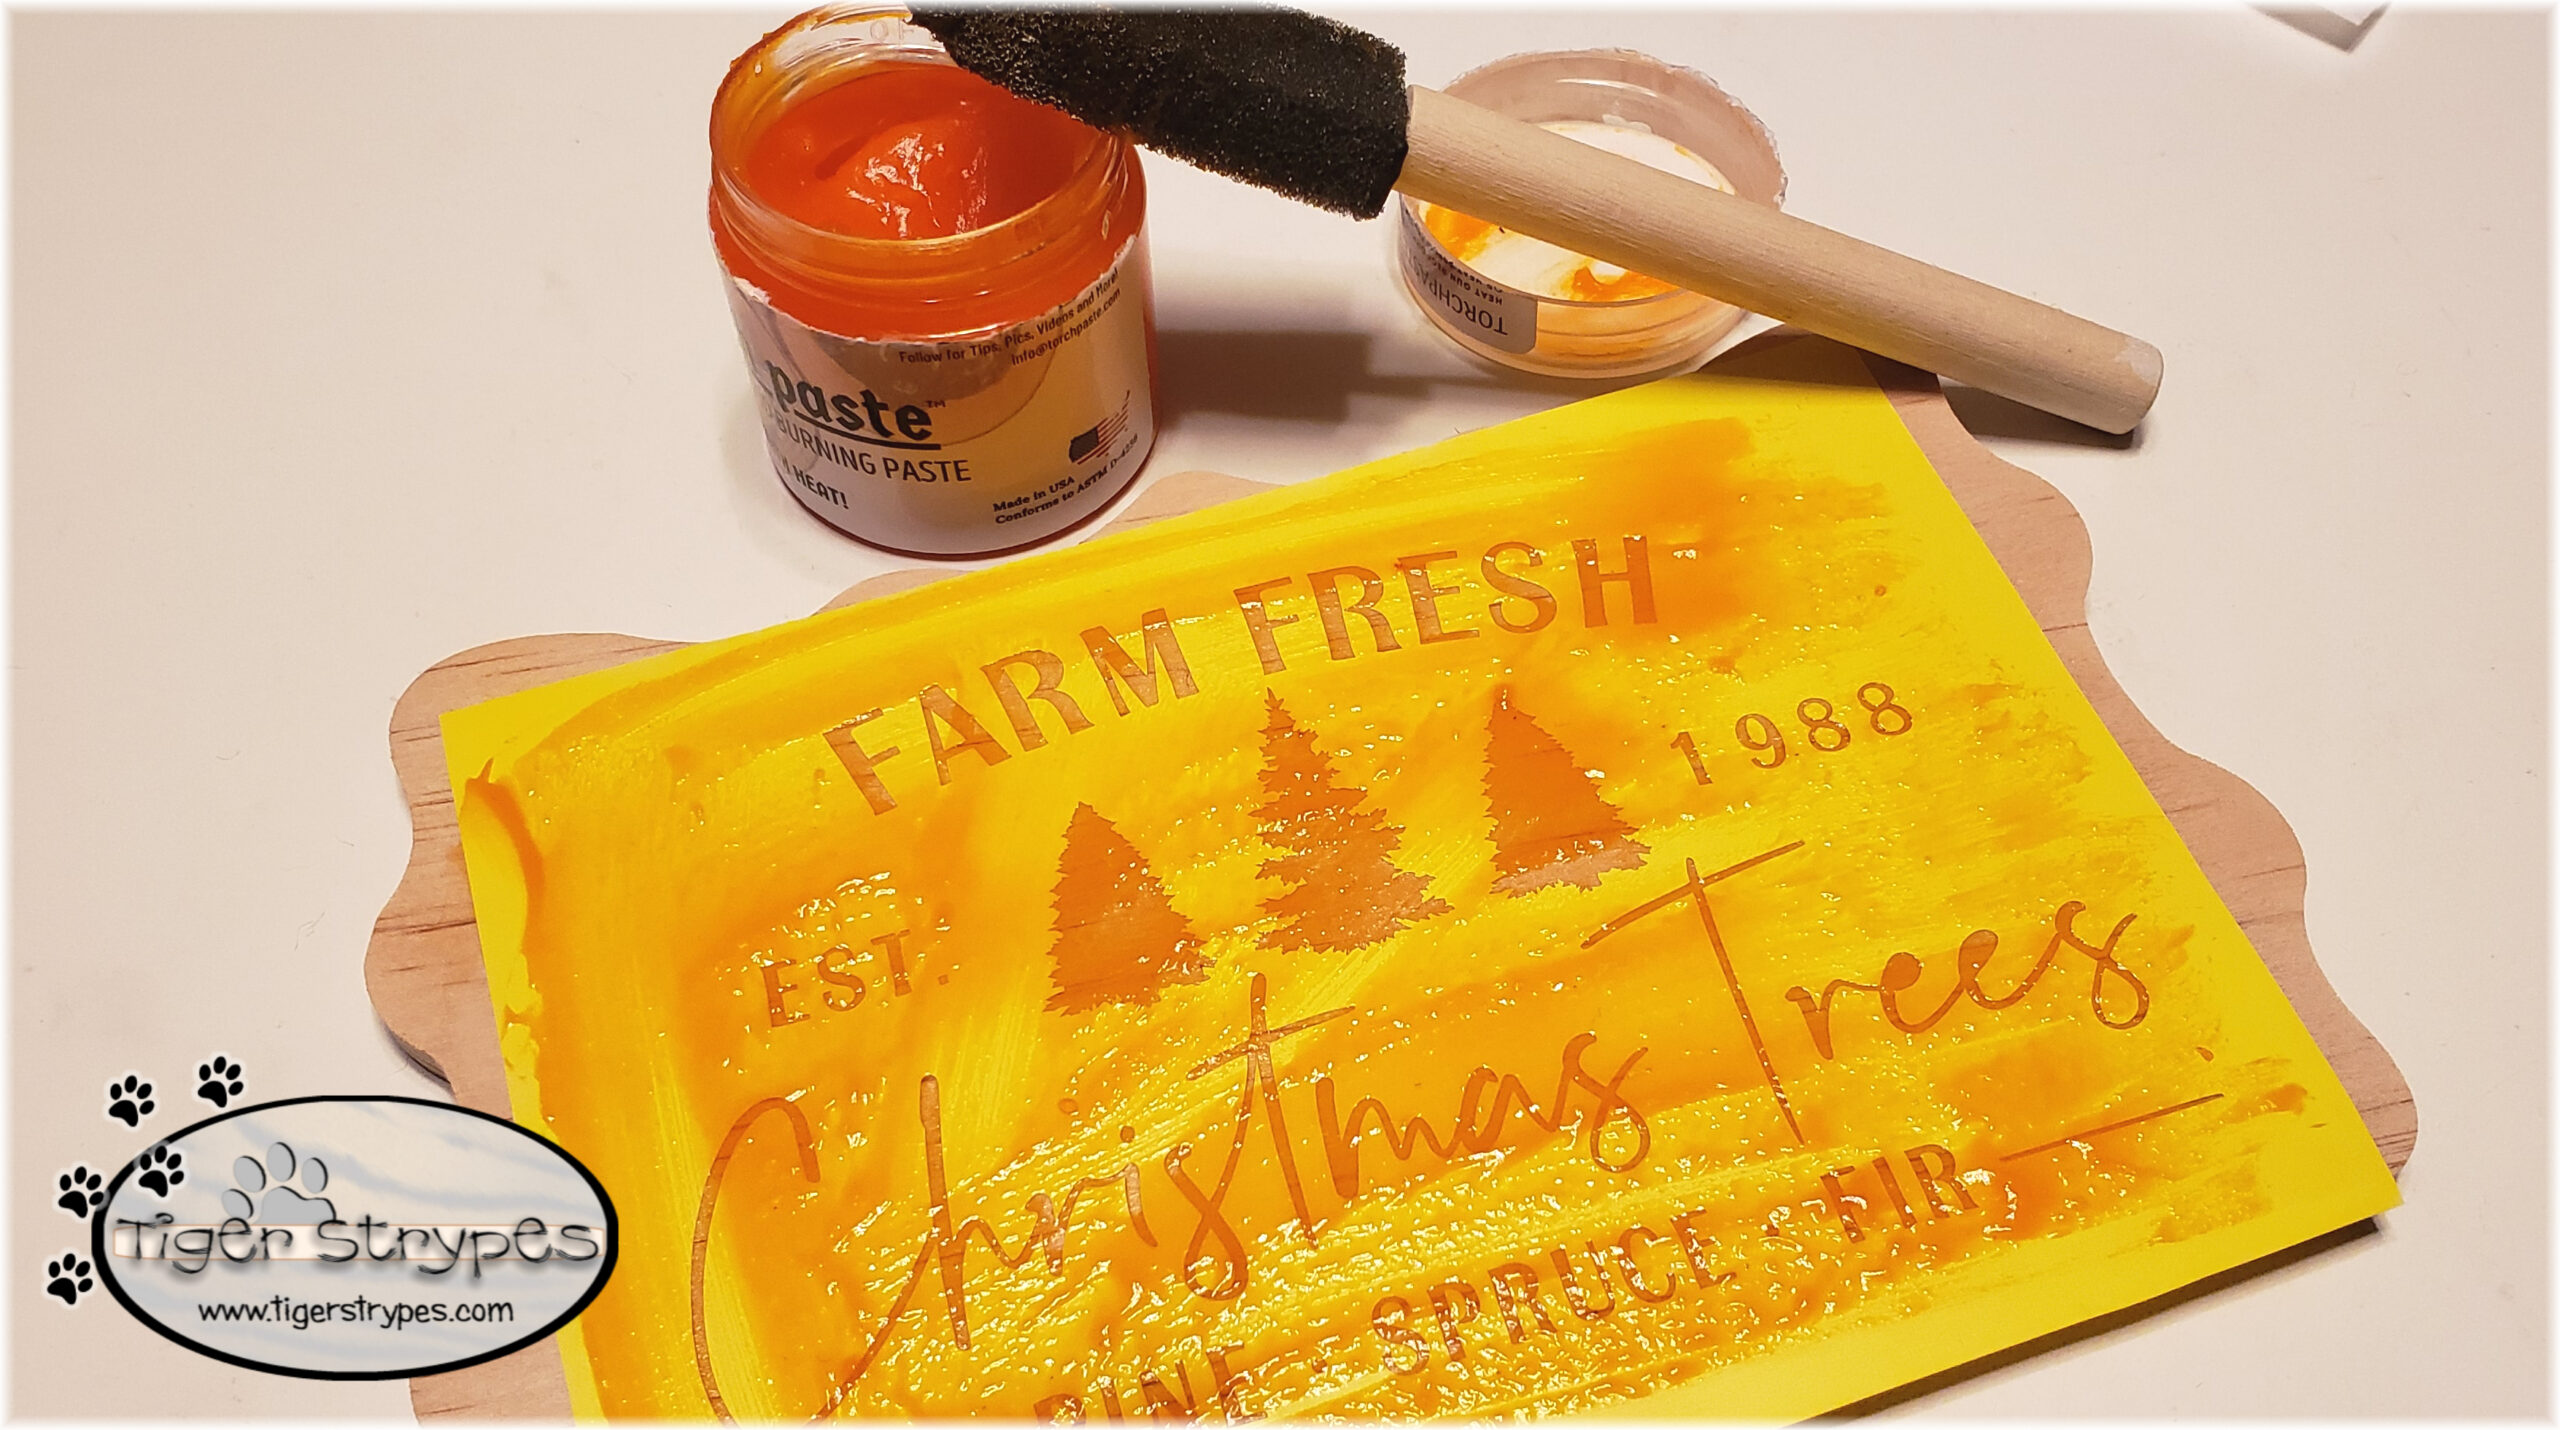
I started by creating a cut-out design on my Cricut. I had this design in my craft folder for a sign to be painted, but figured it would work for this, just as well. When you are finalizing the project after it’s cut, be sure to pull out any parts of the vinyl that you are going to want the burning gel to be and create the artwork. Using transfer tape, attach it to the piece of wood. Make sure that all of the pieces that are small, or on the inside of letters, are attached securely. Be sure to push it down tight to help with the bleeding of the gel, which you can see is something I learned after making this first one.
Once the vinyl is attached securely, you can use a small foam brush to paint on the burning gel. You don’t need much, so use sparingly. When you have the gel painted where you need it, allow it to dry for just a short time. I think I let mine sit too long, as it was harder to heat it up. If you let it stay a bit moist, it will help in the burning process.
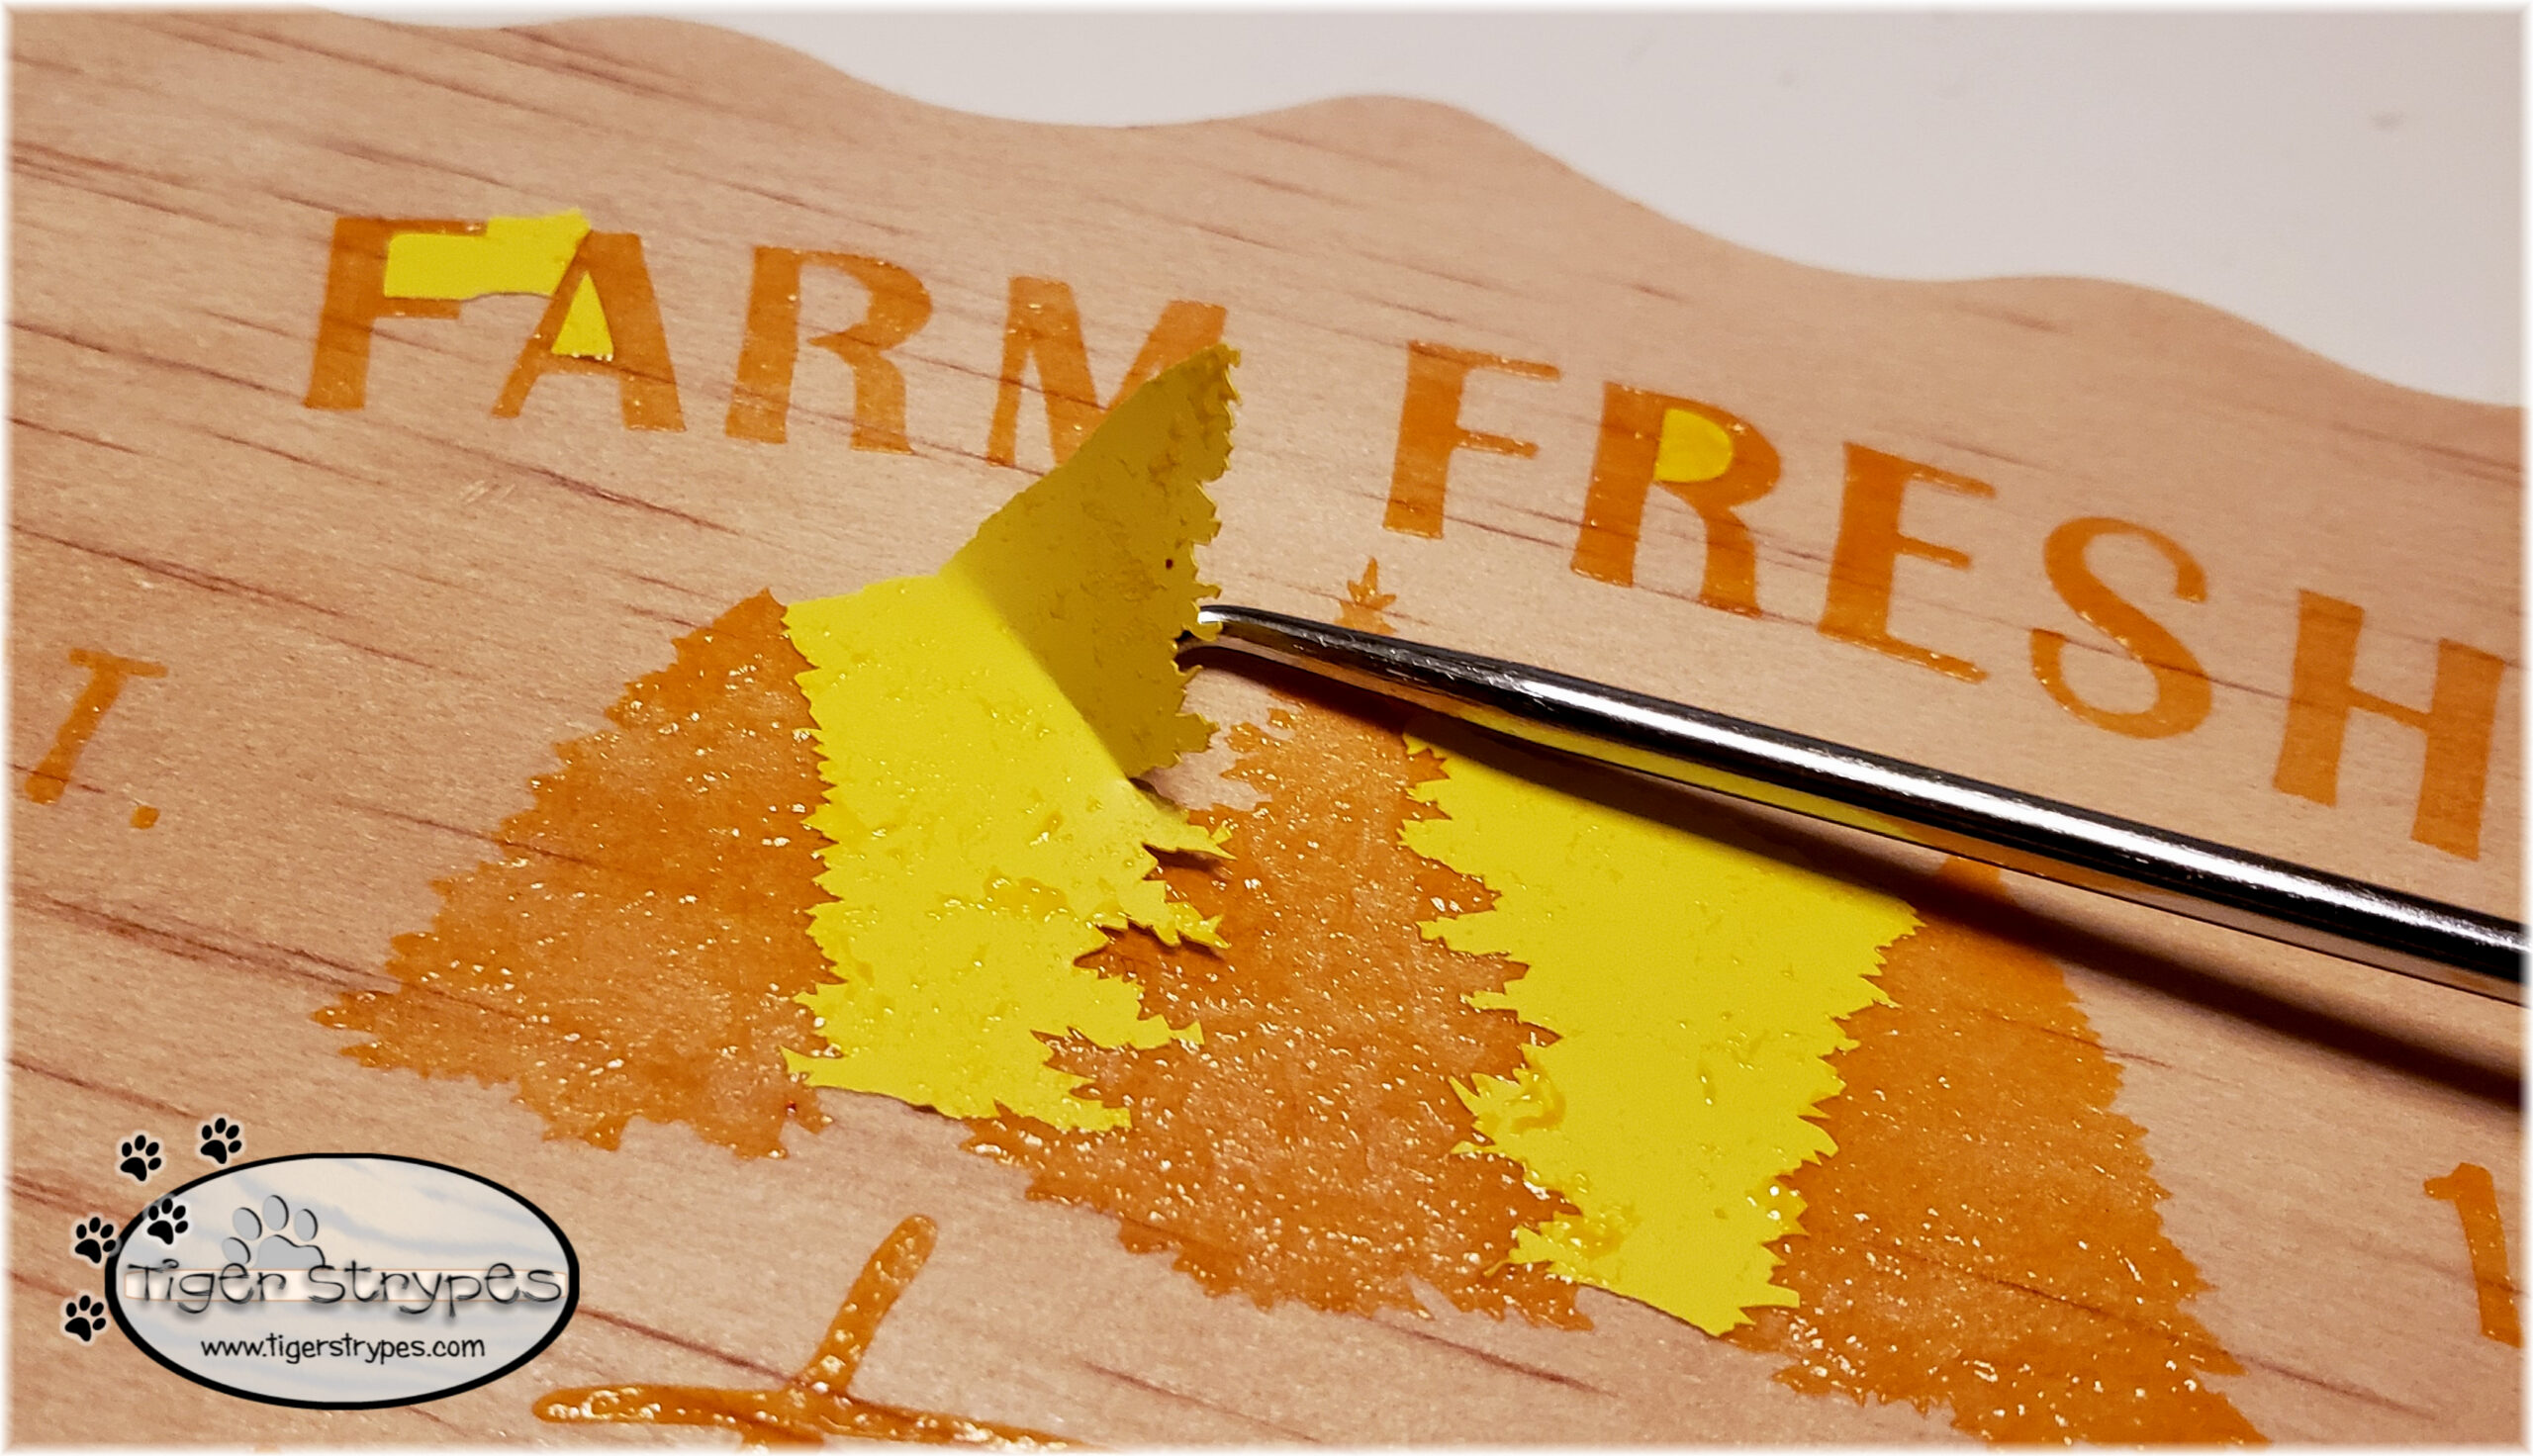
When you think that the gel is ready to be heat treated, you can start removing the vinyl. You might want to use a tool for this, or wear gloves. You really don’t want that gel on your skin. Be sure to get all of the vinyl off of the main piece, before continuing.
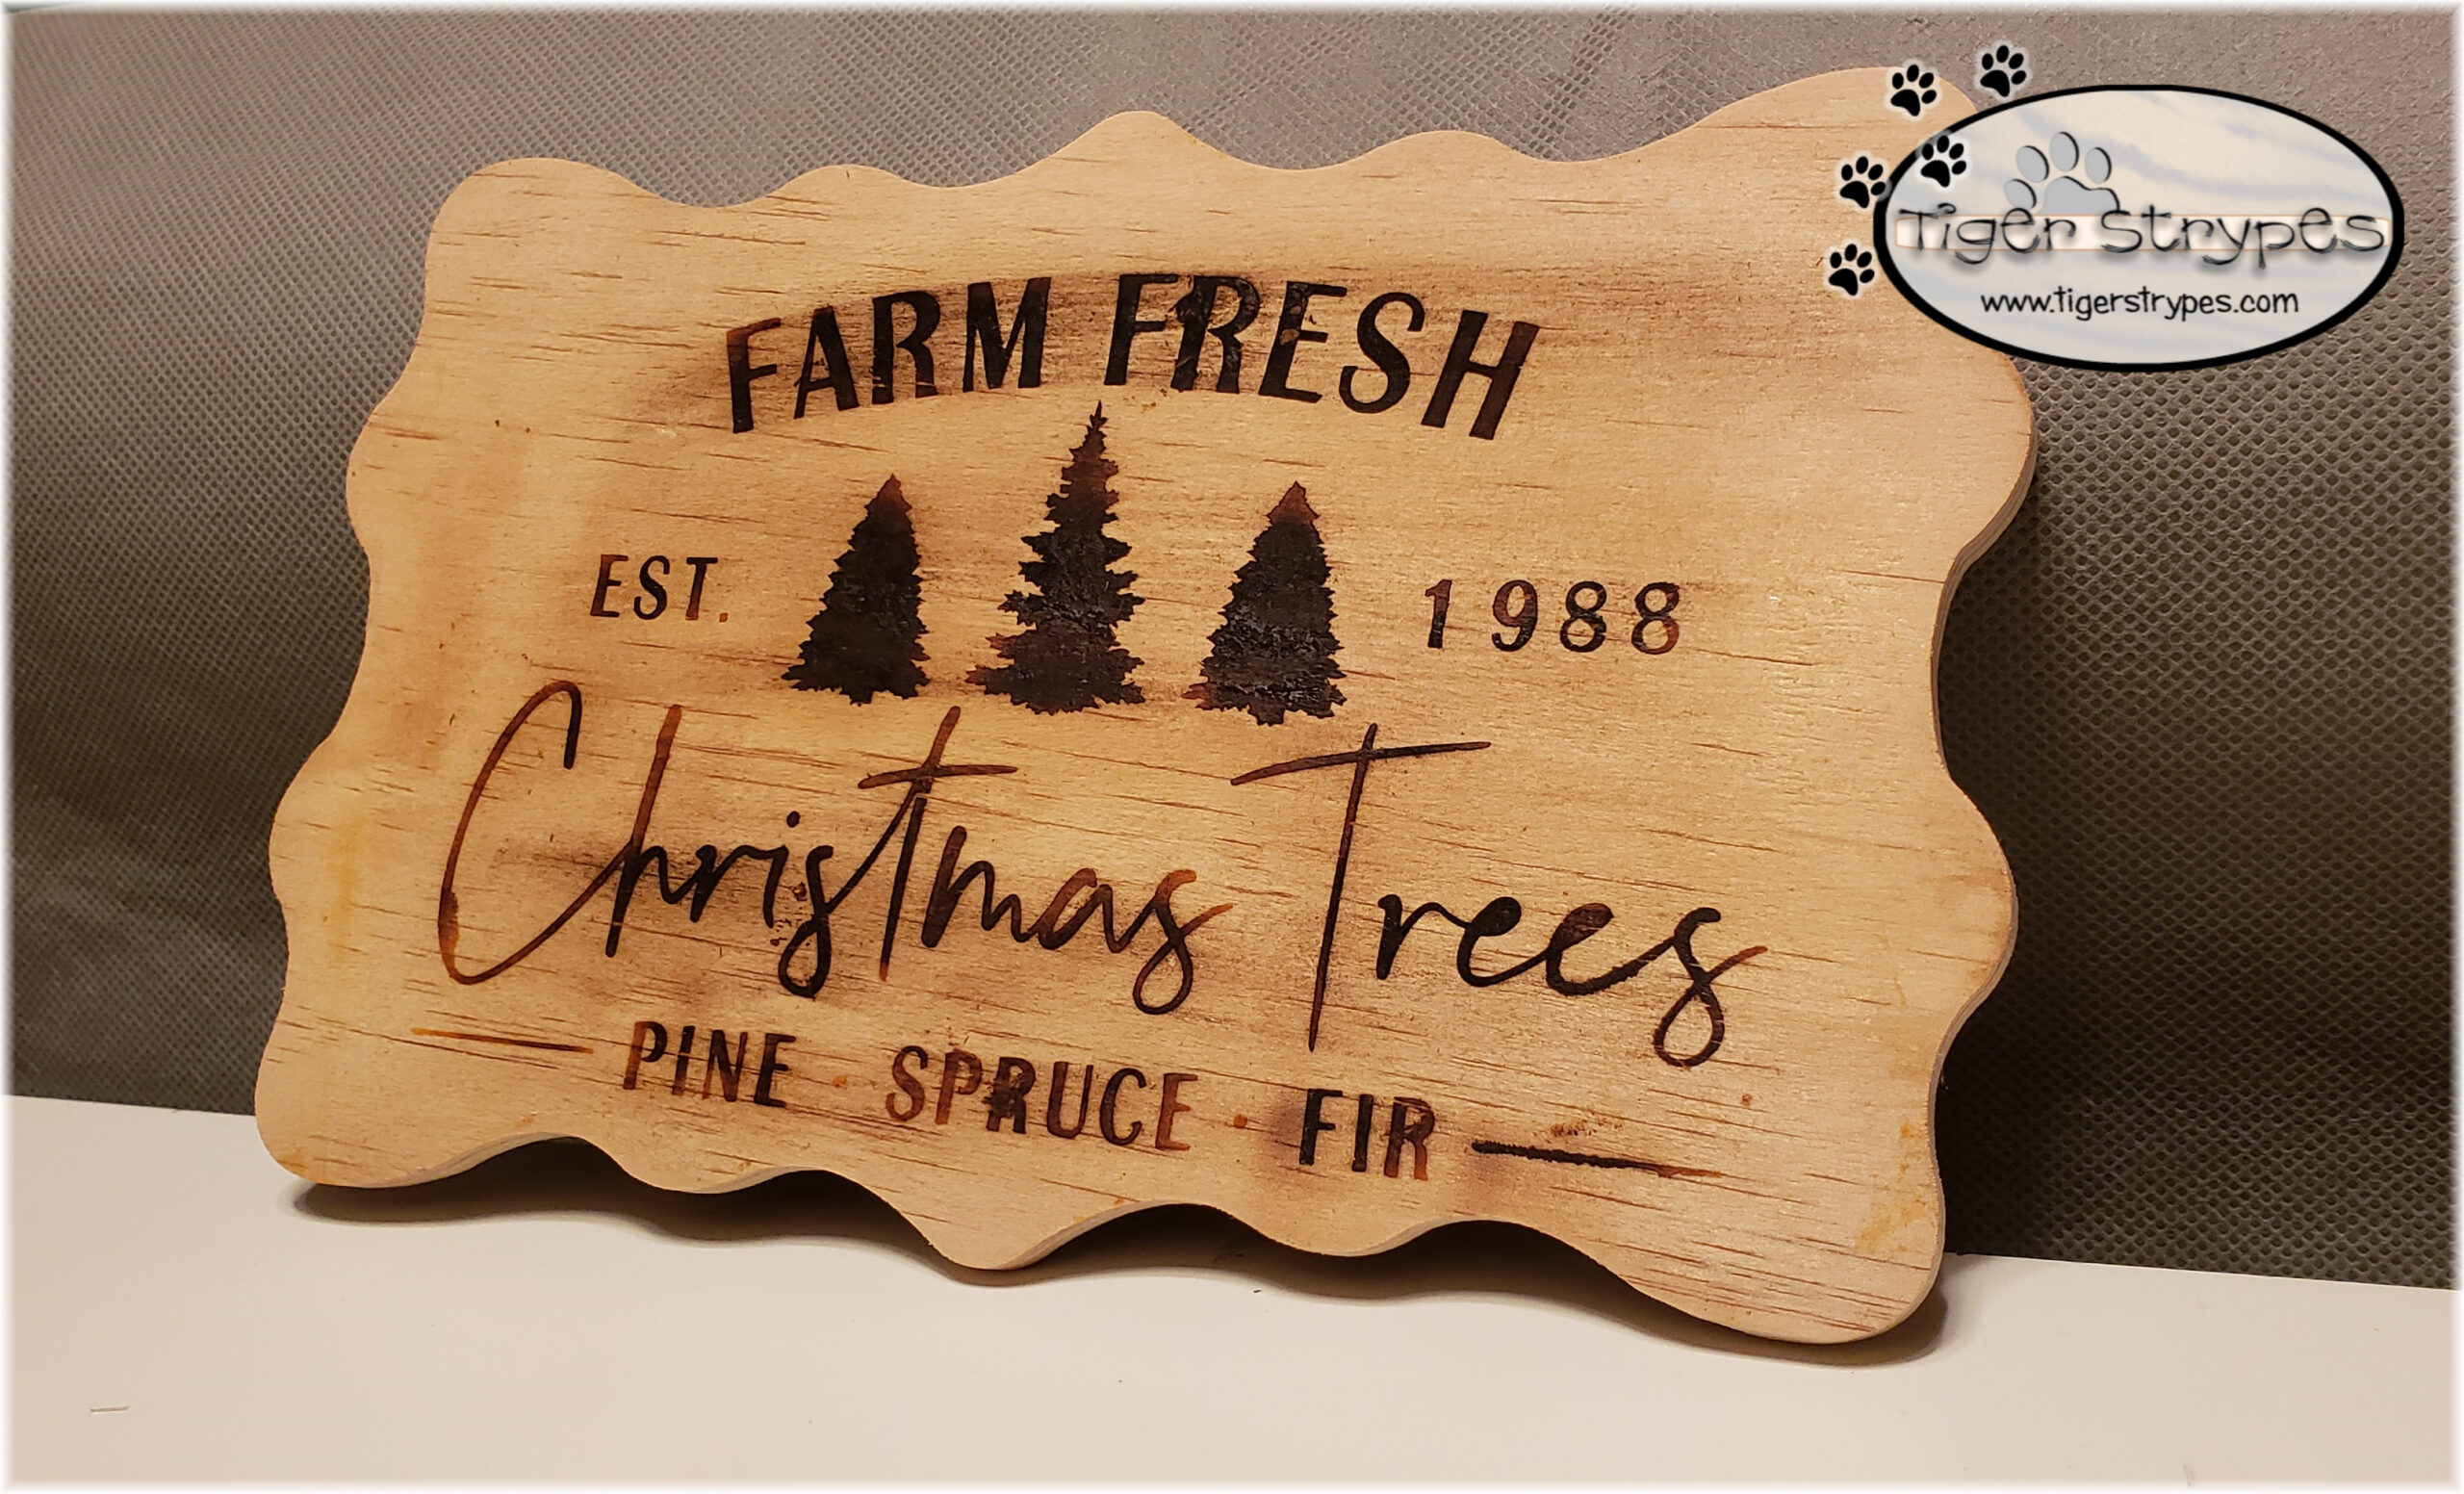
Using your heat gun (outside of course, for safety), just go over each part of the gel evenly. You’ll start to see it browning and know the time that is needed for the rest of the piece. Be careful not to let it sit too long, and also be very careful with the heat near your hands, etc. This is not a part of the craft for the little ones to help with. Once you have the design burnt, be sure to unplug your heat gun and allow it to cool completely before putting it away.

Like I said, this was my first time doing this, and I learned a lot. Being sure to time the gel product drying, and heat the piece evenly will help it to be a lot cleaner. I tried to wipe some of the burn off of the “FARM,” as you can see, and that didn’t go very well. Live and learn, right? I’ll definitely be trying out new designs, now that I feel more comfortable with the product.
There are so many great things that you can create with this technique. Great for gifts or fun home décor.
What do you think? I hope you like it! Please take a minute to leave me a comment on what you would like to create, and maybe if you have any tips on how to do it different, or better!
Be sure to tweet, pin, share, etc. – thanks!!
“If you do not remain in me, you are like a branch that is thrown away and withers; such branches are picked up, thrown into the fire and burned.”–John 15:6
 PLEASE SHARE THIS POST USING THE OPTIONS BELOW…THANKS!
Affiliate links for Amazon are used on my site. This means that when you click on a link, and make a purchase, I earn a commission for that purchase. There is no extra charge for you, it’s just their sites way of saying thank you for helping them get a customer. I use affiliate links to help fund my crafting budget, as well as help provide for our home.
How cool! I’ve never tried using burning gel but I love the effect. Great idea to re-purpose your stencil!
I was just worried about using a torch, so this turned out to be a lot easier. Just using a craft heat gun makes me feel a lot better! 😉 It was fun, too.
You are so talented! I tried a wood burning tool once and could do some of the solid lines, but I couldn’t get the curved letters well. I didn’t realize that you could use a stencil like this. Such a great idea! I can’t wait to see what you make next!
Thank you Daisy – I always see projects online and figure, “hey, I can try that!” Sometimes it works out well, others…not so much. The little heat tool is great for this burning gel. I’d love to get one with attachments for shapes and stuff later on, when I get more comfortable. 🙂
This is super cool, it looks great. This would be a great display piece or gift!
Thanks Heidi – it turned out pretty well for my first try. Can’t wait to make more! 🙂