
This site contains affiliate links. Please see below for more information.
Make a Reversible
Scarecrow & Snowman
#DIY #Craft
With Thanksgiving here tomorrow, and Fall close to being over, I’m running a little bit late with this craft. I saw a post on HGTV awhile back, and thought that this would be fun to make. Heading for the local hardware store, I was able to find everything that I needed, and actually built the whole thing myself, with no help from the husband! It was really fun to make, and could be changed up however you wanted! Using stuff that I already had around the house, it saved me a lot of money in the end.
I hope this craft idea will help you get ready for the Fall & Winter holidays, and give you some ideas of how to decorate your home. If you make one, be sure and share a photo on my FB page, with what you come up with. I’d love to see it!
I sure hope that you like the tutorial, and pray that you have a blessed day!
Please be sure to comment, and share this craft on your social media channels – thanks so much!!
Learn How to Make a Reversible #Scarecrow & #Snowman for #Autumn #Fall & #Winter. #Craft #DIY via #TigerStrypesBlog - Find out more at Share on X

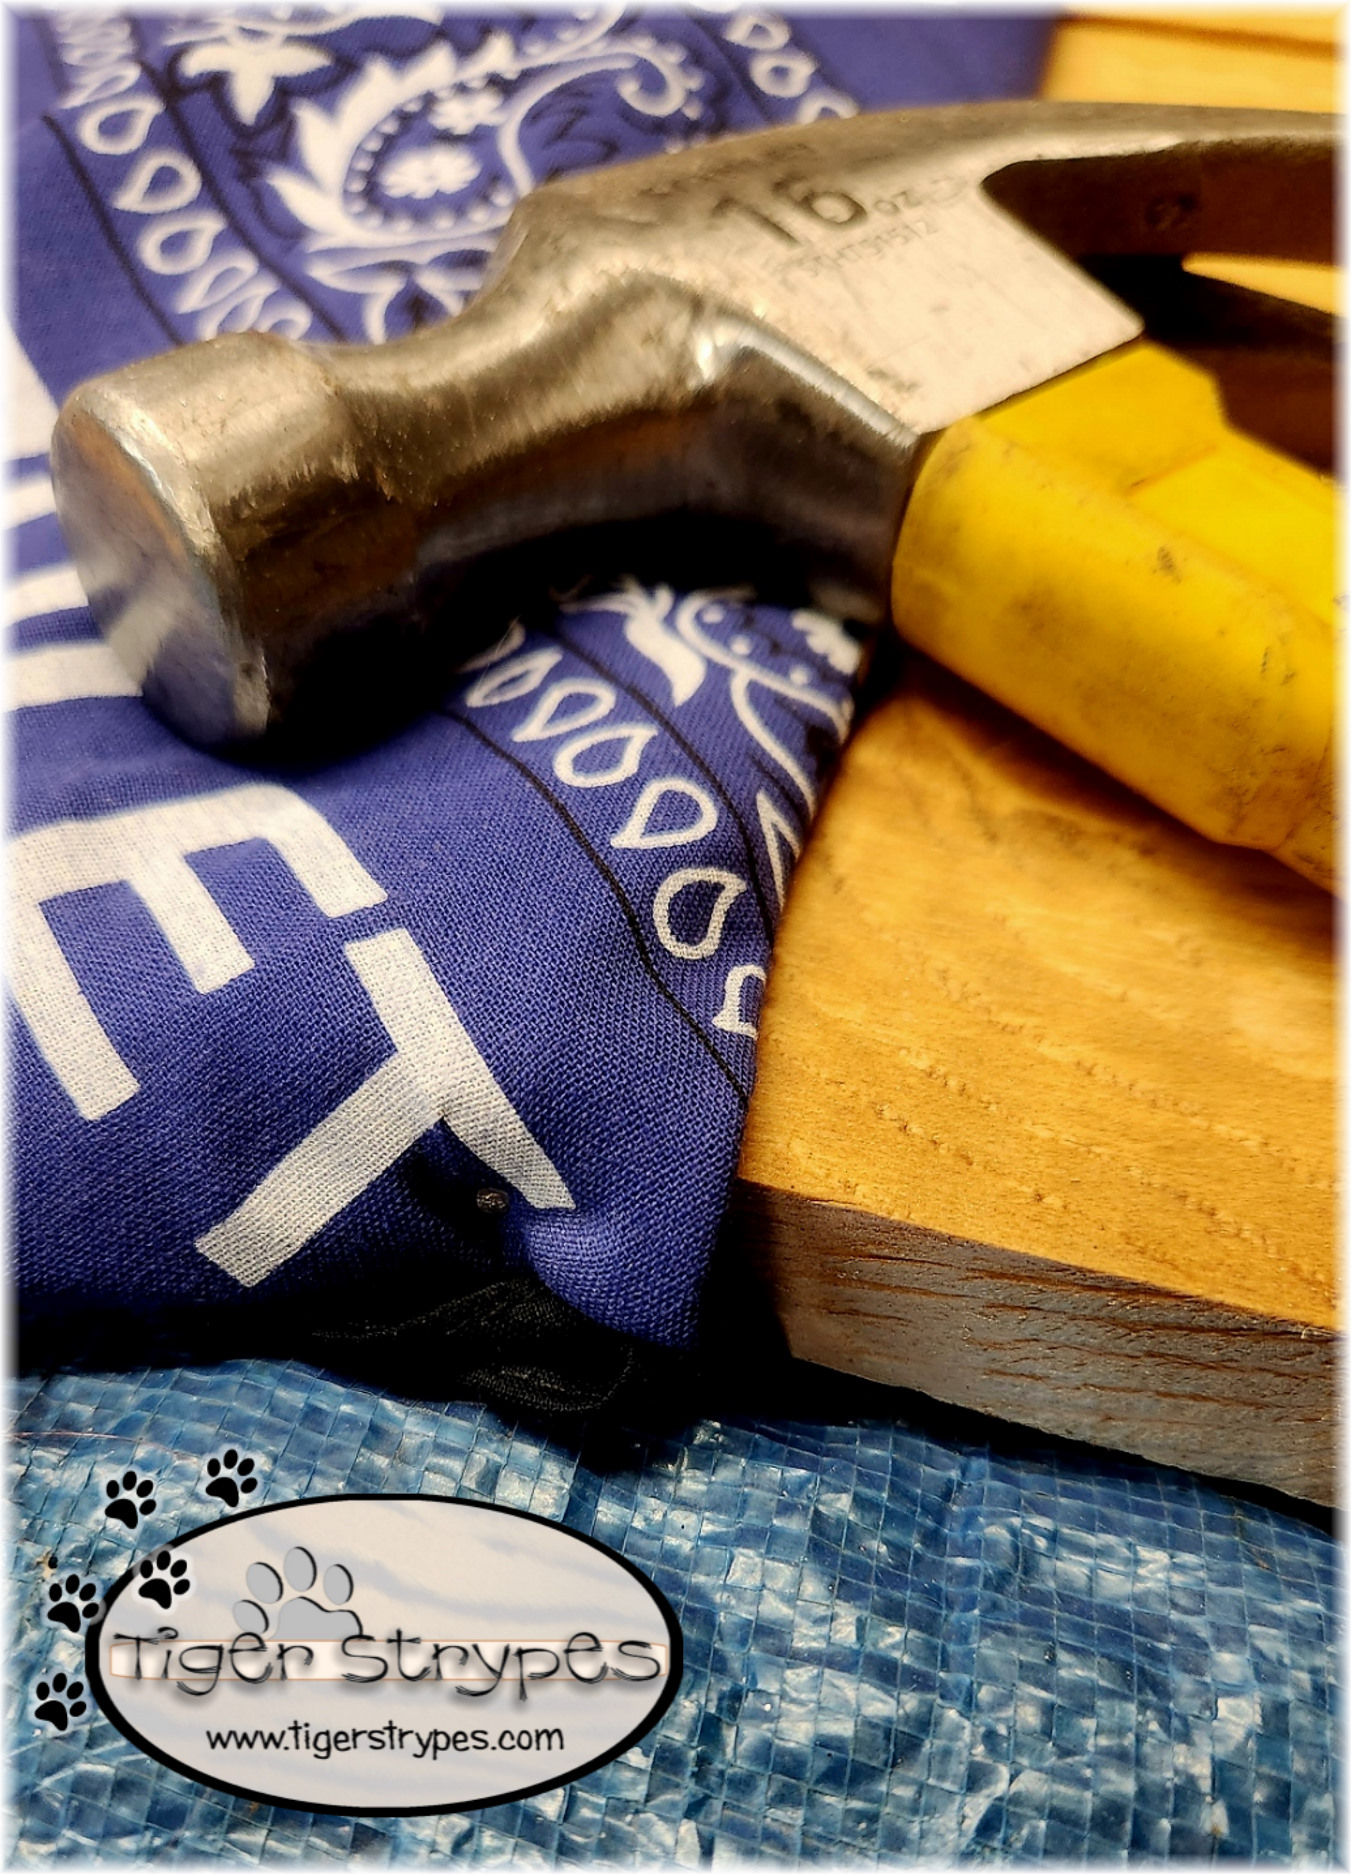
Materials/Tools Used:
- (4) 1×4 x 4’ or 5′ pine boards
- (2) 1×4 x 2’ pine boards
- Hammer
- 1.5” Nails
- Wood Stain & Cloth
- Acrylic Craft Paint & Roller or Brush
- Addt’l Décor
- & Time!
Instructions for the Reversible Scarecrow & Snowman:
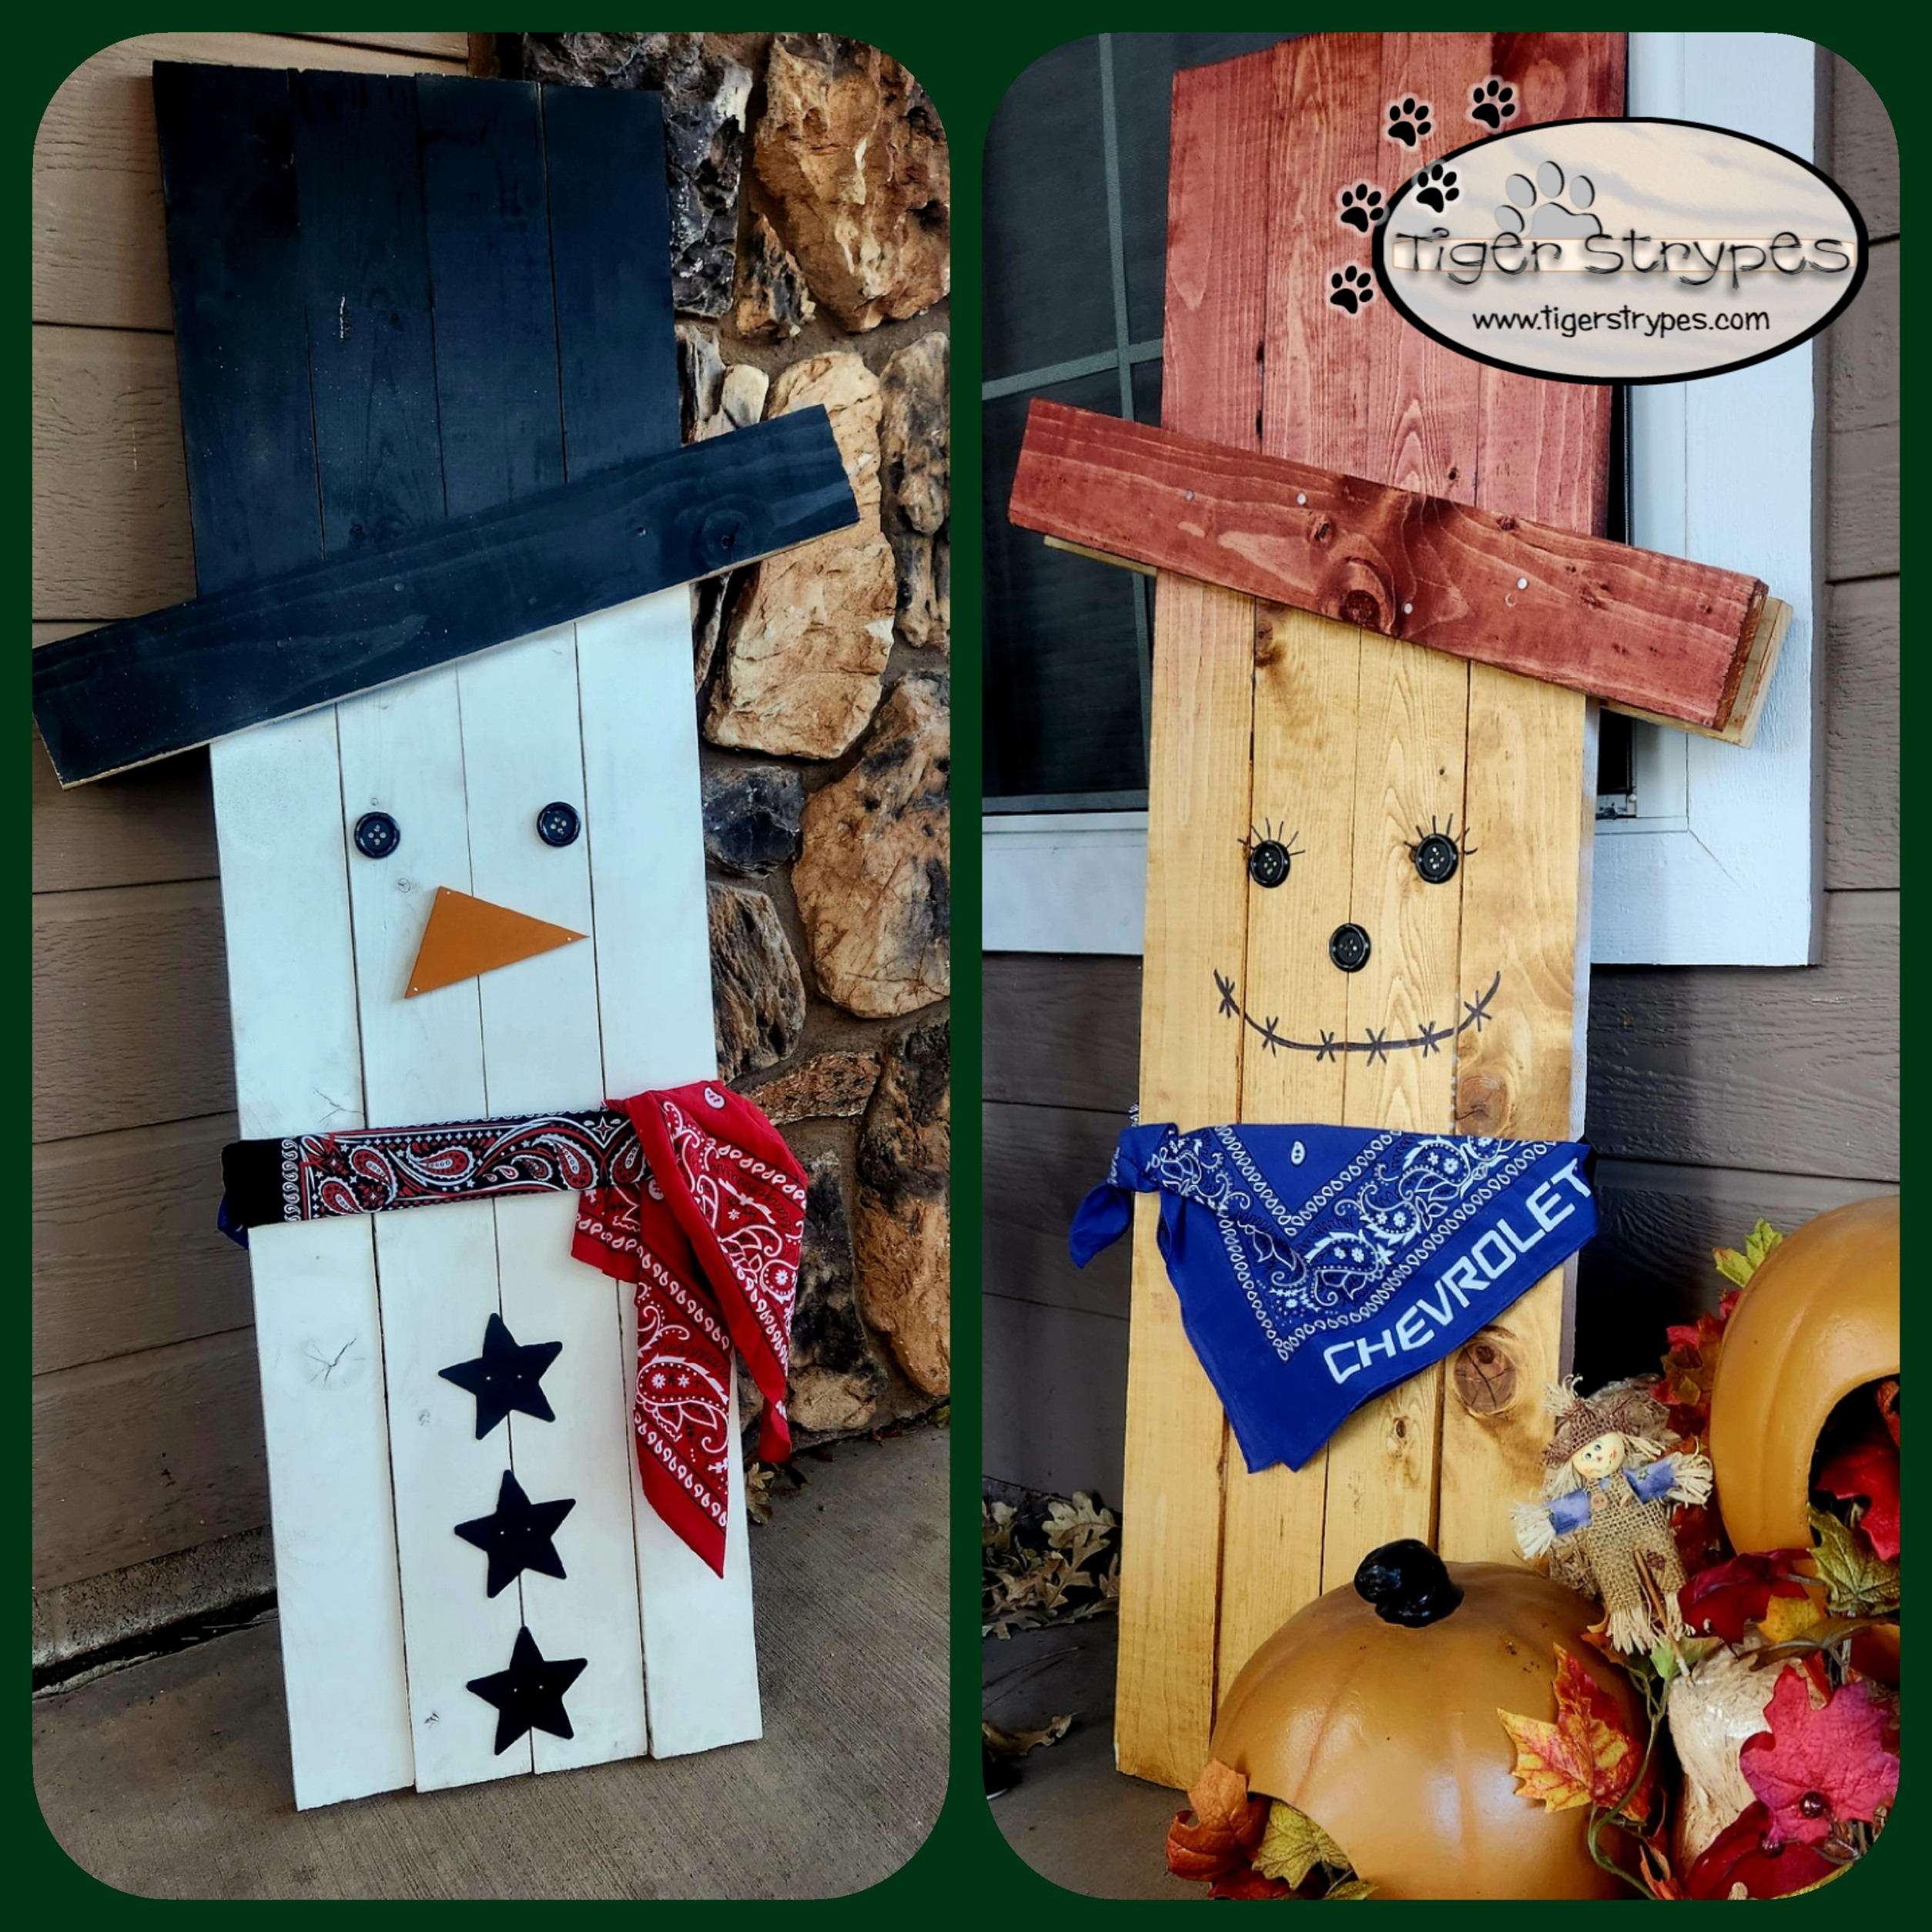
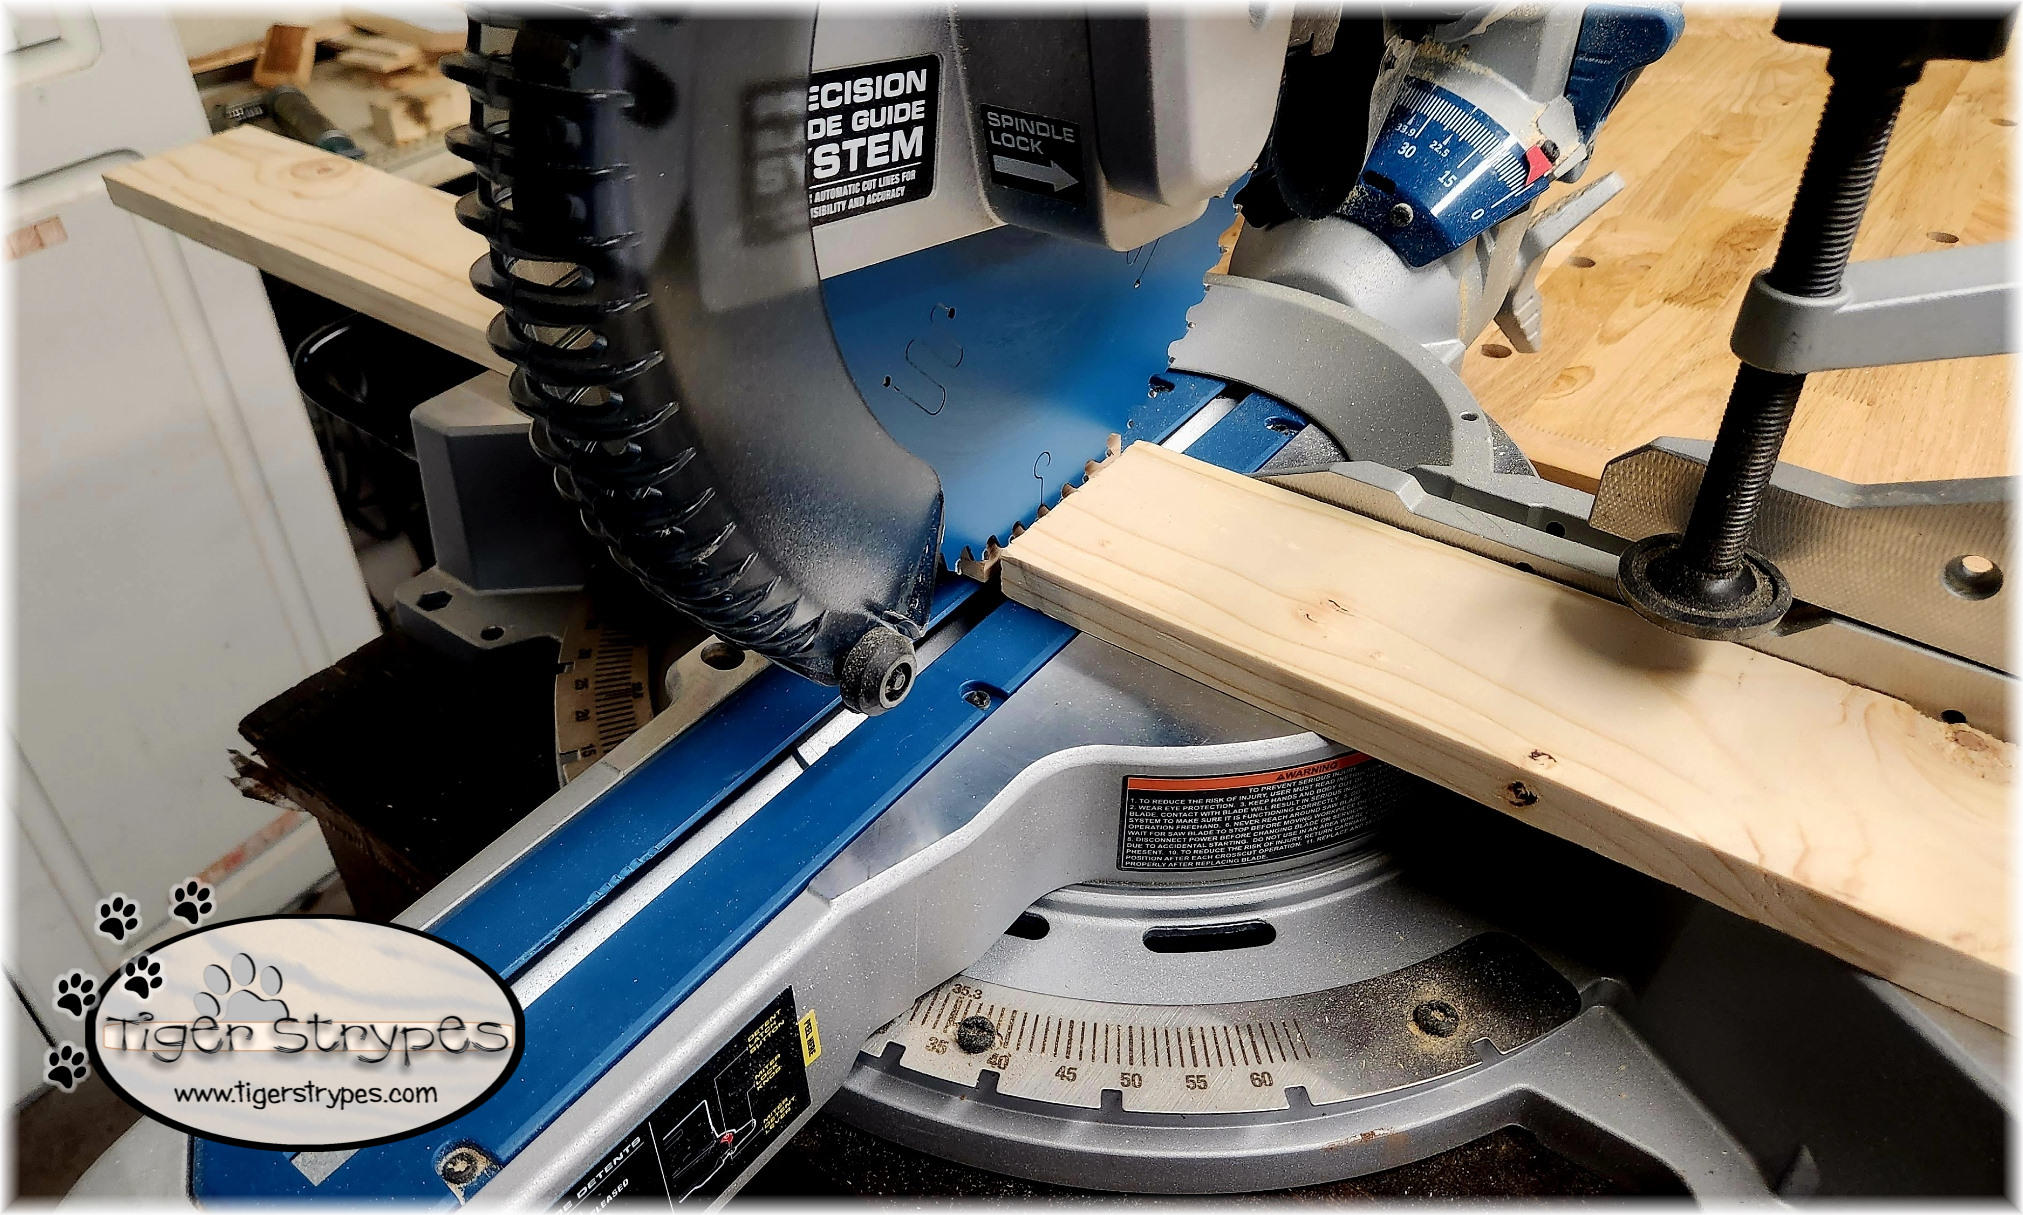
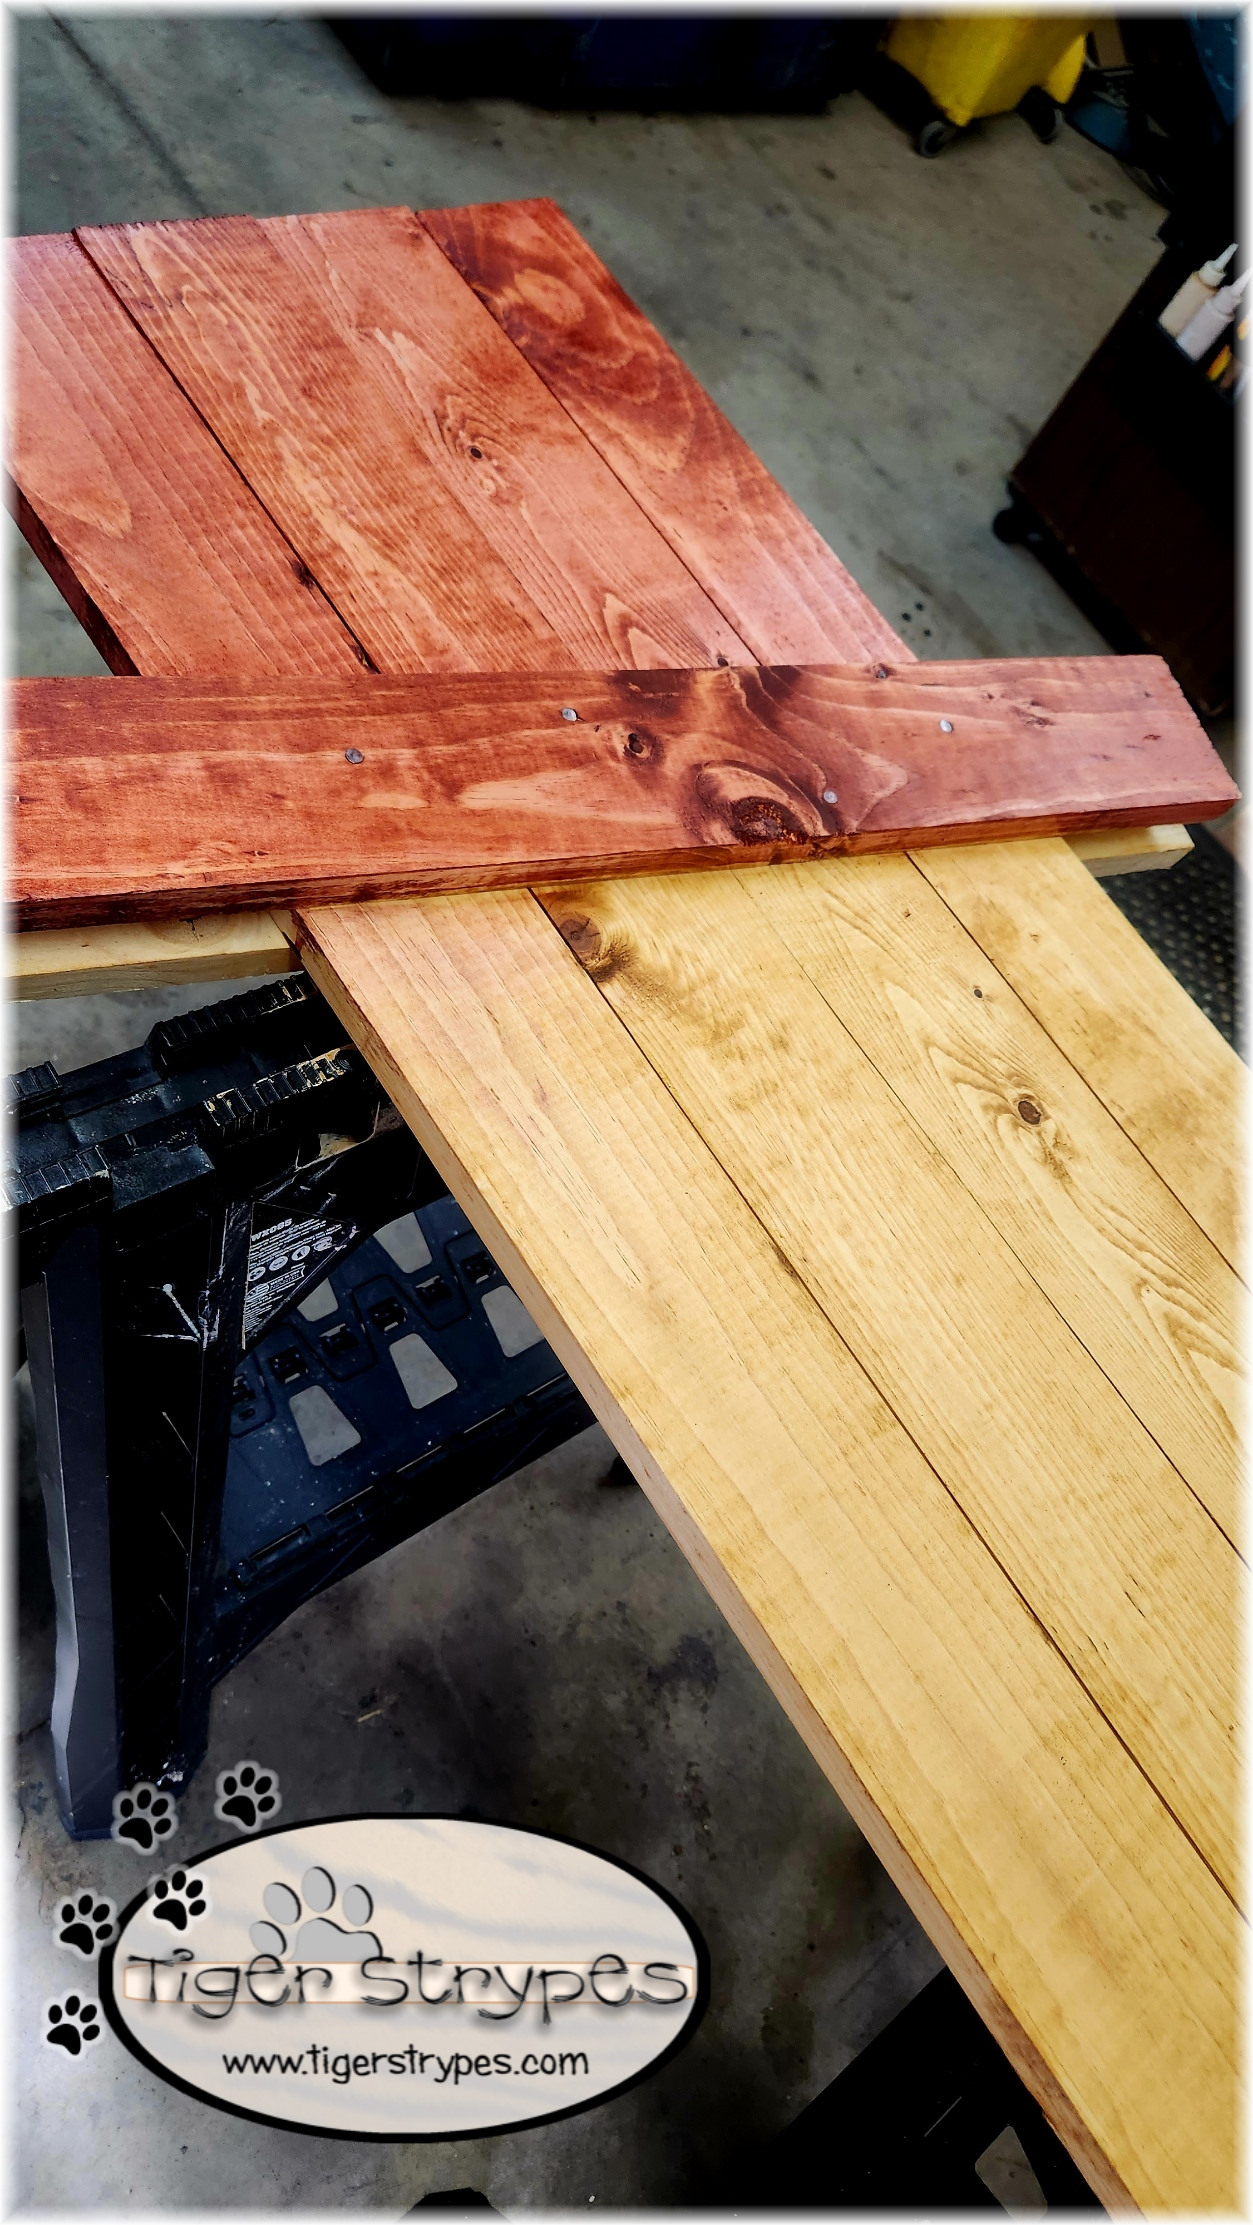
After heading to the hardware store, to get some of the pieces that I needed, I went out in the garage and got to work. I started by cutting one of the 1″x4″x4′ pieces in half. This will be used for the hat brim.
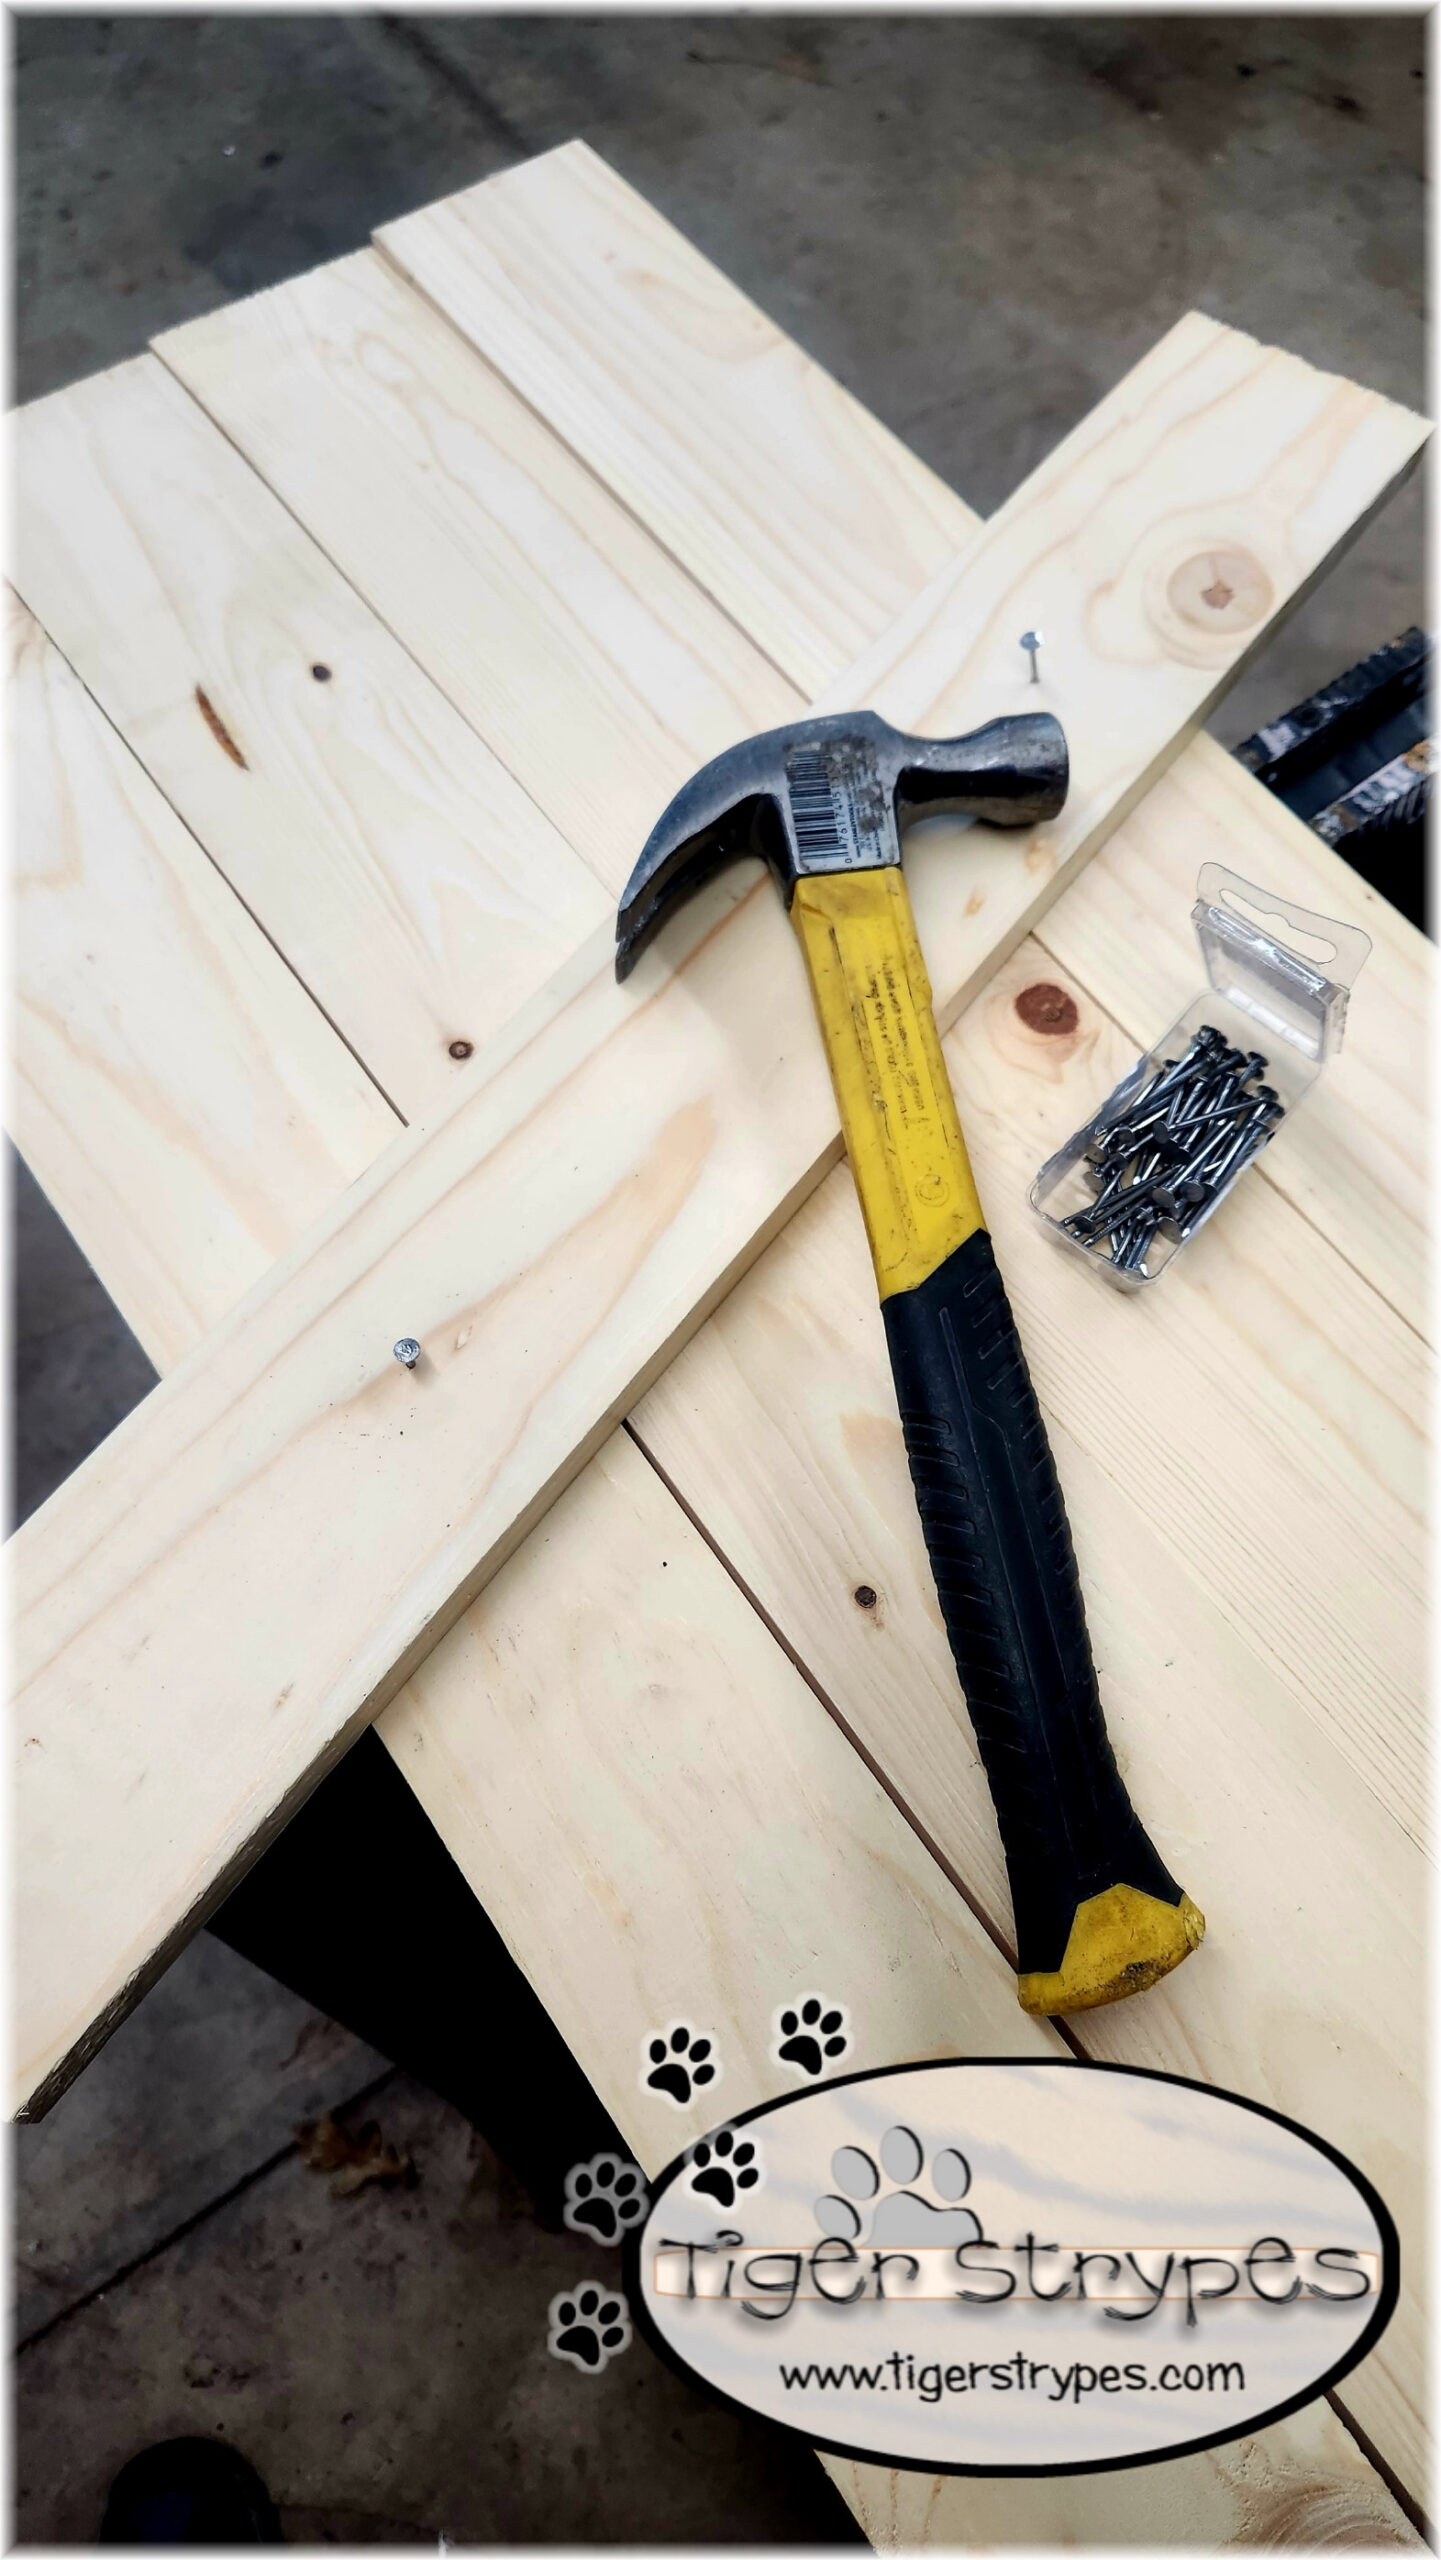
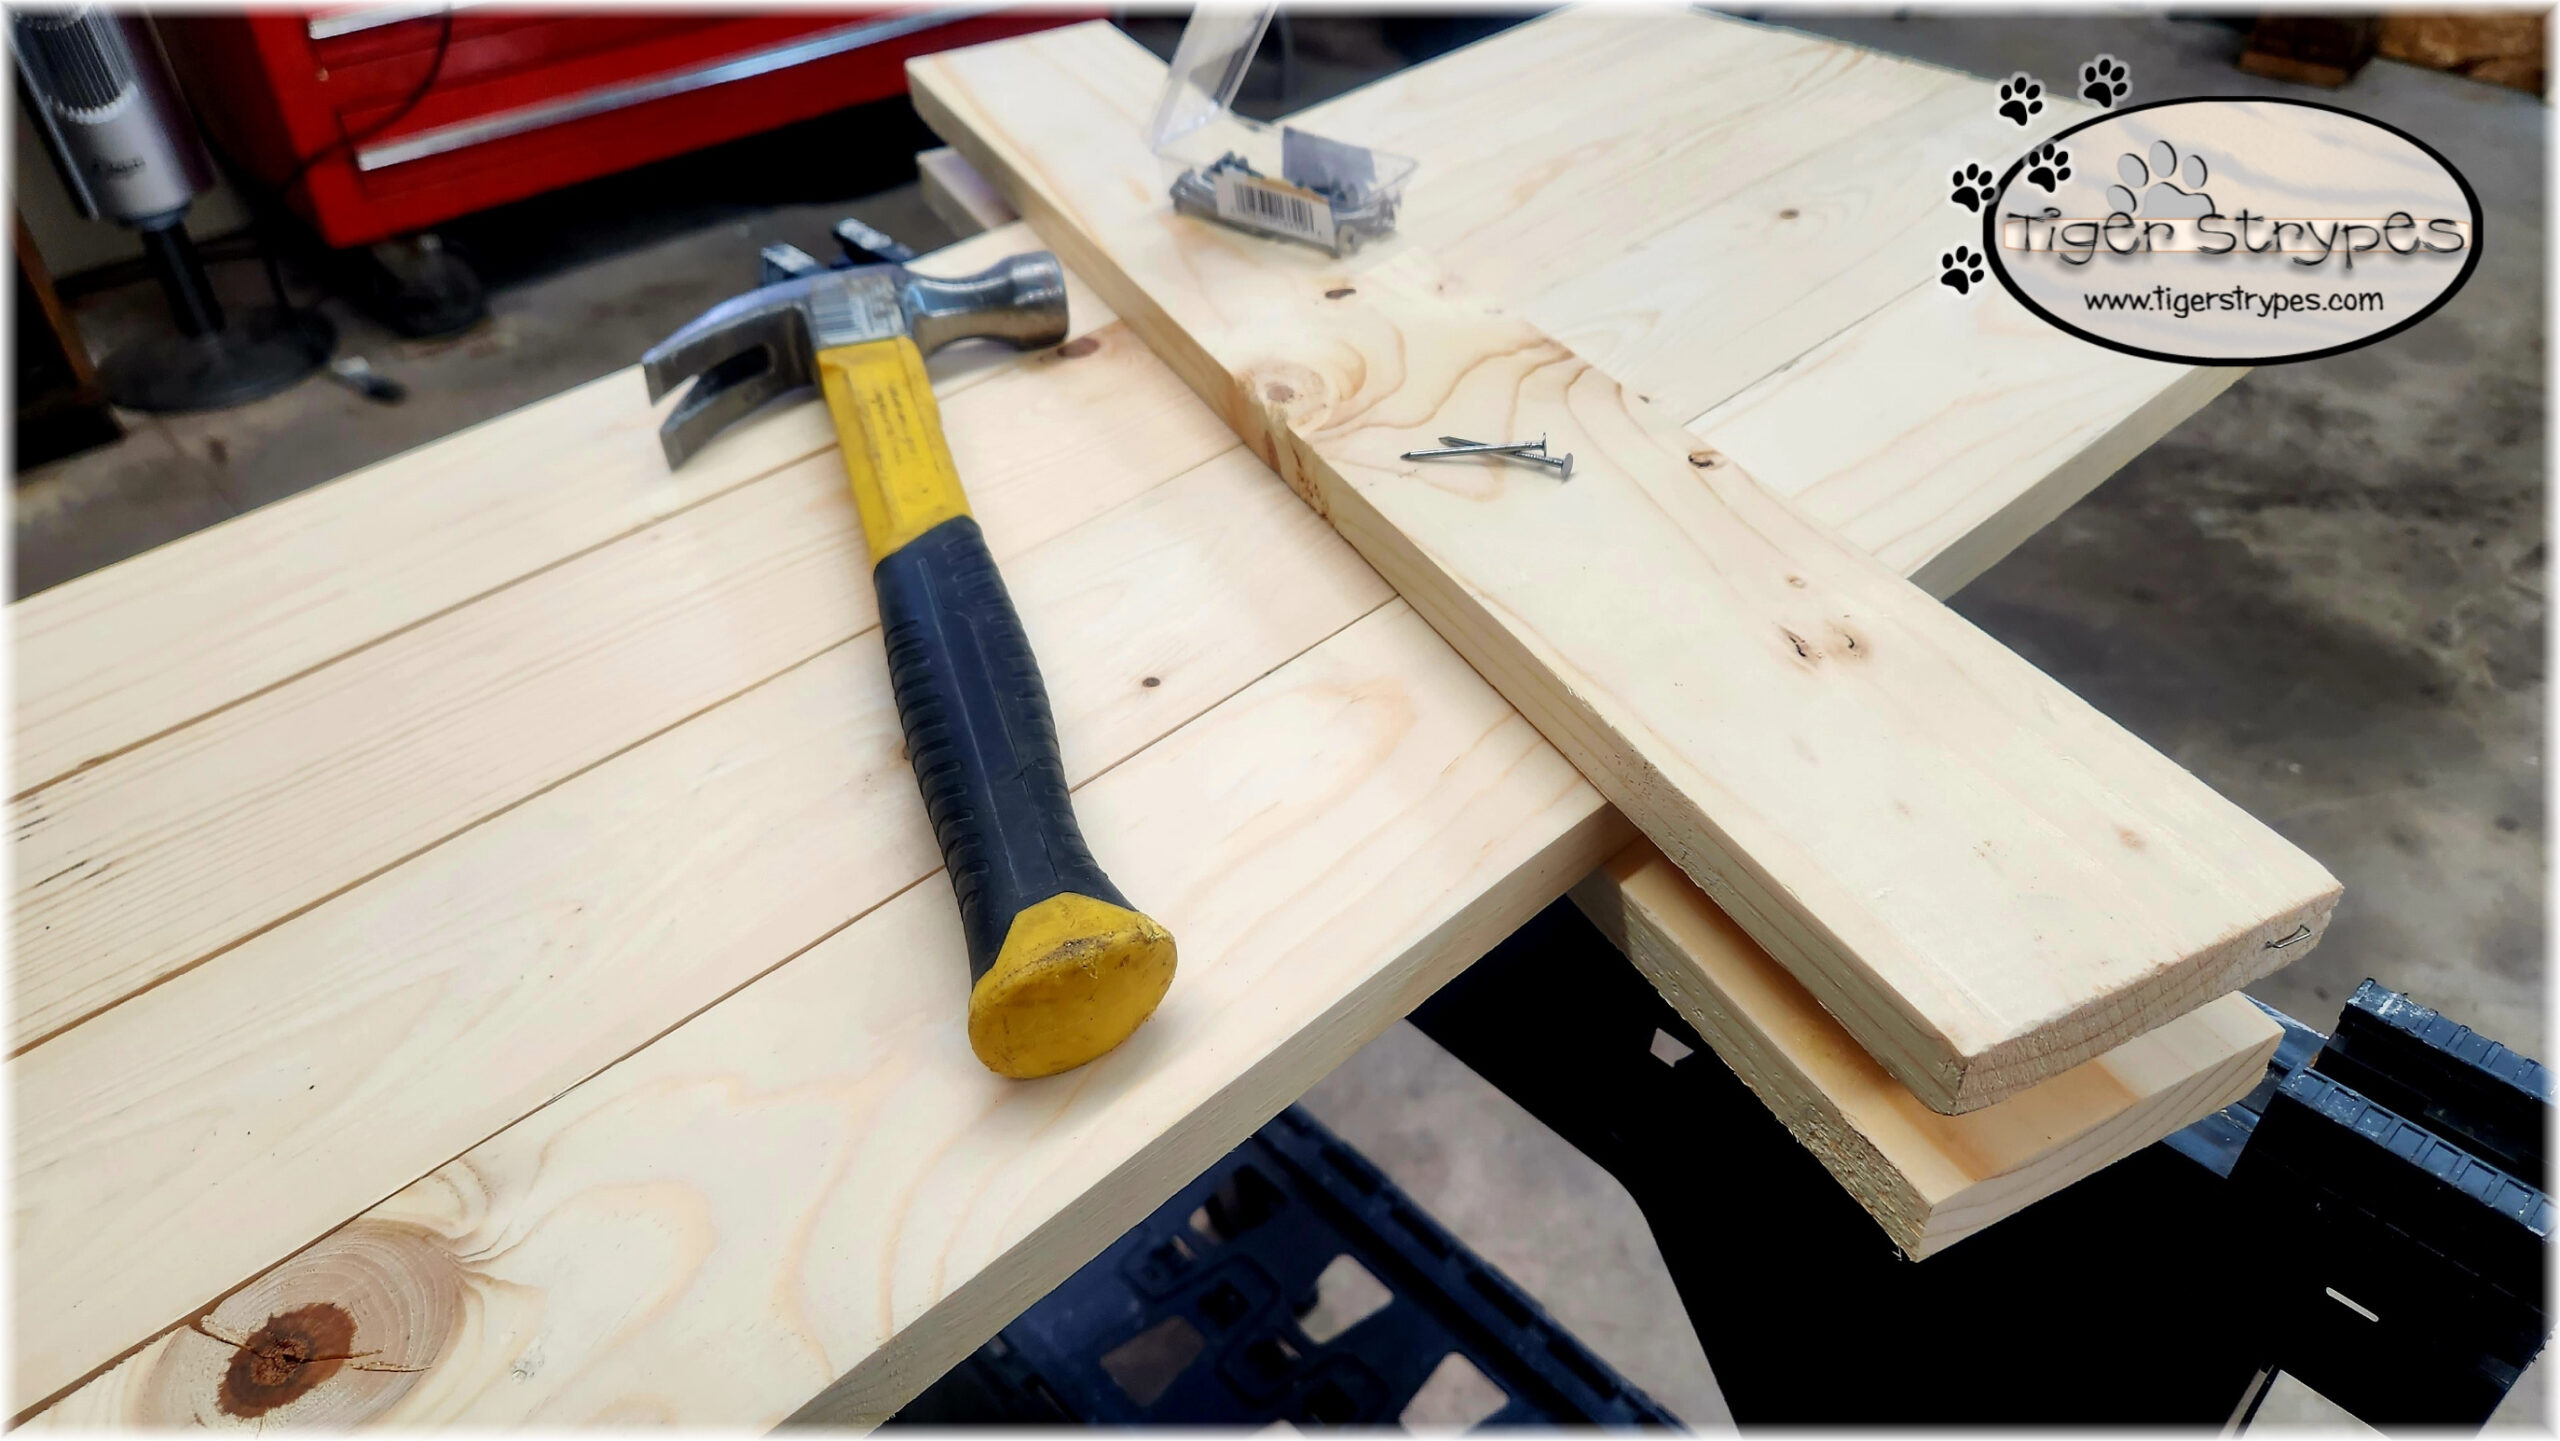
Next, I laid out the other 4 boards together on stands in the garage, to make it easier to assemble.

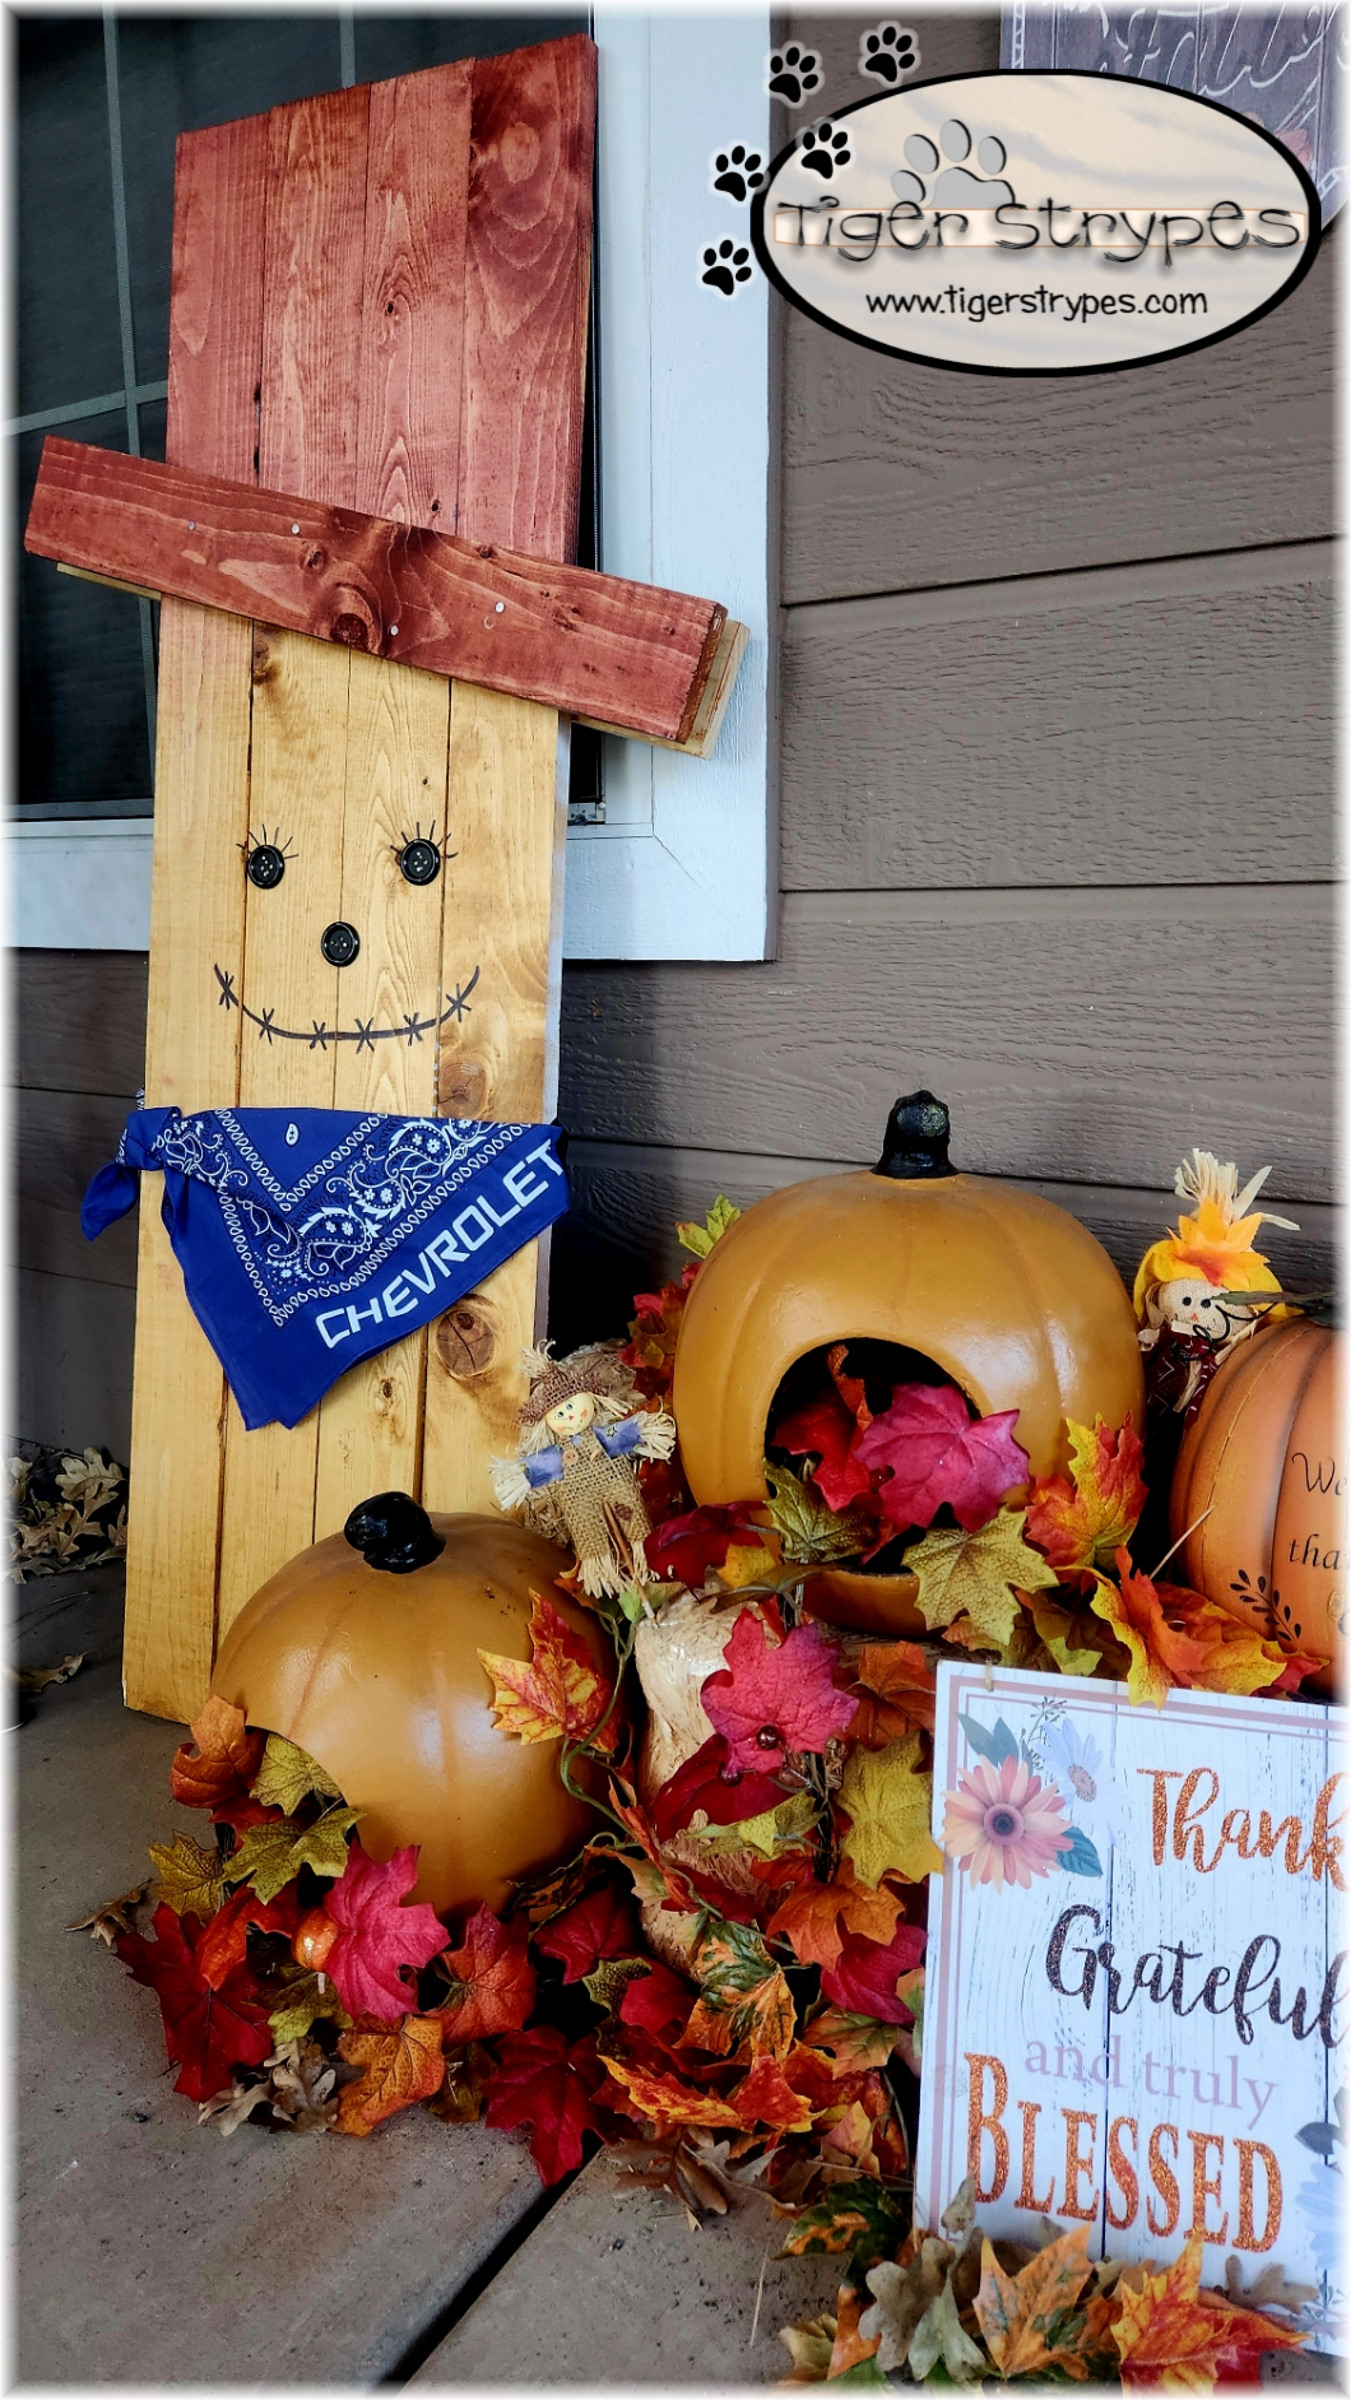
Using the 1.5″ nails, I laid one of the cut pieces across a bit unevenly at the top to create the hat brim. Flipping the whole piece over carefully, I then lined up the other smaller piece and nailed that in, as well.
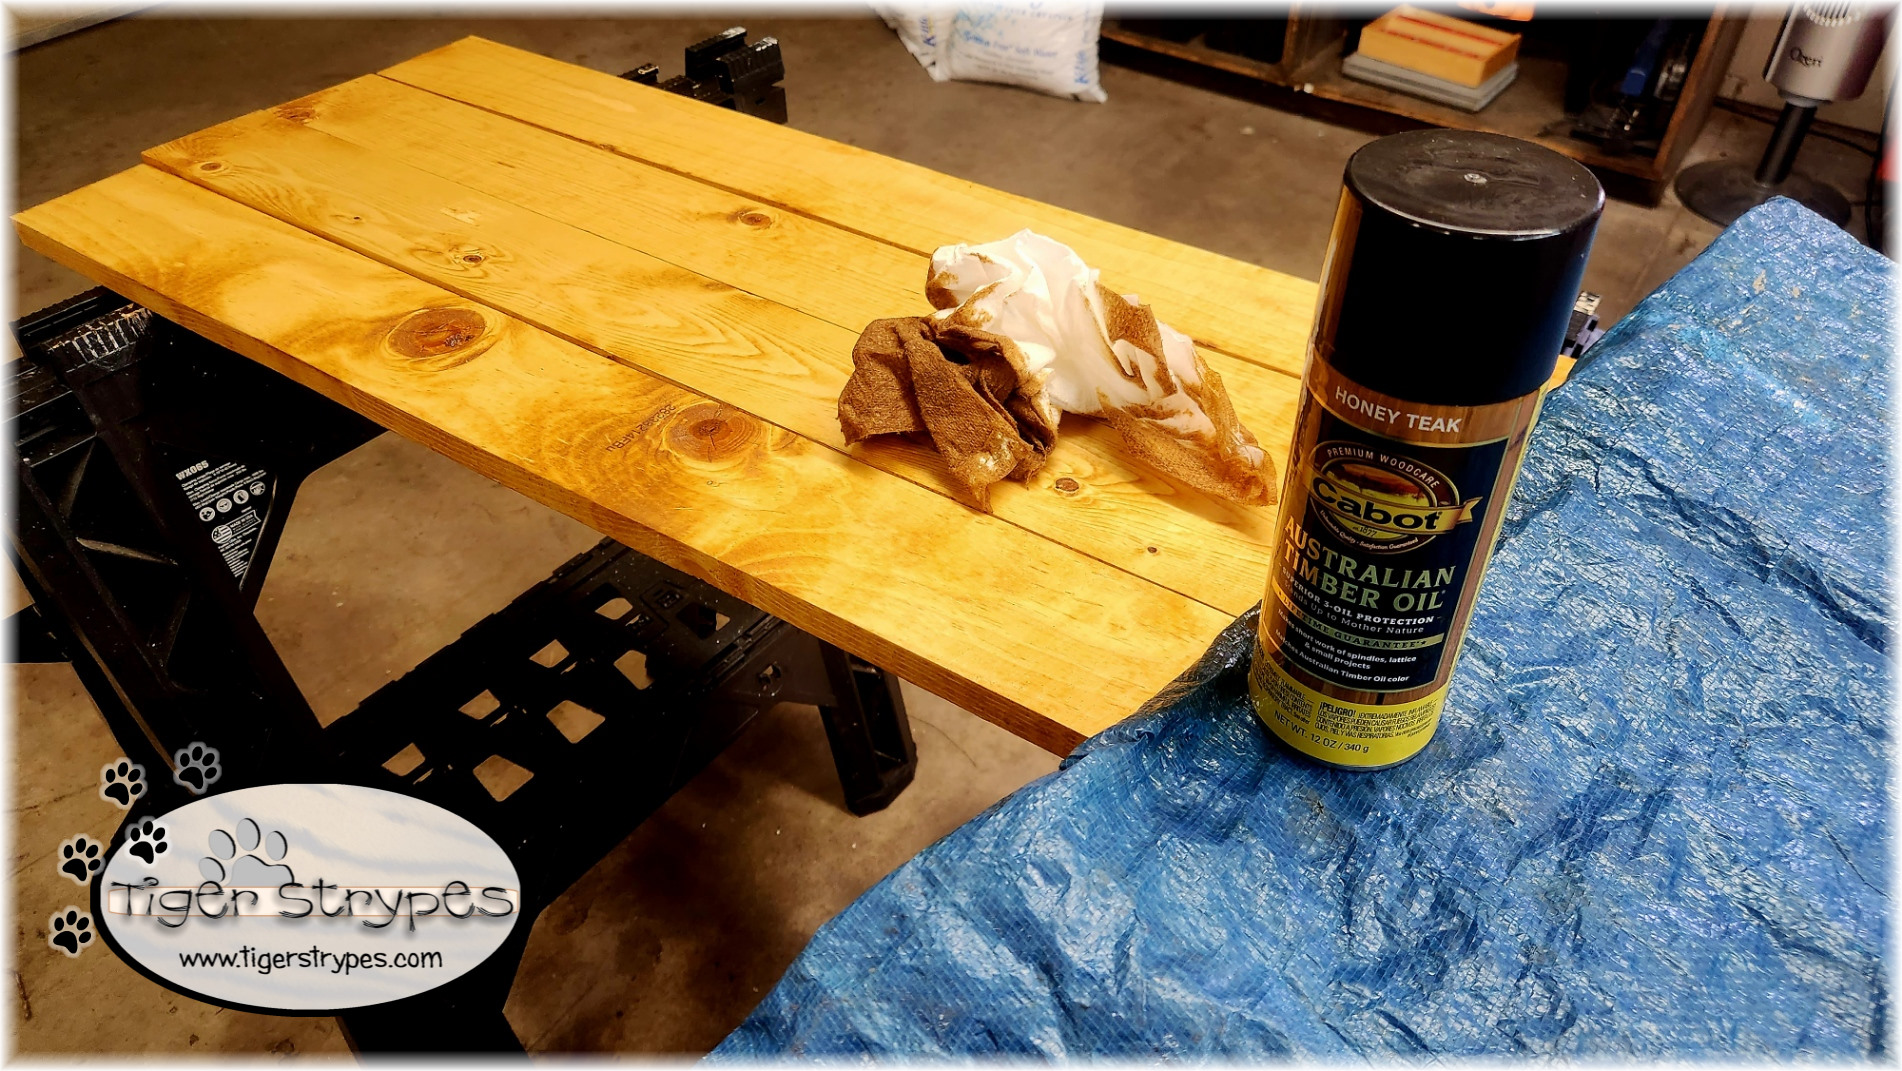
Now it was time to start staining the one side. Using a light color as the face/body, and darker color as the hat, I just made it a bit easier and bought spray stain. After the stain was applied, I used a few rags to apply it and clean it up. The amount of application that you do, is up to you. I went with two, since I ended up wanting it a bit darker.
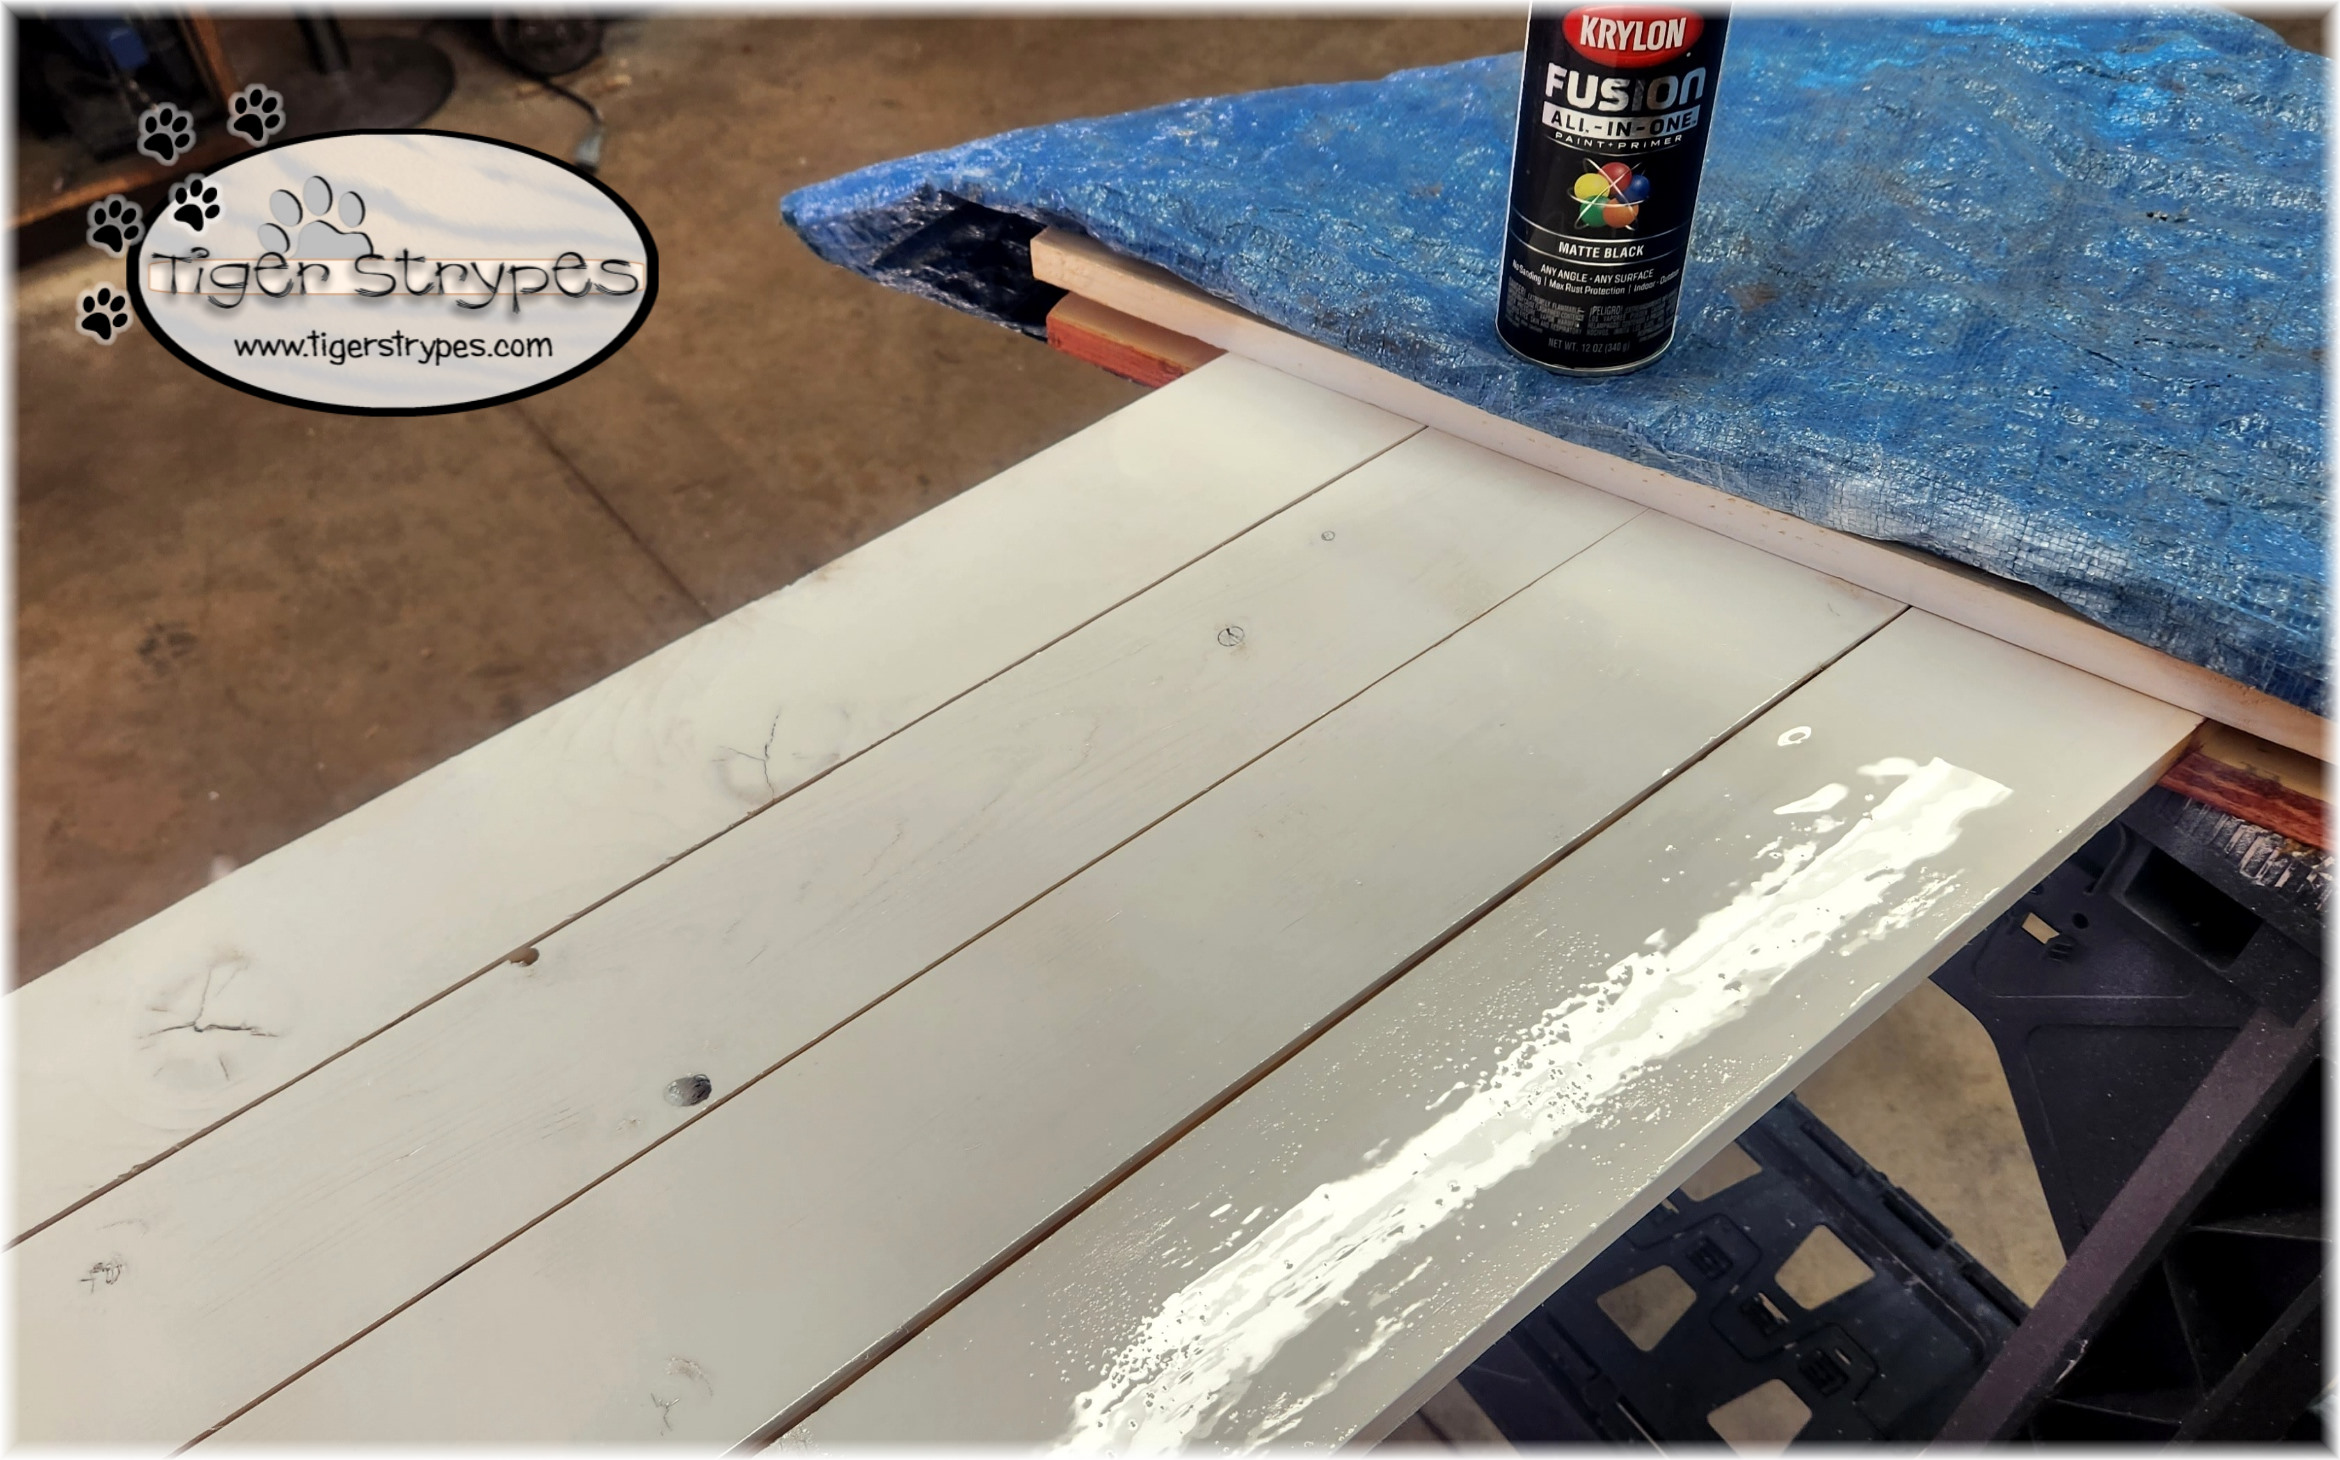
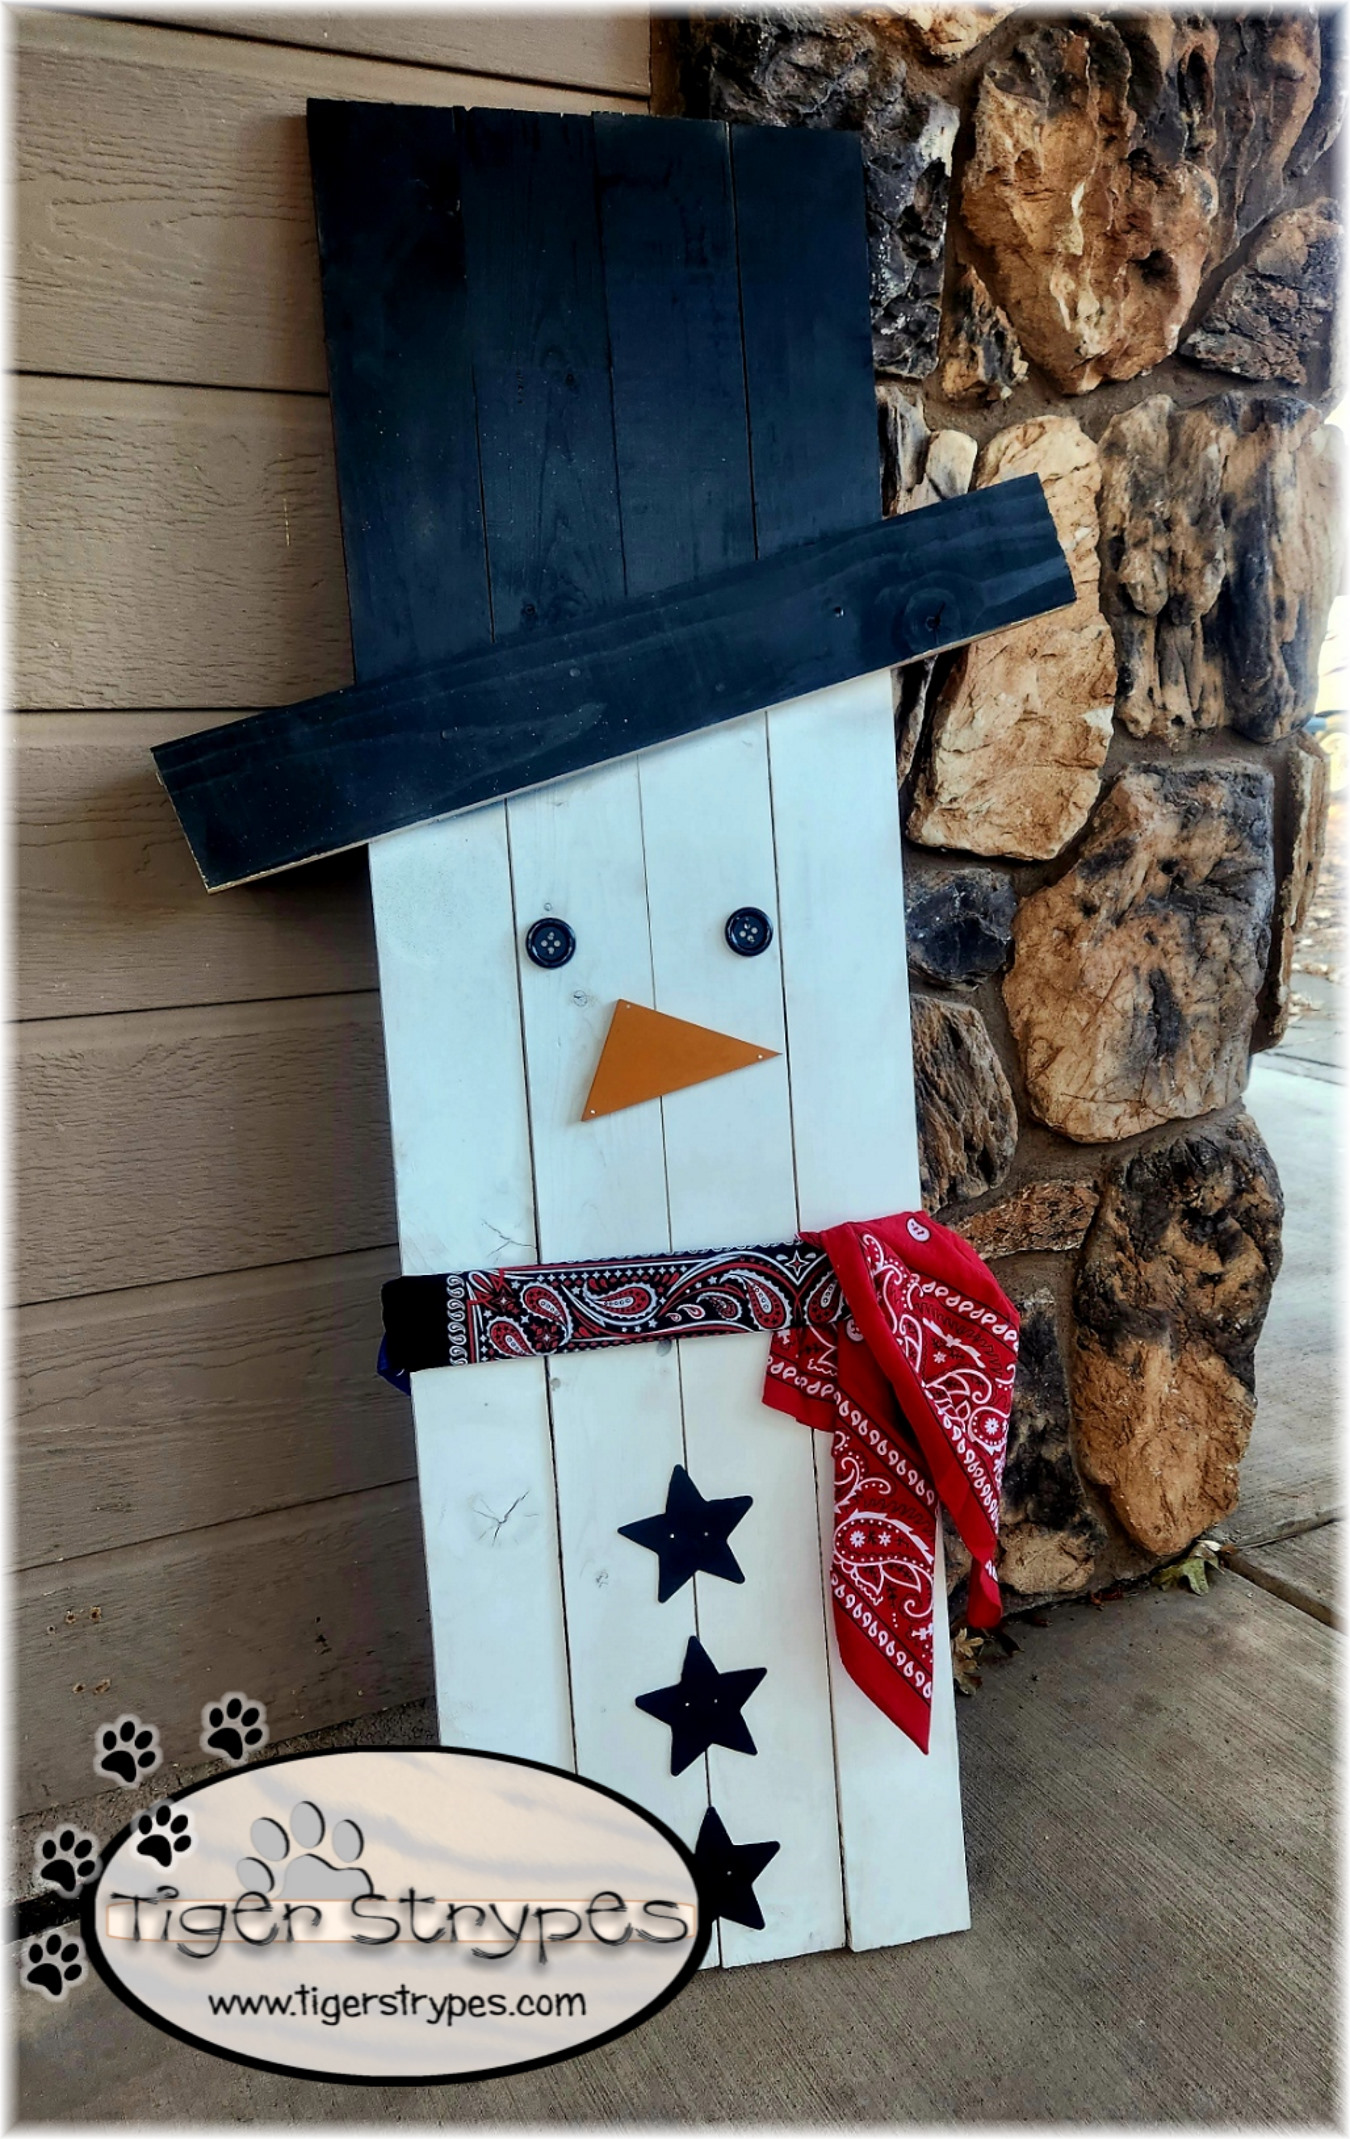
Leaving the stain to dry for a few hours, I went back into the garage and started on the other side. Flipping the stained piece over, I applied white paint to the face/body and black to the hat. I was sure to open the garage up for some ventilation, since it was a super cold day. It might be better to do this outside, but I just didn’t want to freeze.

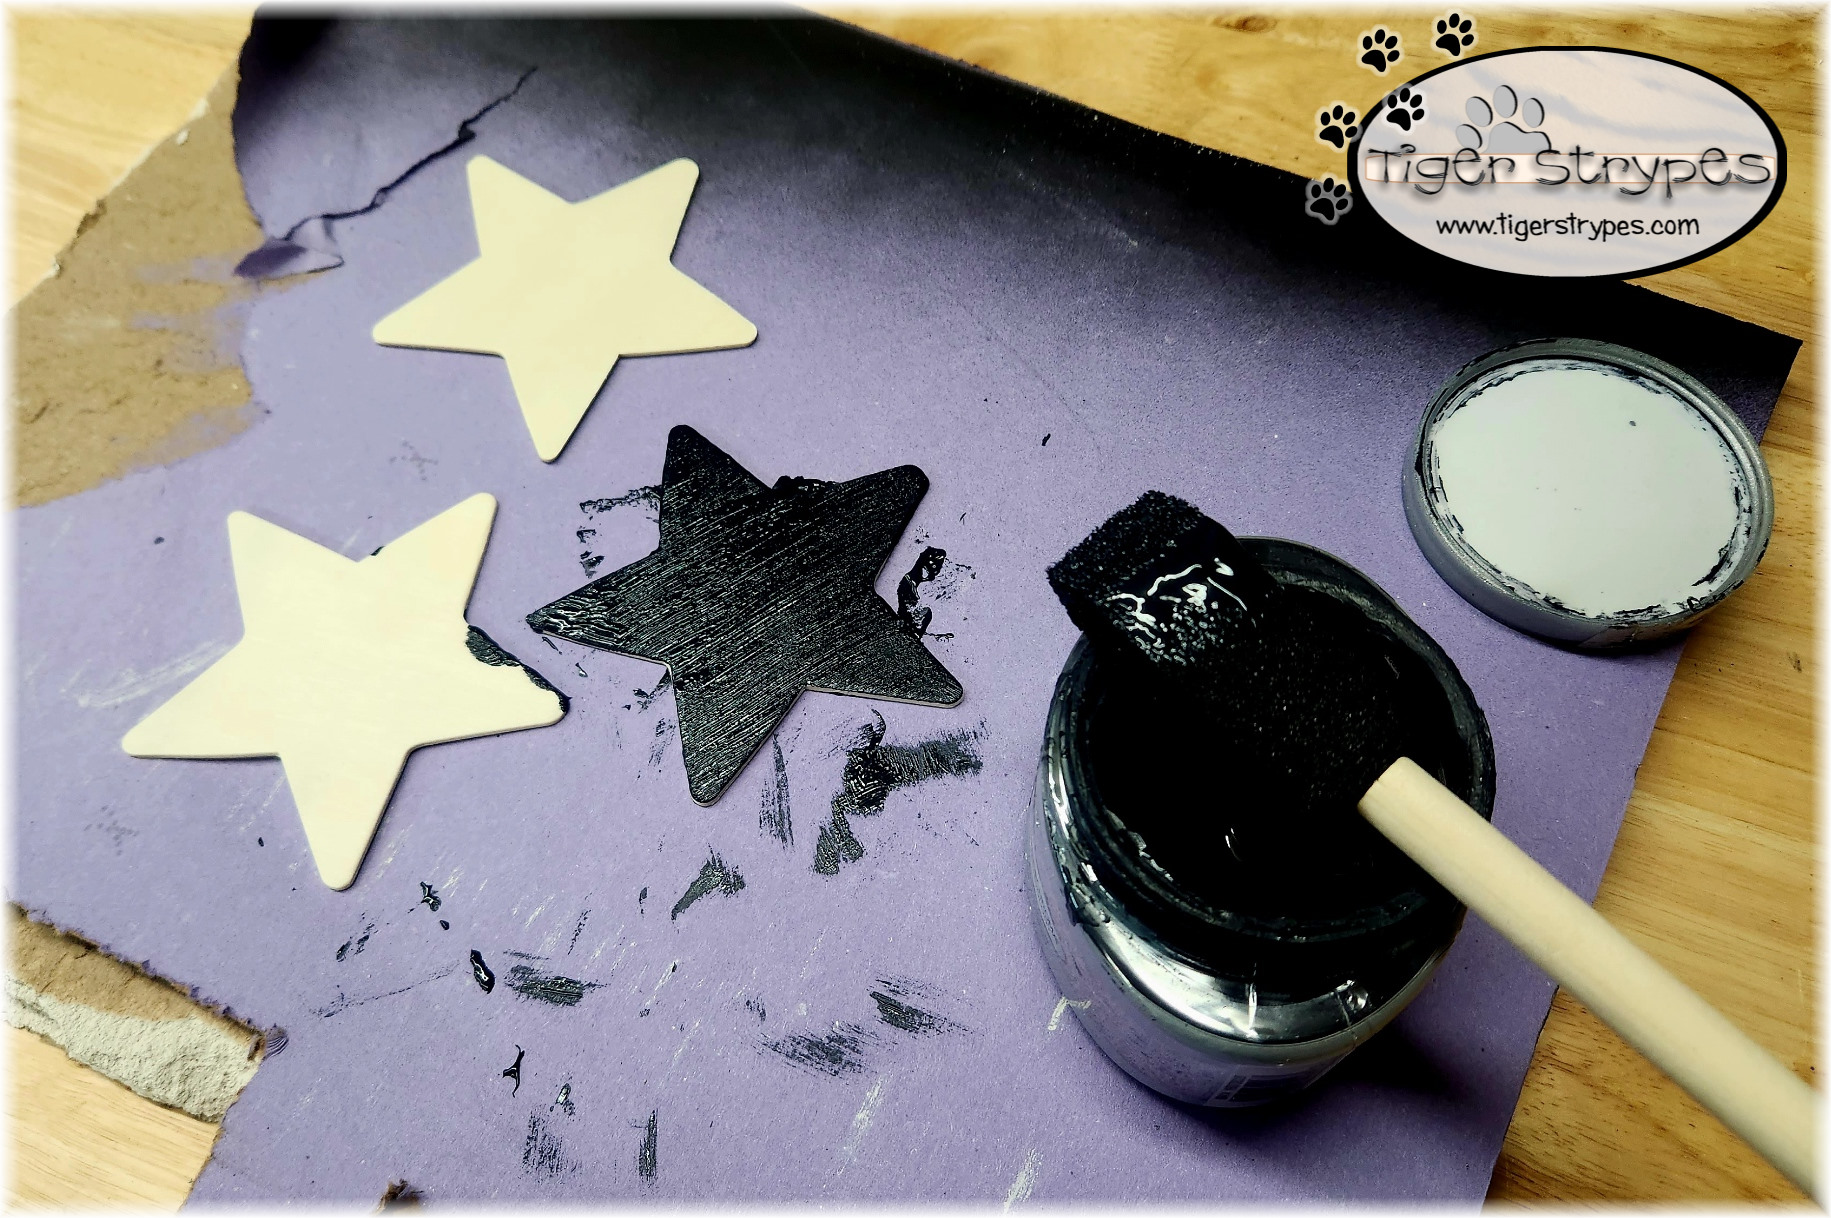
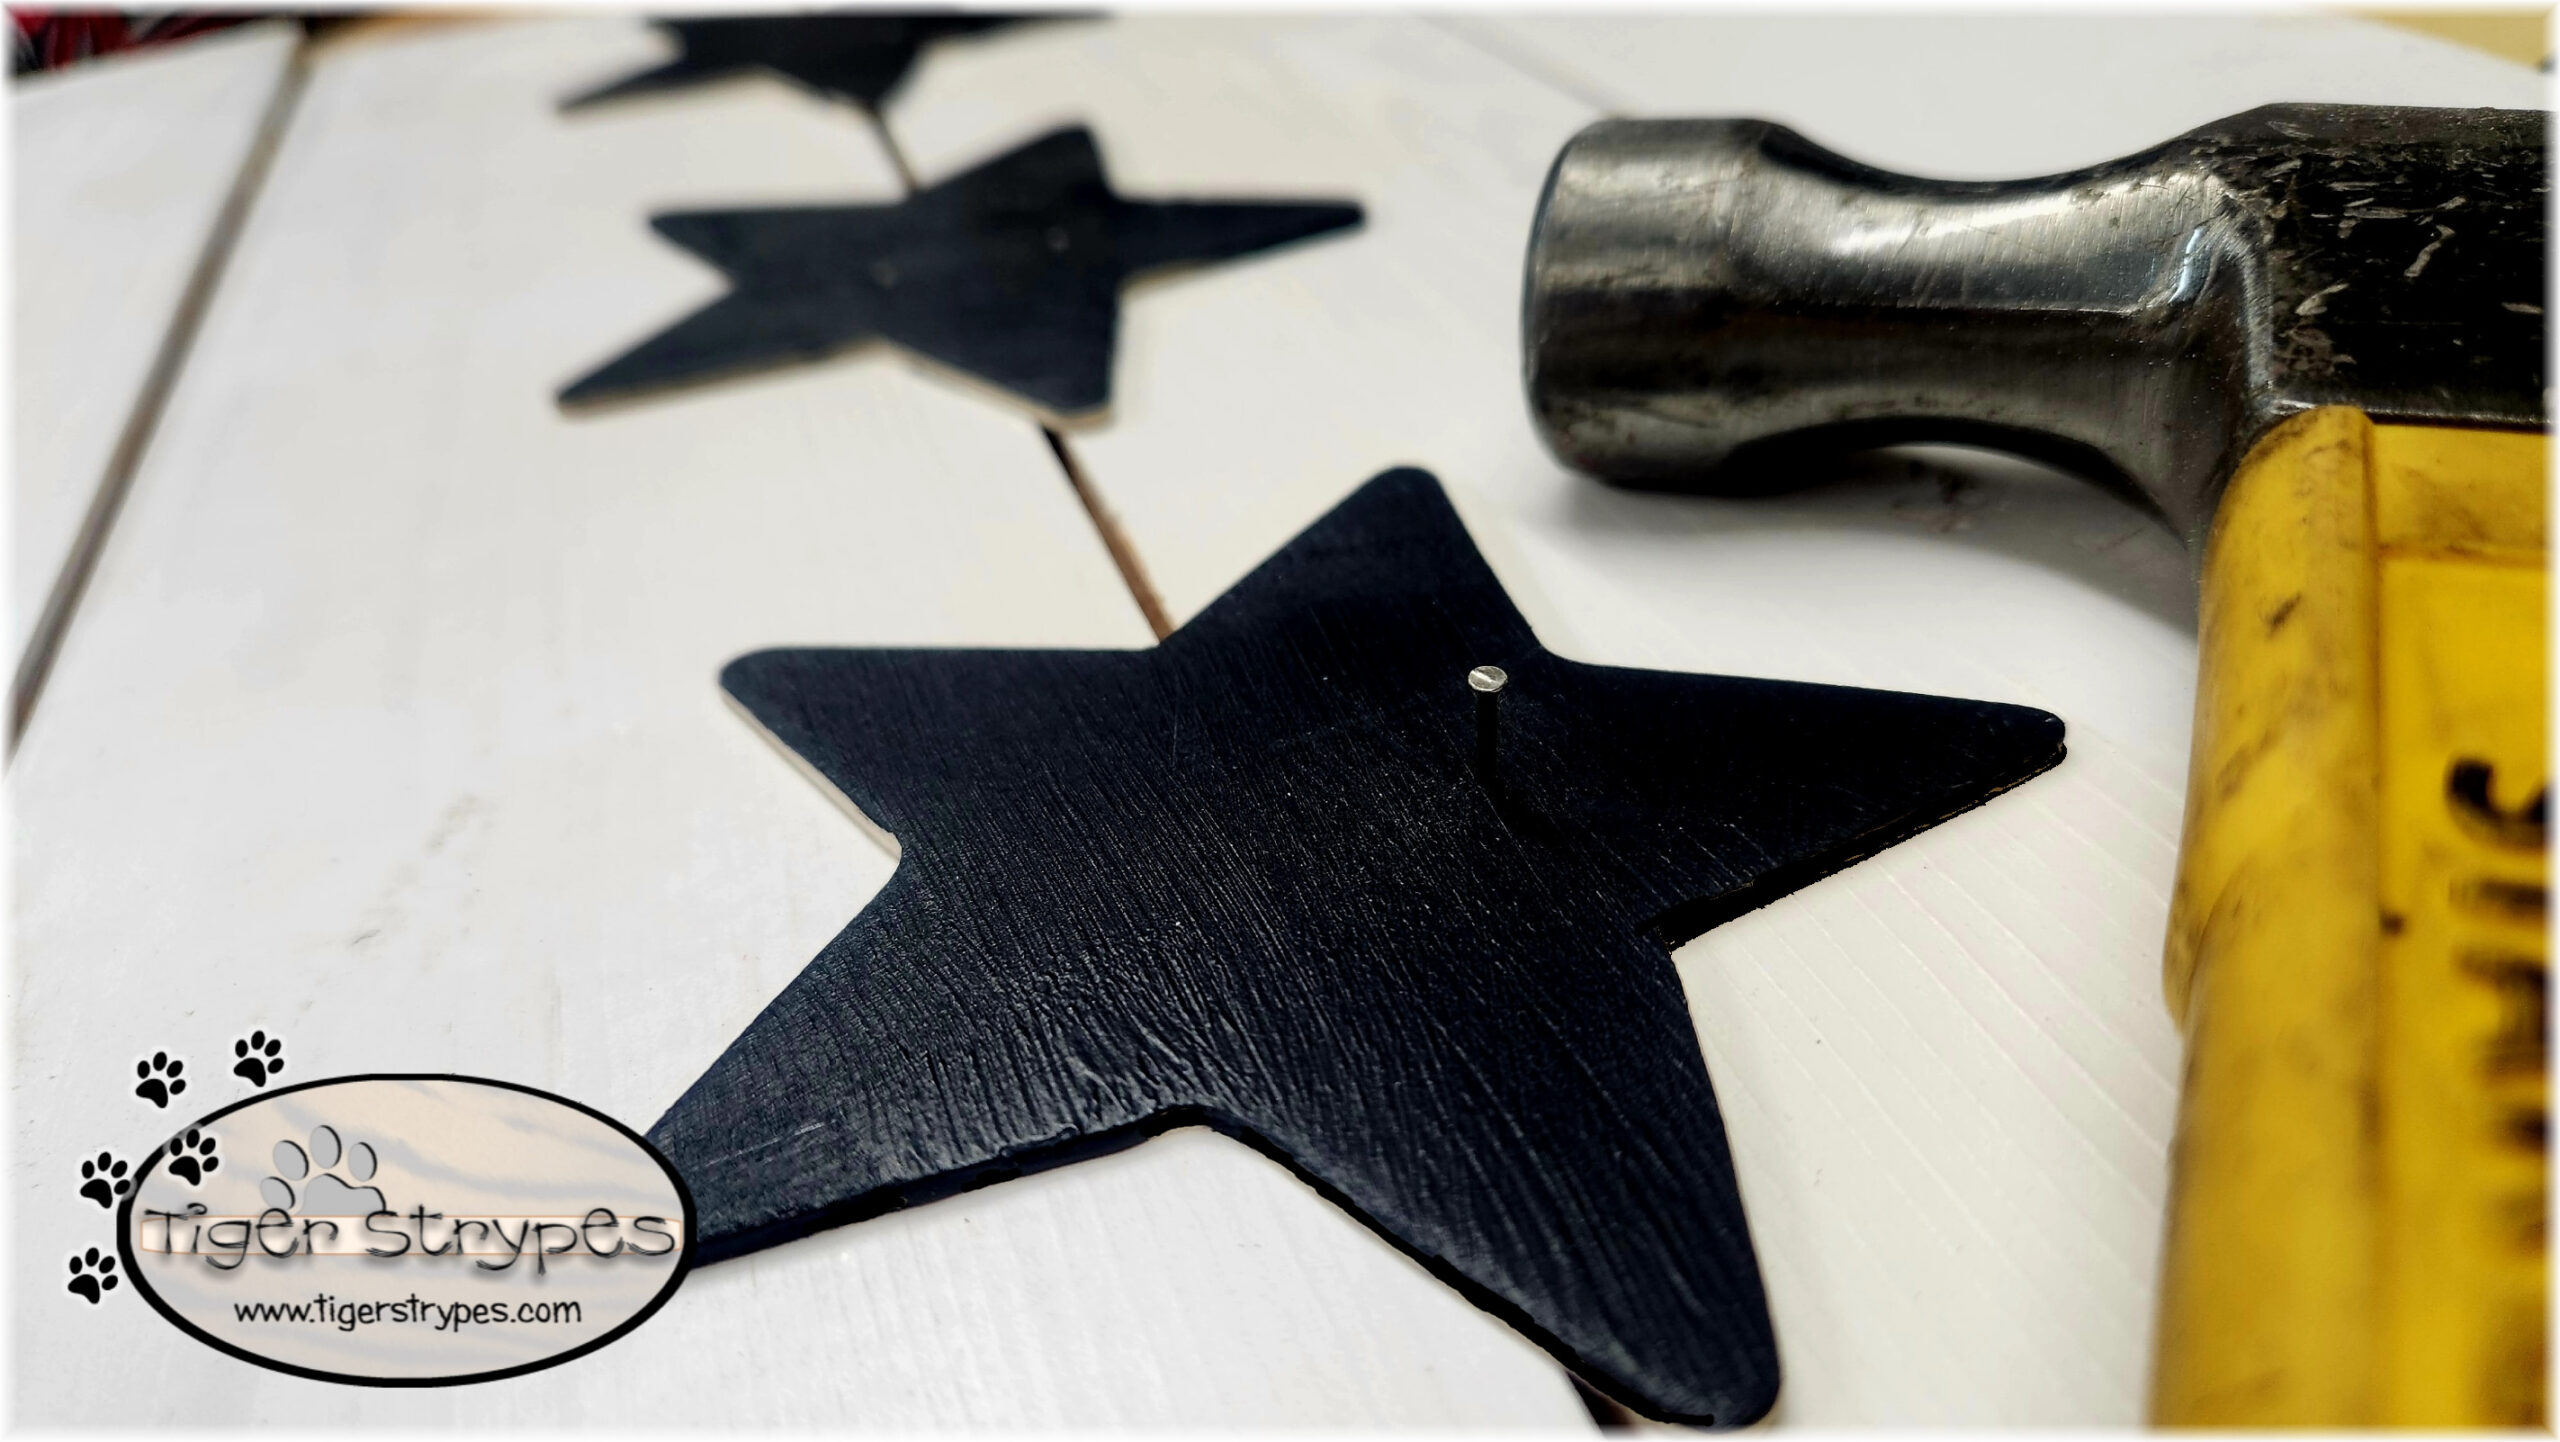
Now it’s time to let that paint dry. While I was waiting, I started on some of the things that I would add to the front and the back. I had some wooden stars in my craft drawer, that I’d never used and thought they would be perfect for the buttons on the snowman. Using some black paint, I got those painted, and then attached them with more nails.
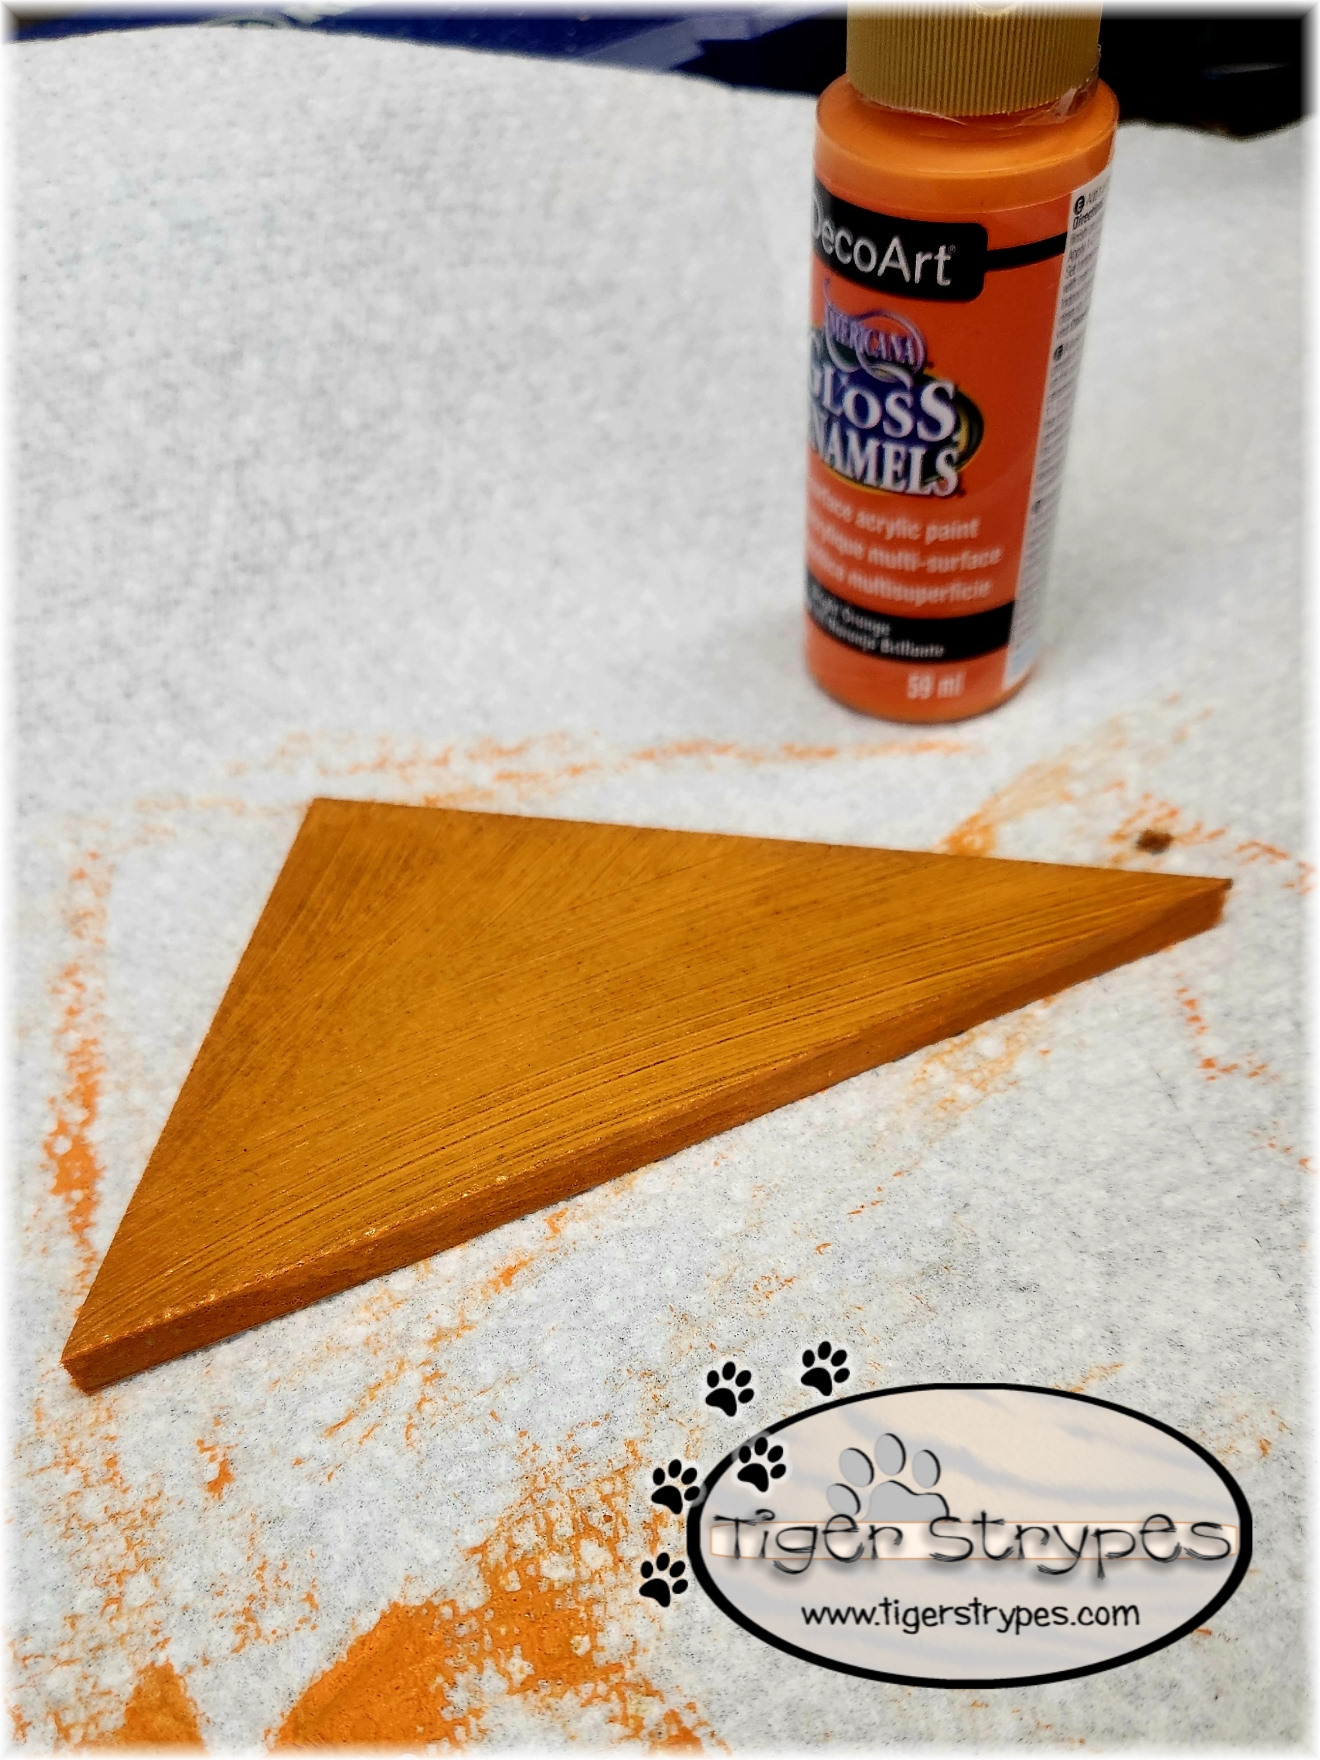
I trimmed a piece of scrap wood, and made something that would look a nose for the snowman. Using some orange craft paint, I finished it up to look like a carrot.

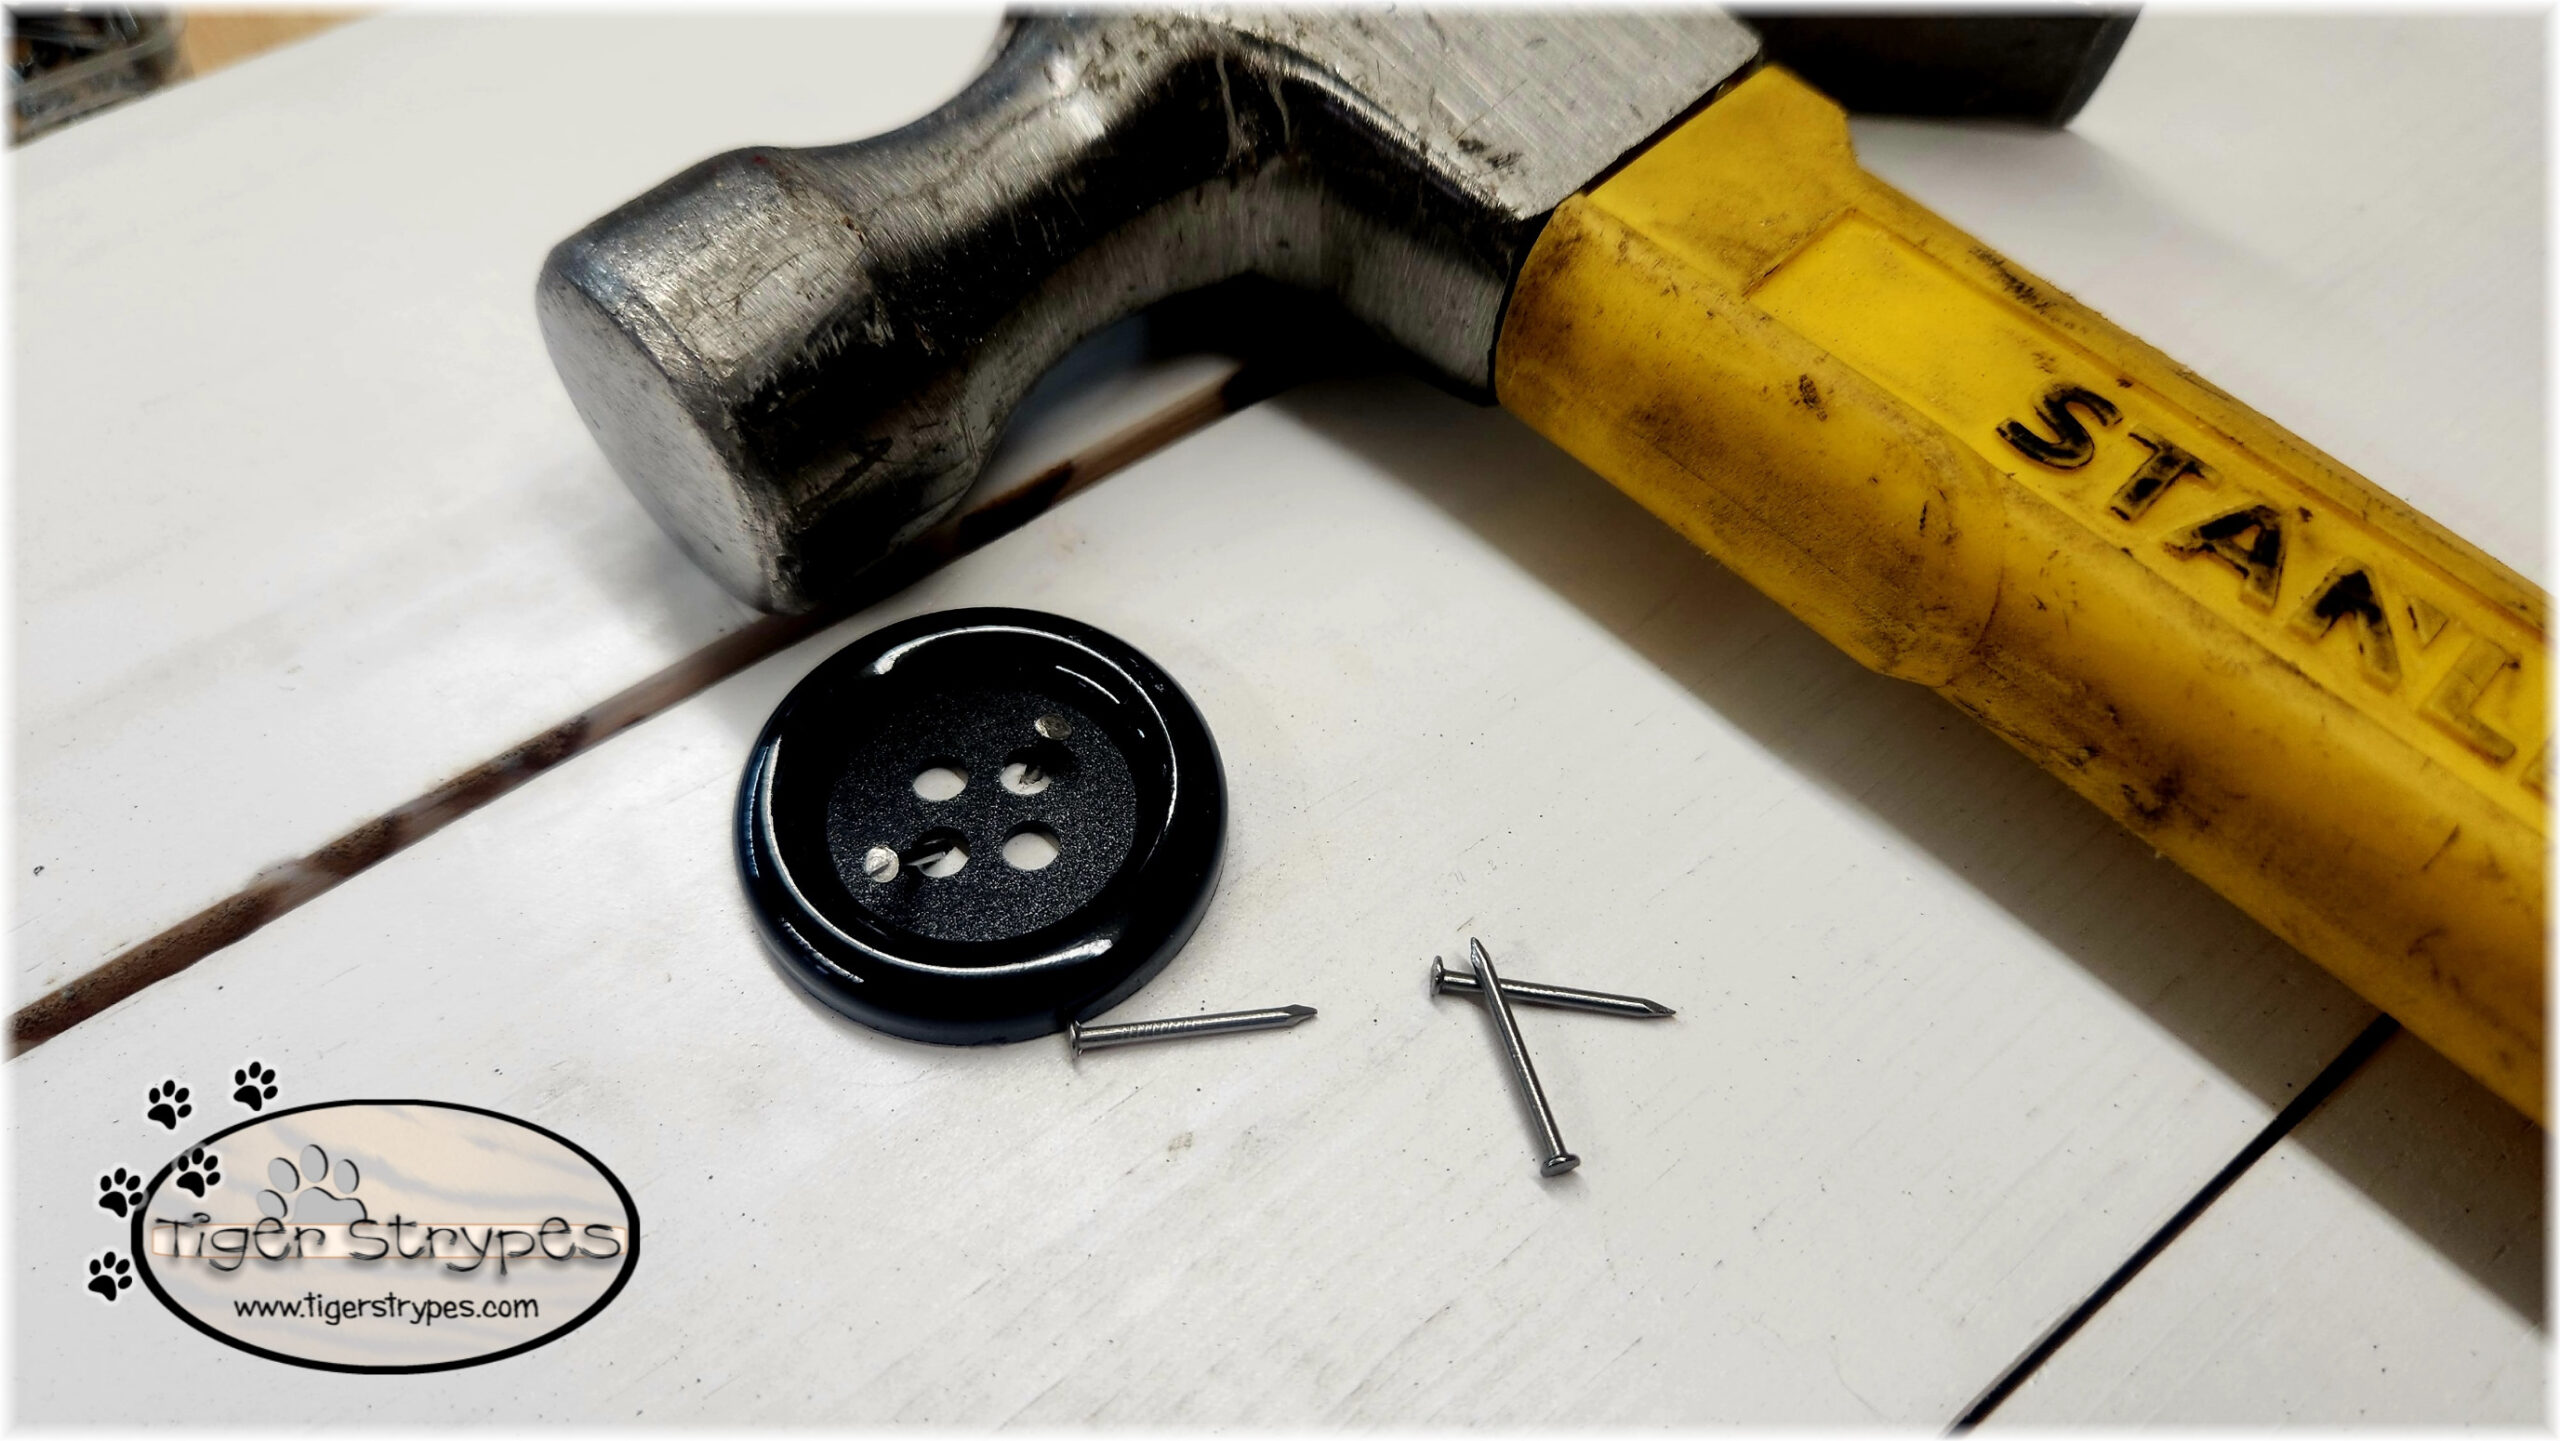
Finding some buttons in my craft drawer, I thought they would be perfect for the eyes. I just used some more nails to attach those to the front and back. I thought about gluing it, but was worried with the cold, how long it would stay adhered. Praying the nails don’t fail, even though it was tricky to attach them!
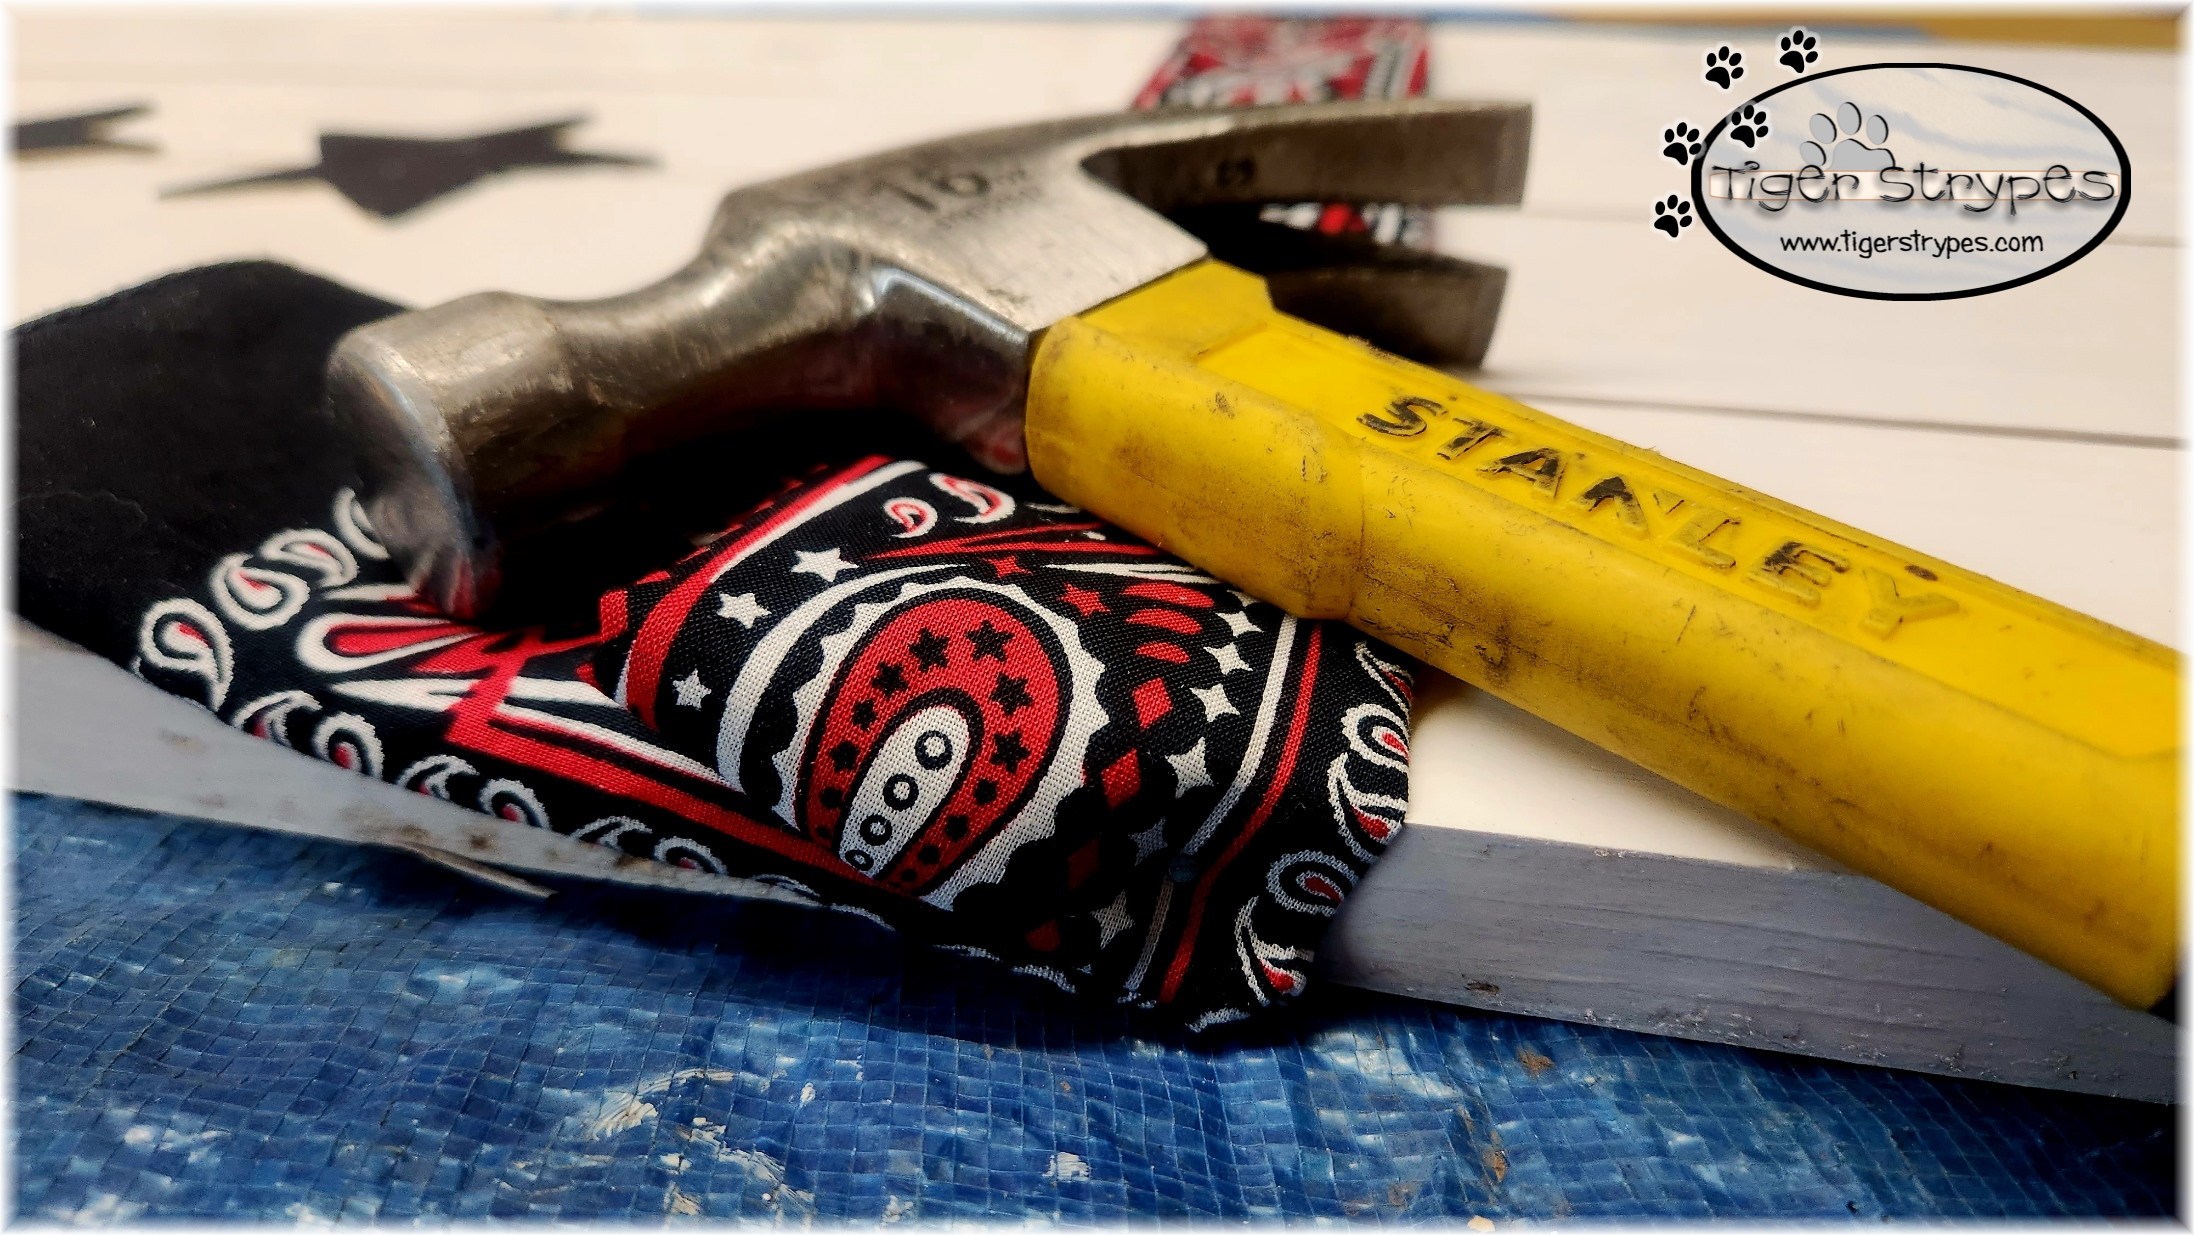
Now it was time to dress them up a bit. I had a few extra handkerchiefs in my closet that I never used, so I decided to give them a new life. Using nails again, I attached them to the sides of the wood. This really helped to make the piece sturdy. You can always use perforated metal straps to attach each piece along the very bottom, if you wish, but I didn’t think it was necessary. I also drew on a mouth for the scarecrow with a large black marker.
Now it’s time to just enjoy it. Heading to our front porch, I just set out the scarecrow and will be flipping it over in about a week, when we go to put our Christmas lights up. I can’t wait to enjoy it for longer next year!
I hope you and your family have great Autumn & Winter seasons. Stay safe and stay warm! What do you think? I hope you like it! Please take a minute to leave me a comment on what you would like to create, and maybe if you have any tips on how to do it different, or better!
Be sure to tweet, pin, share, etc. – thanks!!
“Yes, and from ancient days I am he. No one can deliver out of my hand. When I act, who can reverse it?”.”–Isaiah 43:13

PLEASE SHARE THIS POST USING THE OPTIONS BELOW…THANKS!
Affiliate links for Amazon are used on my site. This means that when you click on a link, and make a purchase, I earn a commission for that purchase. There is no extra charge for you, it’s just their sites way of saying thank you for helping them get a customer. I use affiliate links to help fund my crafting budget, as well as help provide for our home.

[…] Reversible Scarecrow + Snowman Pallet Sign […]
Wow! This is a really awesome and clever idea! I’m gonna let my husband see this thanks again for sharing this with us!
It was fun to make! I didn’t even need any help. 🙂
That’s a great way to create a multi-season decoration. I loved your detailed photos of the construction process!
Thanks! I just want to help people that might be new to this, make it easily! 🙂
I love this! It’s great that it can transition from one month into the next, love multi-purpose décor!
I agree – any way to save storage space is a bonus for me!
I like it! It’s such an awesome idea! I would like to have a snowman like this in my yard!
It was fun to make – you could do anything you wanted, and I love that!
Aw, how cute! Also a great idea if you have old wood or you want to reuse wood.
Absolutely – that would be great!
I have an old pallet. I wonder if that would work for a smaller version of this.
I bet it would be perfect for it!! I always love to upcycle things at home! 🙂
How cute. I made a smaller version of this a while back. It’s nice to just be able to flip!
I love that you can make it however you want. Now I need to make one for Spring and Summer! 🙂
These are so cute and fun that you can flip it for the next season!
Thanks! I love to save space, and this really helps. 🙂
That’s a great idea to make something more useful than for just one season.
I love it. It’s always better to not have as much to put away after the holidays. 🙂
This looks absolutely cute! I’m going to save this to make next year!
It was fun to make, and really not that hard! 🙂
This is so adorable, and I love that you can use it for both!
Yeah, when I saw it on HGTV, I thought it would be perfect to save space and decorate outside!
This turned out really cute! I love that it’s reversible! I also love the western touch to each with those bandanas! 🙂
Thanks Daisy! I just figured it would work with our home, and I could use the things that I already had.