
This site contains affiliate links. Please see below for more information.

Indoor Mason Jar Planters
#Indoor #Gardening
I haven’t posted a craft in a long time. As I’m sure a lot of you completely understand, things have just been crazy. Time has been focused on just living and getting by. Well, I decided to start doing a few things to just help around the house, and use up items just sitting around. Who doesn’t have a bunch of mason jars on the shelf? Some of us think we’re going to use them as drink cups, other people are brave and actually want to learn how to can fruits & veggies. Yeah, that last one is definitely not me!! I’ve purchased a bunch of jars, just because I love the look, and would love to use them for parties, etc. Well, having them sit in the cupboard isn’t doing much good, so I thought I would put a few to good use for the Spring & Summer months.
Here in the mountains of Arizona, we don’t get to even start gardening until like last weekend. The old timers always tell newbies that you don’t start the garden, until the oak leaves are the size of a squirrel ear. Who doesn’t love Redneck knowledge, right? 🙂 I figured being able to start some in the house early, is always a plus, since I don’t have an outdoor greenhouse, etc. You could use these to start any seeds, or just have some small things inside all year!
I’m really hoping this craft idea will help you get ready for gardening, if you haven’t started already. Do you have any of that elder wisdom that you’ve heard and applied to your home or garden? Leave a message below to share it, and I hope it can help others. If you make some of the planters, share a photo on my FB page, with what you come up with. I’d love to see it! I sure hope that you like the tutorial, and pray that you have a blessed day!
Please be sure to comment, and share this craft on your social media channels – thanks so much!!
Learn How to Make Indoor Mason Jar Planters #Gardening #DIY #Home via #TigerStrypesBlog - Find out more at Share on X
Materials/Tools Used:
- Mason Jars & Lids
- Applesauce or Fruit Cup Plastic Containers
- Wood Skewers
- Potting Soil
- Herb Seeds (or Whatever You Like)
- Water
- Yarn or Twine
- Cricut w/Pen
- Craft Paper
- Hole Punch
- & Time!
Instructions for the Indoor Mason Jar Planters:
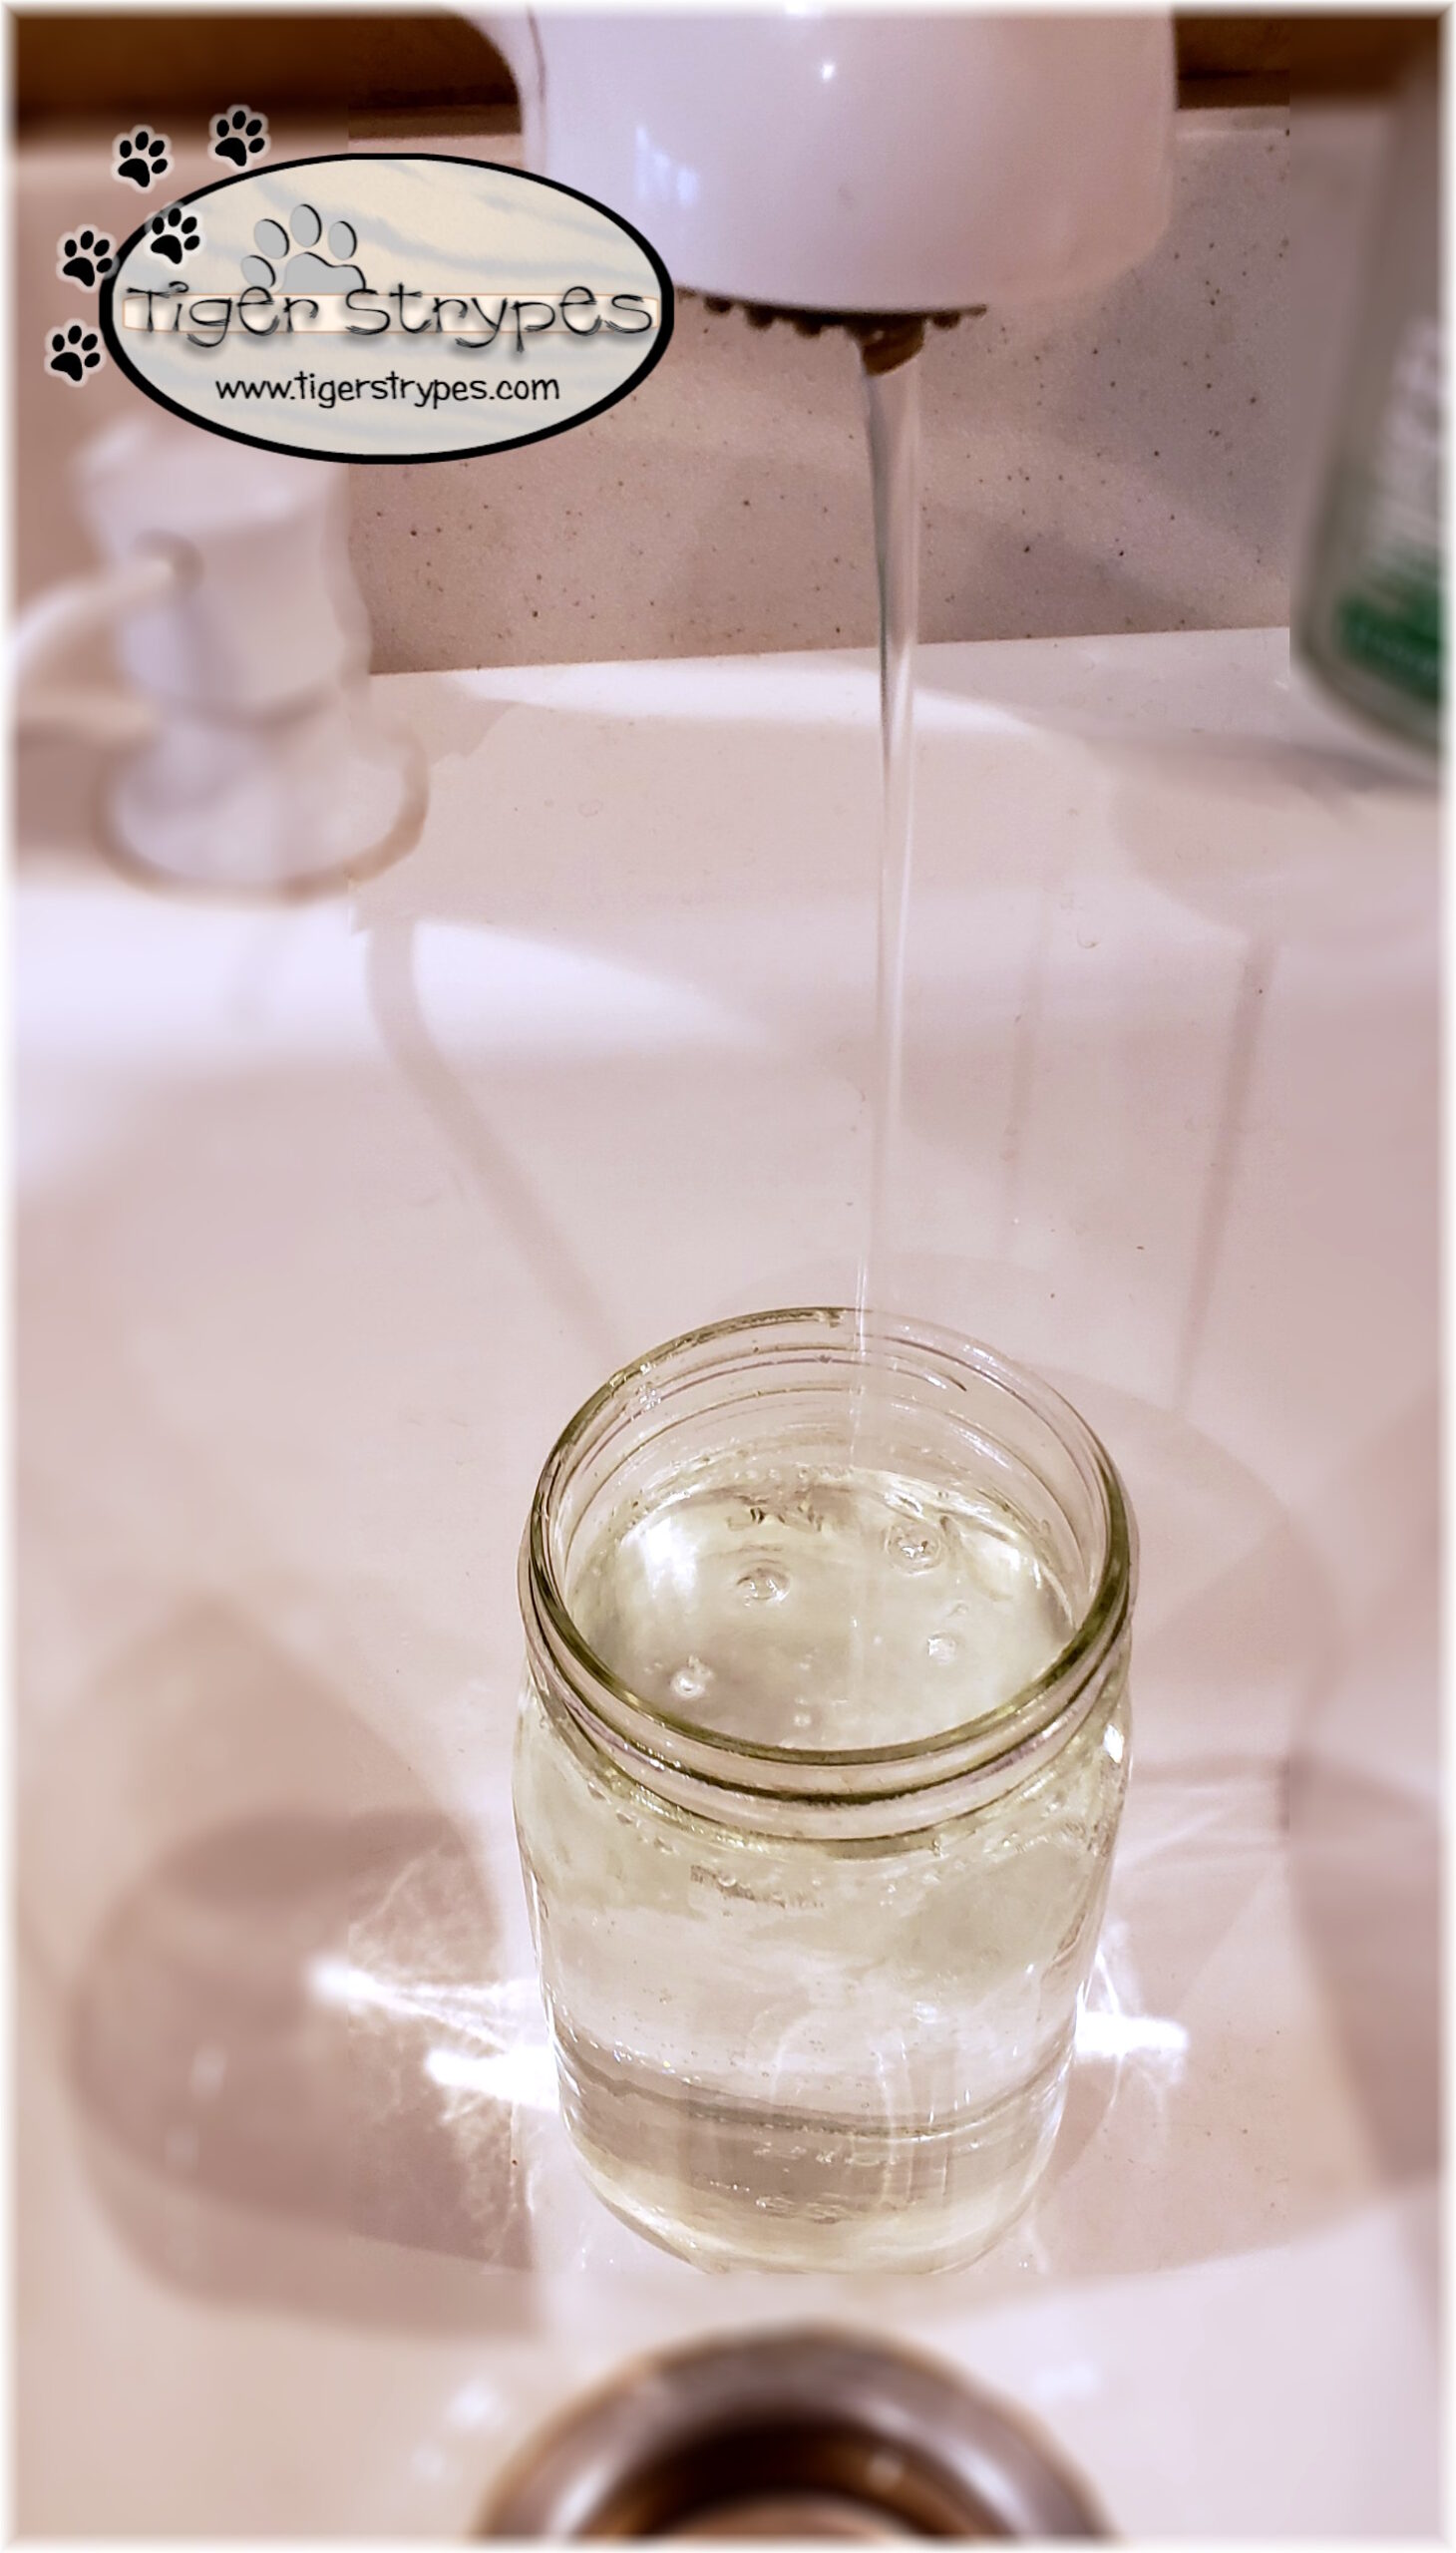
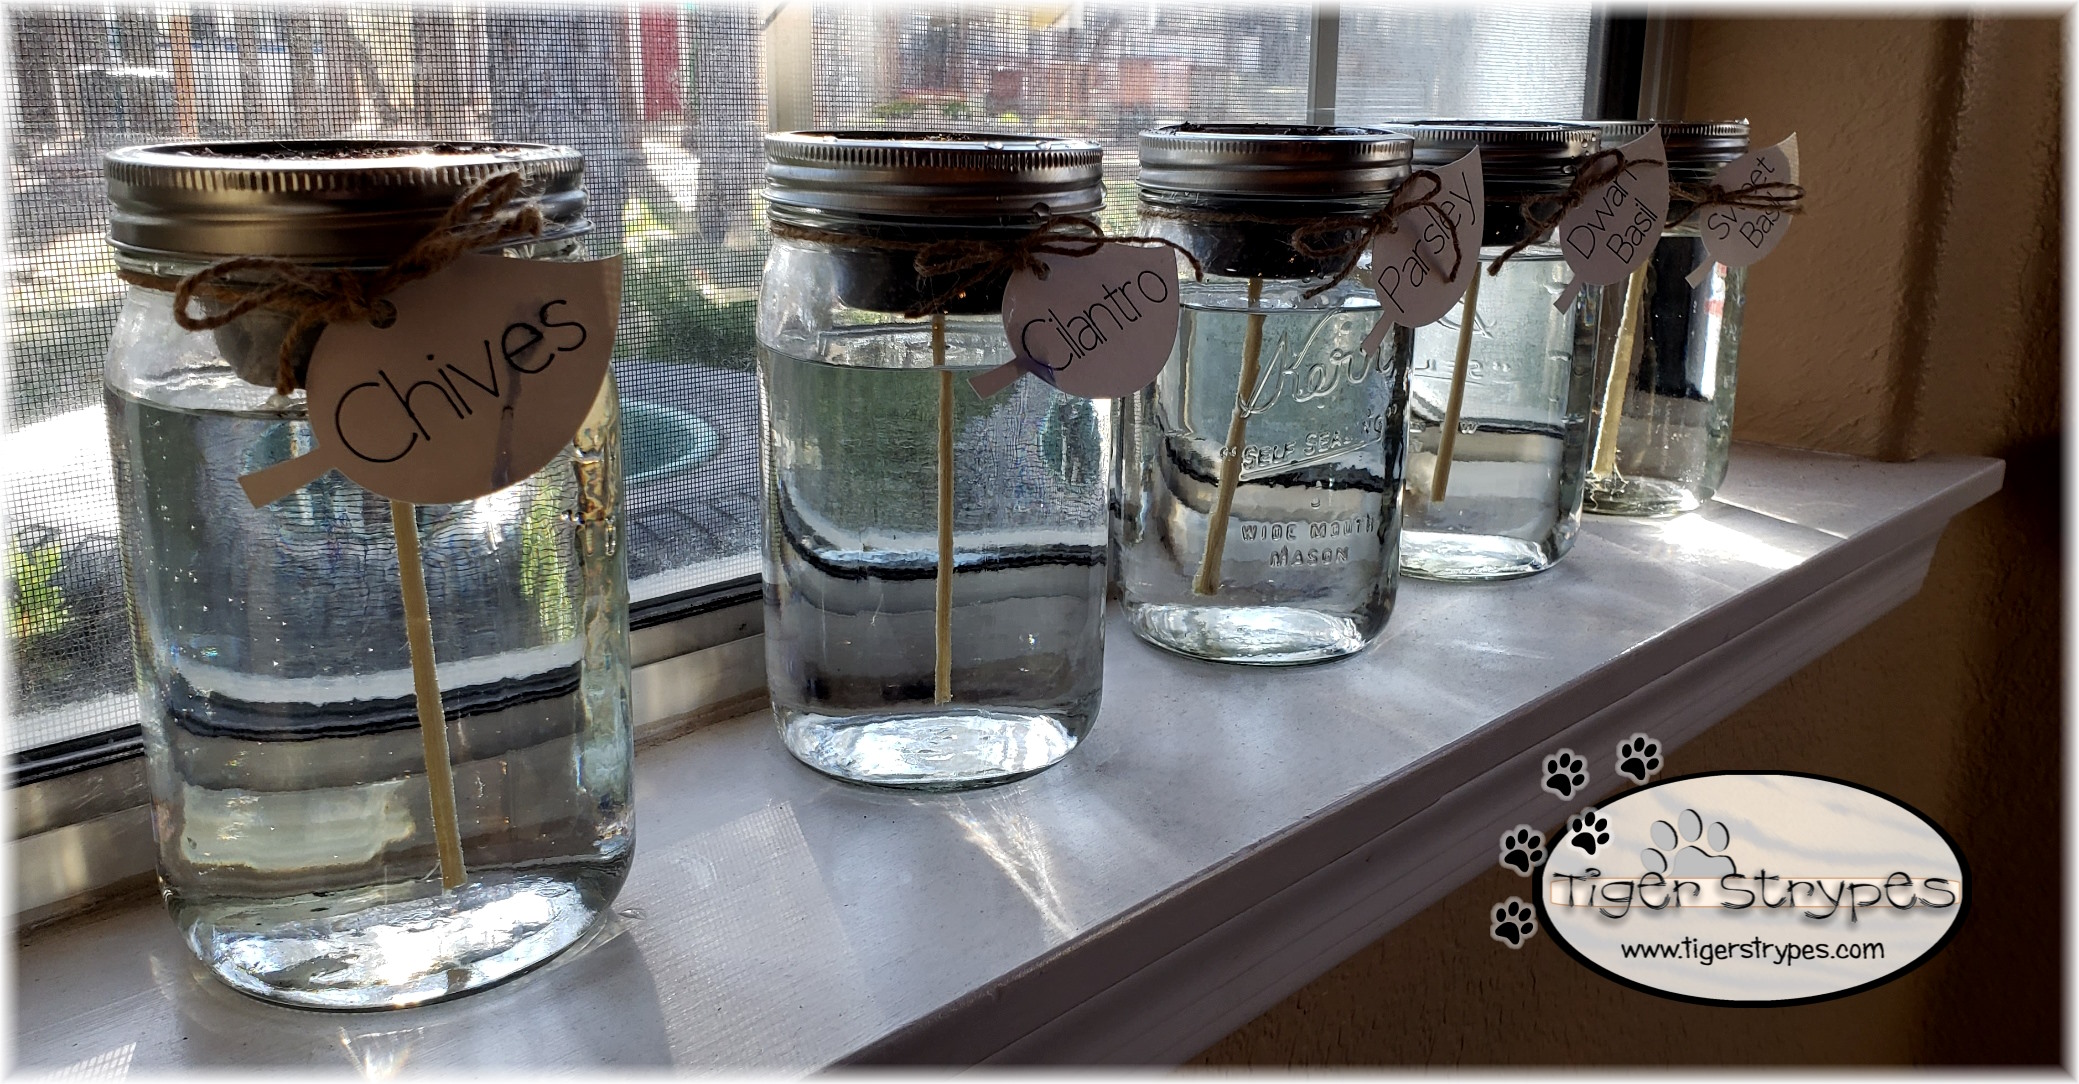
Start by cleaning out some applesauce or fruit plastic cups, and the mason jars (make sure the cup will sit on top of the mason jar – if it doesn’t, you might need a smaller size). Dry everything well, and set the mason jars aside.
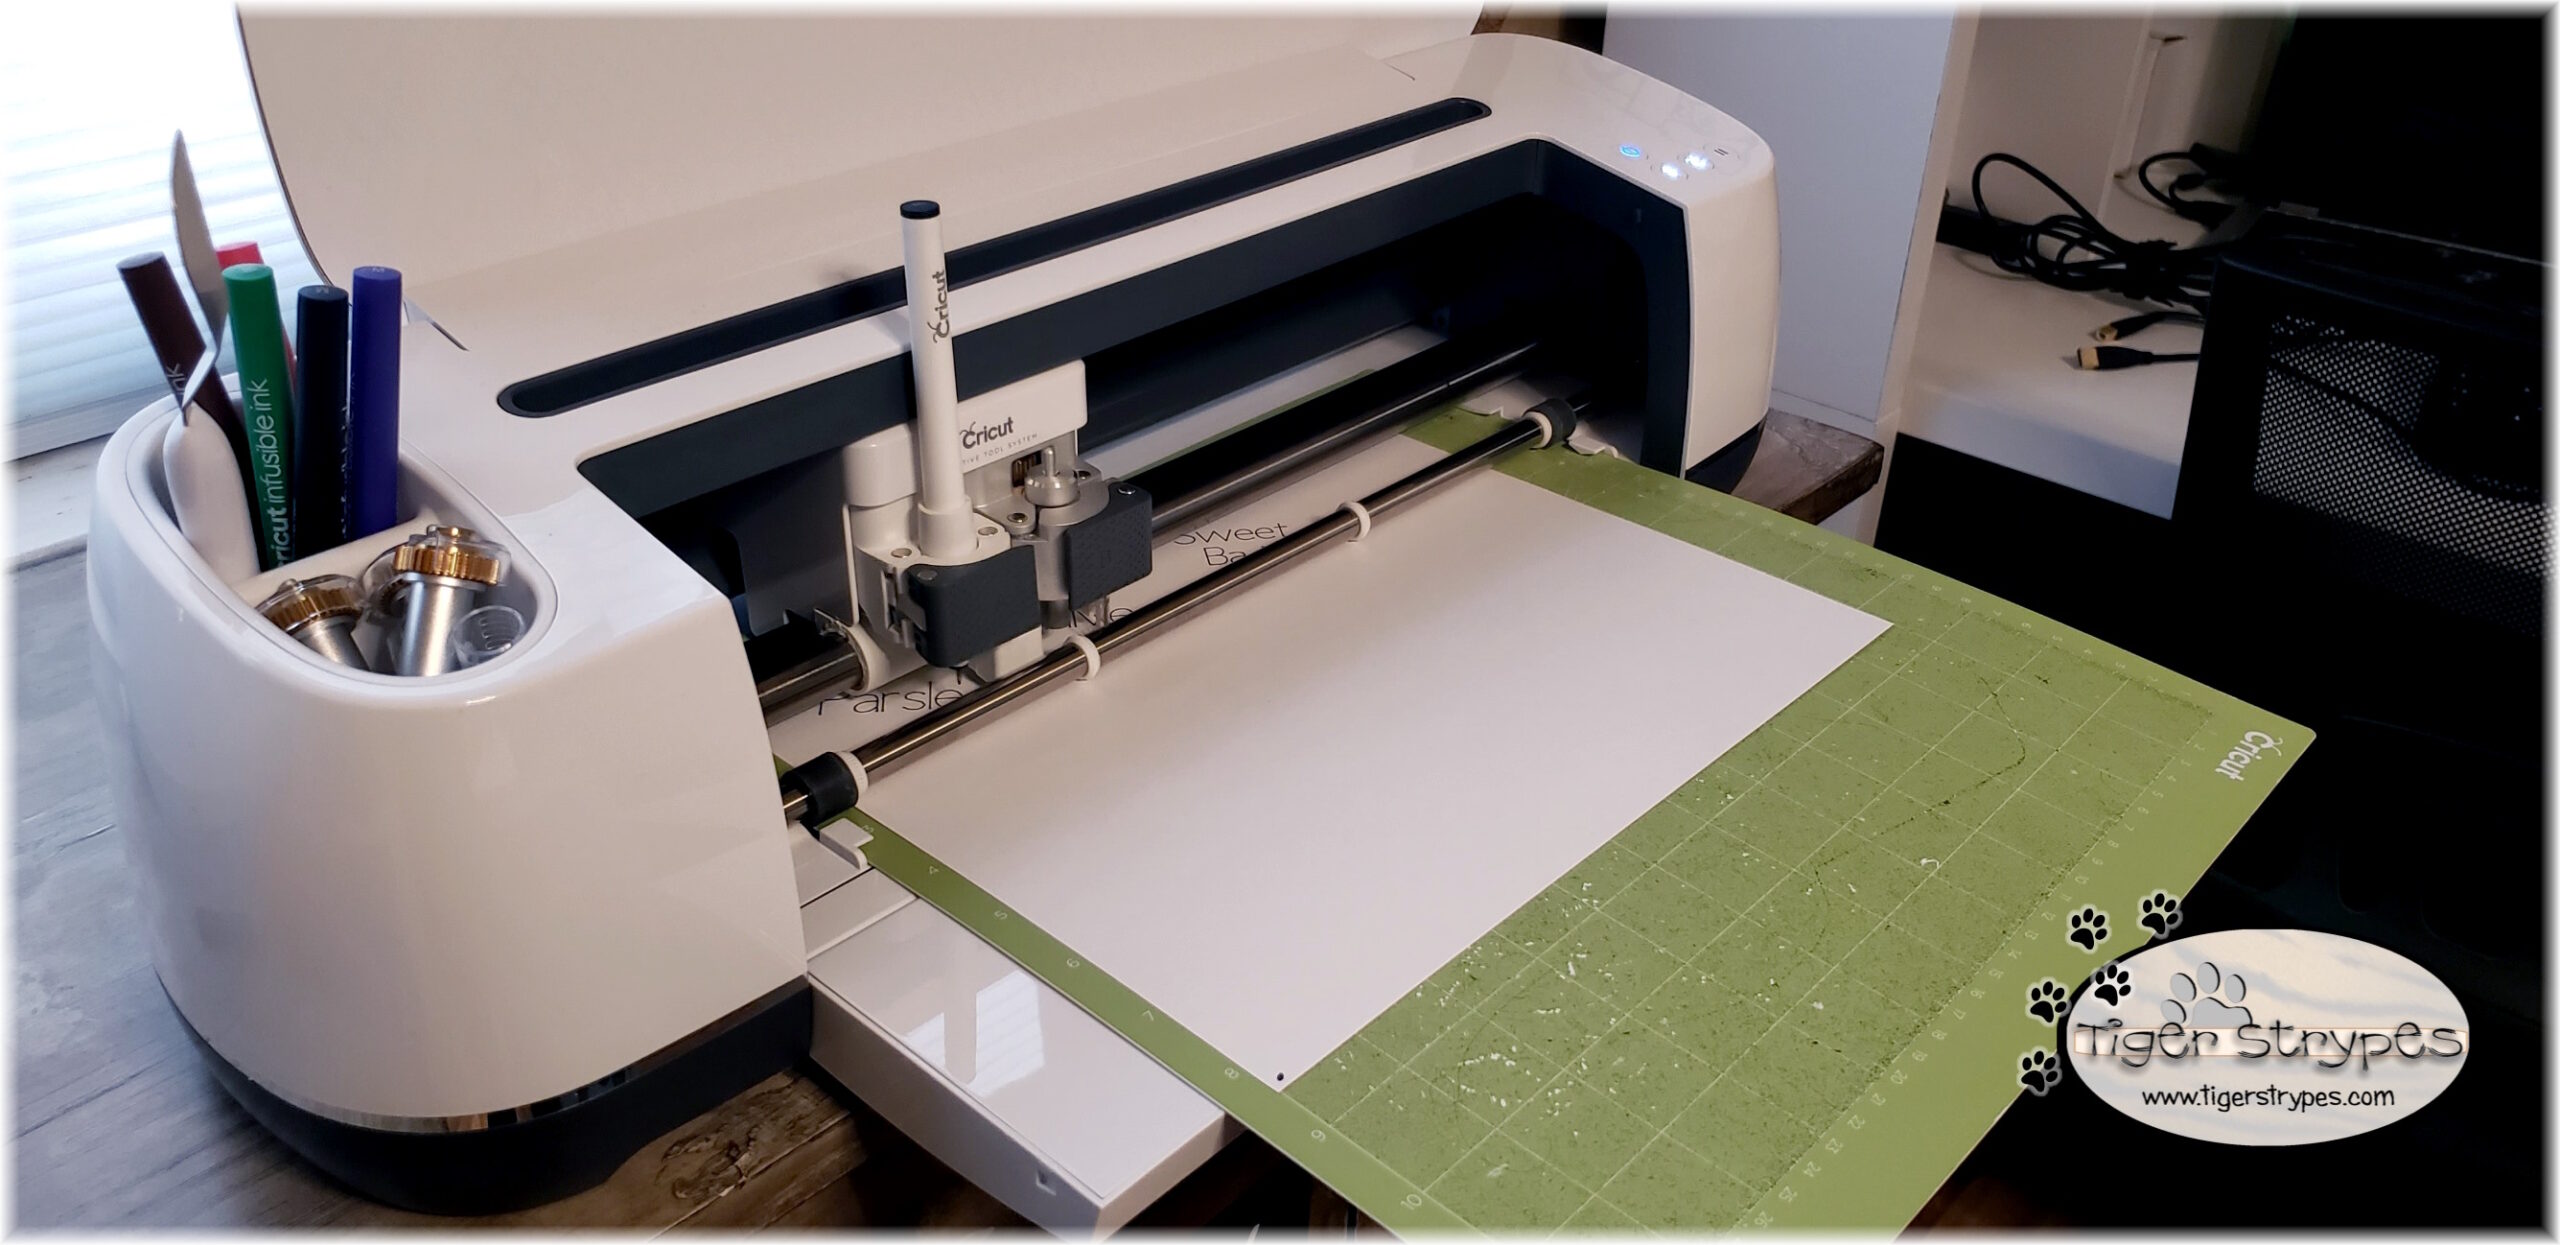
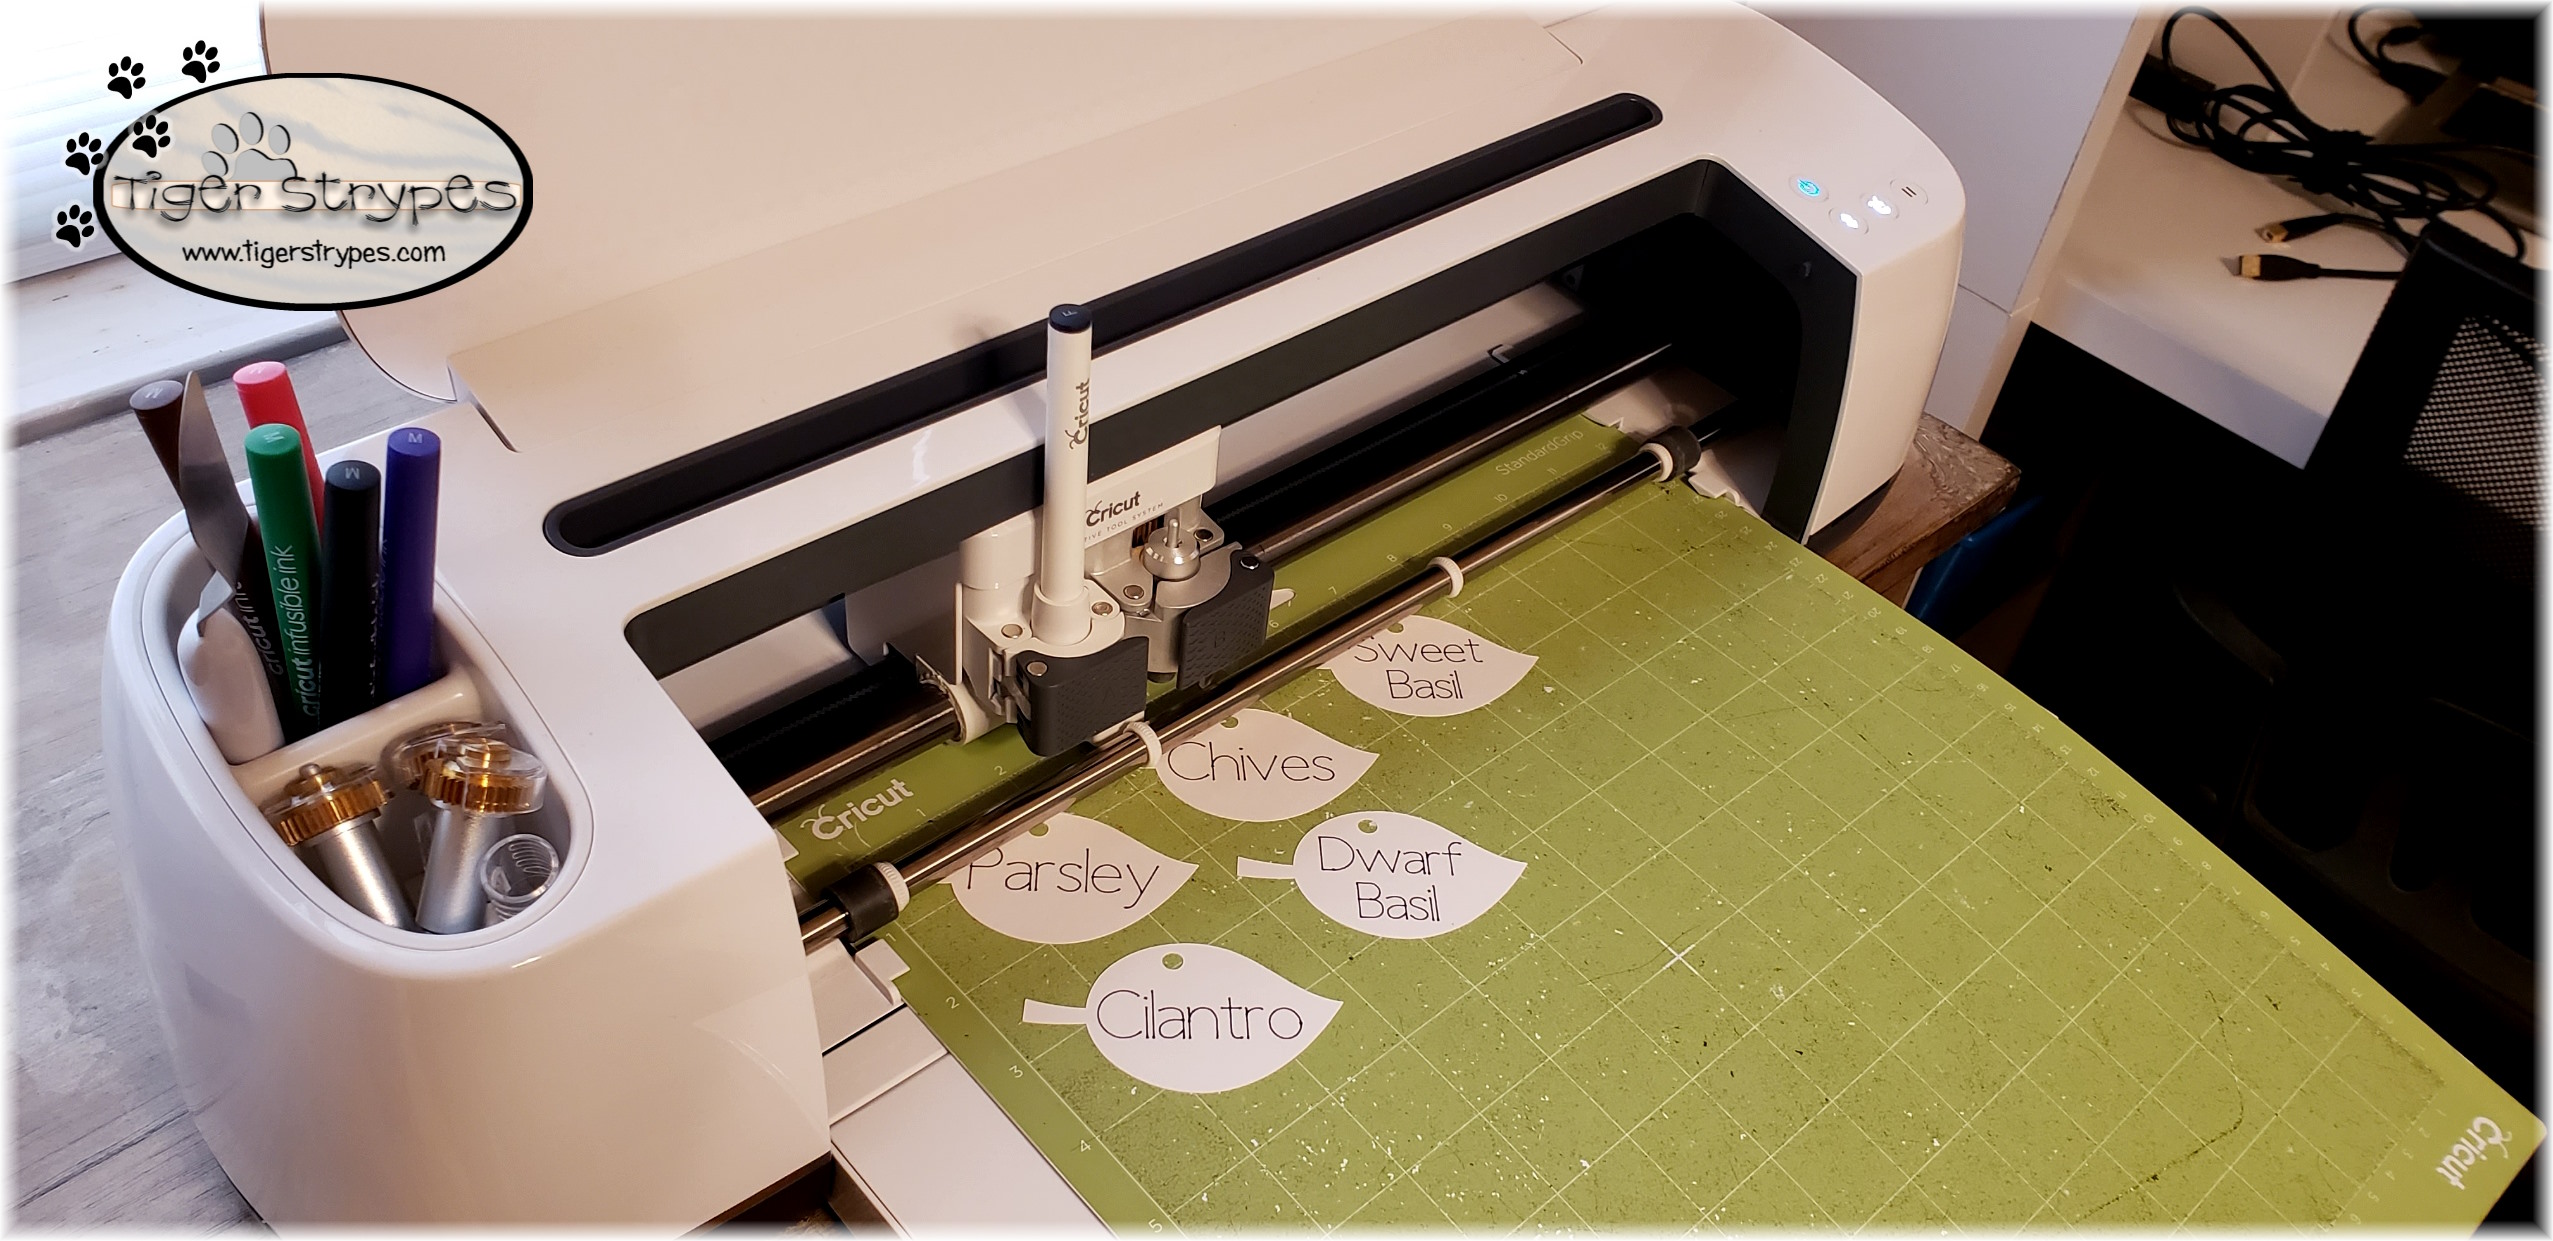
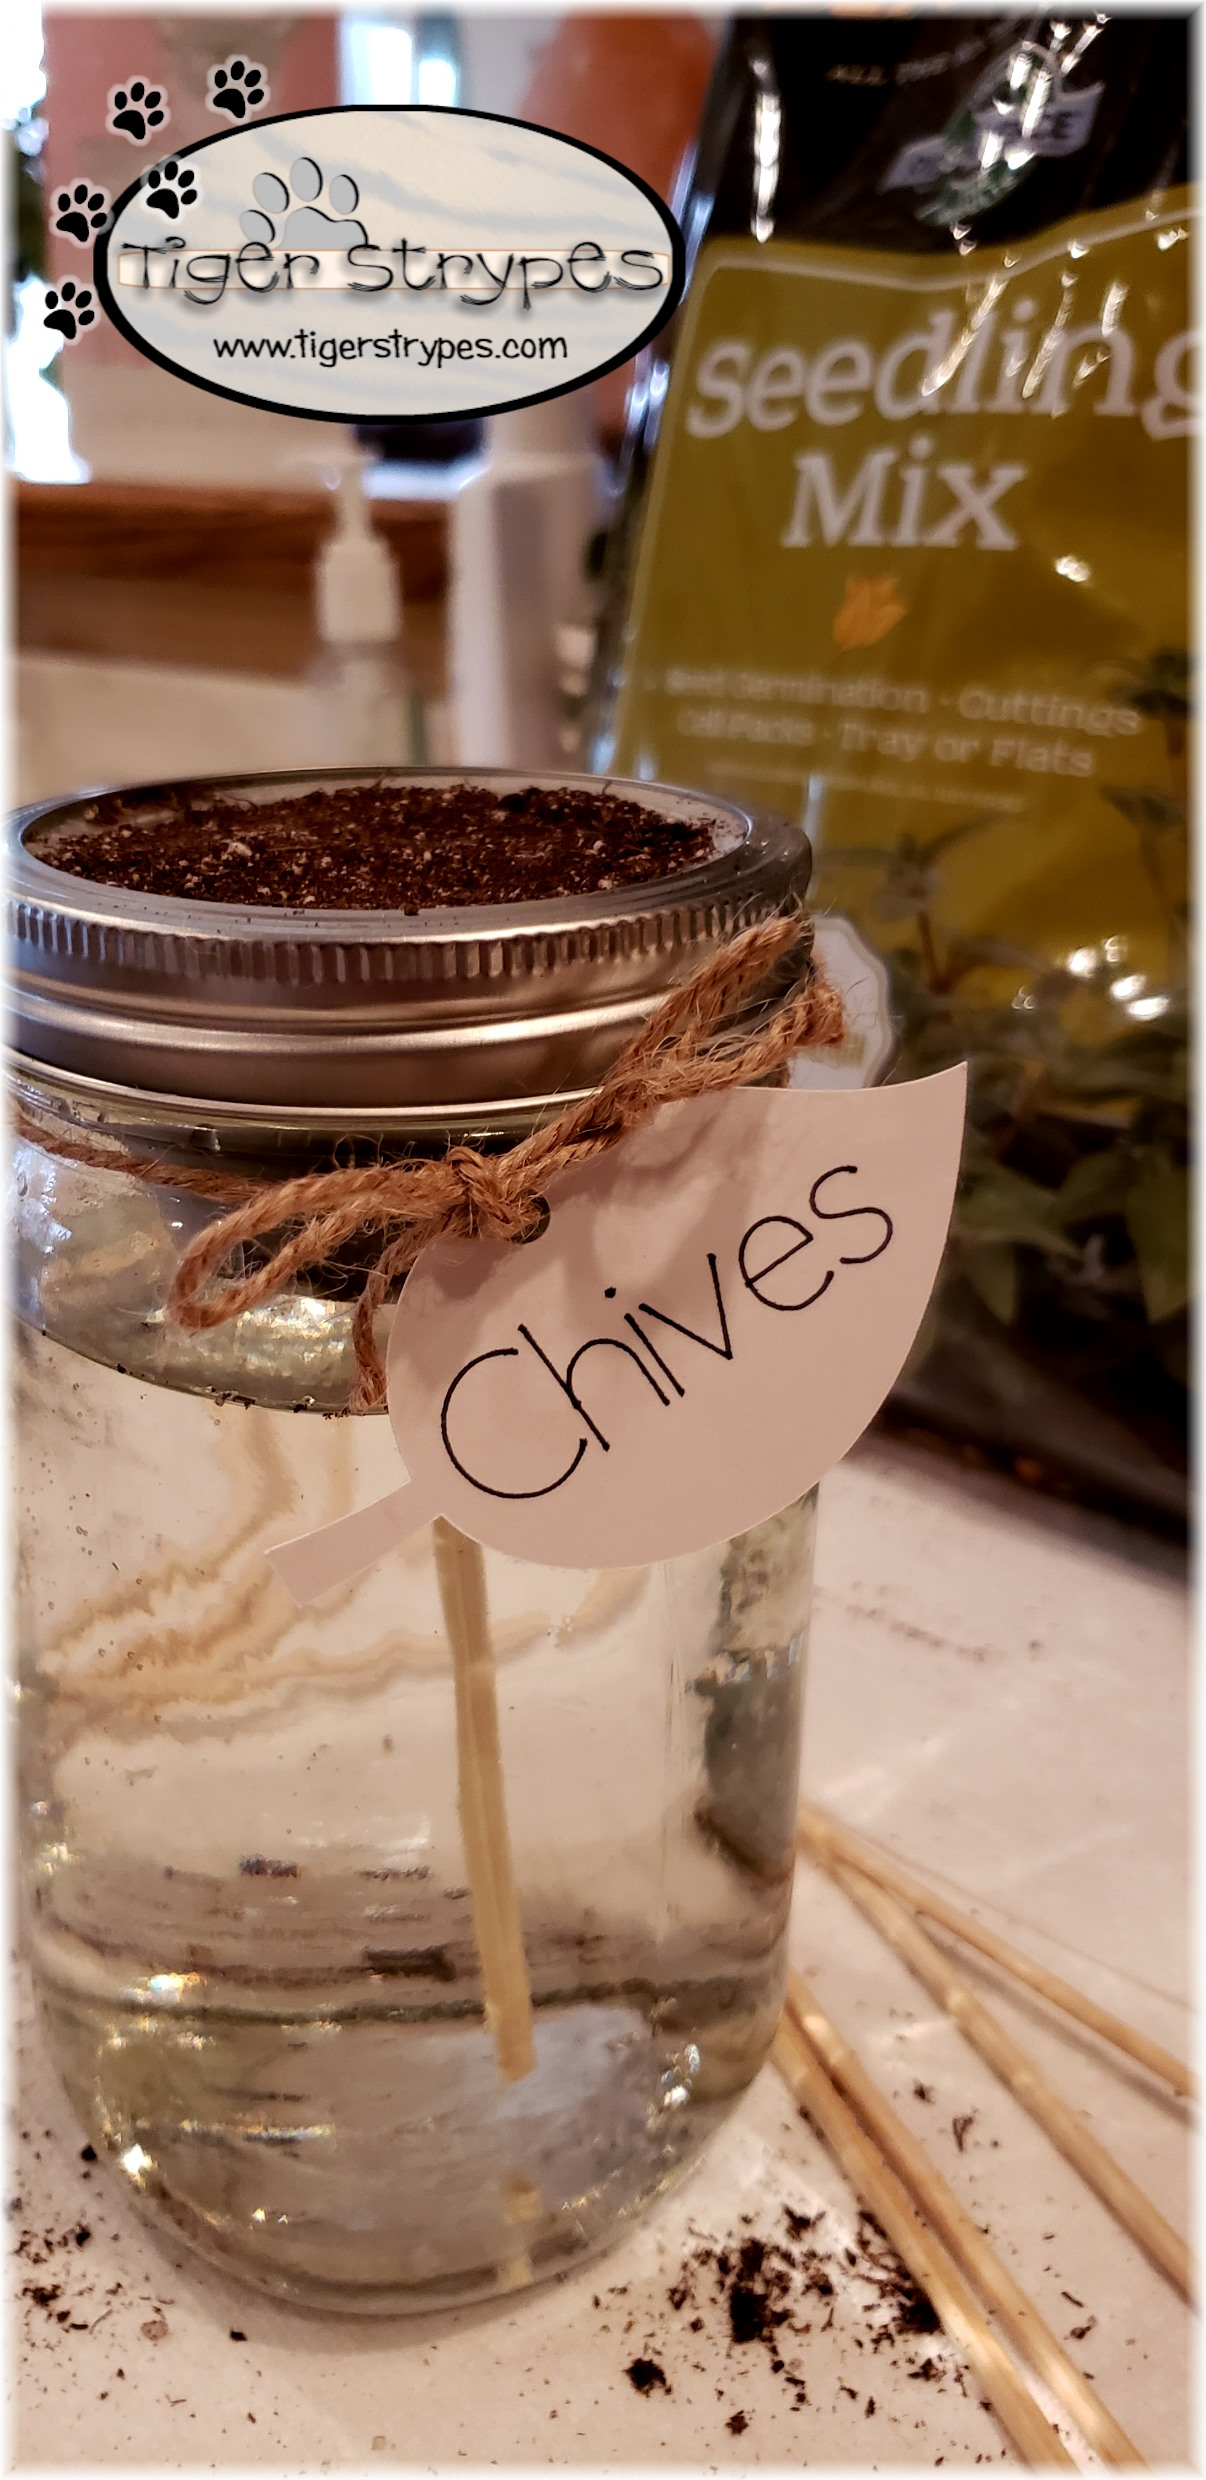
While you’re waiting for everything to dry, you can start on the Cricut project (if you want to). You could always just make your own labels another way, but I just love using my machine to cut projects. I just used a leaf shape to cut (as well as a small circle to insert the twine), and then the writing option for whatever I was putting in each jar. When you have it done how you want, send it to the machine to finish. Cut some pieces of twine to go around each jar, and be able to tie them in a bow, or however you want. Set this stuff aside, until after the planting is done, and then you can attach.
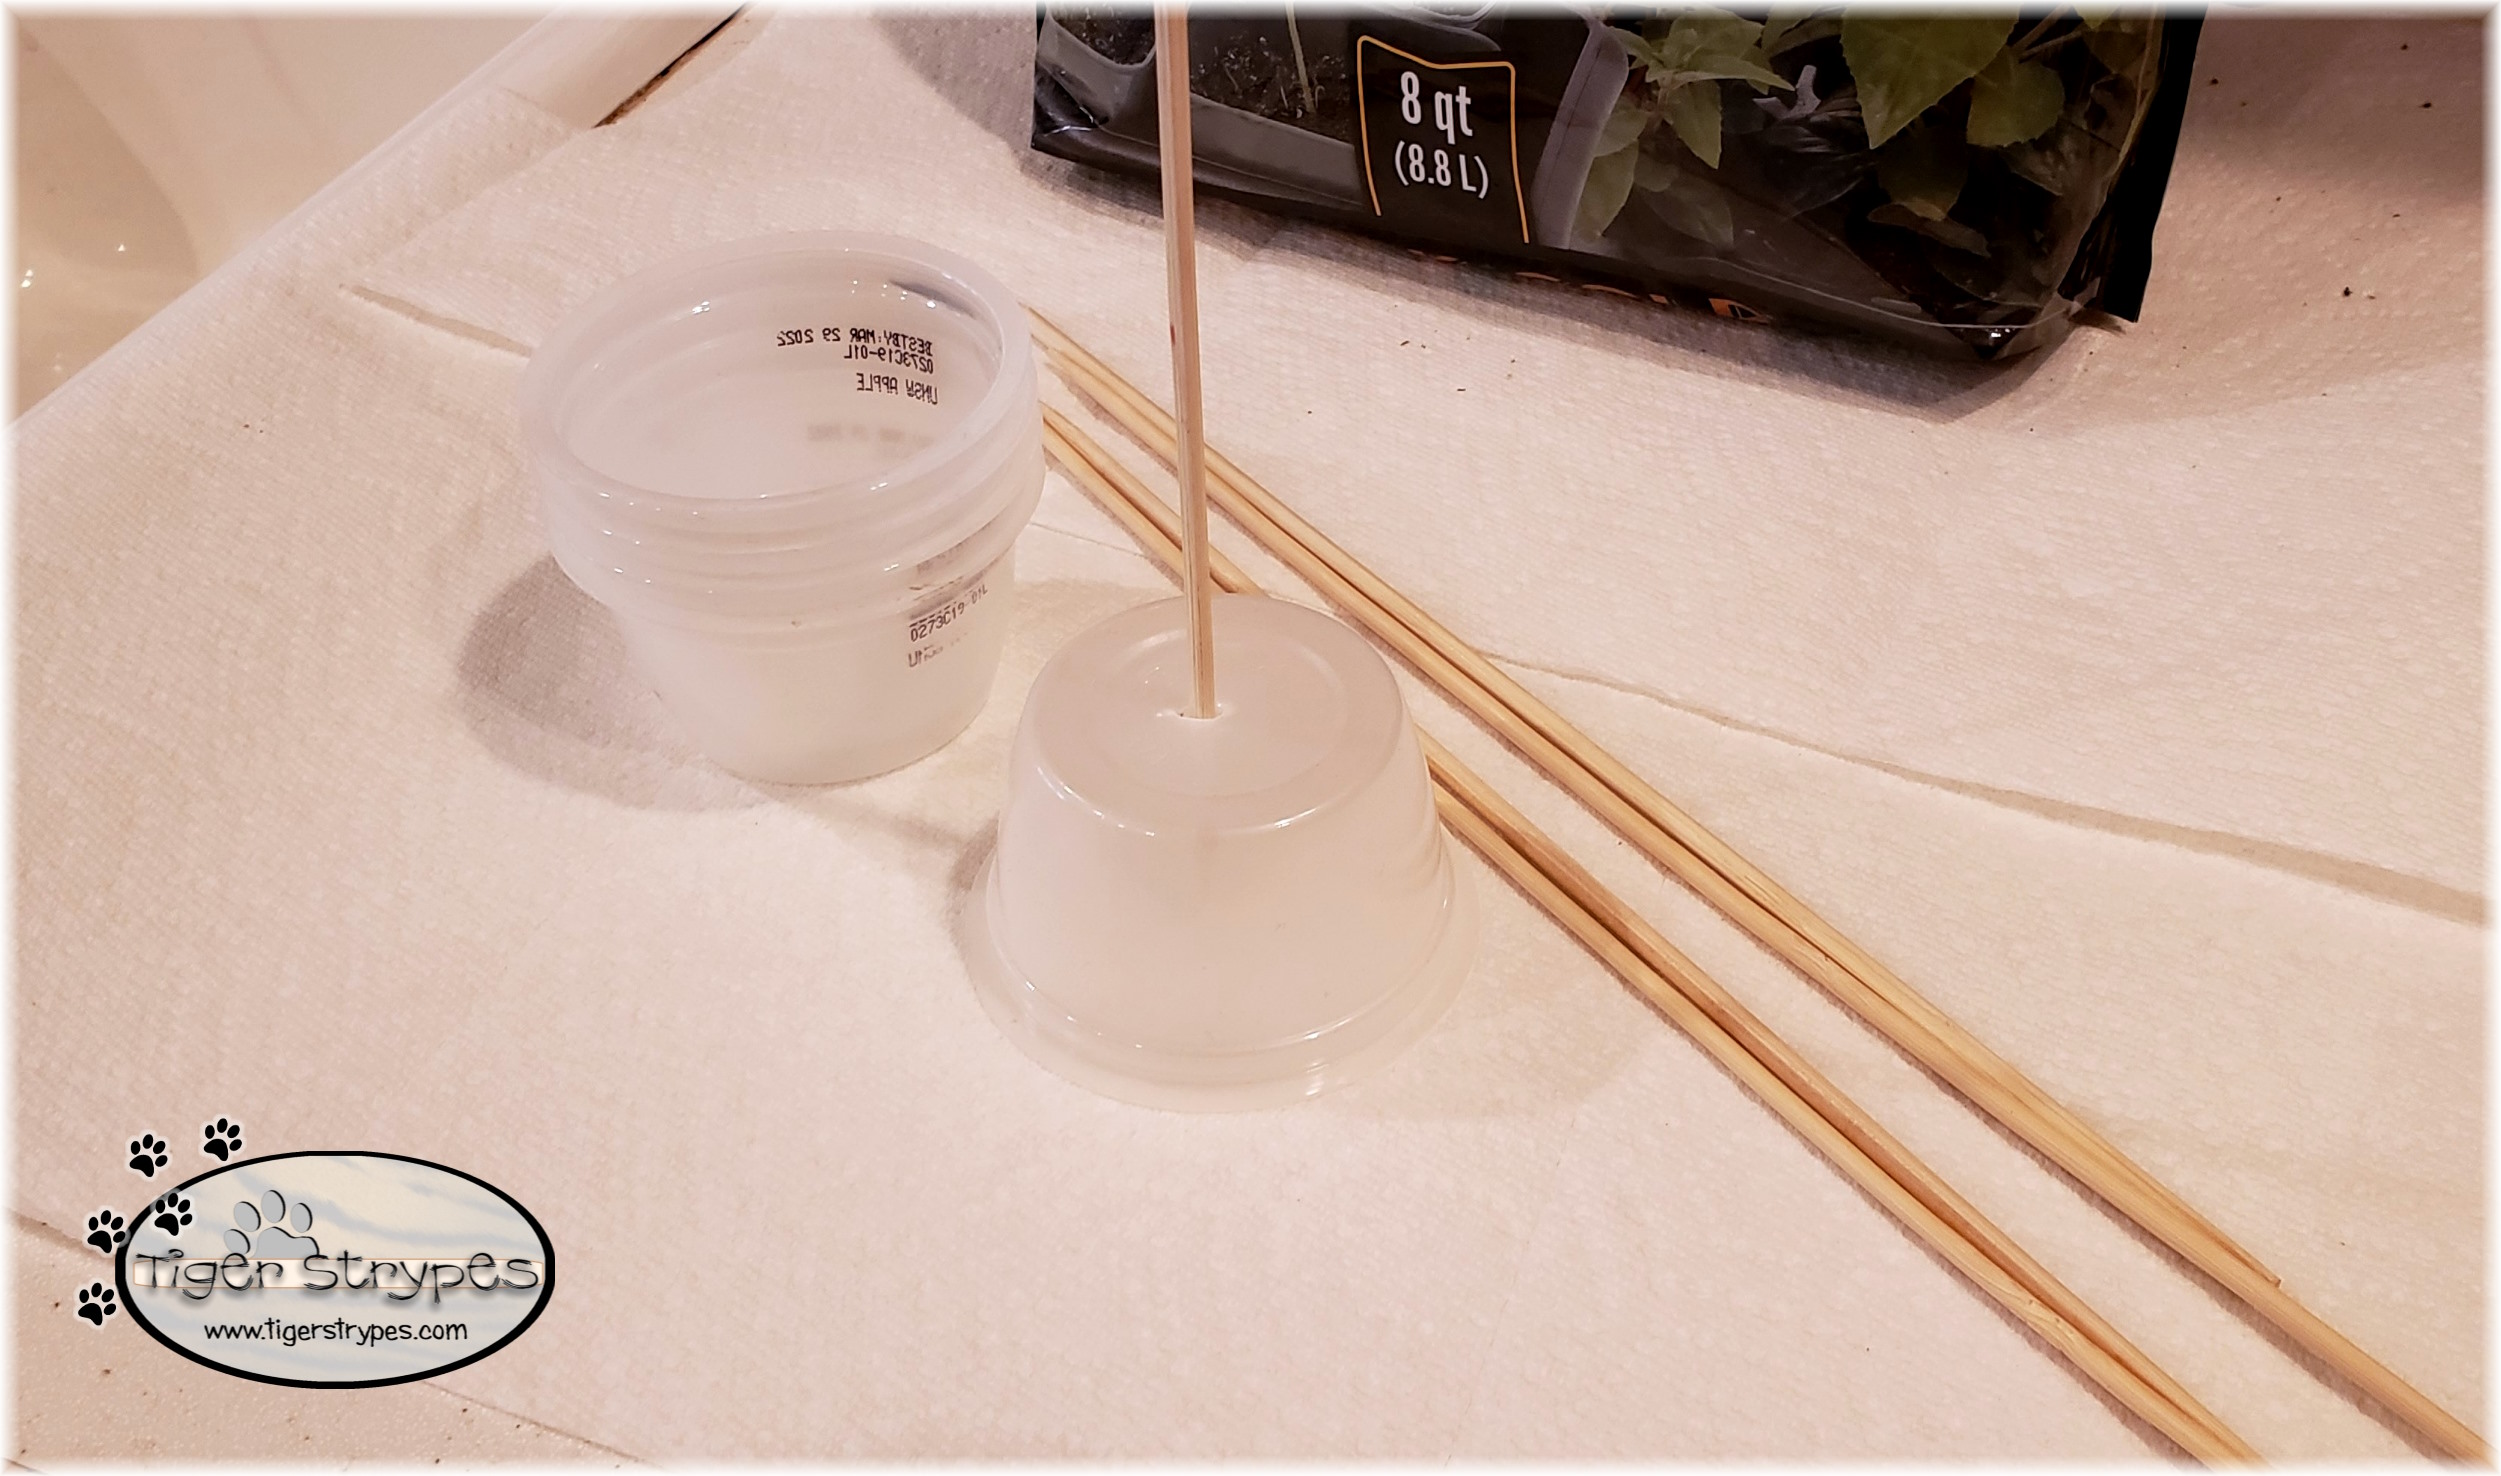
Get your wood skewers out, for the next step. Depending on the size of the mason jar, you might have to break them in half, or even smaller. Use the pointy side and poke one through the bottom of the fruit cup. Bring the tip to almost the top of the cup. Be sure to leave it just below the top, so you don’t poke yourself with one of the next steps.
Fill the mason jar with water, almost to the top. Don’t overfill, because it might overflow when you continue.
Place the fruit cup with the skewer into the mason jar. It should sit on the lip of the jar and be ready to be held into place.
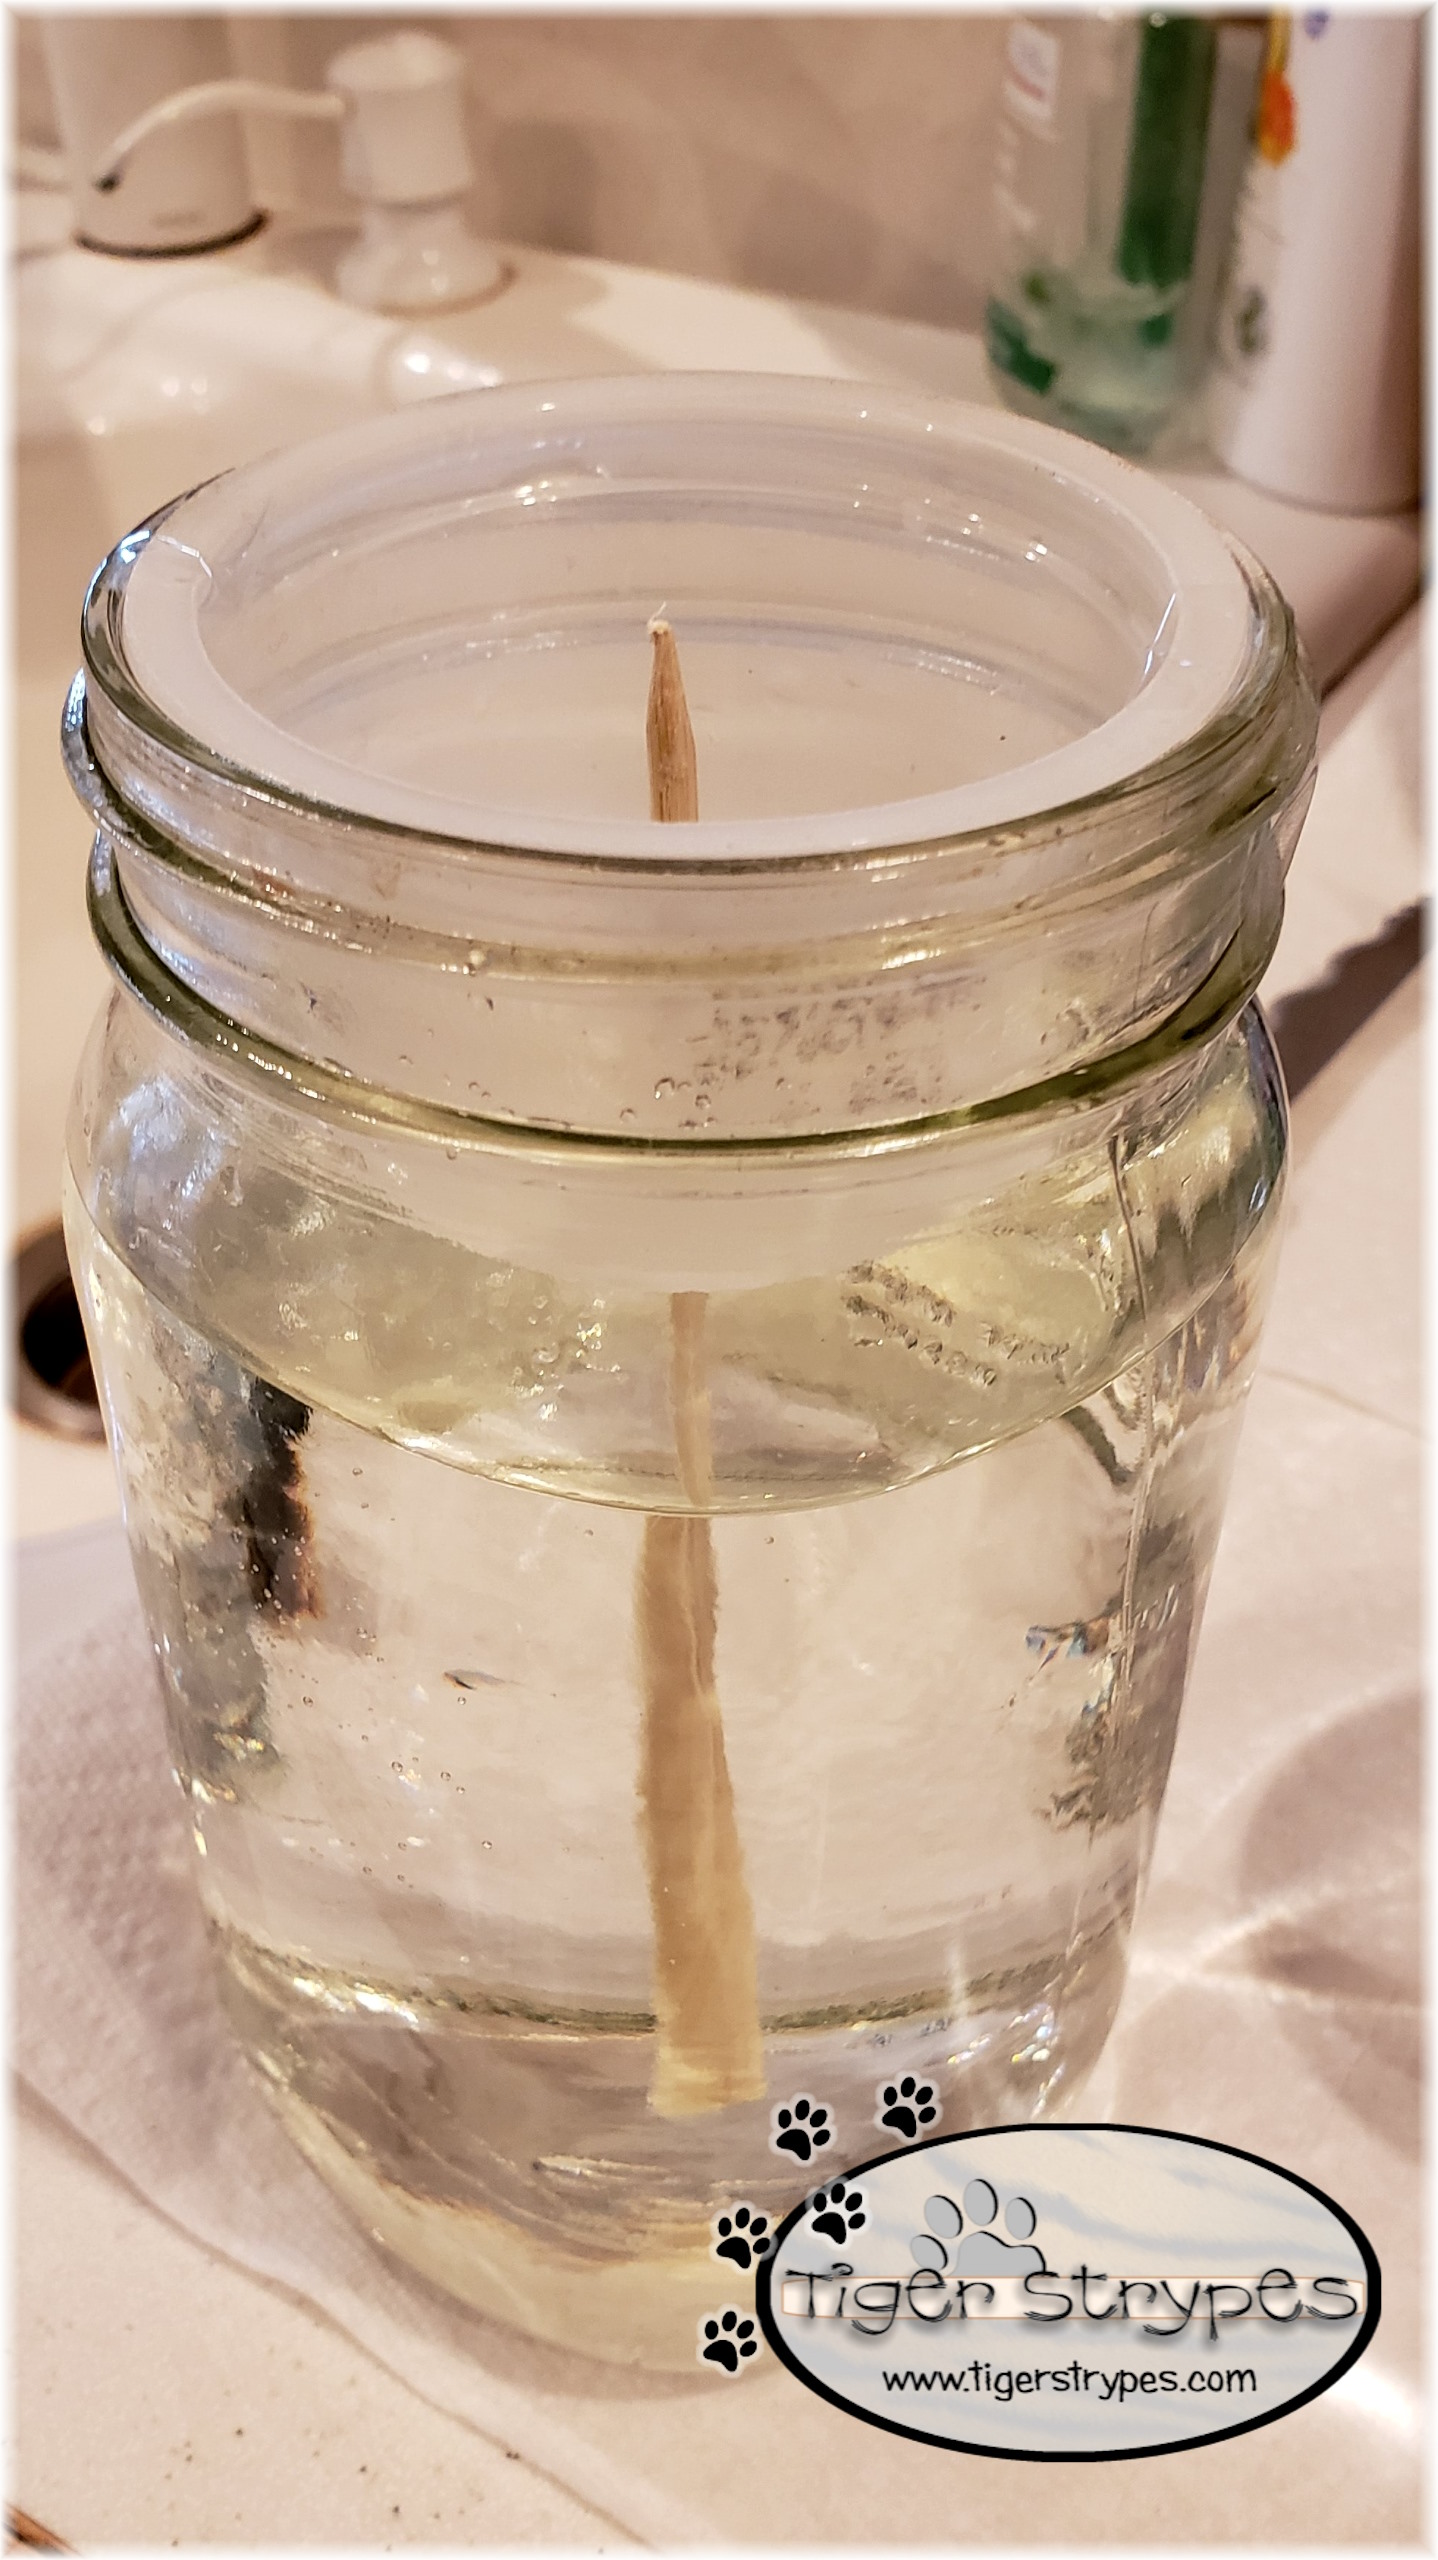
Screw on the mason jar lid to secure the cup. You can just set aside that lid insert for another time, or to use it again in another project later. Fill the fruit cup with some potting soil. Wet it down and add more, if needed.
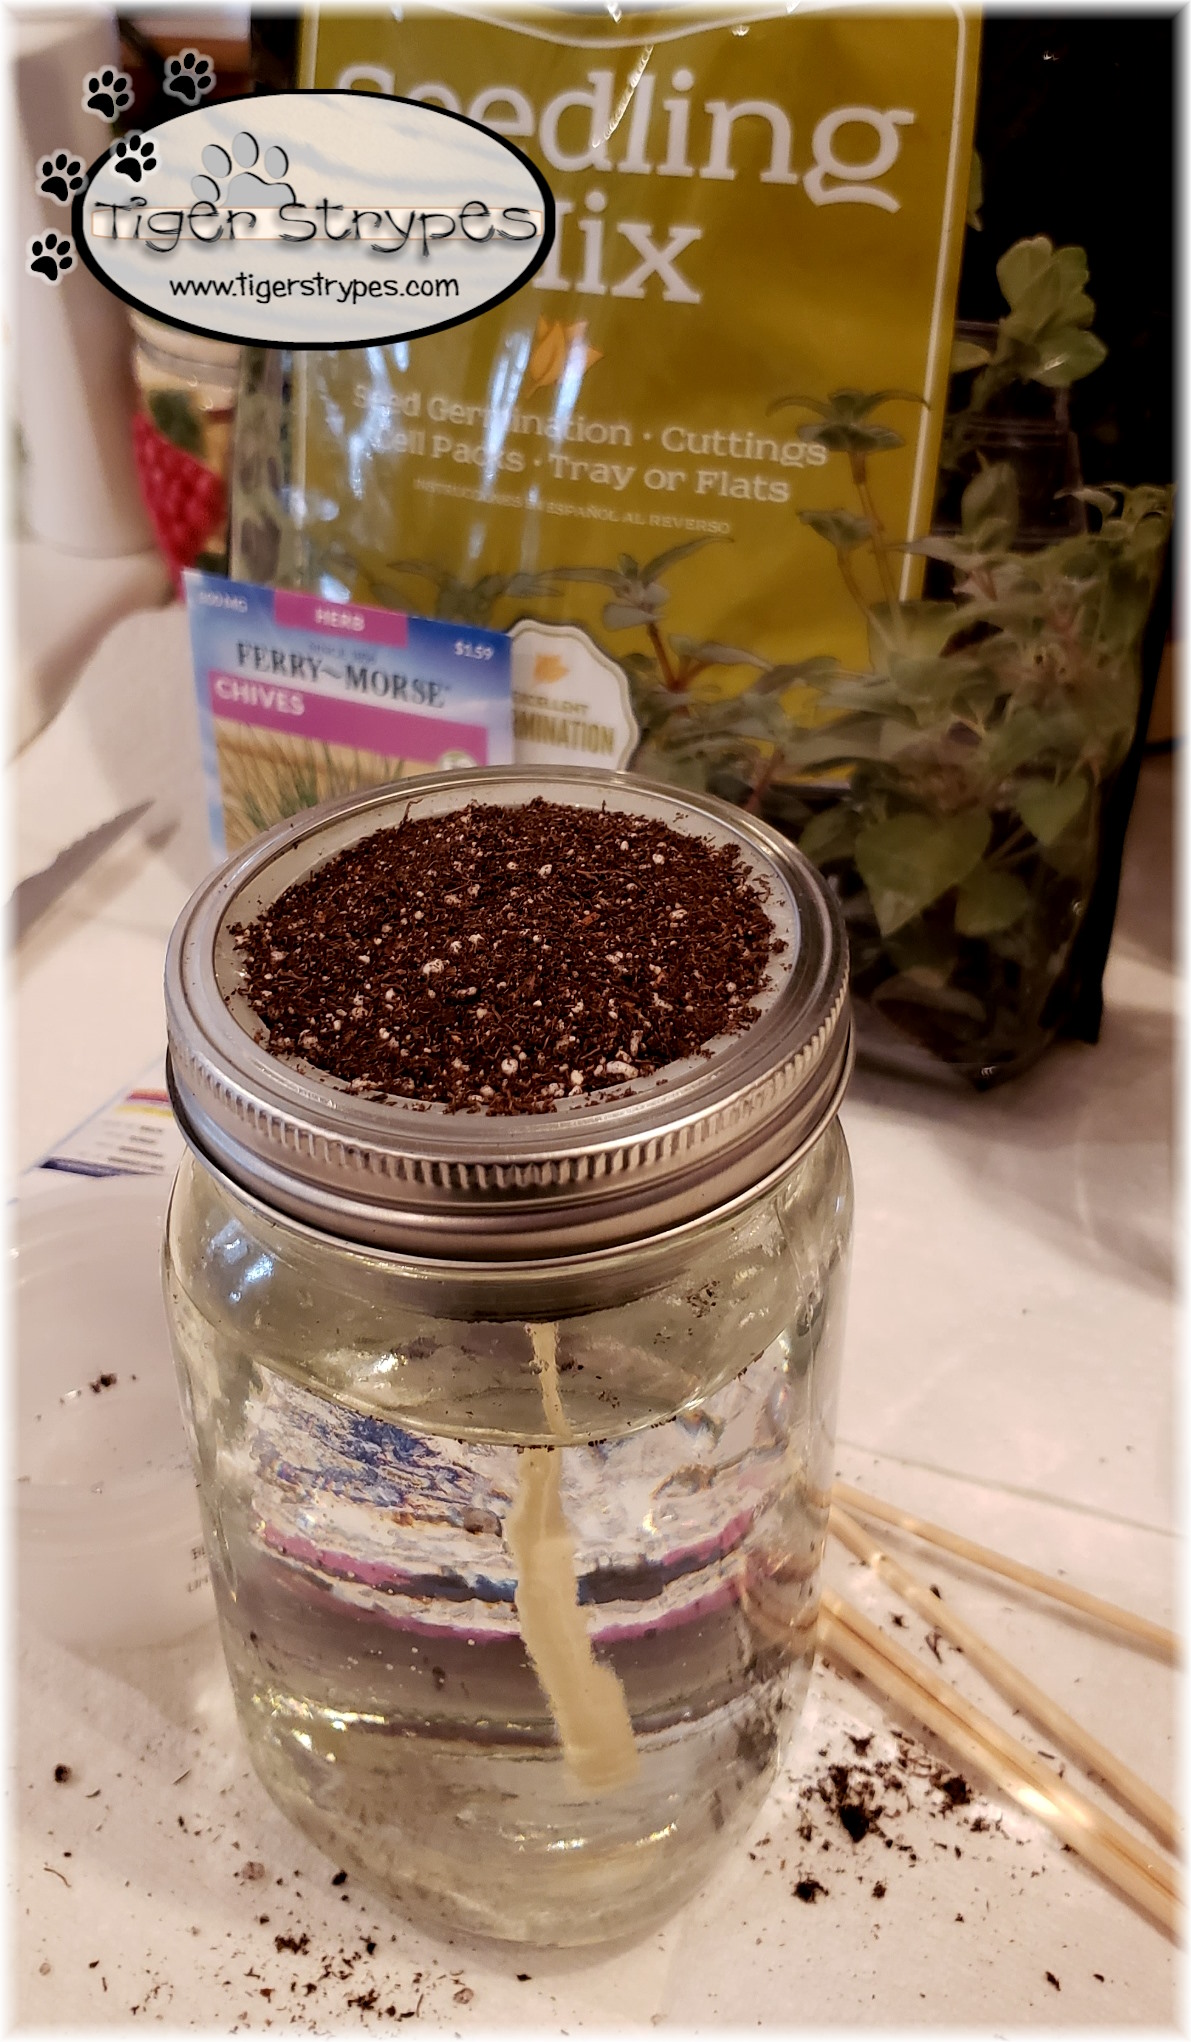
Using whatever seeds that you have, plant a few in the dirt you have ready. Once each jar is planted, you can attach the tags that we made earlier. Just run the twine around the top, and tie it into a knot or a bow. These just help to tell you what should be sprouting in each one, when the time comes.
After adding the tags, set them in a window that gets some good sunlight. Be sure to check them often to see if the dirt is staying wet, and refill the water, when needed (by unscrewing the top, and removing the cup to add more).
I hope you and your family are able to grow some great things. Be sure to leave a photo on my FB page if you get something to grow – I’d love to see it!
What do you think? I hope you like it! Please take a minute to leave me a comment on what you would like to create, and maybe if you have any tips on how to do it different, or better!
Be sure to tweet, pin, share, etc. – thanks!!
“…a time to be born and a time to die, a time to plant and a time to uproot…” –Ecclesiastes 3:2

PLEASE SHARE THIS POST USING THE OPTIONS BELOW…THANKS!
Affiliate links for Amazon are used on my site. This means that when you click on a link, and make a purchase, I earn a commission for that purchase. There is no extra charge for you, it’s just their sites way of saying thank you for helping them get a customer. I use affiliate links to help fund my crafting budget, as well as help provide for our home.


This is a great idea and looks super easy! They’d look cute on the windowsill too.
Thanks, Julie – they are fun to grow! 🙂
Love the super cute tags! Mason jars just totally rock, so many awesome uses!
Thanks!! I’m always looking at more projects to do with them. You can never have too many! 😉
Love it! This would be a great thing for the kiddos to do. We love our plants and have a ton of jars!
It kind of reminded me of a science experiment, so it would be great for learning! 🙂
This is so adorable. I love the little labels. I do not have a green thumb, but I may have to try this!
I love using my Cricut for everything. Figured it was good for gardening, too! 🙂
You make it look so easy that even I might be able to grow these!
It would be a lot easier if they planted themselves!! ha/ha Let me know if you try it!