
“Illuminated Pumpkin Craft”
#TigerStrypesBlog
I saw this craft on the Recaptured Charm website and loved it. I wanted to try it out for myself and do it a bit different. Fall and Harvest season are my absolute favorite time of year. The air is getting crisp and the trees are beginning to change colors up here in the White Mountains of Arizona. We usually plan a trip up a bit higher in the hills to see the glorious artwork that the Lord provides in the hills.
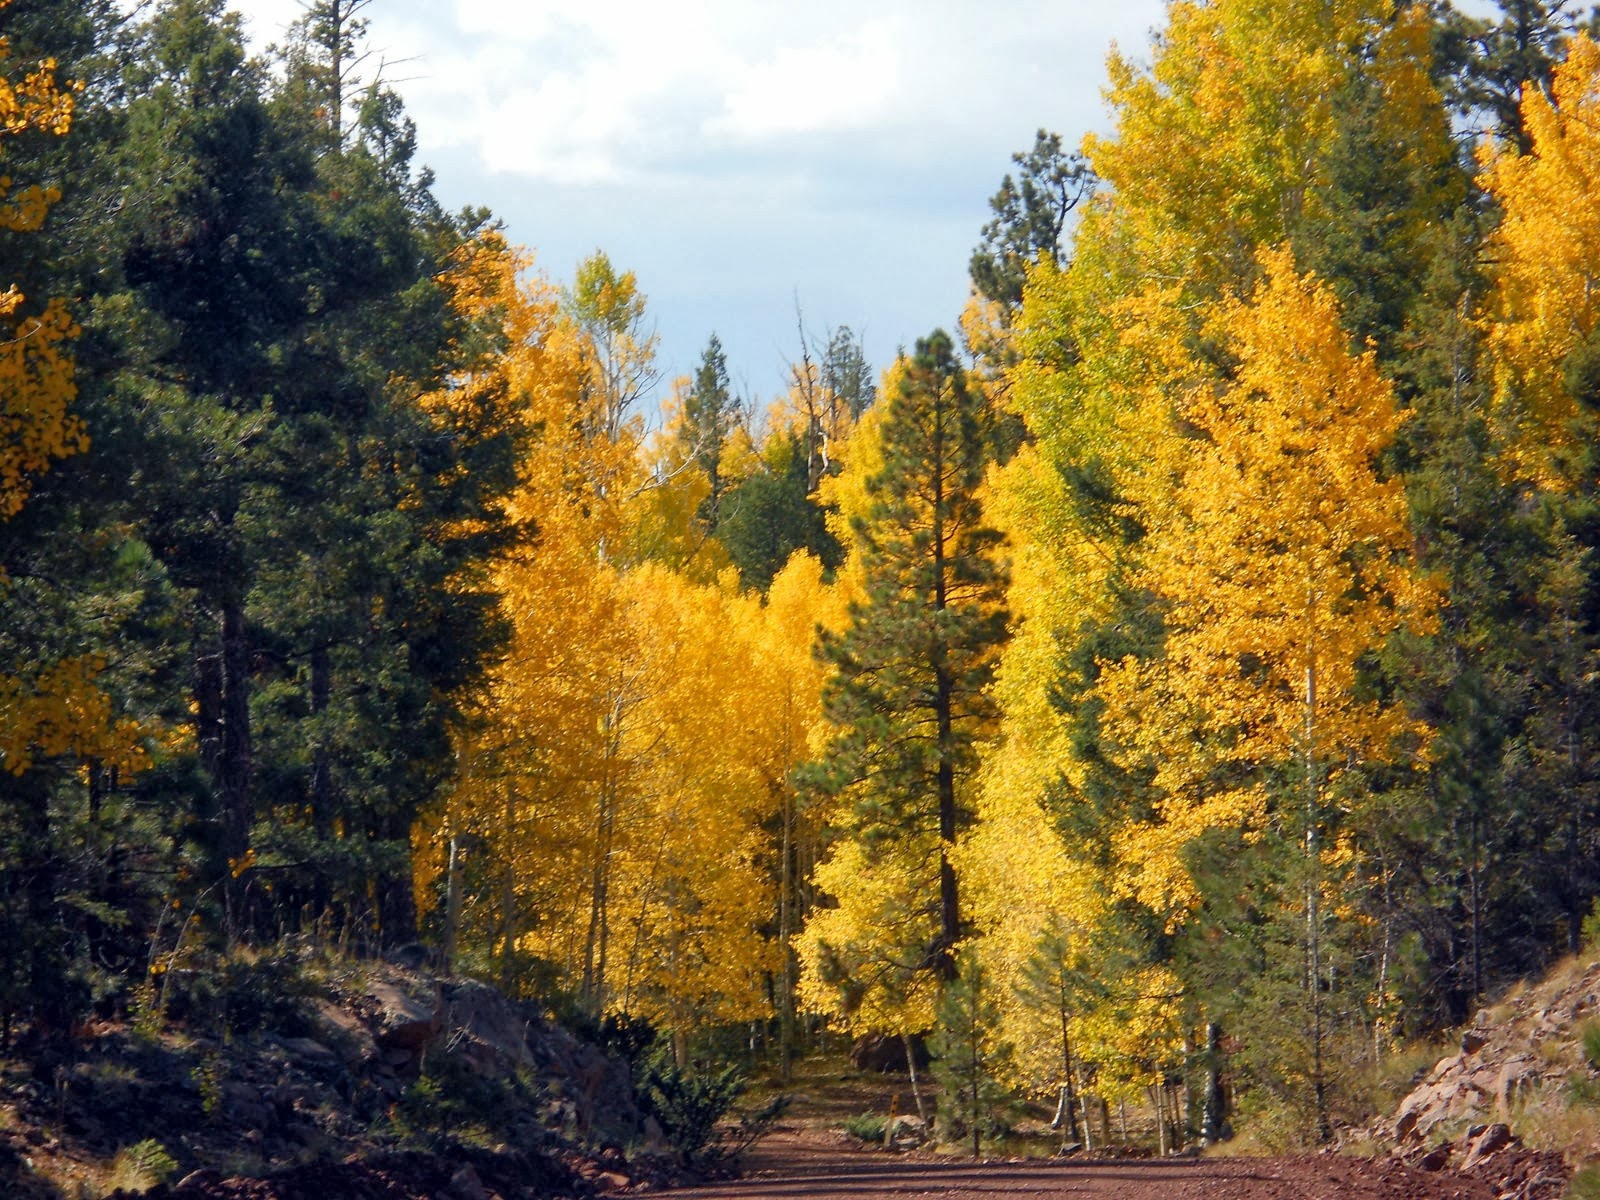
Here’s a picture from a past Fall season in our area:
For my craft, I wanted to make something that wouldn’t be set to any specific holiday. I don’t really “celebrate” Halloween, per se, however really put an emphasis on the Harvest Season of this time of year. This craft can be left out for Thanksgiving time, as well. Pretty easy to make, and would be really fun for your little ones to help out to get their hands full of glue (I sure wouldn’t miss that part) ha/ha. I hope you like it!!
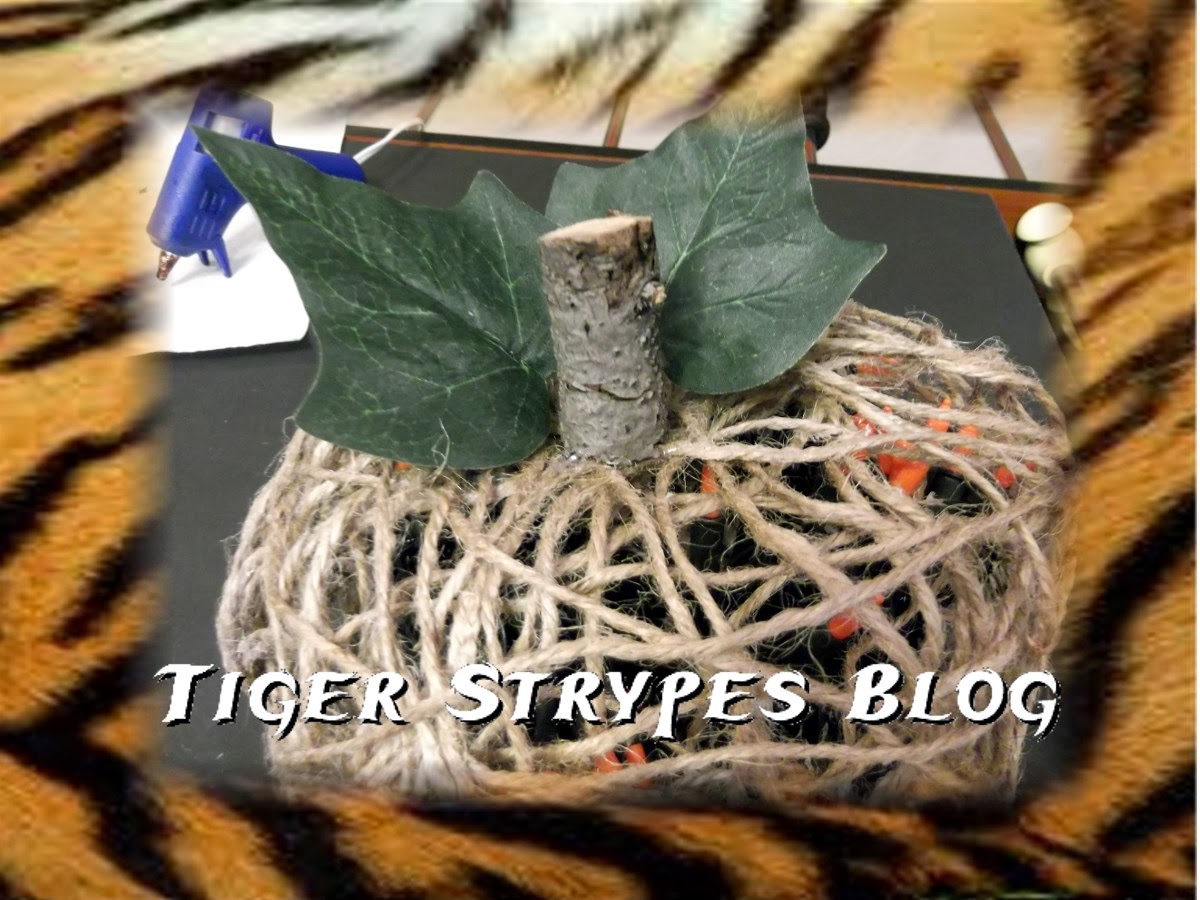
“Illuminated Pumpkin” Craft
- Balloons
- Shipping Twine
- White Glue
- Sponge Applicator
- Gloves
- Lights
- Twig/Branch
- Newspaper for Table
- & Time
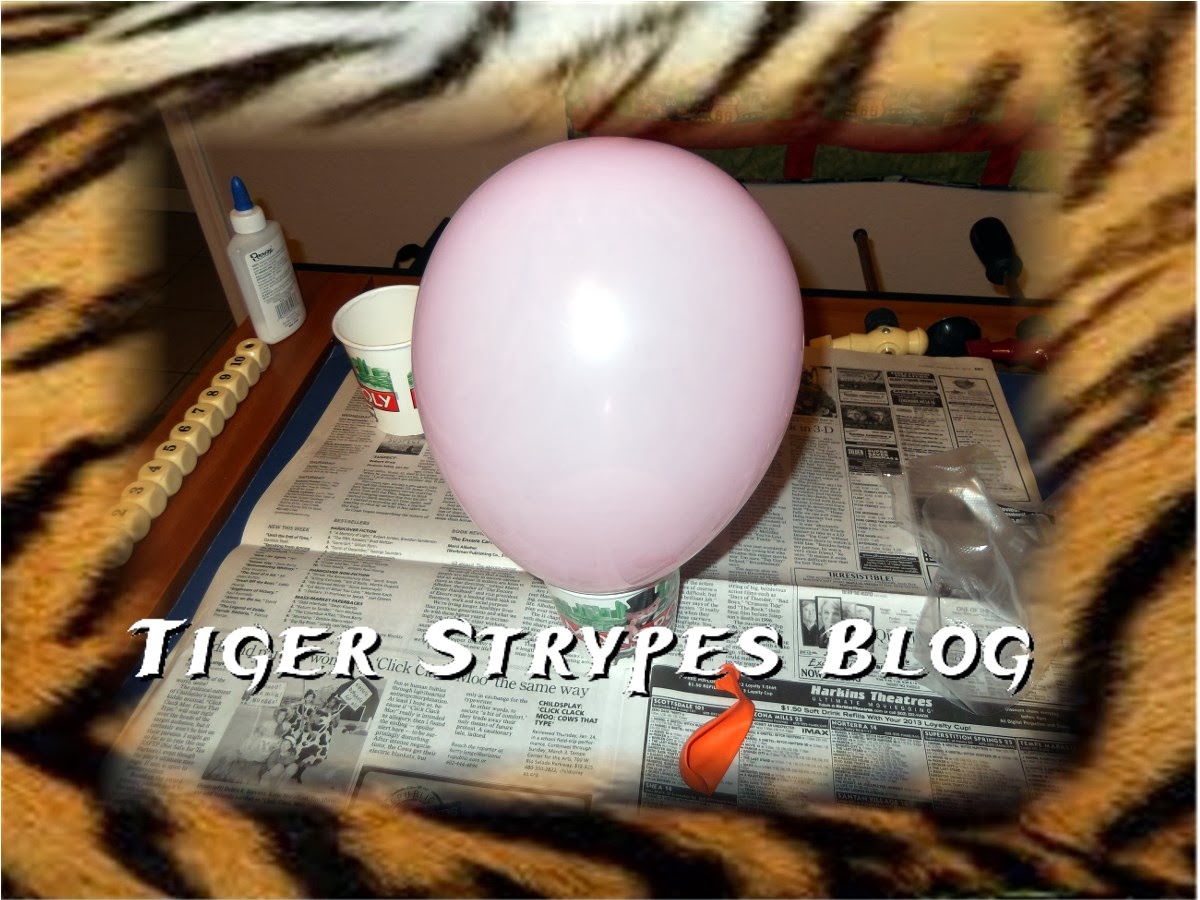
Most of the materials needed, I was able to get at the Dollar Tree in our area. The lights were the only thing I had to buy elsewhere, but got on sale, so not too expensive. Begin this craft by blowing up a few balloons to the sizes you’ll want your pumpkins to be (give or take). You can secure them in plastic cups to make it easier to attach the twine. I actually ended up using my gloved hands to just hold them, which made it easier.
Begin by “painting” the glue around the entire surface of the balloon.
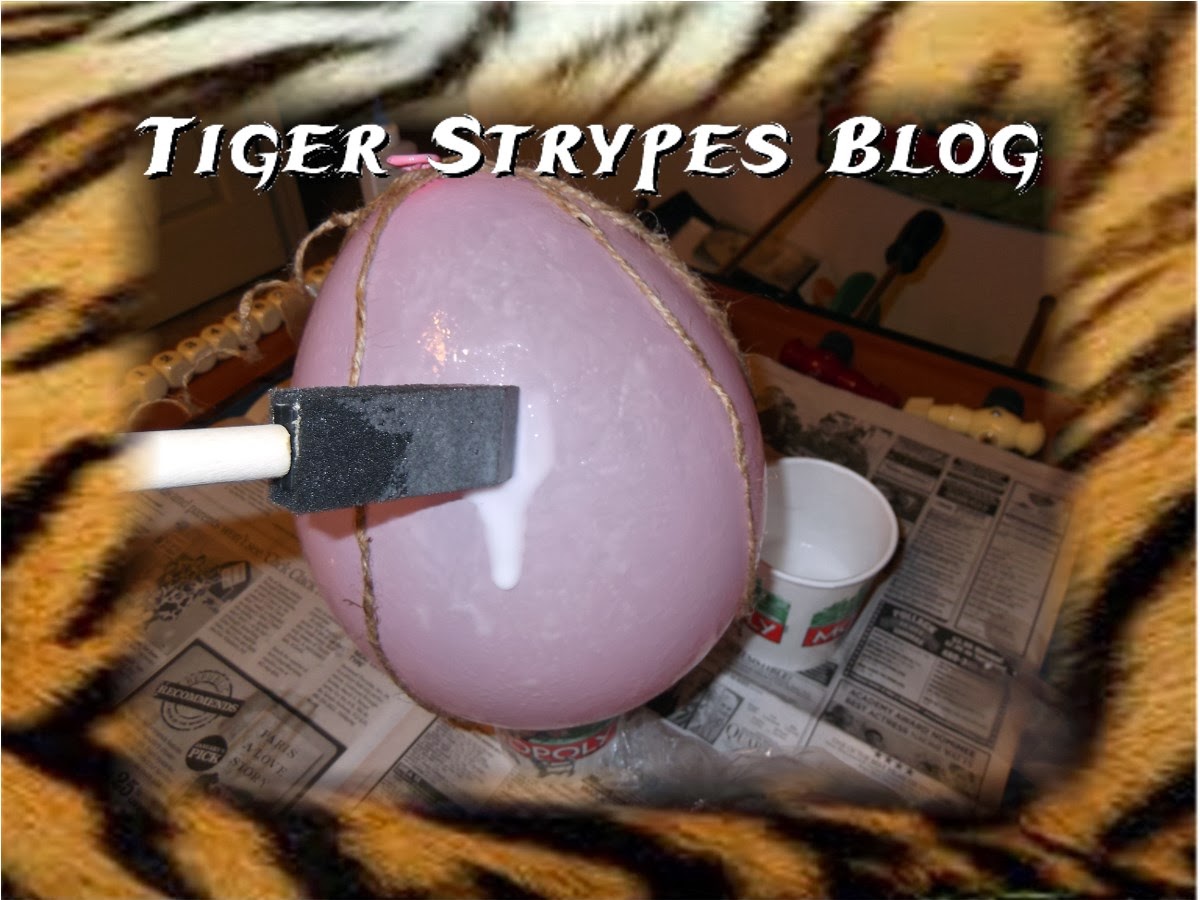
Start wrapping the twine around the balloon, making sure it sits somewhat tight. There are no right or wrong ways to wrap it, use your imagination and go crazy with the twists and turns. Just make sure to leave a bit of room at the top and bottom for some of the finishing.
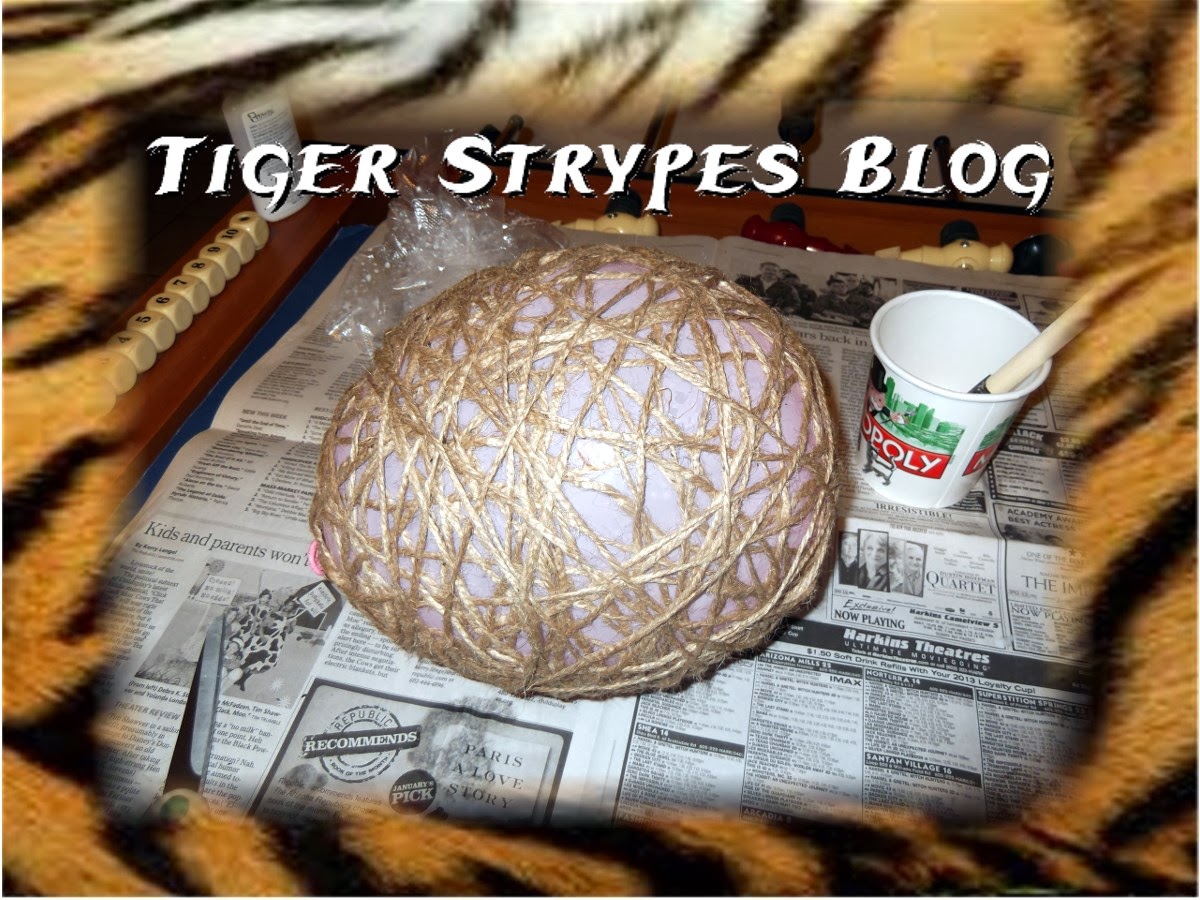
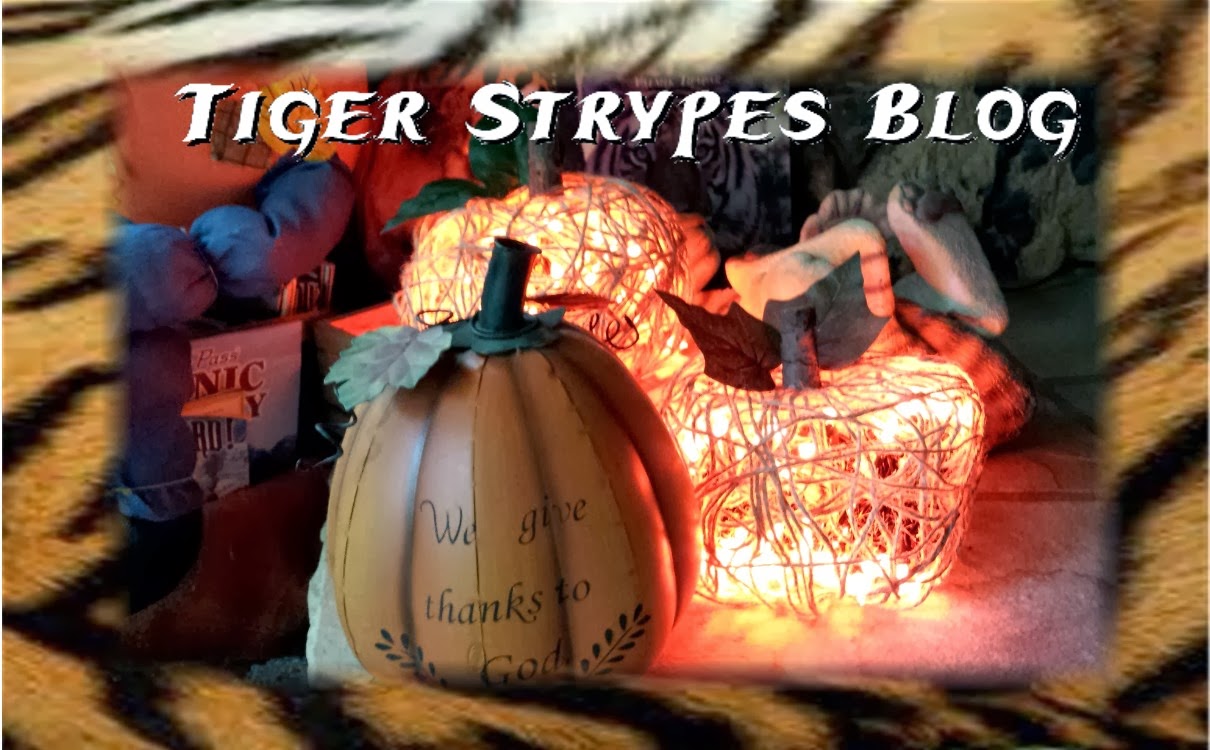
When you have the twine completed, let the balloons sit in the cups to dry for about 3-4 hours.
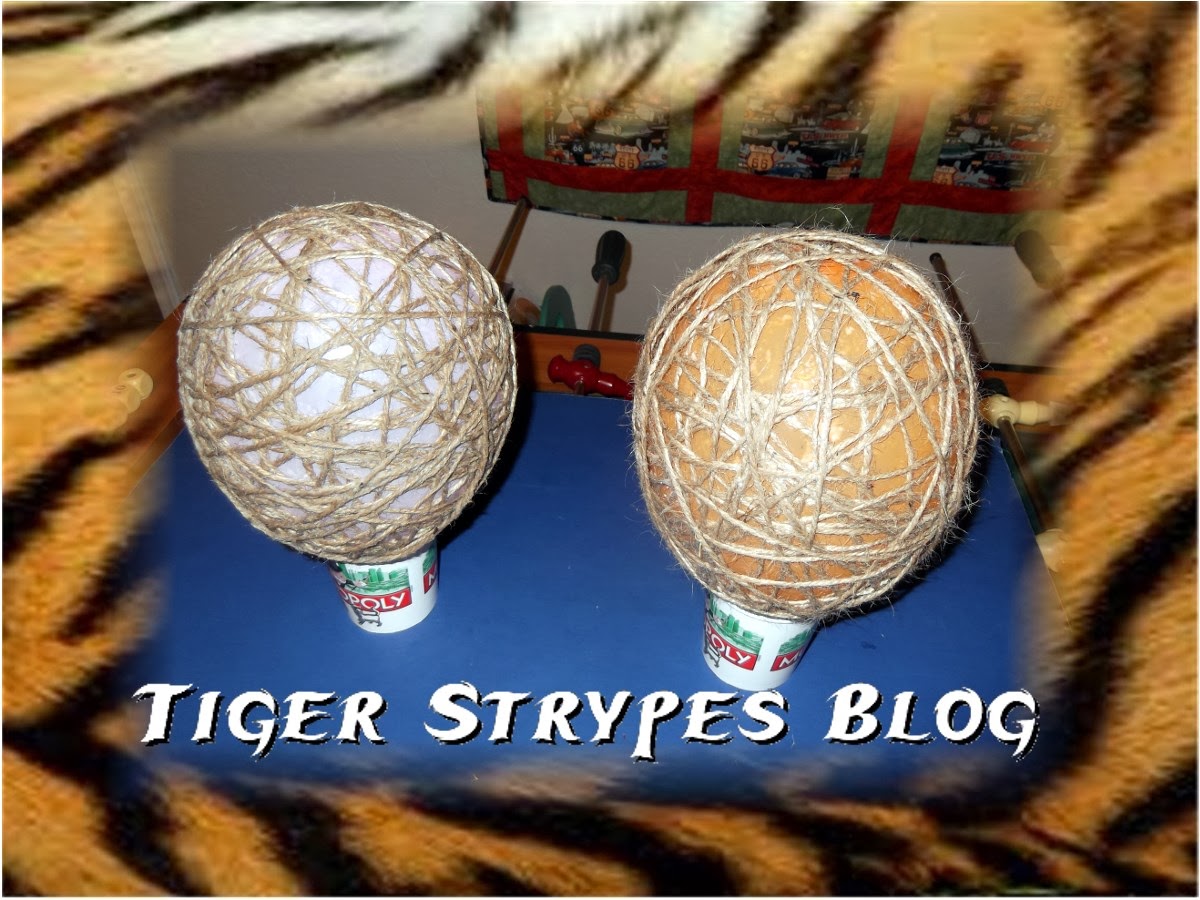
Once they have almost become dried and are pliable, pop the balloons and somewhat “smash” in the top and bottom to make it a bit more pumpkin-shaped. Once you have your preferred shape, let it sit overnight or for a few more hours to dry completely.
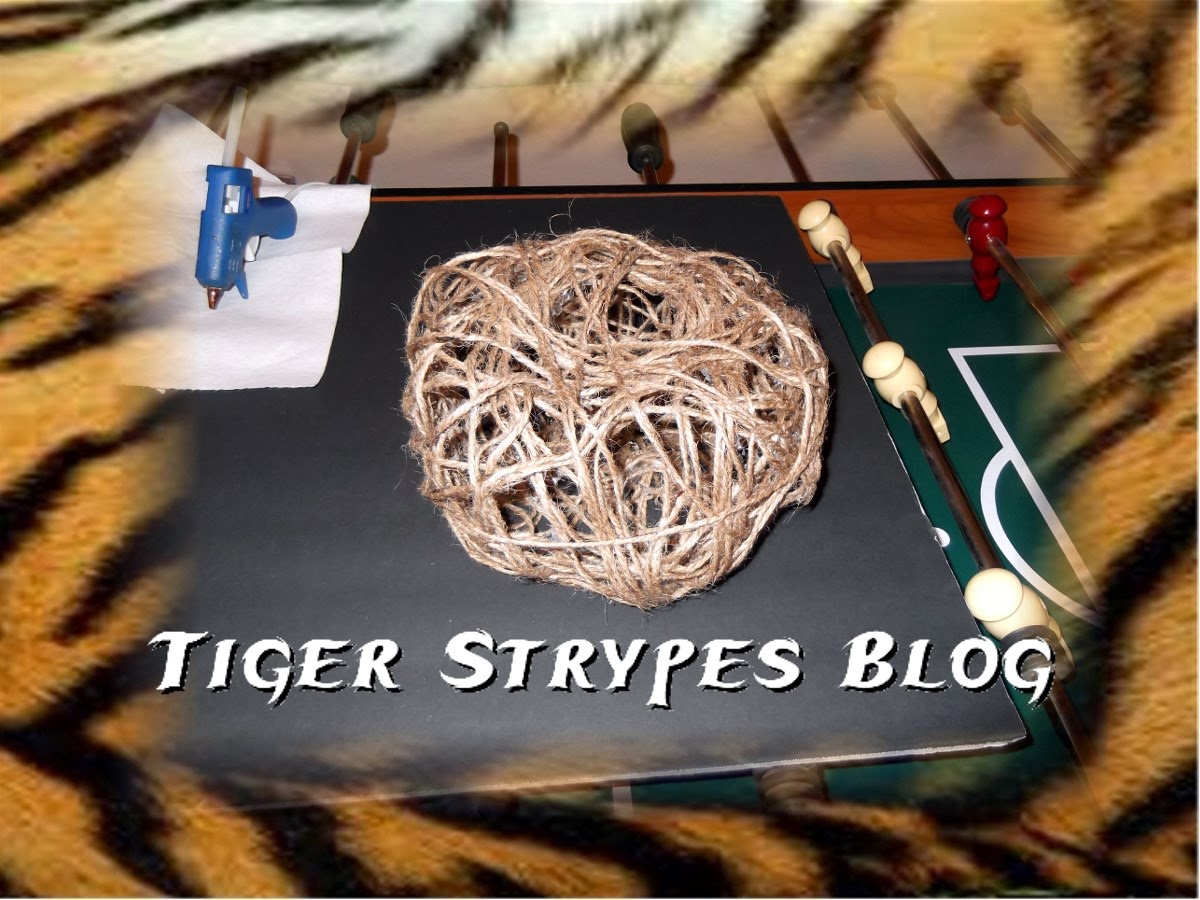
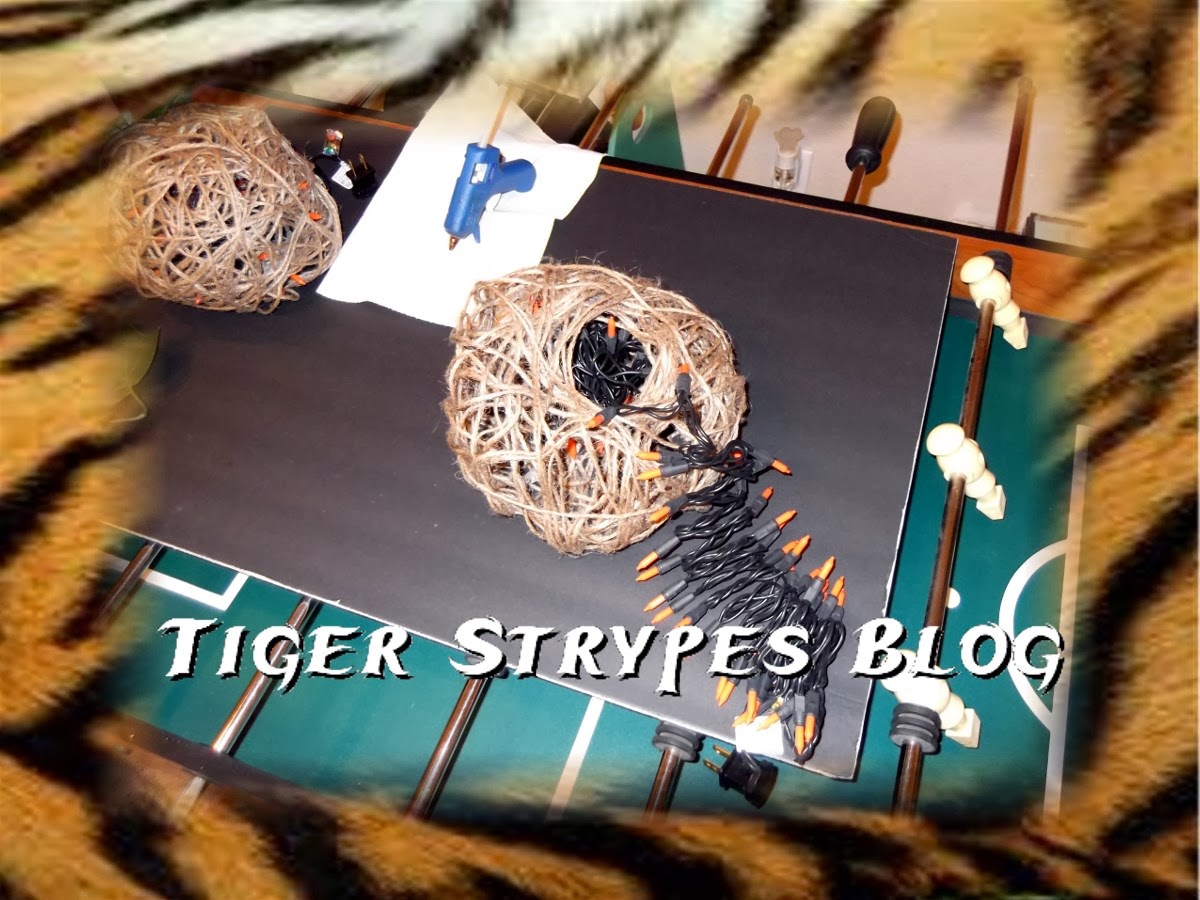
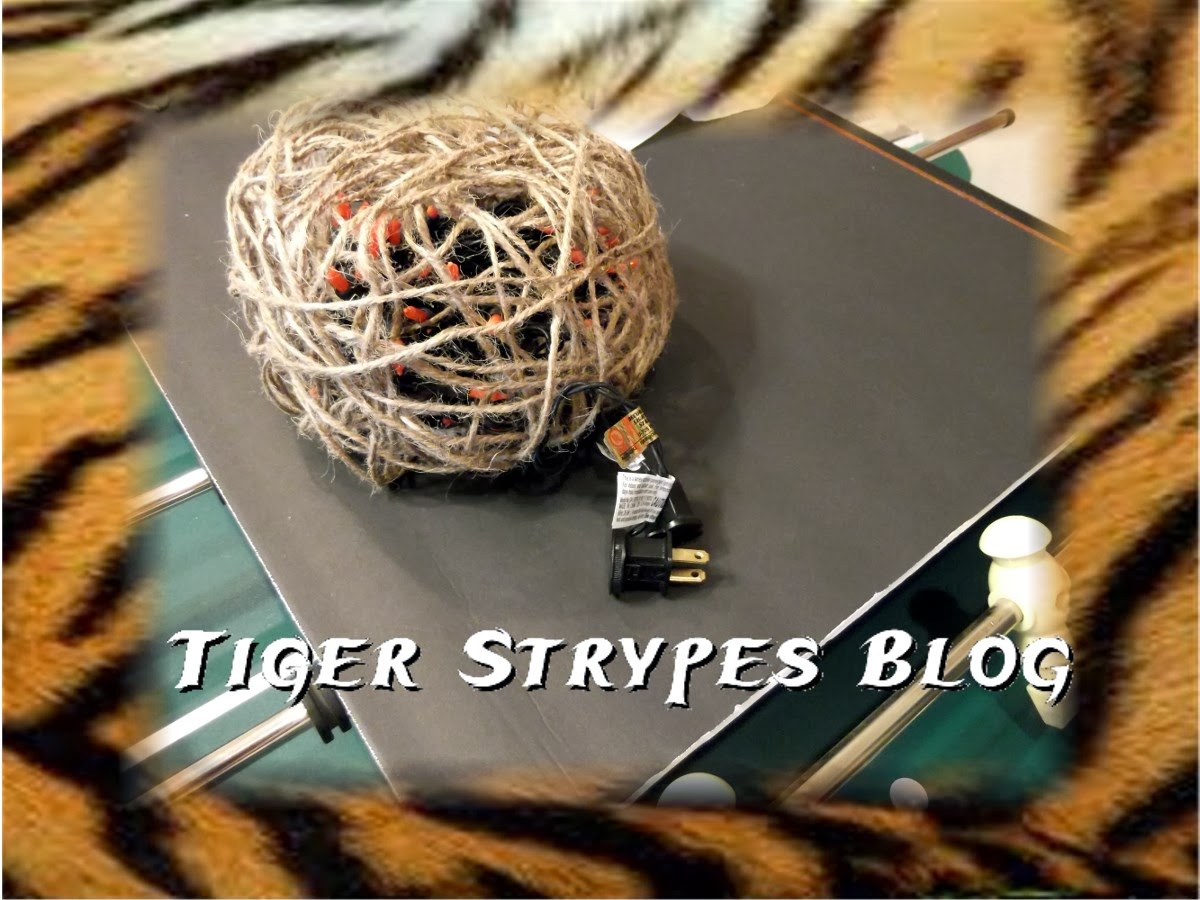
Now that your “pumpkin” is completely dry, you can paint it or decorate it how you wish. I wanted to keep it a bit natural, so I just coated over it with clear paint to make sure the pieces were secured. When the paint is dry, you can insert your lights in the bottom hole and make sure to leave enough out to plug it in where you wish. You could always go with battery operated lights and put it wherever you wish, but those just cost too much and I didn’t want to go with those.

All pictures and text are my own and have not been copied in any way. I, Jamie Tomkins, own and operate Tiger Strypes Blog located at www.TigerStrypes.com. From time to time you’ll hear about my real life experiences or creations with products and/or services from companies and individuals. Let it be known that I have no affiliation with these said companies, and have not received compensation for reviewing or using their service/product. The information that I give regarding the product/service is based off my own personal experience, I do not guarantee that your experience will be the same.


Cool! Pinned and tweeted. Thanks for stopping by and partying with us! I hope to see you on Monday at 7 pm, so we can pin and tweet your masterpieces! Lou Lou Girls
Thanks Lou Lou Girls!! I always love seeing what you have at your party! 🙂
Unique! I’ve never seen anything like it! And easy enough for the grand baby to help. Bonus!
Here from HomeMatters.
Thanks Melinda – they were fun to make!!
Great craft! It looks doable and like something that I would make and use.
I like the look of your site update. I can access it easier from my cell phone.
Thank you for the comment Rachee & the feedback – much appreciated!!
I love these and I am going to have to try this! Looks like fun!
How neat, VERY creative! ♥
What a cute idea for autumn!