
Learn How To Make Some Button Bugs
Well, this week is crazy, so I just had to do something simple and easy – hope you don’t mind. Coming up on Friday is the “Cavalcade of Cars” up here in Pinetop-Lakeside, AZ and, I think, my favorite time of year!! A bunch of oldies that are up here for the “Run to the Pines” car show all get together and cruise our main road all the way to Hon-Dah Casino and have a classic cruise night. It’s the most fun event of the fall….well EVER!! Almost everyone in our small town gets together and sits on the side of the road to enjoy the cruise, and the candy that we through out from our classics. Living in a small town can be awesome at times like this, when you see a whole community come together for an event. I love it!!
Here’s my “Cruiser”:

With this event coming up, my Mom is flying out from Oregon, to be a part of it with us. I CAN’T WAIT!! and we’re going to have a great time. With all of this coming up and happening, I only had a few minutes early in the week to put this together. Hope you like it!!

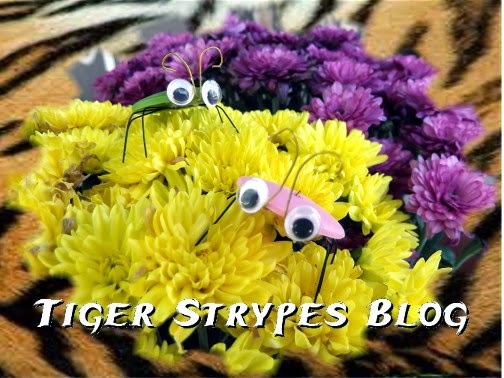
“Button Bugs” Craft
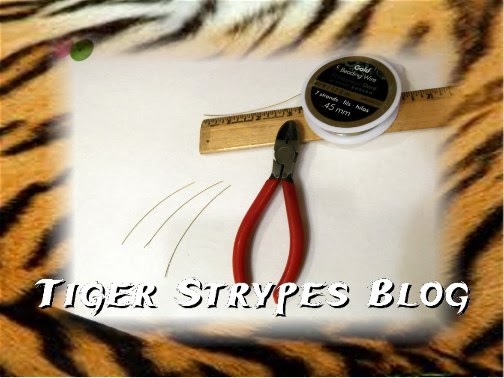
- Plastic Buttons
- Craft Wire (Different Colors)
- Ruler
- Wire Clippers
- Glue Gun
- Wiggly Eyes
- & Time
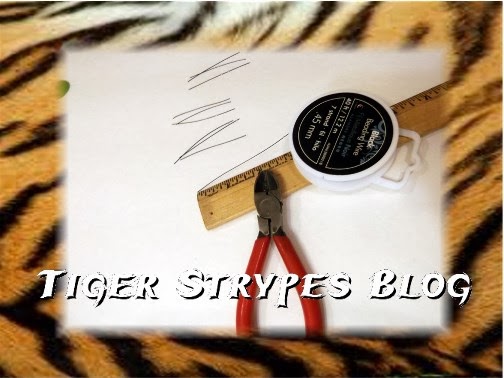
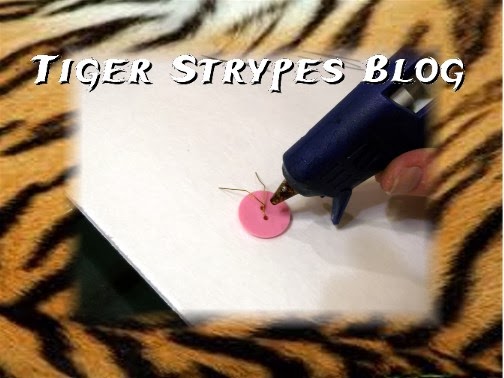
Begin by cutting your “antennae” wire in 3″ sections. You’ll need one (1) of these for every creature you’re going to make.
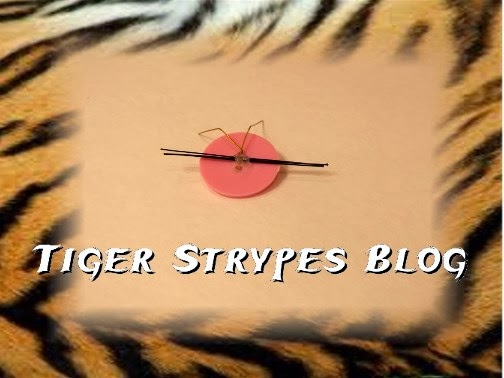
Take one of the 3″ sections and thread through the eyes of the button.
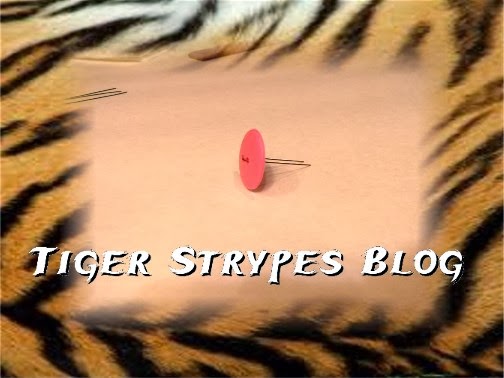
Twist them tight and then fold up and over the front to resemble “antennae”.
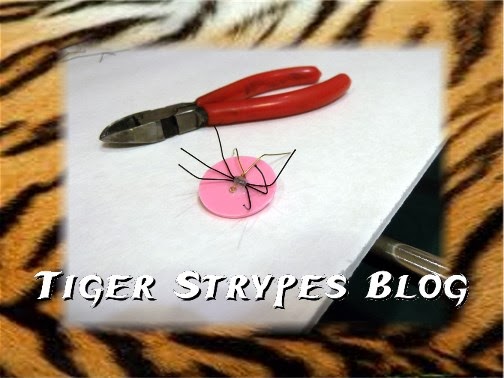
Now attach the (3) 2.5″ pieces onto the glue spot, making sure to cover the pieces in glue, so that they will not fall off.
Using your fingers, or pliers, bend each of the ends of the “legs” down, so that they will be able to be stood up. Try and bend them apart as well to have space between each of them.
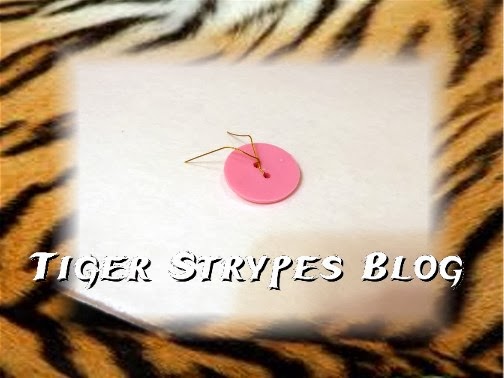
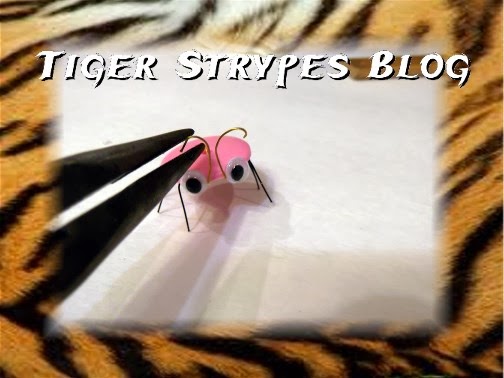
Now you can glue on your eyes. Just put a small dot on each side of where your antennae go up and attach them onto the front of the button.

Next, you can bend the tips of the antennae however you wish it to look.
Now you can hide them or display them wherever you wish. Cute little friends for planters or shelves. Hope you like them!!
“I know every bird in the mountains, and the insects in the fields are mine.” –Psalm 50:11
All pictures and text are my own and have not been copied in any way. I, Jamie Tomkins, own and operate Tiger Strypes Blog located at www.TigerStrypes.com. From time to time you’ll hear about my real life experiences or creations with products and/or services from companies and individuals. Let it be known that I have no affiliation with these said companies, and have not received compensation for reviewing or using their service/product. The information that I give regarding the product/service is based off my own personal experience, I do not guarantee that your experience will be the same.
*****************************************************************
[…] Button Bugs shared by Jamie […]
These are adorable. I don’t have the skillset to do this kind of thing even though it’s simple to do. They turned out great!
These are so cute. I never would have thought of making these out of buttons. Love having you as cohost on #homemattersparty
I always have extras laying around, so I wanted to put them to use! 🙂
These little button bugs are so cute! Thanks for sharing at #HomeMattersParty
What a fun craft for kids!
Thank you Marisa – it was fun for this big kid…that’s for sure! 🙂
These look so cute, Jamie.
Thanks Sahana, they were really fun to make!
[…] Button Bugs shared by Jamie […]
[…] Button Bugs shared by Jamie […]
So cute! How do you think of the cutest ideas? I am pinning this because I know it will come in handy one day. #HomeMattersParty
Thank you Nicole – they are so much fun to make! Send me a picture if you make some! 🙂
These are cute, I am looking for some black buttons and make spiders for Halloween.
That’s a great idea!! Now I’ll have to borrow that and make some next month! 🙂
These are so stinkin cute! Sometimes the simplest crafts are the best.
Thank you Rachee – I agree, the simpler, the better!
How cute! There’s so many cute ways to incorporate this into different holidays and events. I love it!
Thank you Amanda – they were really fun to make!
Oh how absolutely adorable those are!
Thanks Ellen – they were super fun to create!
Oh my gosh! I love these little critters! I am going to try these as spiders for halloween! Just gotta get me some black buttons! Thanks for sharing! Pinned and Tweeted!
Great idea, Dawn – I never thought of that!! I think I would use larger buttons and thicker wire in the future, this thin stuff was pain! 🙂